Loading ...
Loading ...
Loading ...
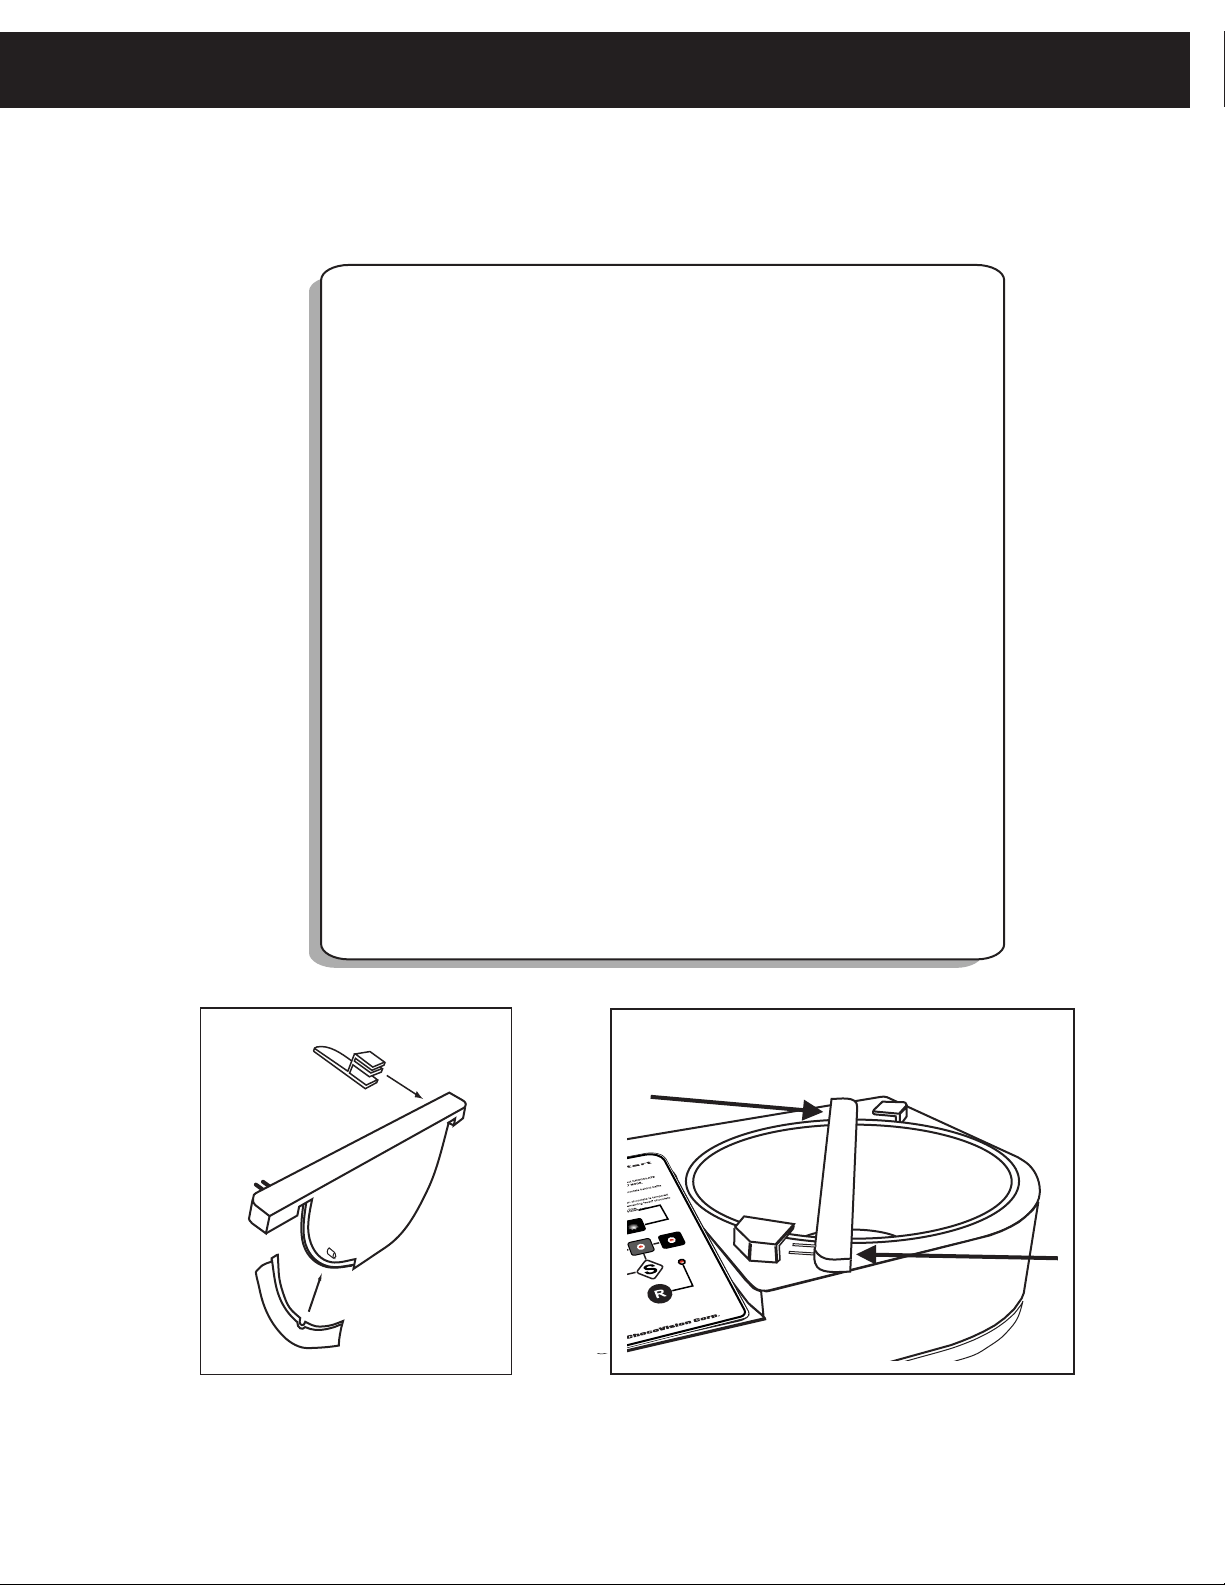
* Place the BOWL in your machine and rotate the BOWL
until it drops into place.
* Attach the SCRAPER to the BAFFLE (Fig. 1). When
properly installed, the SCRAPER should curve towards
the front of the machine (Fig. 1).
NOTE: To avoid damage to your scraper it is recommended
that your BOWL/SCRAPER be "primed" for the first few
uses. To do so, take a small piece of unmelted chocolate,
and simply rub it on the inside of the bowl. This will
insure a smooth initial start up.
* Fit the BAFFLE into the BOWL by rotating the BAFFLE
clockwise until the BAFFLE CONNECTOR PINS engage
into BAFFLE LOCK (CONNECTOR) (Fig. 2).
* Slide the BAFFLE CLIP on to the BAFFLE (Fig. 1). This
keeps the solid chocolate from climbing out of the bowl
as it rotates.
Fig.1
- 4 -
NOTE: BEFORE USING YOUR MACHINE, WASH ALL COMPONENTS THAT MAY COME IN
CONTACT WITH CHOCOLATE, USING A SOFT SPONGE OR CLOTH, AND MILD SOAP.
ASSEMBLY
R
Y
O
U
R
C
H
O
C
O
L
A
T
E
W
H
I
T
E
M
IL
K
o
r
D
A
R
K
.
2
.L
o
a
d
t
h
e
s
e
le
c
t
e
d
t
y
p
e
o
f
c
h
o
c
o
la
t
e
b
e
h
in
d
t
h
e
b
a
f
f
le
.
4
.P
r
e
s
s
t
h
e
T
E
M
P
E
R
b
u
t
t
o
n
wh
e
n
y
o
u
h
a
v
e
e
n
o
u
g
h
m
e
lt
e
d
c
h
o
c
o
la
t
e
.
5
.P
u
t
t
h
e
"S
E
E
D
"
c
h
o
c
o
la
t
e
b
e
h
in
d
t
h
e
b
a
f
f
le
.
6
.W
h
e
n
t
h
e
ic
o
n
f
la
s
h
e
s
a
n
d
y
o
u
h
e
a
r
t
h
r
e
e
b
e
e
p
s
, r
e
m
o
v
e
a
ll
t
h
e
"
S
e
e
d
"
c
h
o
c
o
la
t
e
.
7
.P
r
e
s
s
t
h
e
b
u
t
t
o
n
t
o
f
in
is
h
t
e
mp
e
r
in
g
.
8
.W
h
e
n
t
h
e
R
E
A
D
Y
ic
o
n
s
h
o
w
o
n
t
h
e
d
is
p
l
a
y
,
a
n
d
y
o
u
h
e
r
e
t
h
r
e
e
b
e
e
p
s
,
t
h
e
c
h
o
c
o
la
t
e
is
r
e
a
d
y
t
o
u
s
e
.
3
.P
r
e
s
s
t
h
e
M
E
L
T
b
u
t
t
o
n
.
R
Q
U
I
C
K
S
TA
R
T
c
hoc
o
v
i
s
i
o
n.
c
om
Fig.2
Loading ...
Loading ...
Loading ...