Loading ...
Loading ...
Loading ...
19INSTALLATION
ENGLISH
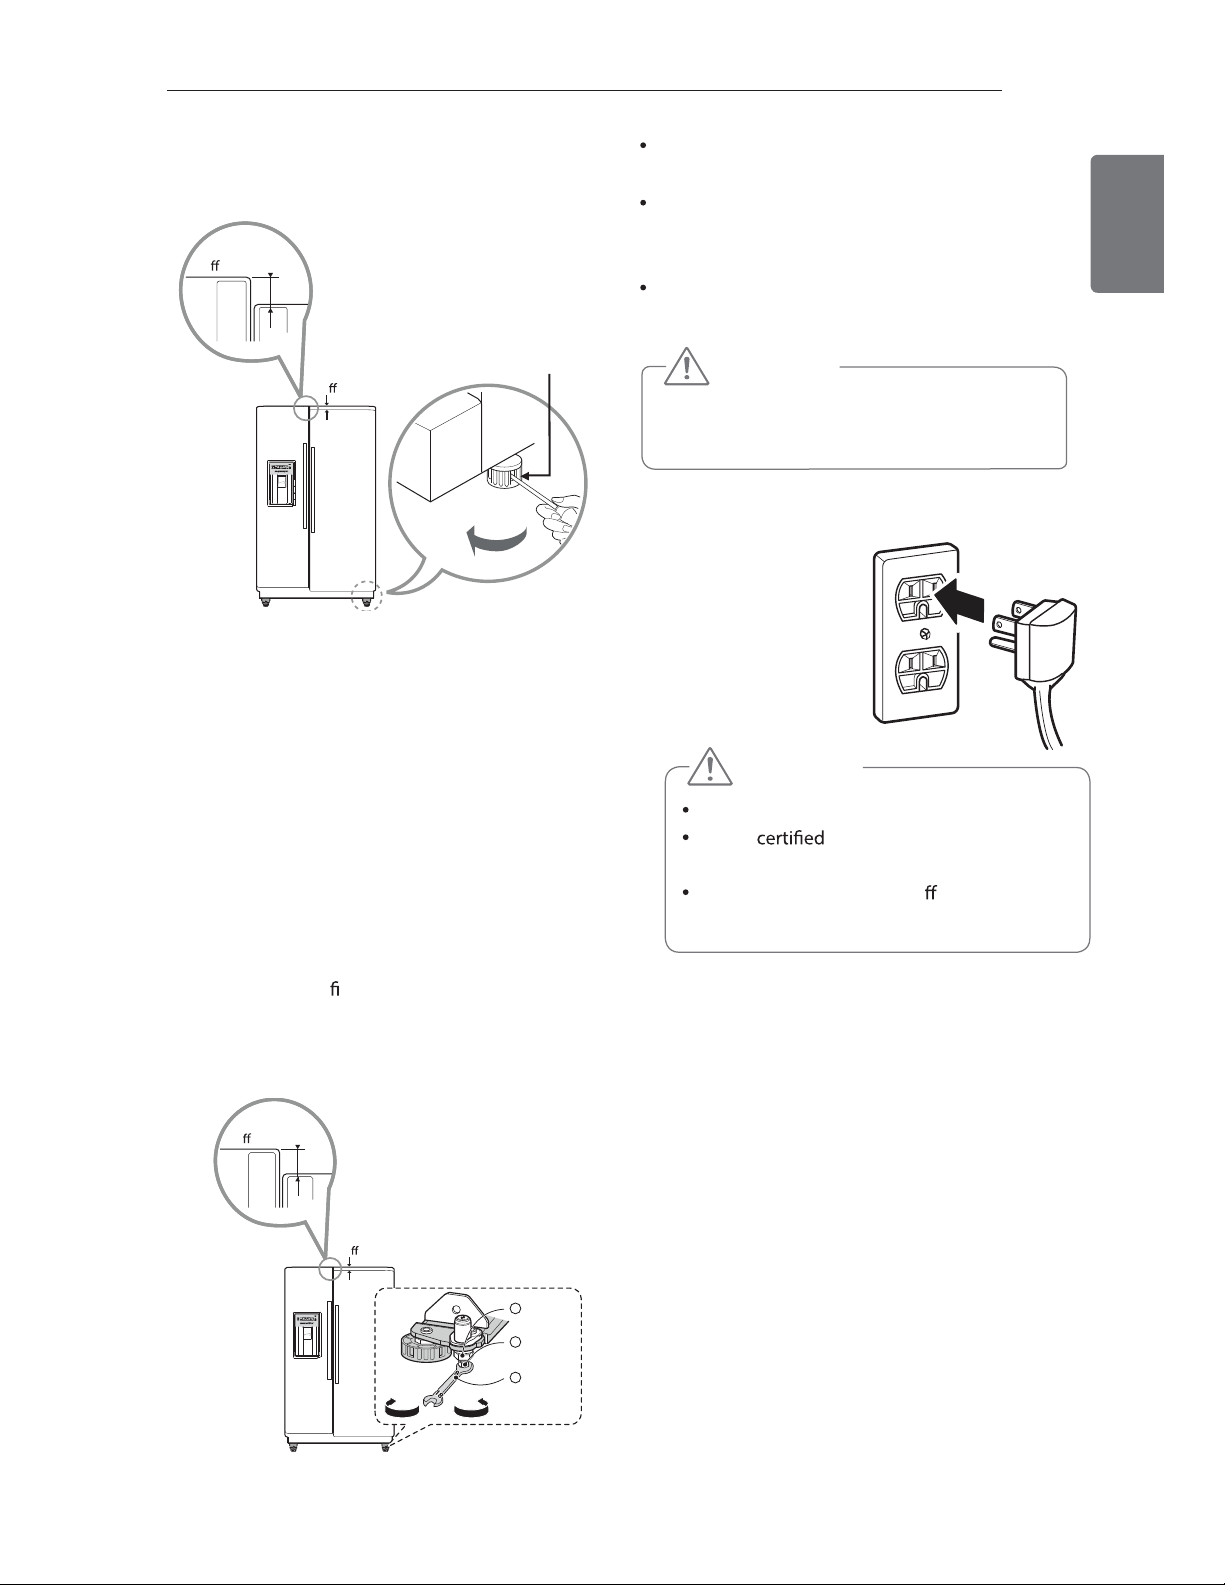
Right leveling leg
Height
di
erence
Height
di
erence
PRESS & HOLD
CHANGE FILTER
C
F
C
F
2 Open both doors again and check to make
sure that they close easily. If the doors do
not close easily, tilt the refrigerator slightly
more to the rear by turning both leveling
legs counterclockwise. It may take several
more turns. Be sure to turn both leveling legs
the same amount.
Door Alignment
If the doors are still uneven after the refrigerator
has been leveled,
nish adjusting the doors by
following the instructions below:
Tools Required: 5/16” (8mm) wrench and 3/4”
(19mm) wrench.
Height
di
erence
Height
di
erence
PRESS & HOLD
CHANGE FILTER
C
F
C
F
Up
Down
1
keeper nut
2
Adjustment
hinge pin
3
Too l f or
adjustment
Using a 3/4” (19mm) wrench, turn the keeper
nut counter clock wise to loosen it.
Using a 5/16” (8mm) wrench, turn the
adjustment hinge pin clockwise or coun-
terclockwise to level the refrigerator door.
After leveling the door, turn the keeper
nut clockwise to tighten it.
Turning on the Power
1
Plug in the
refrigerator.
CAUTION
Connect to a rated power outlet.
Have a electrician check the wall
outlet and wiring for proper grounding.
Do not damage or cut o the ground
terminal of the power plug.
CAUTION
Do not overtighten the door adjustment screw.
The hinge pin can be pulled out (adjustable
range of height is a maximum of 2 in. (5cm).
NOTE:
To make adjusting the legs easier,
have someone push backward against the
top of the refrigerator.
Position the Refrigerator
Arrange the coil of tubing so that it does not
vibrate against the back of the refrigerator or
against the wall. Push the refrigerator back
toward the wall.
Start the Icemaker
If the water line is connected, set the icemaker
power switch to the ON position.
The icemaker will not begin to operate until it
reaches its operating temperature of 15°F (-9°C)
or below. It will then begin operation
automatically if the icemaker power switch is in
the ON (|) position.
Loading ...
Loading ...
Loading ...