Loading ...
Loading ...
Loading ...
18 INSTALLATION
ENGLISH
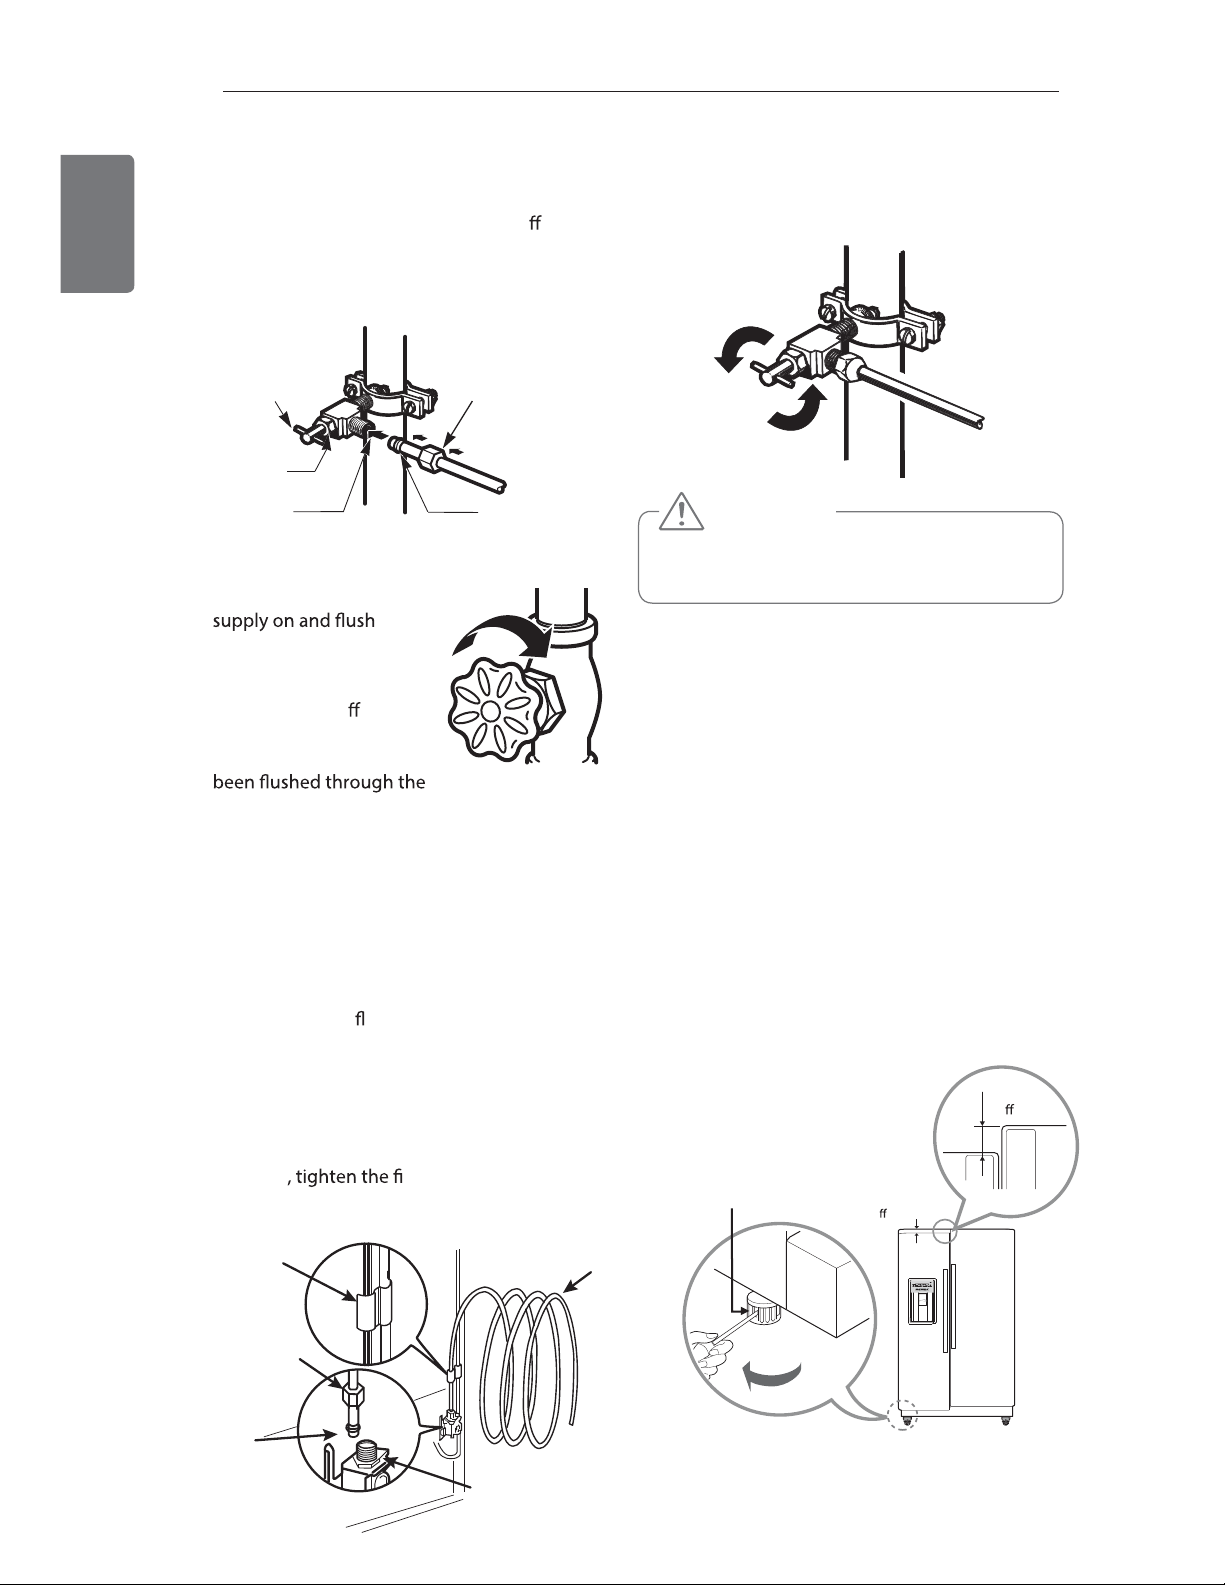
7 CONNECT THE TUBING TO THE VALVE
Place the compression nut and ferrule
(sleeve) for copper tubing onto the end of
the tubing and connect it to the shuto
valve. Make sure the tubing is fully inserted
into the valve. Tighten the compression nut
securely.
8 FLUSH OUT THE TUBING
Turn the main water
out the tubing until the
water is clear.
Shut the water o
at the
water valve after about
one quart of water has
tubing.
9 CONNECT THE TUBING TO THE
REFRIGERATOR
NOTE: Before making the connection to
the refrigerator, be sure that the refrigerator
power cord is not plugged into the wall
outlet.
a. Remove the plastic exible cap from the water
valve.
b. Place the compression nut and ferrule (sleeve)
onto the end of the tubing as shown.
c. Insert the end of the copper tubing into the
connection as far as possible. While holding
the tubing
tting.
10 TURN THE WATER ON AT THE
SHUTOFF VALVE
Tighten any connections that leak.
Saddle-Type
Shutoff Valve
Packing Nut
Outlet Valve
Compression
Nut
Ferrule (sleeve)
Tubing Clamp
¼ in. Tubing
¼ in.
Compression
Nut
Refrigerator
Connection
Ferrule (sleeve)
CAUTION
Check to see if leaks occur at the water line
connections.
Leveling
The refrigerator has two front leveling legs.
Adjust the legs to alter the tilt from front-to-back
or side-to-side. If the refrigerator seems unsteady,
the doors do not close easily, adjust the refrigerator’s
tilt using the instructions below:
NOTE: Tools Required: 11/16” (18mm) wrench
1 Turn the leveling leg counterclockwise
to raise that side of the refrigerator or
clockwise to lower it. It may take several
turns of the leveling leg to adjust the tilt of
the refrigerator.
Left leveling
leg
Height
Height
di erence
di erence
PRESS & HOLD
CHANGE FILTER
C
F
C
F
or at-blade screwdriver.
Loading ...
Loading ...
Loading ...