Loading ...
Loading ...
Loading ...
9
When you switch on a hotplate, the indicator lamp lights up.
Buttons and display
You can use the buttons to set various additional functions. On
the display, you can read the values that you have set.
The time-setting option that is currently selected in the display
is indicated by brackets [ ] around the corresponding symbol.
Exception: For the clock, the
0 symbol only lights up if the time
is being changed.
Buttons
The sensors are located under the individual buttons. They
must not be pressed too firmly. Only touch the corresponding
symbol.
The cooking compartment
The oven light is located in the cooking compartment. A cooling
fan protects the oven from overheating.
Light
The oven light remains on while the oven is working.
However, the light can be turned on without the oven being on
by setting the function control knob to
^.
Cooling fan
The cooling fan switches on and off as required. The hot air
escapes above the door.
So that the cooking compartment cools down more quickly
after operation, the cooling fan continues to run for a certain
period afterwards.
Caution!
do not cover the ventilation slots. Otherwise the oven will
overheat.
Your accessories
The accessories supplied with your appliance are suitable for
making many meals. Ensure that you always insert the
accessories into the cooking compartment the right way round.
There is also a selection of optional accessories, with which
you can improve on some of your favourite dishes, or simply to
make working with your oven more convenient.
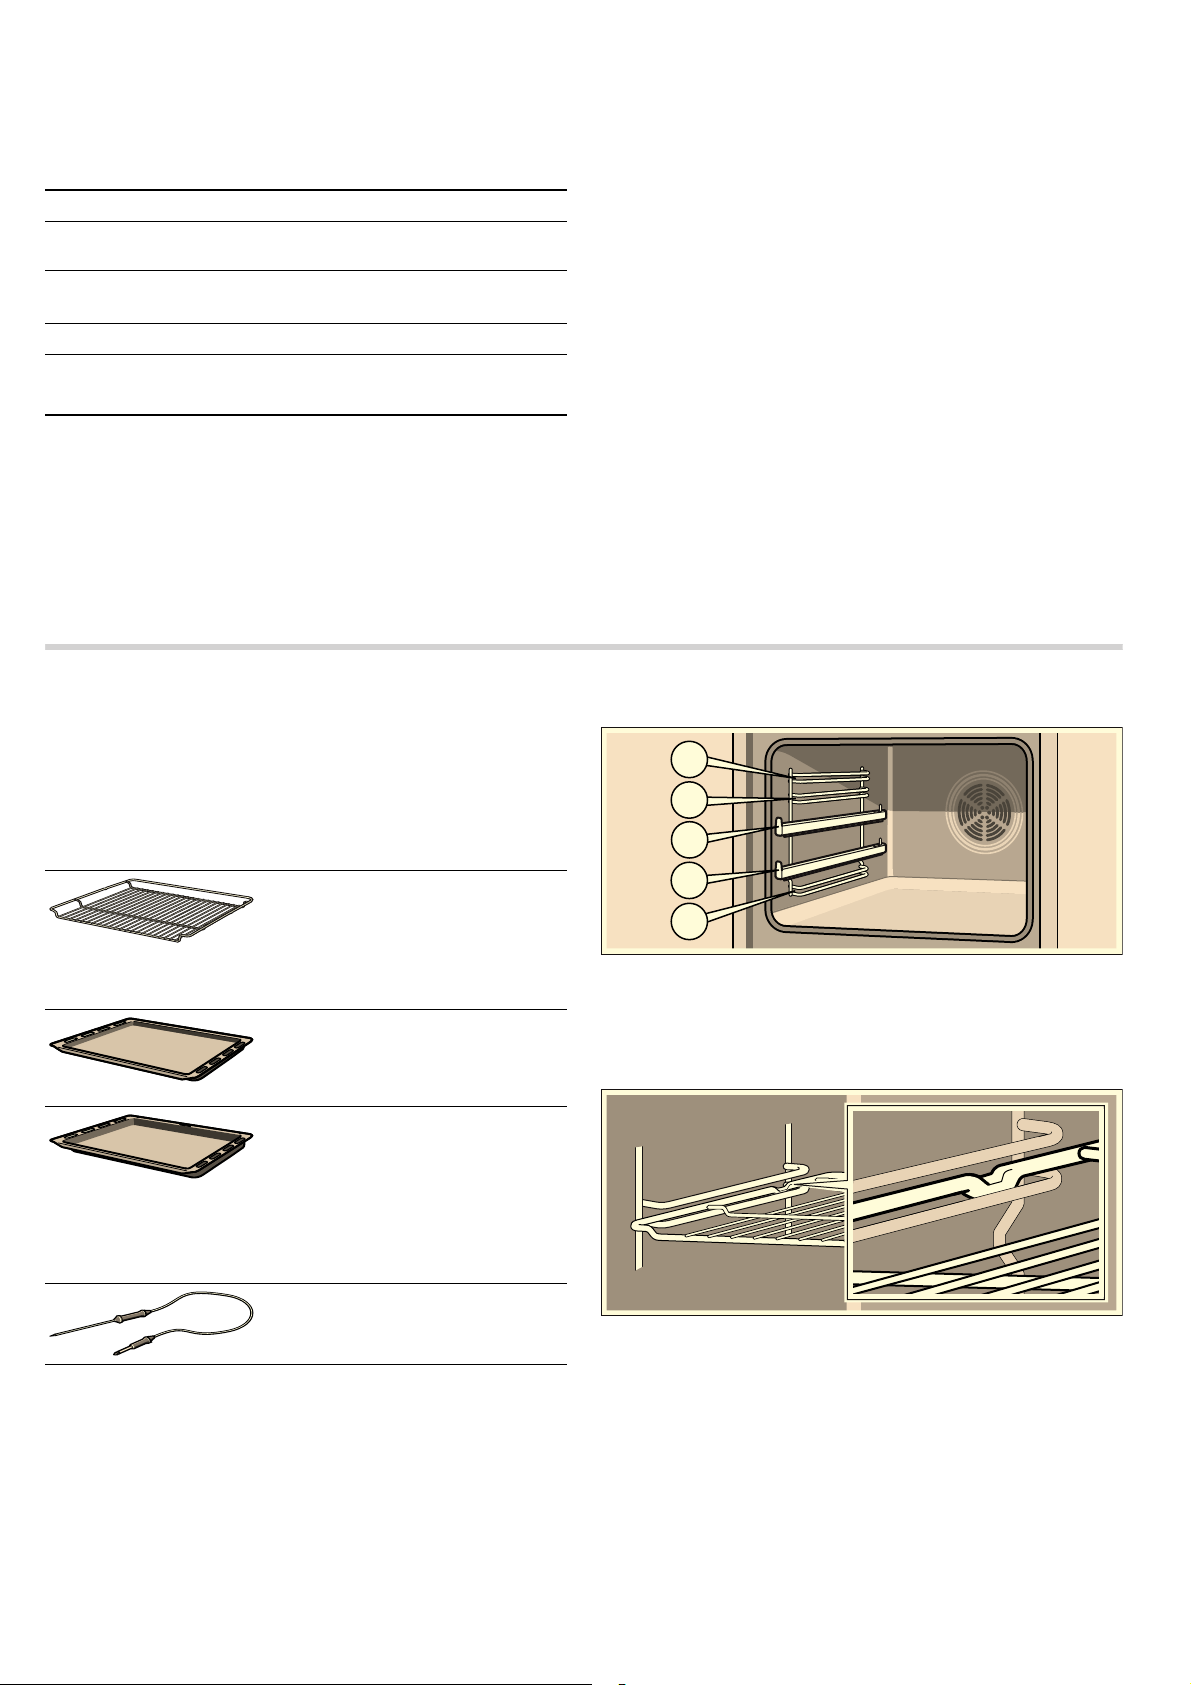
Inserting accessories
You can insert the accessories into the cooking compartment
at 5 different levels. Always insert them as far as they will go so
that the accessories do not touch the door panel.
The accessories can be pulled out approximately halfway until
they lock in place. This allows dishes to be removed easily.
When sliding the accessories into the cooking compartment,
ensure that the indentation is at the back. They can only lock in
place from this position.
With the pull-out rails at levels 2 and 3, you can pull the
accessories out further.
Depending on the appliance equipment, the pull-out rails lock
into place when they are pulled out fully. This makes it easier
for you to place the accessories on top. To unlock, push the
pull-out rails back into the cooking compartment with a certain
amount of force.
Note: The accessories may deform when they become hot.
Once they cool down again, they regain their original shape.
This does not affect their operation.
Button Use
c
Rapid heating Heats up the oven particularly
quickly.
0
Time-setting options
Selects the timer
U, cooking
time
r, end time p and clock 0.
D
Childproof lock Locks and unlocks oven functions.
A
@
Minus
Plus
Decreases the set values.
Increases the set values.
Wire rack
For ovenware, cake tins, joints,
grilled items and frozen meals.
Insert the wire rack with the open
side facing the oven door and the
curvature pointing downwards
¾.
Enamel baking tray
For cakes and biscuits.
Slide in the baking tray with the
sloping edge facing the oven door.
Universal pan
For moist cakes, pastries, frozen
meals and large roasts. It can also
be used to catch dripping fat when
you are grilling directly on the wire
rack.
Slide in the universal pan with the
sloping edge facing the oven door.
Meat thermometer
The meat thermometer makes accu-
rate roasting possible.
Loading ...
Loading ...
Loading ...