Loading ...
Loading ...
Loading ...
23
Step 5
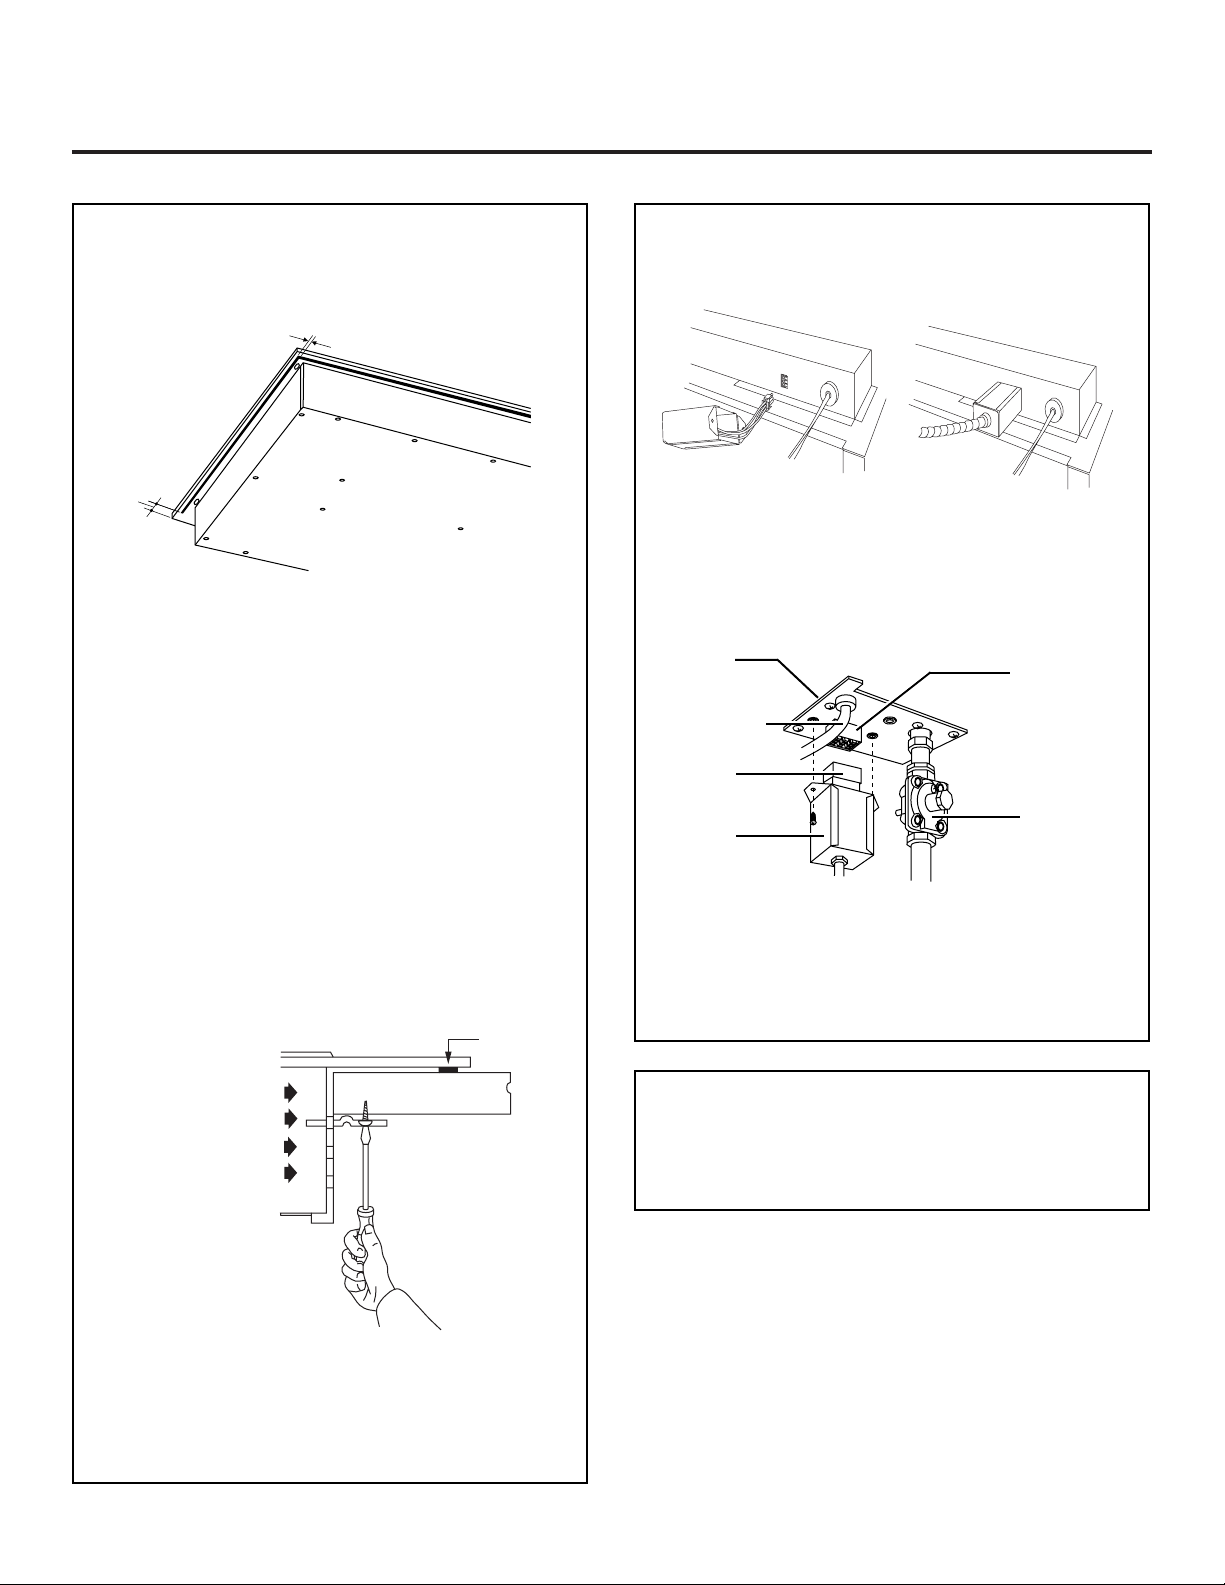
Electrical Connections
■Connect the 3-pin plastic plug from the
blower/motor assembly to the 3-pin plastic socket on
the underside of the vent, next to the conduit.
■Slide the metal cover over the connection and
secure with screws.
■Connect the 6-pin plastic plug from the downdraft
assembly to the 6-pin plastic socket on the underside
of the cooktop, next to the power cord.
■Slide the metal cover over the connection and
secure with screws.
Step 6
Connect Power
Plug power cord into properly grounded receptacle.
Step 4
Install the Cooktop
(continued)
■Cut a 3/16″ gasket strip in half. Peel off the
backing and apply to the underside of the glass
cooktop edge, on each side at least 3/8″from the
back and as close to the edge as possible without
protruding.
■Apply the other gasket strip to the underside of the
glass at the front of the cooktop.
■Remove remaining adhesive backing.
■Position the cooktop over the opening, making
sure that the power cord is dropped into the cabinet.
■Lower the cooktop into the cutout, pressing gently
and evenly to seat.
NOTE:
If the cooktop is installed in a 36″base cabinet,
the mounting brackets cannot be used because of
interference with the cabinet sides. In this case, the
cooktop can be secured to the cabinet with angle
brackets (not supplied).
Remove one screw
at the bottom of
the cooktop body
on both sides and
secure the bracket
with those screws.
Then, secure the
brackets to the
cabinet sides.
■Insert hold-
down bracket into
highest slots on
the right and left
sides of the
cooktop.
Cooktop has three slots, the highest available will
depend on the thickness of the countertop.
■Secure the brackets to the underside of the
countertop with screws provided.
1/16"
3/8"
Gasket
Countertop
1/16″
3/8″
Electrical
6-pin socket
Pressure
regulator
Metal
cover
6-Pin plug
Electrical
supply cord
Service
plate
Loading ...
Loading ...
Loading ...