Loading ...
Loading ...
Loading ...
22
Installation instructions.
Step 4
Install the Cooktop
NOTE:
If the cooktop is installed into a 36″base
cabinet, the pressure regulator
MUST BE
installed to
the bottom of the cooktop before the cooktop is
placed into the cabinet.
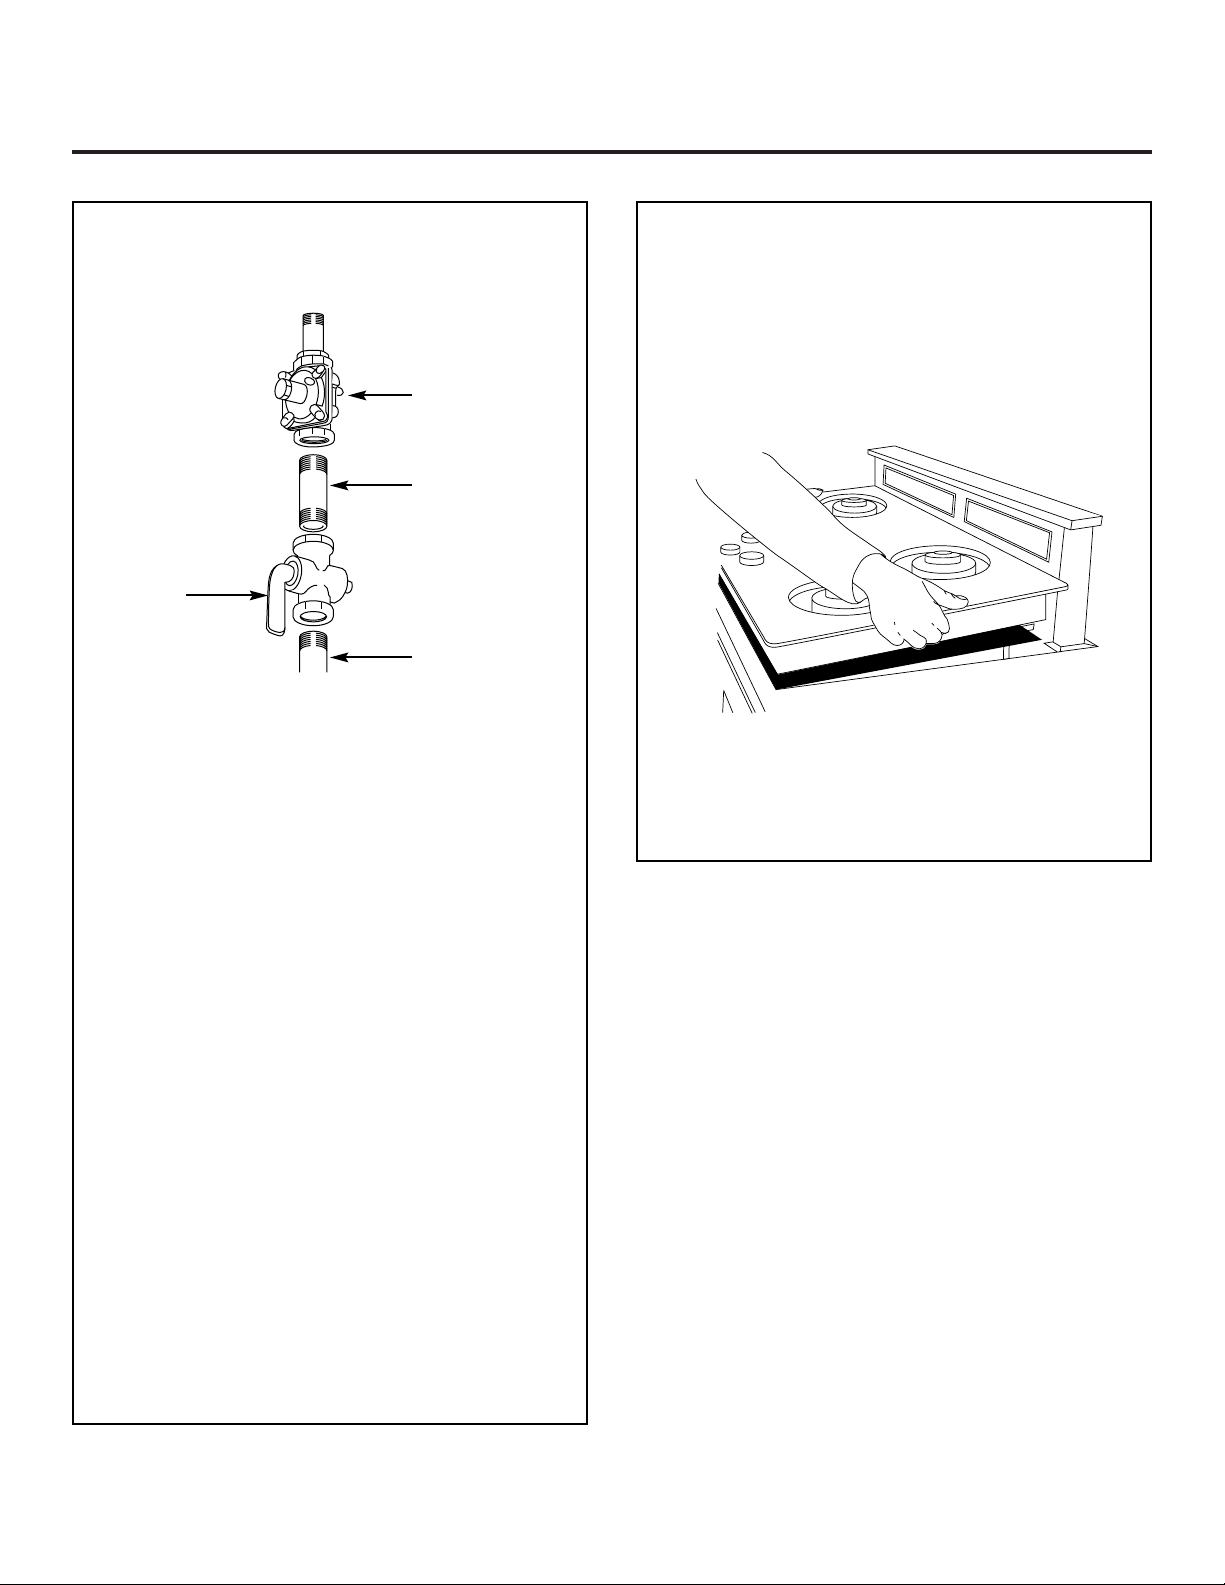
■Remove packaging from the cooktop.
■To insure a good fit, position the cooktop over the
cutout opening and carefully lower into place. Check
edges all the way around to be sure all cutout edges
are concealed and there are no gaps.
■Carefully lift and remove the cooktop.
Step 3
Install the Pressure Regulator
■Install the supplied pressure regulator and nipple
in the gas line as close to the cooktop inlet as
possible. Allowances for ventilation ducting may be
necessary.
Make sure the regulator is installed in the right
direction.
■Install a manual shut-off valve in the gas line in an
easily accessible location.
NOTE:
Instead of using solid piping to connect to
pressure regulator, an approved flexible metal
appliance connector may be used between the pipe
stub and the shut-off valve and the pressure
regulator, if local codes permit.
Appropriate flare nuts and adapters are required at
each end of the flexible connector.
■Turn on the gas. Check for leaks using a liquid leak
detector at all joints in the system. (The pressure test
nipple is adjacent to the gas inlet pipe on the rear
right hand side of the cooktop bottom.)
CAUTION: DO NOT USE A FLAME TO CHECK FOR
GAS LEAKS.
IMPORTANT:
Disconnect the cooktop and the
individual shut-off valve from the gas supply piping
system during any pressure testing of that system at
test pressures greater than 1/2 psig. Isolate the
cooktop from the gas supply piping system by closing
the individual manual shut-off valve to the cooktop
during any pressure testing of the gas supply piping
system at test pressures equal to or less than 1/2 psig.
Regulator
Solid piping or flexible
connector
Pipe stub
Shut-off
valve
Loading ...
Loading ...
Loading ...