Loading ...
Loading ...
Loading ...
Checking and refilling levels
Checking and refilling levels
Fuel
Introduction
The correct type of fuel for your vehicle is in-
dicated on a sticker on the inside of the fuel
tank flap, along with the tyre size and pres-
sure ››› Fig. 107 .
WARNING
Observe all relevant statutory regulations on
transporting spare fuel canisters. For safety
reasons, we do not recommend carrying a
spare canister in the vehicle. The canister
could be damaged in an accident and fuel
may leak. Risk of fire!
CAUTION
●
Never completely empty the tank! An irreg-
ular fuel supply can cause ignition faults,
which can result in damage to a substantial
amount of engine parts and the exhaust sys-
tem.
●
If any fuel is spilt onto the paintwork of the
vehicle, it should be removed immediately.
Risk of damage to paintwork!
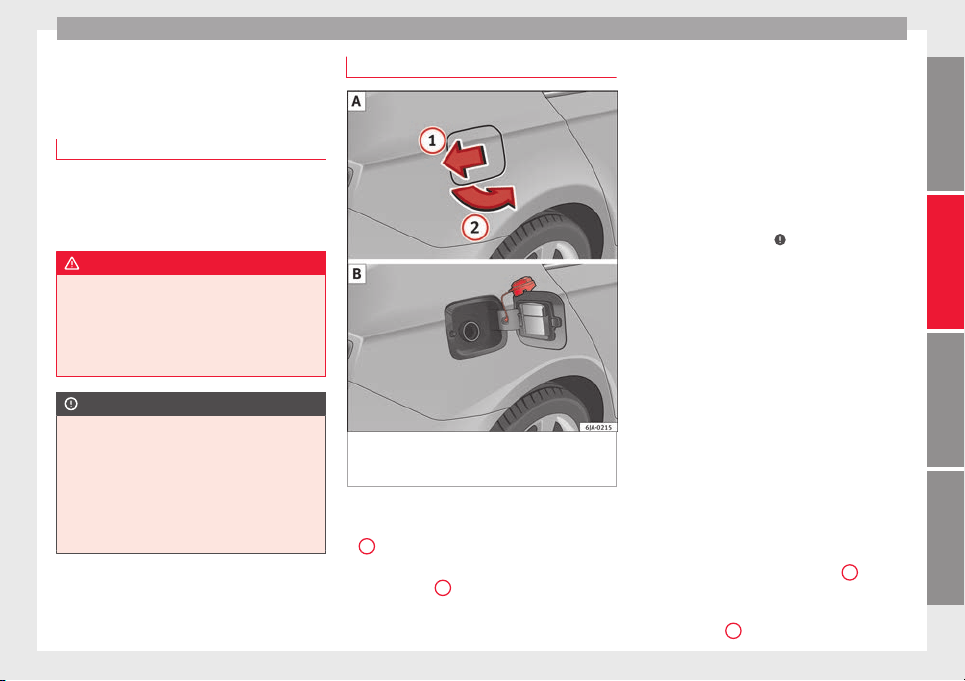
Refuelling
Fig. 107 Vehicle as seen from the rear right:
fuel tank flap/fuel tank flap with tank un-
screwed cap attached.
Vehicles with a fuel cap with key
–
Press the flap in the direction of the arrow
1
››› Fig. 107
.
–
Open the c
o
ver in the direction indicated
by the arrow
2
.
–
Hold onto the fuel tank cap with one hand
and unlock it using the ignition key, turning
it anti-clockwise.
–
Unscrew the tank cap anti-clockwise and
place it on top of the tank flap ››› Fig. 107
.
–
In
ser
t the pump nozzle into the fuel feed
tube as far as it will go.
The fuel tank is full as soon as the automatic
filler nozzle cuts out ›››
.
–
Remove the pump nozzle from the fuel feed
tube and place it back on the pump.
–
Screw the tank cap clockwise until it clicks
into place.
–
Hold onto the fuel tank cap with one hand
and lock it using the ignition key, turning it
clockwise.
–
Press the tank flap with your hand to close
it.
–
Check that the fuel flap is correctly closed.
Vehicles with a keyless fuel cap (the side
flap will unlock using the central locking
system)
–
Once the vehicle has been unlocked using
the central locking button, press the fuel
flap in the direction of the arrow
1
››› Fig. 107
.
–
Open the c
o
ver in the direction indicated
by the arrow
2
.
»
129
Technical specifications
AdviceOperationSafety
Loading ...
Loading ...
Loading ...