Loading ...
Loading ...
Loading ...
1110
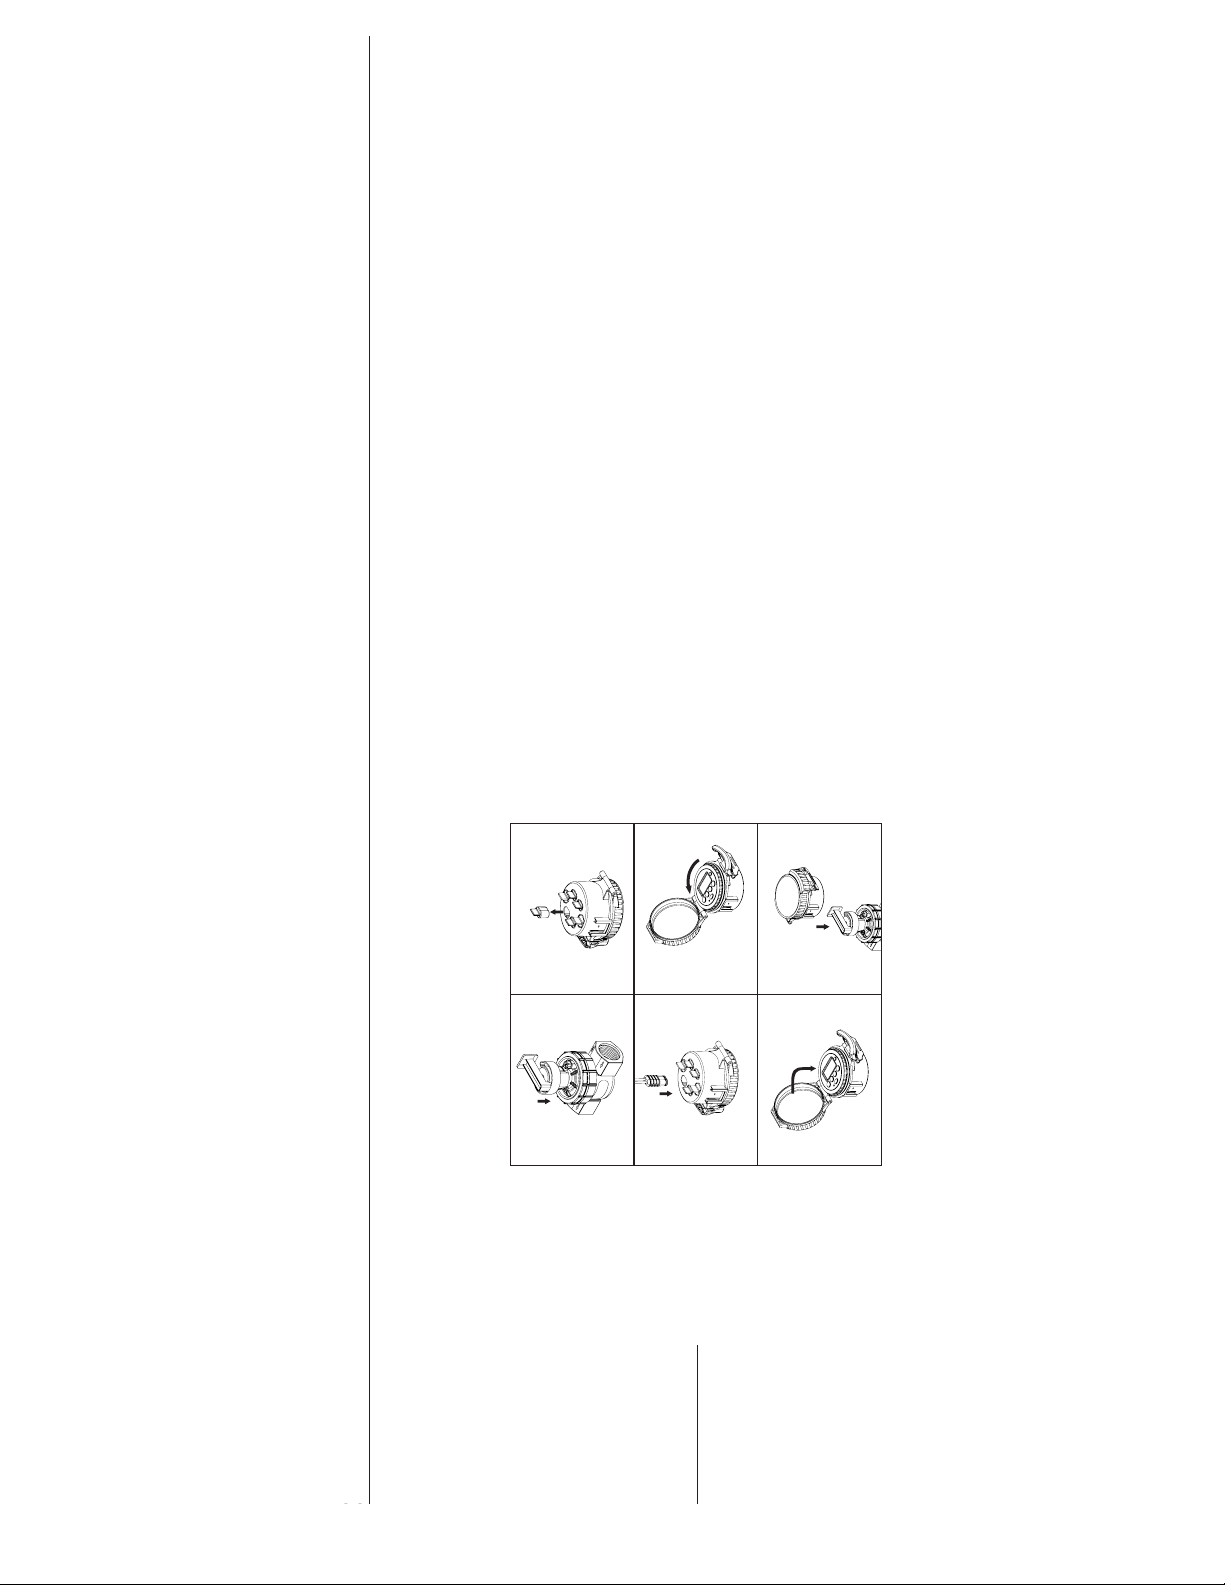
Connect the timer to the valve after you
have programmed it. This timer will only
operate with DC solenoids that have been
included in the package. Replace any
original solenoids on valves connected to
the timer with these DC solenoids.
1. Make sure the main timer unit is fully
inserted into the docking bay.
2. Twist on the protective timer cover tight
enough to ensure a waterproof, dirt-
proof seal. Do not over-tighten.
Connecting Timer to Valve
1. Attach timer clip to valve solenoid.
2. Remove plug from the recepticle
marked “1” on the bottom of the timer.
3. Insert wire connector into the recepticle
marked “1” on the bottom of the timer.
Ensure that the connector fully seats
into the recepticle.
4. Attach timer to timer clip.
5. Rotate dial to OFF. Wait 60 seconds to
allow the timer to close all valves.
6. Rotate dial to AUTO and replace cap.
Timer- A device that is responsible for
turning an automatic watering system on
and off.
Cycle Start Time- The time the program
begins watering the first station.
Multiple Start Times- A feature that
allows a program to be operated multiple
times on the same day.
Program (A or B)- One or more
watering stations that share a common
programmed watering schedule.
Rain Delay- A feature that prevents
the sprinkler timer from running it’s
scheduled watering program for a specific
duration.
Solenoid- The electrical part on a
sprinkler (irrigation) valve that opens and
closes the valve.
Stacking- When a start time is set before
the previous program has completed, that
start time will be “stacked” or delayed, and
will start upon completion of the previous
program.
Station (Watering Station)- An area where
the watering (irrigation) is all controlled by
a single control valve.
Valve (Watering or Irrigation Valve)- Used
in conjunction with sprinkler timers – a
convenient way to deliver water to lawns,
plants and gardens.
Watering Program- See Program (A or B).
Zones- See “Station (Watering Station).”
CONNECTING THE TIMER GLOSSARY OF TERMS
Step 1
Step 3
Step 5
Step 2
Step 4
Step 6
Loading ...
Loading ...
Loading ...