Loading ...
Loading ...
Loading ...
14
BEFORE YOU BEGIN
Read these instructions completely and carefully.
•
IMPORTANT – Save these
instructions for local inspector’s use.
•
IMPORTANT – Observe all
governing codes and ordinances.
• Note to Installer – Be sure to leave these
instructions with the Consumer.
• Note to Consumer – Keep these instructions
for future reference.
• Skill level – Installation of this appliance requires
basic mechanical skills.
• Completion time – Refrigerator Installation
15 minutes
• Proper installation is the responsibility of the
installer.
• Product failure due to improper installation is not
covered under the Warranty.
• Do not install the refrigerator where the temperature
will go below 60°F (16°C) because it will not run often
enough to maintain proper temperatures.
• Install it on a floor strong enough to support it fully
loaded.
REFRIGERATOR LOCATION
Installation
Refrigerator
Instructions
Models 20, 22, 25
Allow the following clearances for ease of installation,
proper air circulation and plumbing and electrical
connections.
• Sides 1/8″ (4 mm)
• Top 1″ (25 mm)
• Back 1″ (25 mm)
A door clearance of 3/4″ (19 mm) is needed for a 90°
door opening which provides better access to the food
storage area.
CLEARANCES
If the refrigerator has an icemaker, it will have to be
connected to a cold drinking water line. A GE water
supply kit (containing tubing, shutoff valve, fittings
and instructions) is available at extra cost from your
local distributor.
Installation of the icemaker must be done by a
qualified service technician.
WATER SUPPLY TO THE ICEMAKER
(on some models
)
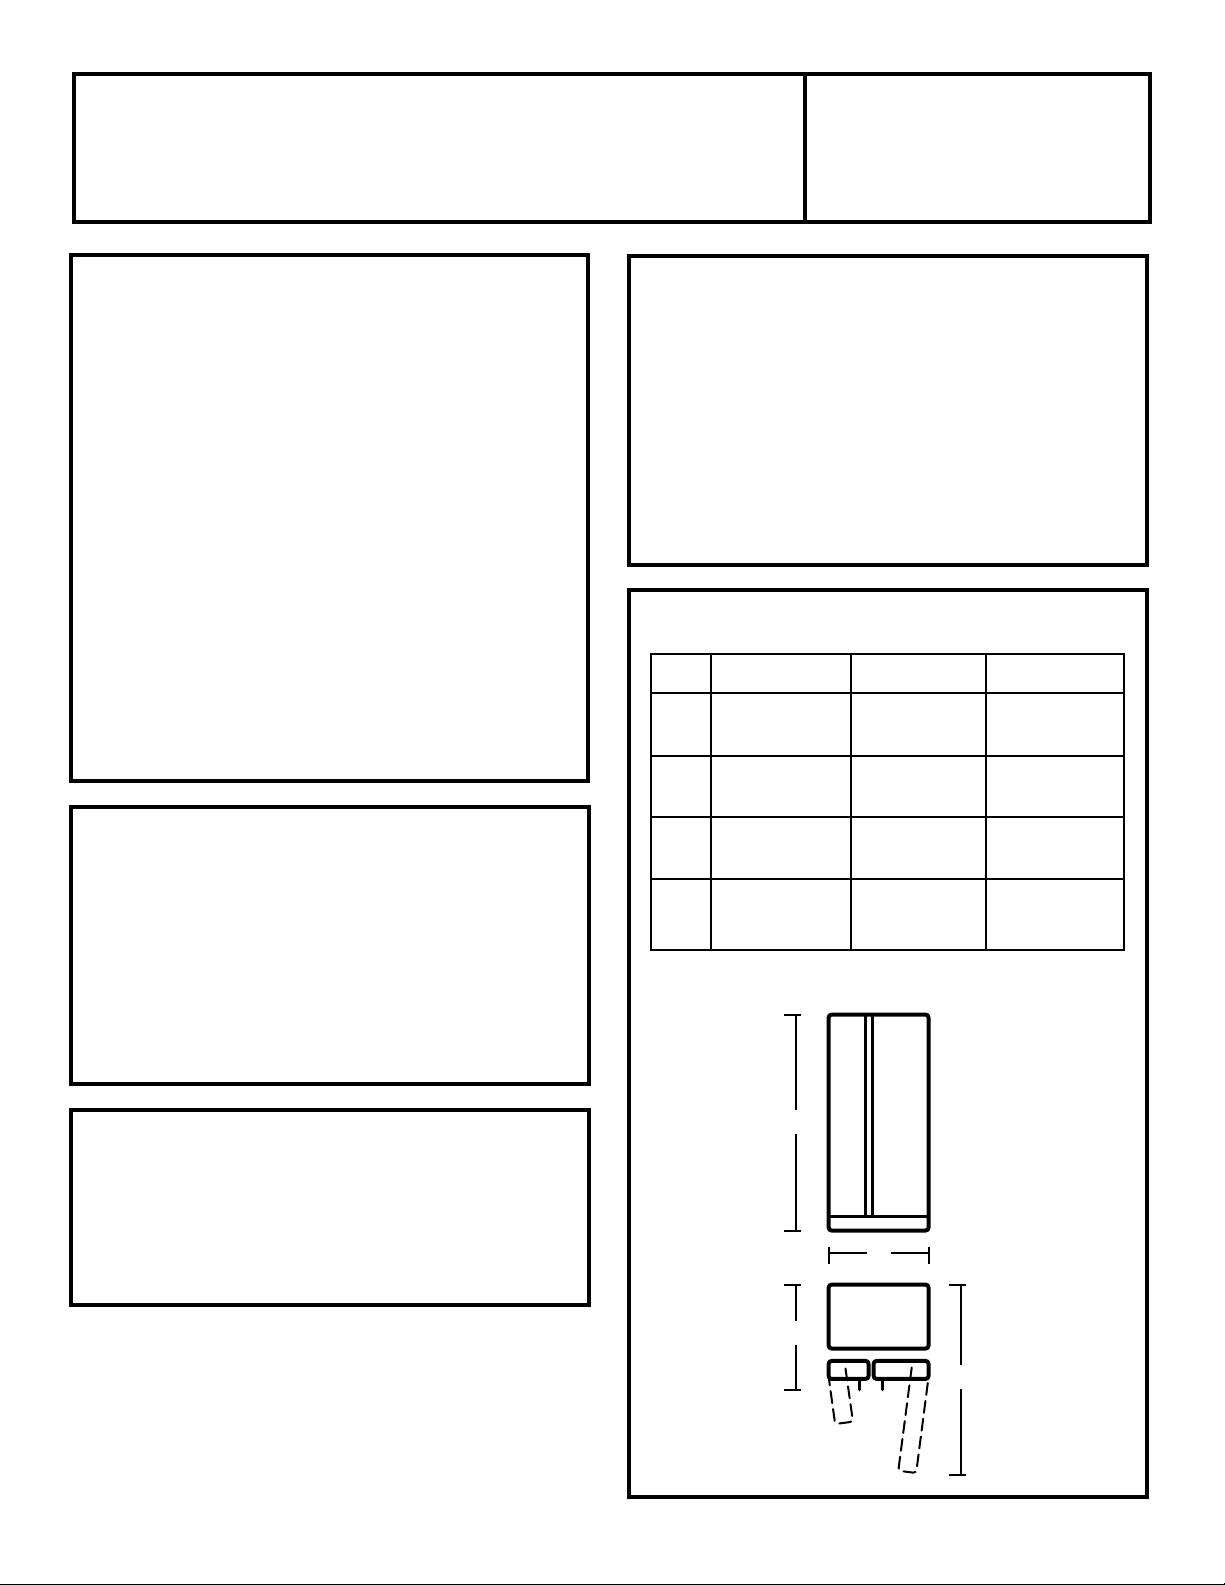
*Height does not include hinge.
**Depth includes handle.
DIMENSIONS
20 22 25
A* 66
1
⁄2″ 66
1
⁄2″ 68
3
⁄4″
(1689 mm) (1689 mm) (1746 mm)
B 31
1
⁄2″ 33
1
⁄2″ 35
3
⁄4″
(800 mm) (851 mm) (908 mm)
C** 34″ 34″ 34″
(864 mm) (864 mm) (864 mm)
D 47
7
⁄8″ 49
7
⁄8″ 49
7
⁄8″
(1216 mm) (1267 mm) (1267 mm)
A
B
C
D
Loading ...
Loading ...
Loading ...