Loading ...
Loading ...
Loading ...
www.oster.com
13
CARE & CLEANING
NOTE: Do not attempt to sharpen the cutting edges of the chopping blade or the
reversible disc. They are permanently sharpened at the factory and will be ruined
by attempted sharpening.
CLEANING
1. Before cleaning, be sure the unit is switched o and the cord is unplugged.
2. Whenever possible, rinse parts immediately after processing for easy cleanup.
3. Wipe the base, control panel, and feet with a damp cloth and dry thoroughly.
Stubborn spots can be removed by rubbing with a damp cloth and a mild,
non-abrasive cleaner. Do not immerse the base in liquid.
CAUTION: BLADE and PROCESSING DISC ARE SHARP. Handle carefully.
4. All removable parts can be washed by hand or in a dishwasher, top rack.
• If washing by hand, wash in hot soapy water, rinse, and dry thoroughly.
If necessary, use a small nylon bristle brush (not included) to thoroughly
clean the bowl and food chute/cover, this type of brush will also help prevent
from coming in contact with the blades and the reversible slice/shred disc.
• If washing in a dishwasher, place removable parts on the top rack only —
and small parts in the utensil basket.
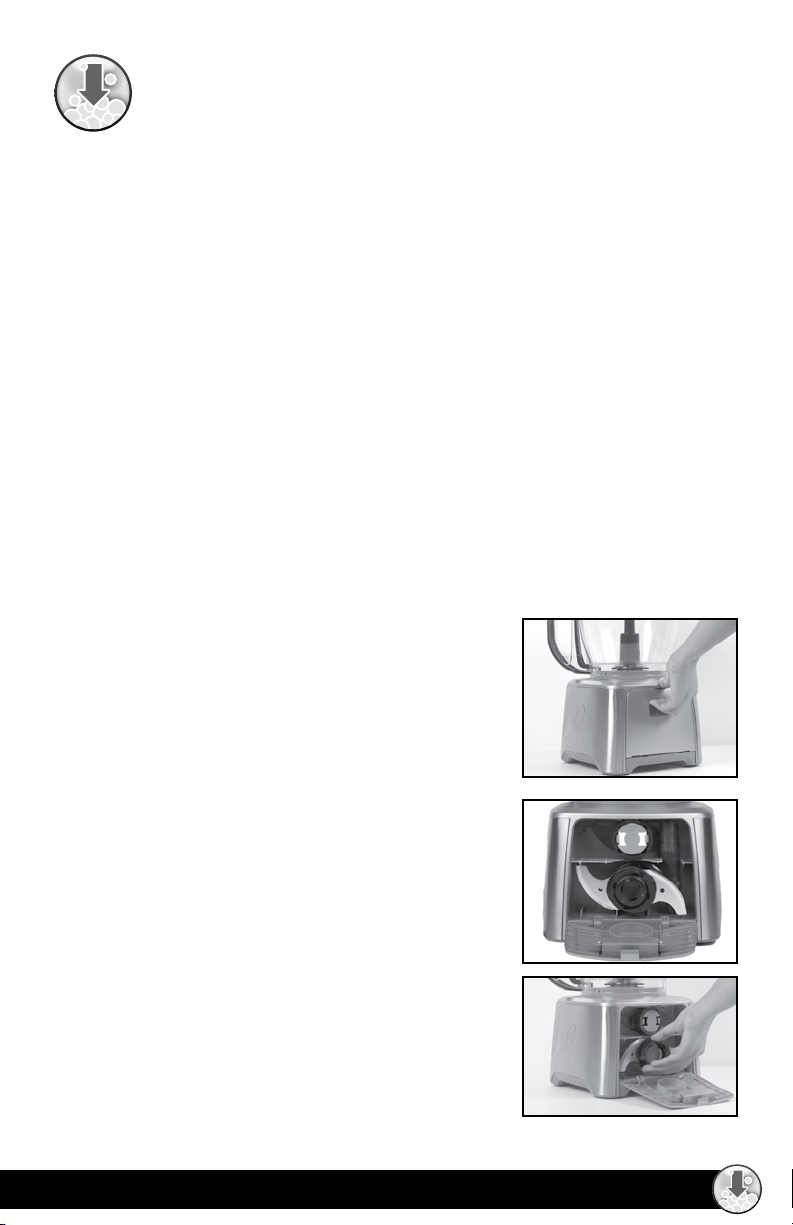
USING YOUR STORAGE COMPARTMENT
The convenient built-in blade storage compartment allows
you to keep all of your accessories together with your food
processor, so you know where they are when you need them.
Blade, Dough Blade and Stem t safely into storage slots for
easy insert and removal.
1. Open the Storage Compartment by gently
pulling on handle (Figure 14)
2. Once open, you can either remove the blade you
need, or replace a blade you are not using, by carefully
holding the plastic end and inserting blade
until it stops (Figure 15).
3. When blades are inserted, simply lift door back up
until door snaps shut. (Blades should be far enough
in to allow the door to close.)
USER MAINTENANCE
This appliance has no user-maintenance or user-serviceable
parts. Any servicing other than cleaning per the cleaning
instructions should be performed by an authorized service
representative.
FIGURE 14
FIGURE 15
Loading ...
Loading ...
Loading ...