HEAT LIVE RELAX
OPERATION, MAINTENANCE
AND SAFETY INSTRUCTIONS
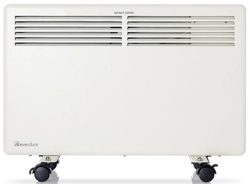
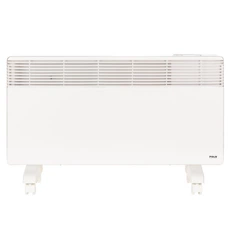
FOR EVERDURE PANEL CONVECTION HEATERS NPE1500W, NPE2000W & NPE2400W

HEAT LIVE RELAX
IMPORTANT SAFETY INSTRUCTIONS
IMPORTANT: Read the safety precautions of this booklet carefully before attempting to assemble, install, operate or
maintain the product described. Protect yourself and others by observing all safety information. Failure
to comply with instructions could result in personal injury and/or property damage. If you are unsure
about anything regarding your heater or these instructions, please contact Everdure on 1300 766 066 in
Australia or (09) 415 600 in New Zealand before operating your appliance.
1. Read all instructions carefully before using the panel convection heater.
2. Use this heater only as described in this manual. Any other use not recommended by the manufacturer
may cause fire, electrical shock, or injury to persons.
3. Remove the package and ensure that the heater is undamaged. In case of doubt do not use the heater and
contact Everdure Service. Do not let children play with any parts of the package.
4. This appliance is not intended for use by persons (including children) with reduced physical, sensory or
mental capabilities, or lack of experience or knowledge, unless they have been given supervision or
instruction concerning the use of the appliance by a person responsible for their safety. Children should be
supervised to ensure that they do not play with the appliance.
5. Before you use the heater, check if the voltage marked on the rating label corresponds to the mains in your
home.
6. When first operated, a slight burning smell may be experienced. This is normal.
7. Avoid using extension cords as the extension cord may overheat and cause a risk of fire.
8. This heater is hot when in use. To avoid burns, do not let bare skin touch hot surfaces. Always use the control
panel or castor supports when moving the heater (when not wall mounted). Keep combustible materials such
as furniture, pillows, bedding, papers, clothes and curtains at least 1 meter from the front & top of the heater
and keep them at least 0.5 meters from the sides and rear. Do not cover.
9. Do not pull the power cord to disconnect with the power source. Always grasp the plug to pull it out.
10. Do not insert any objects into the heater as it may cause an electric shock or fire or damage to the heater. Do
not block or tamper with the heater in any manner while it is in operation. To prevent a possible fire, do not
block the air inlet or outlet in any manner. Do not place on soft surfaces, like a bed or long pile carpet, where
openings may become blocked.
11. Do not leave the heater unattended. Always unplug the heater when not in use. Always let the heater cool
down before moving or storing away.
12. The heater has hot parts inside. It must NOT be used in potentially dangerous locations such as flammable,
explosive, chemical-laden or wet atmospheres. This heater is intended for general indoor domestic use
ONLY.
13. This heater is not intended for use in wet or damp locations, such as a bathroom or any area containing a
bath, shower, wash basin or close to water or damp items. Never locate a heater where it may fall into a
bathtub or other water container. It must be positioned or installed so that the controls cannot be touched by
a person in a bath or shower. Do not immerse the power cord in any liquid (including water).
14. This heater is for use indoors only.
15. This heater includes an overheat protection safeguard that will turn the unit off should it overheat. If this
occurs, remove the plug from the mains socket & allow to cool for 45 minutes, at which point it can be
restarted. Check for the reason for the overheating, such as blocked vents, prior to starting up again.
16. Never install or use the heater directly below a wall socket.
17. When fixing on a wall, the heater must be level, securely fixed & at the correct height (check with local
authorities if unsure). There must be at least 150mm between it and any barrier/wall to the sides, bottom or
top to prevent overheating or damage.
18. Always use the heater with the castors supplied on level floors or attached to a wall with the supplied brackets.
WARNING: The Main Power Switch and the On/Off switch should not be used as the sole means of
disconnecting power. Always unplug the power cord before servicing or moving the unit.
WARNING:
To avoid danger of electric shock, unplug from outlet when not in use and before cleaning. If the
supply cord is damaged, it must be replaced by a special cord or assembly available from an
authorized person. In order to avoid overheating, do not cover the heater. The heater must NOT
be located immediately below a socket outlet. Do not use the heater in the immediate
surrounding of a bath, shower or swimming pool.
HEAT LIVE RELAX
CONTROL FUNCTIONS
GETTING STARTED
1. Carefully remove the heater from packaging and the carton, and unwind the cord to its full length.
2. Either fit the castors & place the heater onto a stable, flat and dry surface, or fit the mounting brackets to a stable
wall & hang from the wall in a dry position away from open or running water. See installation sections for
details.
3. Turn the heater off at the power switch (on the top right hand side of the unit). Plug the cord set into a
220-240V~A.C. 50Hz electrical outlet. Turn the power on at the electrical outlet.
4. Turn the heater on at the power switch (on the right hand side of the unit). Depending on the last setting, either
the numeric display will light up showing the previous temperature setting (the appliance will start to operate), or
the numeric display decimal point will light up (the appliance in stand-by mode). If in stand-by mode, press the
power button to start the appliance, and press again to put back to stand-by mode.
NOTE: Heater must have castors fitted or be attached to a wall before use.
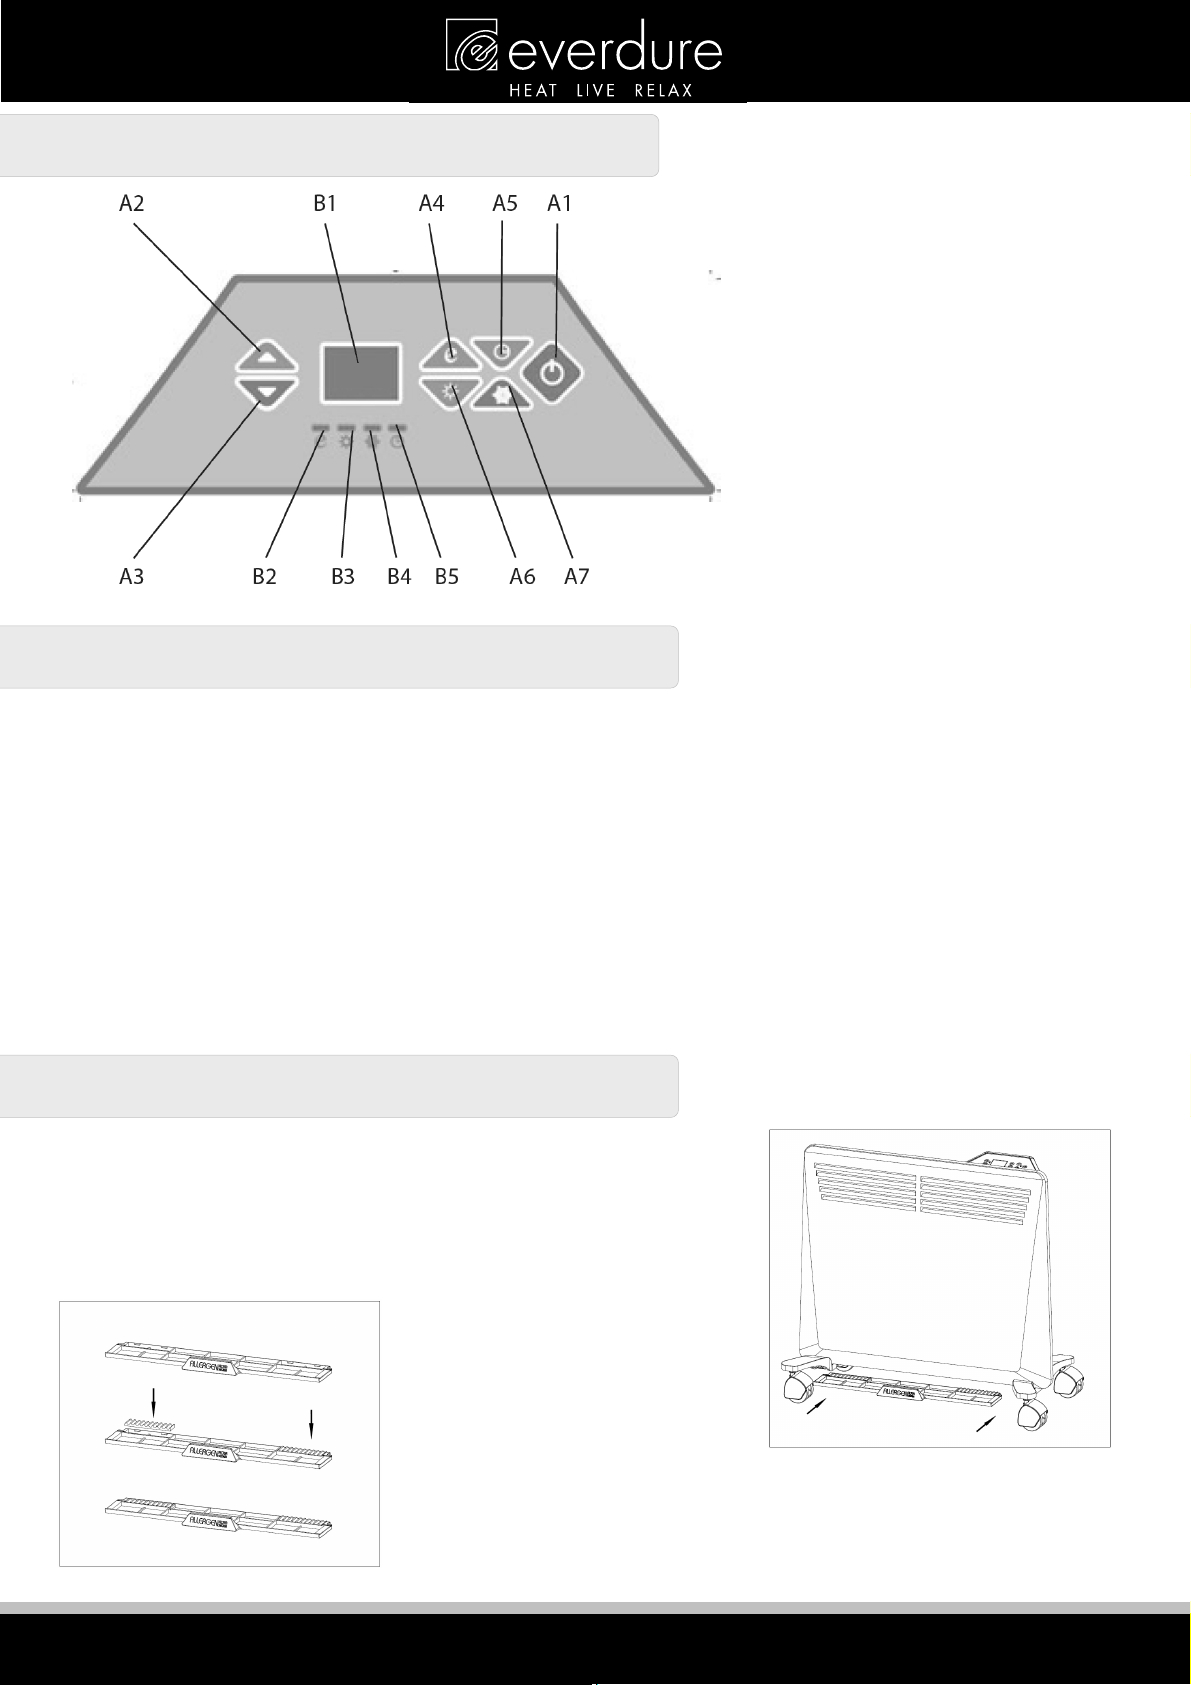
FILTERS
The main filter can be fitted by pushing it into the slots mounted at the
bottom of the appliance. It is designed to stop hair and dust from entering
the appliance and collecting where it is hard to clean as well as removing
them from air circulation. Remover the filter and clean with a vacuum
cleaner periodically to keep the appliance working efficiently. NOTE:
Allowing dust & hair to build up can create a potential fire hazard. The
small filter inserts can be used to
disperse fragrance oils. Place one or
2 drops of the fragrance oil in each
filter insert, and place in the rear
corners of the main filter. Place the
main filter under the appliance as
described above. The heating effect and natural air convection will draw the
scent through the heater and help distribute it throughout the room. NOTE:
Do not overload the filter inserts with oils as they could be potentially
flammable.
A1. POWER BUTTON
A2. INCREASE SETTING BUTTON
A3. DECREASE SETTING BUTTON
A4. LOW POWER (ECONOMY) BUTTON
A5. TIMER BUTTON
A6. FULL POWER BUTTON
A7. ANTI-FROST BUTTON
B1. NUMERIC DISPLAY
B2. LOW POWER INDICATOR
B3. HIGH POWER INDICATOR
B4. ANTI-FROST INDICATOR
B5. TIMER SET INDICATOR

HEAT LIVE RELAX
OPERATING INSTRUCTIONS
TURNING ON & OFF
Once the unit is in stand-by mode, press the power button once to turn the unit on. The LED display will show the
current set temperature. Press again to put the appliance back into stand-by mode (only the decimal point will be
displayed). NOTE: If the power supply is interrupted while the unit is operating, the unit will restart at using the
same function when the power is reinstated.
POWER SETTINGS
There are 3 power settings, low, high and anti-frost. For normal operation, use the low or high settings. Once the
unit is operating, the setting can be changed by pushing the low power button or high power button. Generally,
start the unit using the high power setting (high power indicator lit), to heat the room as fast as possible. Once the
required temperature has been reached, the unit can be turned down to the low power setting low power indicator
lit) to save power but keep the same temperature.
The anti-frost setting runs the appliance at 5°C (the numeric display shows 5°C and the anti-frost indicator is lit).
Press once to activate, and then a second time to revert to the previous power setting (note there is no temperature
adjustment on this setting). Note: Timer functions do not work when using the anti-frost setting.
SETTING TEMPERATURES
While the unit is operating in either the low or high power modes, press the increase setting button or decrease
setting button once (decimal point is lit). Adjust the setting up or down by pressing the buttons. The numeric display
will flash for 5 seconds after the last button pressed and then store the setting (decimal point turns off). The
temperature can be set between 5°C & 35°C).
SETTING THE TIMER
While the unit is operating, press the timer button once. The numerical display will show the current timer setting
(0-24 hours) and the timer set indicator will light up. Adjust the timer setting up or down using the increase setting
button and decrease setting button. The numeric display (and timer setting indicator) will flash for 5 seconds after
the last button pressed and then store the timer setting. Once the timer finishes, the appliance will revert to the
stand-by mode. The timer will be disabled if the power button (A1) is turned off and on, the timer button is pressed
again or the timer setting is set to “0”. The timer will remain set if the main power switch is turned on and off, or the
power supply is interrupted.
A timer function can also be set to turn the appliance on after a set period of time. With the appliance in stand-by
mode, repeat the above sequence to set a time in hours. After 5 seconds, the display will turn off, but the timer set
indicator will stay on. When the set time has elapsed, the appliance will turn on. NOTE: Take care that the
appliance is in a safe position and nothing can accidentally be placed against it.
Timer settings can be adjusted at any time by pressing the timer button twice and adjusting the time as above.
MAIN POWER SWITCH
The main power switch is to the right of the control panel. After the heater is plugged in, switching this on allows the
heater to function & switching it off stops all functions.
CONTROL PANEL LOCK
The control panel buttons can be locked when operating or in stand-by mode. Press the increase setting and
decrease setting buttons together for 3 seconds and the display will show the lock symbol “[]” for 3 seconds and
then revert to the previous display. Pressing any button will cause “[]” to be displayed again with no change to the
functions. Turn the lock off by repeating the process. The lock will stay in place even if the main power button is
turned off and on, or there is a short power failure.
HEAT LIVE RELAX
INSTALLATION GUIDE
This heater can either be mounted to a wall or used with the supplied castors. Please note the following safety
warnings:
This heater is hot when in use. To avoid burns, do not let bare skin touch hot surfaces. Always use the control
panel or castor supports when moving the heater (when not wall mounted). Keep combustible materials such as
furniture, pillows, bedding, papers, clothes and curtains at least 1 meter from the front & top of the heater and
keep them at least 0.5 meters from the sides and rear. Do not cover.
The heater has hot parts inside. It must NOT be used in potentially dangerous locations such as flammable,
explosive, chemical-laden or wet atmospheres. This heater is intended for general indoor domestic use ONLY.
This heater is not intended for use in wet or damp locations, such as a bathroom or any area containing a bath,
shower, wash basin or close to water or damp items. Never locate a heater where it may fall into a bathtub or
other water container. It must be positioned or installed so that the controls cannot be touched by a person in a
bath or shower. Do not immerse the power cord in any liquid (including water).
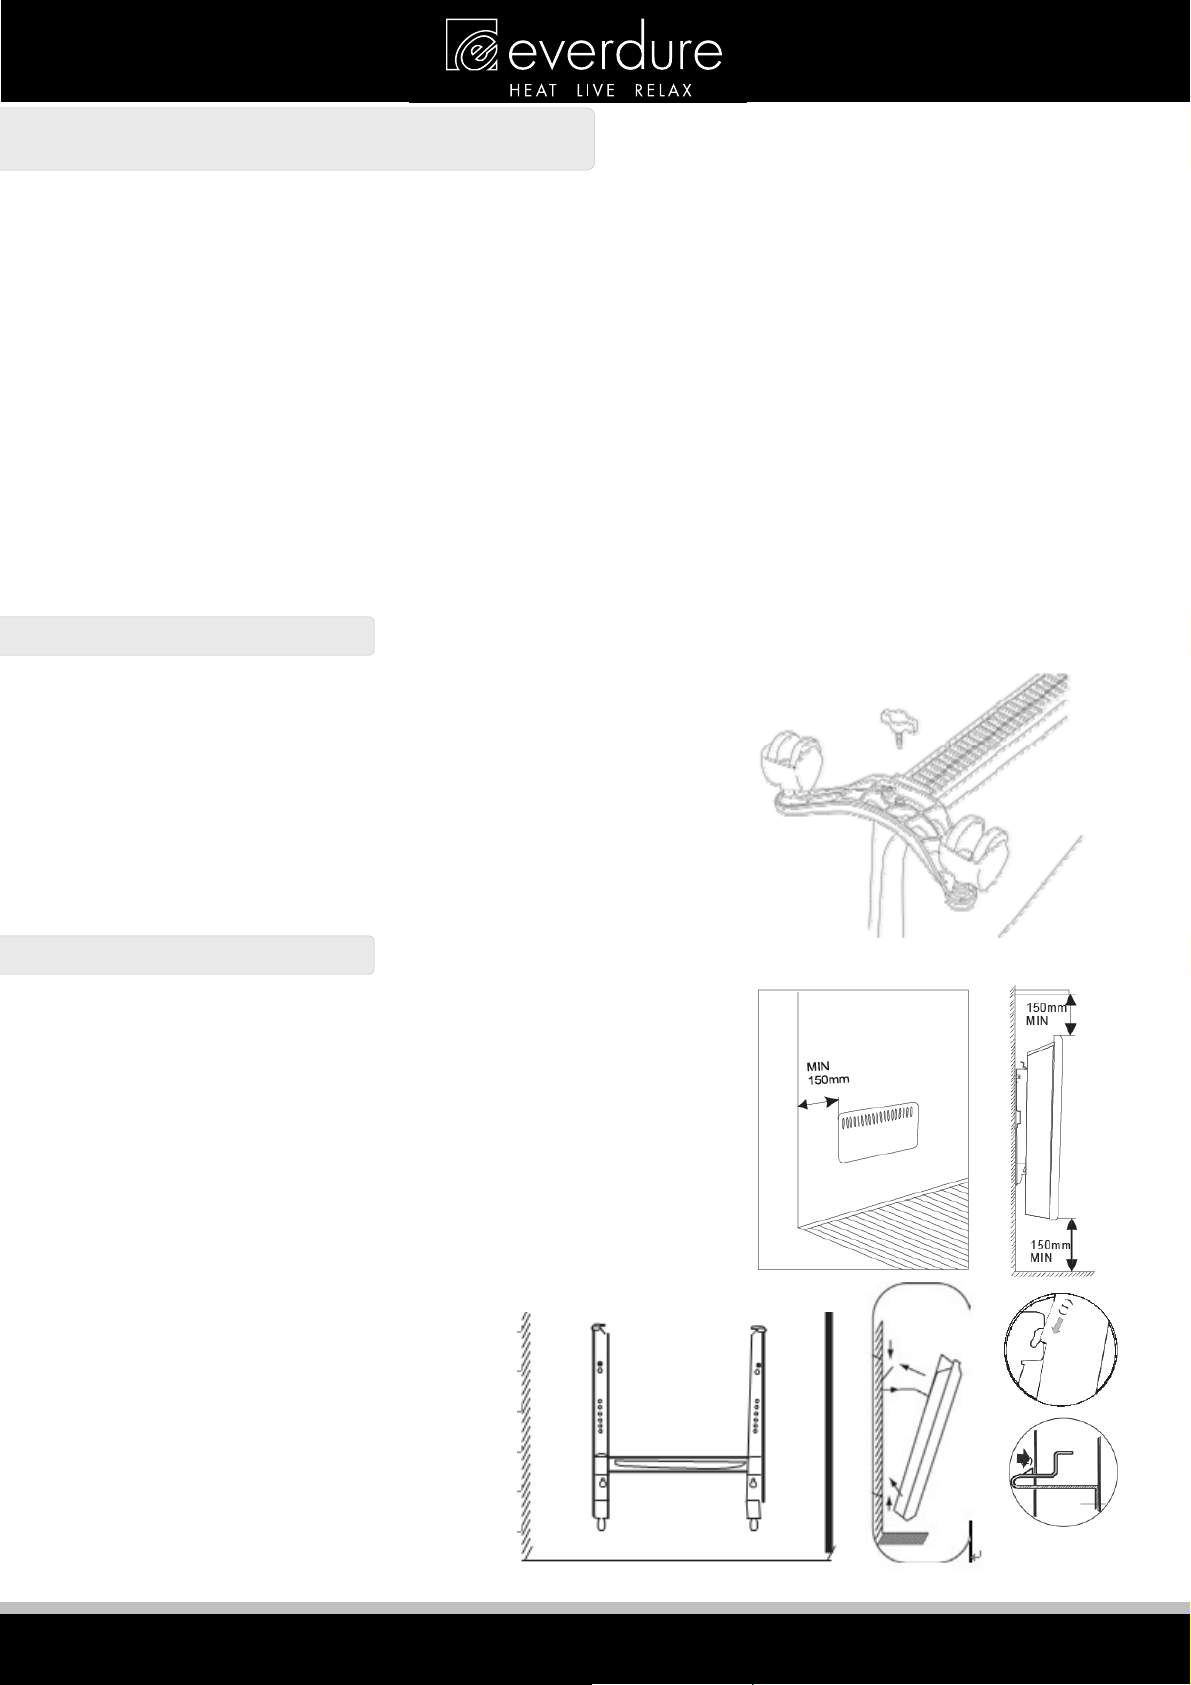
Never install or use the heater directly below a wall socket.
When fixing on a wall, the heater must be level, securely fixed & at the correct height (check with local authorities
if unsure). There must be at least 150mm between it and any barrier/wall to the sides, bottom or top to prevent
overheating or damage.
FITTING CASTORS
Make sure the heater is unplugged from the mains power. Turn the
heater upside down & rest on a protective surface. Place a castor bracket
over the screw hole at either side of the heater base. Use the supplied
thumb screw to attach the castor bracket firmly to the heater base (do not
over-tighten). Push the castors into the slots. Turn the heater right side up
& it is ready to connect to mains power. Note: The heater gets hot when
in use, so it is best not to move when in use. If it must be moved, use the
castor brackets or control panel as points of contact.
WALL MOUNTING
Do not fit the castors to the base of the heater. Make sure the heater is
unplugged from the mains power and the wall is suitable for mounting
the panel heater and there are the correct clearances. Make sure the
panel heater is within 1 metre of a power socket. Detach the mounting
bracket from the rear of the heater by compressing the 2 bracket clips,
pulling the clips out of the heater rear & removing the bracket hooks
from the heater.
Position the bracket on the wall in the desired position & drill holes for
four mounting screws. Once the holes are drilled, use four screws
(appropriate for the type of wall) to fix the
bracket firmly in place. Check for strength.
Carefully place the heater (slightly tilted
forward) onto the hooks at the bottom of the
bracket & rotate back so the clips fix back into
their original holes. Check that they are fixed
correctly. If possible, have a second person
help to check for alignment as the heater is
attached. The heater is now ready to connect
to the mains power.
HEAT LIVE RELAX
SAFETY FEATURES
1. A thermal overload protector is built in to prevent overheating. When an overheat temperature is reached, the
heater will automatically shut off. It can only resume operation when the user resets the unit (see reset instructions
below).
To reset your heater:
Unplug the heater and wait for 45 minutes for the unit to cool down. Then, turn on the unit again and operate
normally.
2. The appliance has a tilt switch built into it so that if the appliance falls over, the element will stop working. Note
that the numerical display does not change even though the elements are no longer running.
To reset your heater:
Turn the appliance off at the main power switch. Right the appliance back onto its castors NOTE: Take care as the
appliance may be hot. Turn the power switch on.
CLEANING & MAINTENANCE
WARNING: ALWAYS UNPLUG THE CORD BEFORE MOVING OR SERVICING, DO NOT
IMMERSE HEATER IN WATER!
With the heater disconnected from the power, clean the exterior body of the heater with a soft damp cloth.
Always make sure that the heater is completely dry before connecting back to the mains supply. A vacuum
cleaner can be used to clean the inlets & outlets of dust & fluff. To clean behind a wall mounted unit, the
mounting clips can be disconnected & the heater rotated slightly forward (a 2 person job). Please make sure the
unit is properly resecured after.
CAUTION: Do not use gasoline, benzene, thinner, harsh cleaners, etc. as they will damage the heater. NEVER
use ALCOHOL OR SOLVENTS.
STORAGE: Store the heater with these instructions in the original packaging, in a cool, dry place.
WEEE WARNING
This product should not be disposed of with household waste. Please recycle where facilities exist and
check with your local authority for recycling advice.
SPECIFICATIONS
MODEL INPUT POWER RATED POWER DIMENSIONS (NO CASTORS)
WEIGHT
NPE1500
W
220-240Vac 50Hz
1500W 640x413
x
113mm (WxHxD)
4.4Kg
NPE2000W 220-240Vac 50Hz
2000W 800x413
x
113mm (WxHxD)
4.9Kg
NPE2400W 220-240Vac 50Hz
2400W 1000x413
x
113mm (WxHxD)
6.9Kg

HEAT LIVE RELAX
HINTS & TIPS
Where possible, your electric panel convection heater should be connected to a power outlet that uses a separate
10 amp power circuit than other items. This will avoid overloading your household fuse.
In the event that your household fuse is overloaded and trips, please note this is normally caused by the use of
excessive power outlets at the same time your heater is operating (for example, a steam iron, kettle, toaster etc.).
Please ensure to check the use of the power circuit and adjust when heater is in use (i.e. turn off the heater when
boiling a kettle).
If your heater does not work:
Check that power is available to the heater & it is plugged in & turned on.
Check that the heater temperatures are set correctly for the ambient temperature.
Check that the thermal cut-out has not activated (see safety features).
Do not try to repair the heater.
Should you still experience difficulty contact Everdure Service for assistance.
It is important that you retain these instructions, proof of purchase as well as
other important documents about this product for future reference.
Due to continual product development, Everdure reserves the right to alter
specifications or appearances without notice.
Dispose of packaging responsibly – recycle where facilities are available.

HEAT LIVE RELAX
A division of Shriro Australia Pty Ltd
104 Vanessa St Kingsgrove NSW 2208
In Australia: 1300 766 066
In New Zealand: (09) 415 6000
www.everdure.com
IM Ref: NPE1500/2000/2400W 13/2015/11