
2
Contents
1、Product Introduction………………………………………………………………………………………..1
2、Warning and Cautions………………………………………………………………………………………3
3、Assembly and Operation Instruction………………………………………………………………….4
4、Trouble Shooting………….………………………………………………………………….………………6
5、Specifications…………………………………………………………………………………………………..8
6、Product Explosion Diagram and List of Accessories…………………………………………8
3
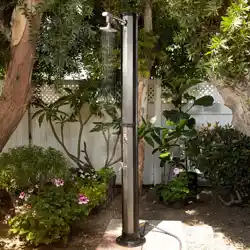
1. Production Introduction:
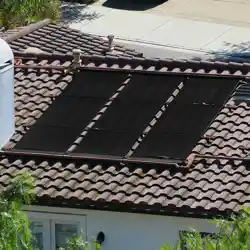
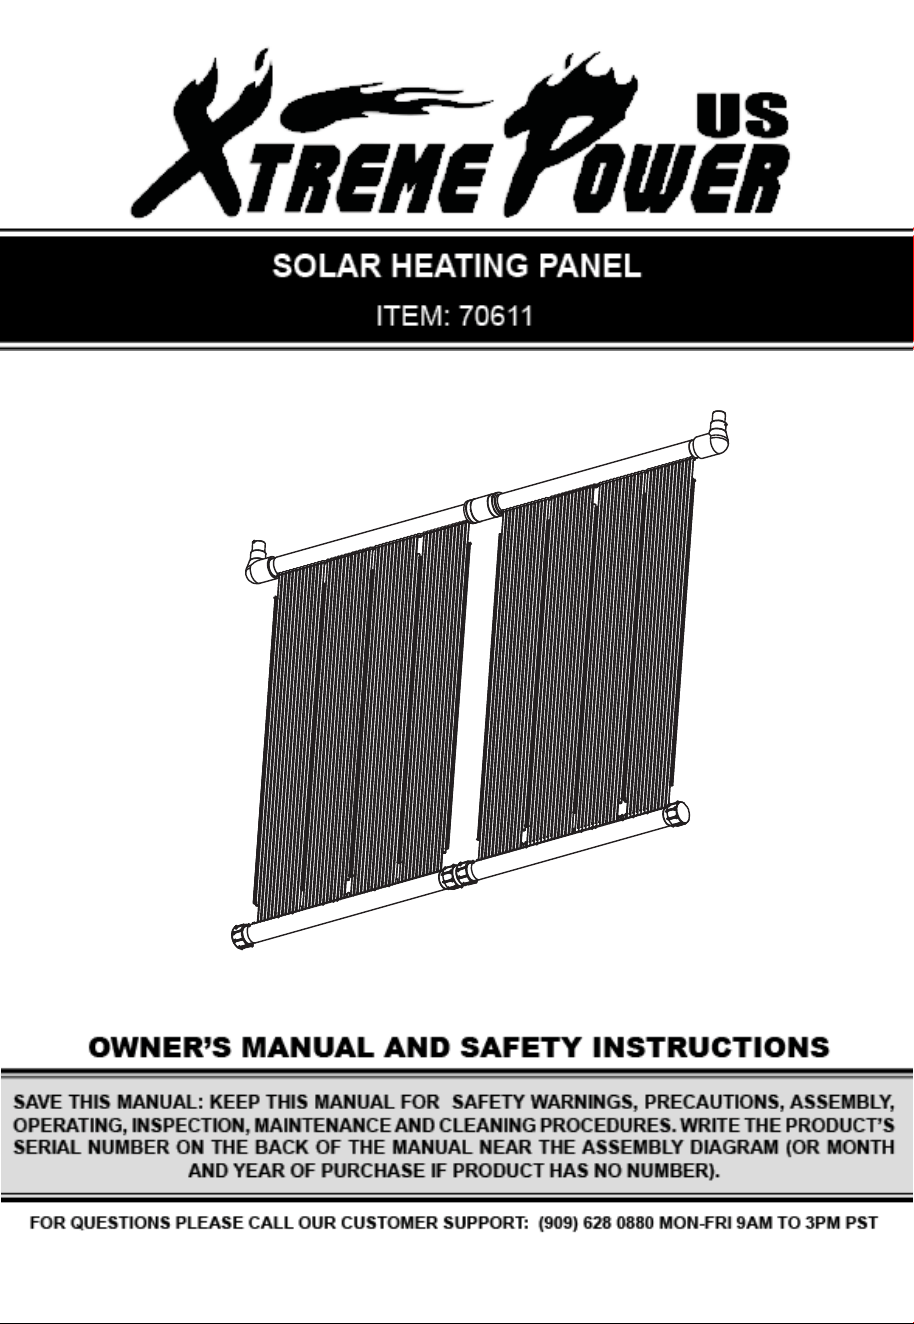
The solar heating panel is a pool solar heating device to be connected to the pool filtration system. The solar
heating panel heats the pool water by absorbing sunlight. Please refer to the below image for the water flow
direction while in use. The water flows out of the swimming pool, enters the filtration system, and flows into
the solar heating plate to flow inside the product. The solar heating panel absorbs the heat of the
sun, thereby
heating the internal water flow, and then the water flows out of the solar heating panel and returns to the
pool to heat the pool water temperature.
The pool pump circulates the Water through the collectors
The collectors absorb the heat from the sun
Warm water is returned to the pool
Solar Heating Panel Cross Section
The panel has a web construction designed form maximum heat absorption regardless of the position of the sun
Pool
Cold Water
Warm Water

4
Warning and Cautions
1. Read this manual carefully
and use it in strict accordance with the operating procedures of this manual.
2. Children are not allowed to operate solar heating panel.
3. Solar heating panels are required to be installed on the ground and are not allowed to be installed on roofs
or vertical structures.
4. It is strictly forbidden to step on the solar heating panel.
1. The solar heating panel should be installed on a sturdy, level ground.
2. It is recommended that the installation site receive at least 6 hours of direct sunlight per day.
3. Adjust the aluminum feet to tilt the surface of the product toward the sun.
4. Always turn off the filtration system when installing, operating, or servicing the solar heating panel.
5. Install the solar heating panel far enough away from t
he swimming pool to prevent children from
swimming with it.
6. When loosening the filter, pump or other connections, make sure the filter hose is closed or blocked.
7. All connecting hoses should be kept open to ensure that the hose does not become severely kinked
or bent.
8. Make sure all hoses are tightly connected. If the hose leaks, check to make sure all parts with O-rings are
connected and tightened.
9. Remarks: You can cover the pool cover at night to help maintain the water temperature in the
pool.
5
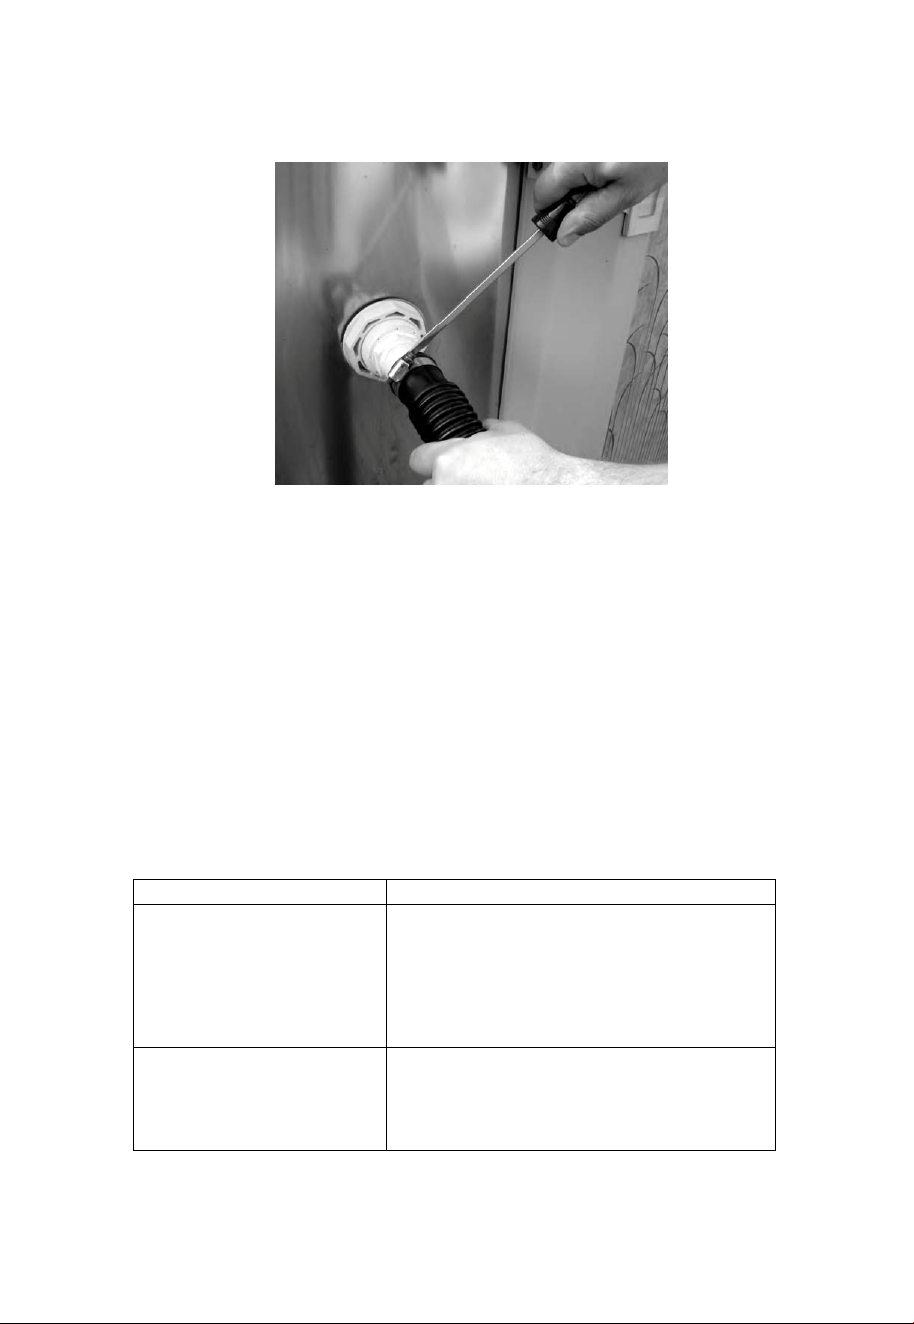
3、
Assembl
y and Operation Instruction
1. Remove the solar heating panel and its accessories from the box.
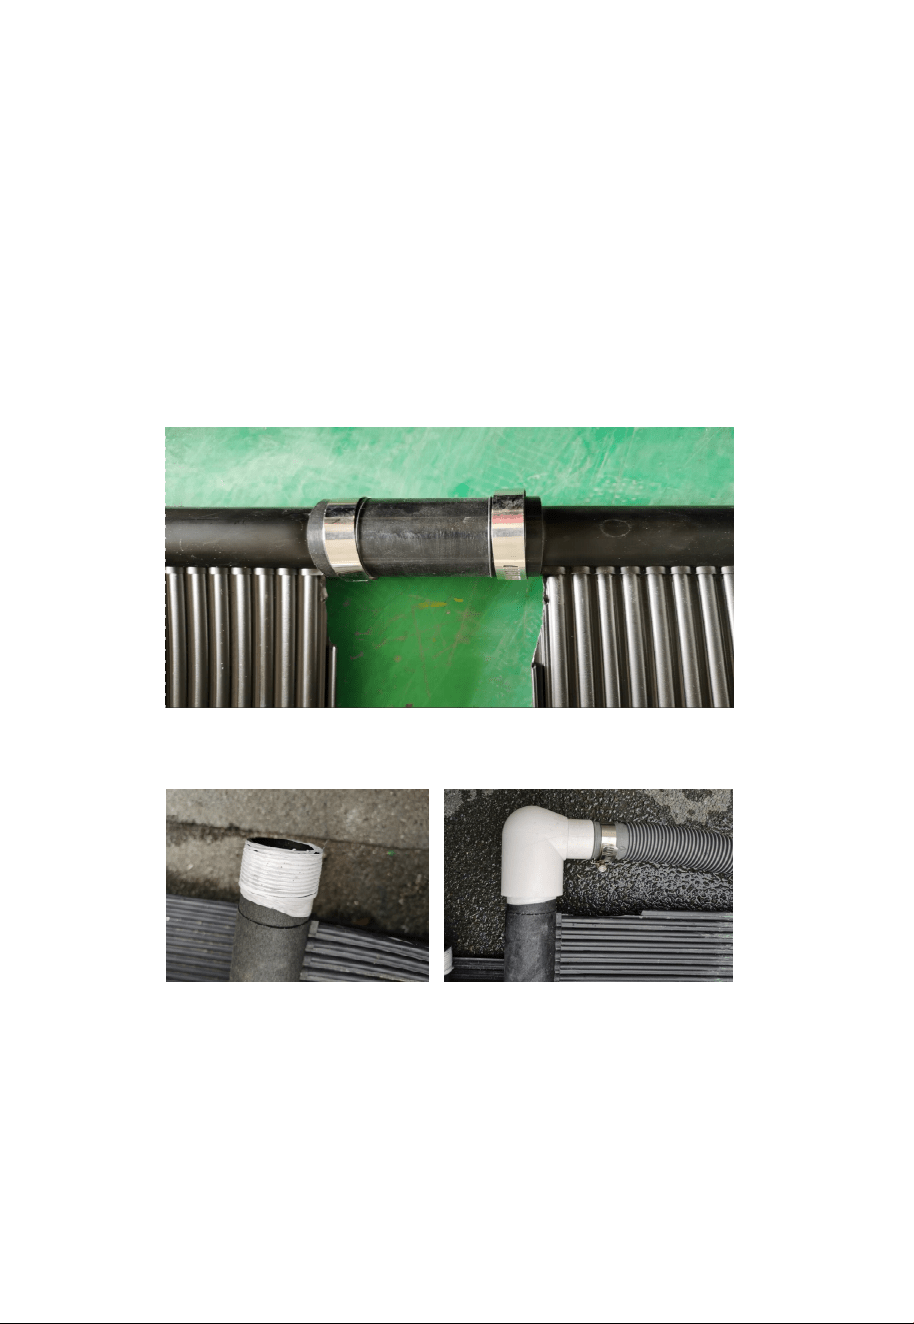
Note:Laying the panel in the reverse direction of the coils will help flatten the panels
2. Remove and discard the black protective caps covering the threaded portion of the headers
3. Join the headers with the white labels together using a rubber hose connector and two11/2” hose clamps.
position the Hose clamps1/2”in from each end of rubber connector hose and tightens.
4.Install the PVC elbow connectors on either end of that header near the label side.
6
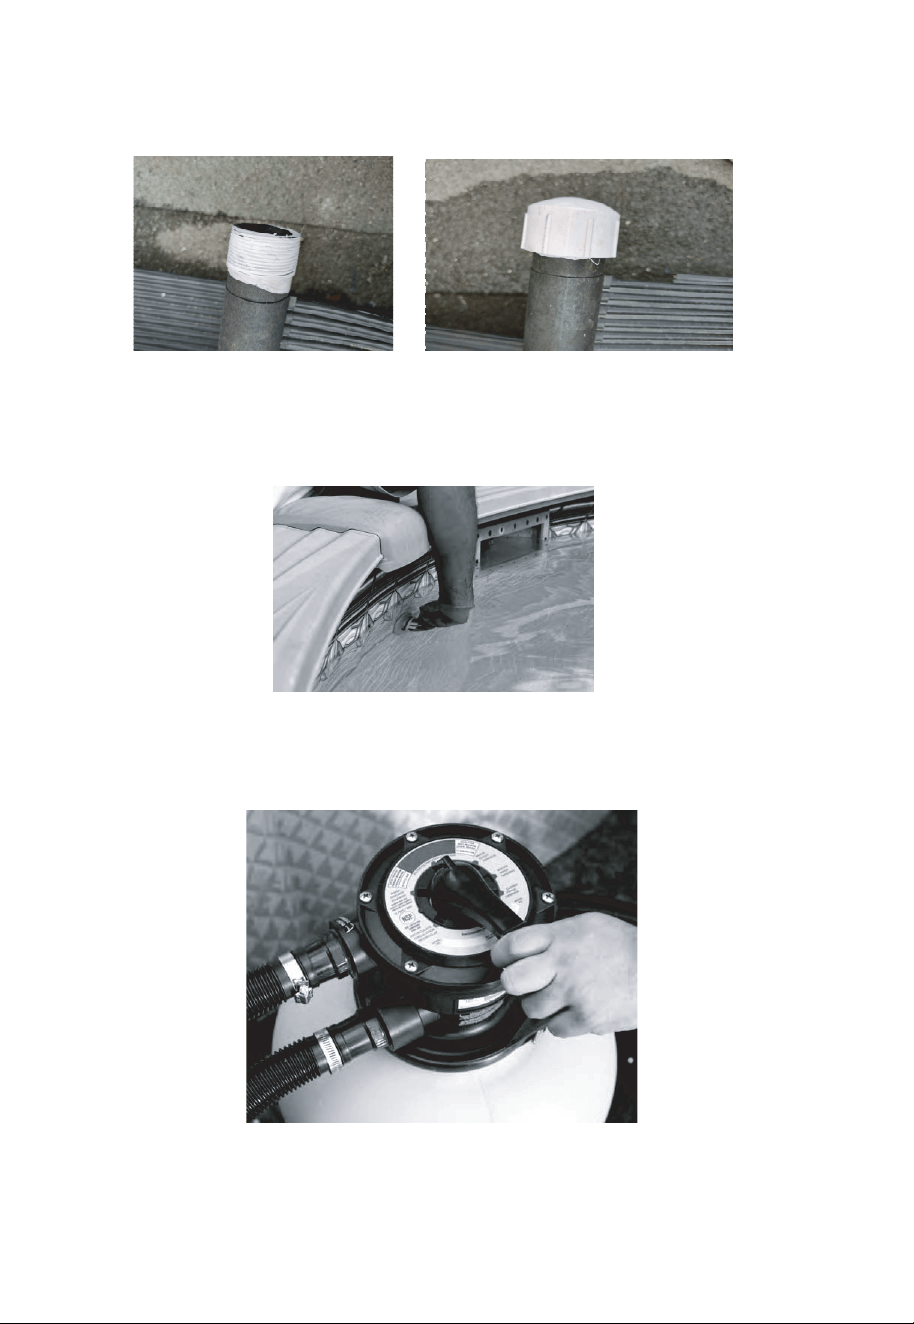
5.Install the PVC end caps on rest of the headers.
6. Plug return fitting in pool to ensure no water loss when disconnecting hose from return.
7. Make sure filter is turned off so no water flows out of the filter when disconnecting return hose from
the
swimming pool return and connecting to the solar heater.
7
8. Secure flex hose to the top PVC elbow and return fitting of the pool using the stainless steel hose clamps.
9. Remove the plug from return fitting and turn on the valve for the filtration system, and
make sure water flow is freely in all the piping.
Concatenation:
M
ultiple solar heating panels can be installed in series for larger pools and/or faster heating.
Winter:
In the winter, empty the water in the solar heating panel, and store the products in a warm and dry place for
future use.
4. Trouble Shooting
Symptom Possible Reasons and Corrective action
Seems the solar heating panel is
not heating the pool water
Check the water flow of the pool backflow; make
sure water go through the solar heating panel.
Check the weather, if it is a cloudy or rainy day.
Use a pool cover in night time will help maintain
the water temperature and reduce heat loss.
Water from the solar heating panel
do not back to the pool
Check whether all connectors are properly
connected.
Check whether the filtration valve is closed
Bubble continue to appear in the
pool during the water intake
Check whether there is leakage for all of the
connections
Check water flow; make sure all the unions are
properly connected.
Check whether there is leakage or block for the
flexible hoses
There is water leakage for the
connection of the solar heating
panel
Check all the unions to see whether they are properly
connected. Make sure all the stainless steel clamps for
the flexible hoses are tighten enough.
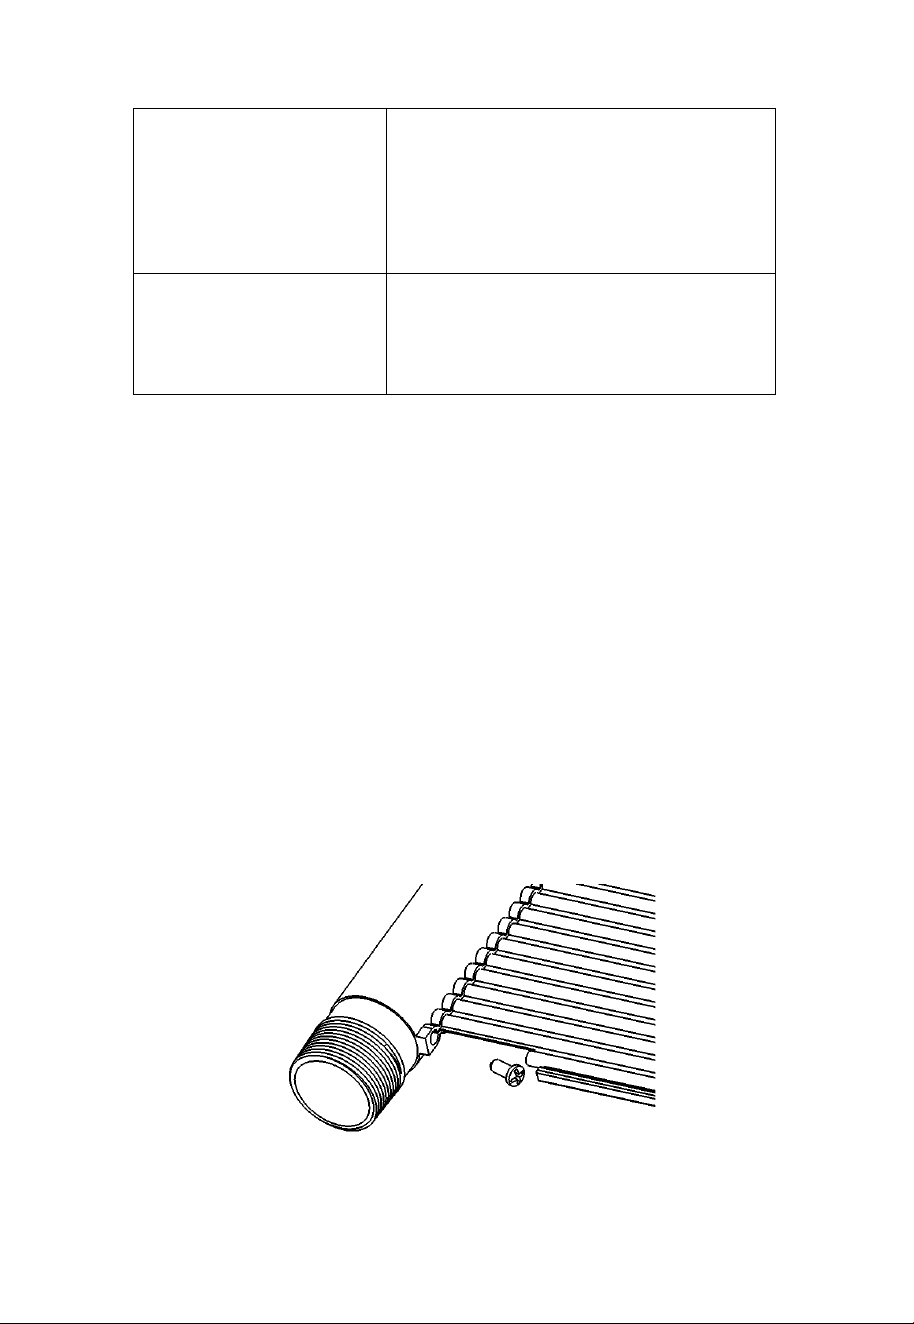
Solar Heating Panel Repair
If a solar heating panel develops a leak
Your solar heating panels are warranted against defects in materials and workmanship. If a leak develops for any
other reason, you should use the repair method shown.
Solar Heating Panel Repair
This method allows for on easy and permanent,in-site repair of a collector by isolating the leading riser tube.
Referring to the figure of the right, locate the tube to be isolated. (End tube has been shown for clarity).
Using a sharp utility knife, very carefully cut away approximately 1” (2.54cm) of the tube at both headers.
Drive a #10 sheet metal screw, preferably stainless, into the hole in the header. The screw must be beween
1/2”( 1.27cm) and 3/4” (1.9cm) long. DO
NOT OVER TIGHTEN.
If the screw strips out, or if the repair leaks use a #12 screw. With proper care and winterizing, you will enjoy
your solar heating panels for many years.
8
9
Specifications:
No. Item Specification
1 Volume capacity for each panel around 20L(2x10L)
2 Max. working pressure 50PSl
3 Connection hose size 1-1/2" hose
5 Carton size 400*410*690MM
6 Gross weight 13.4KG
7 Products Size 6000*700*60MM
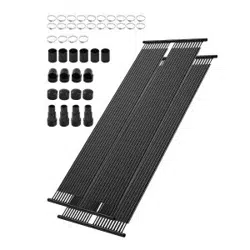
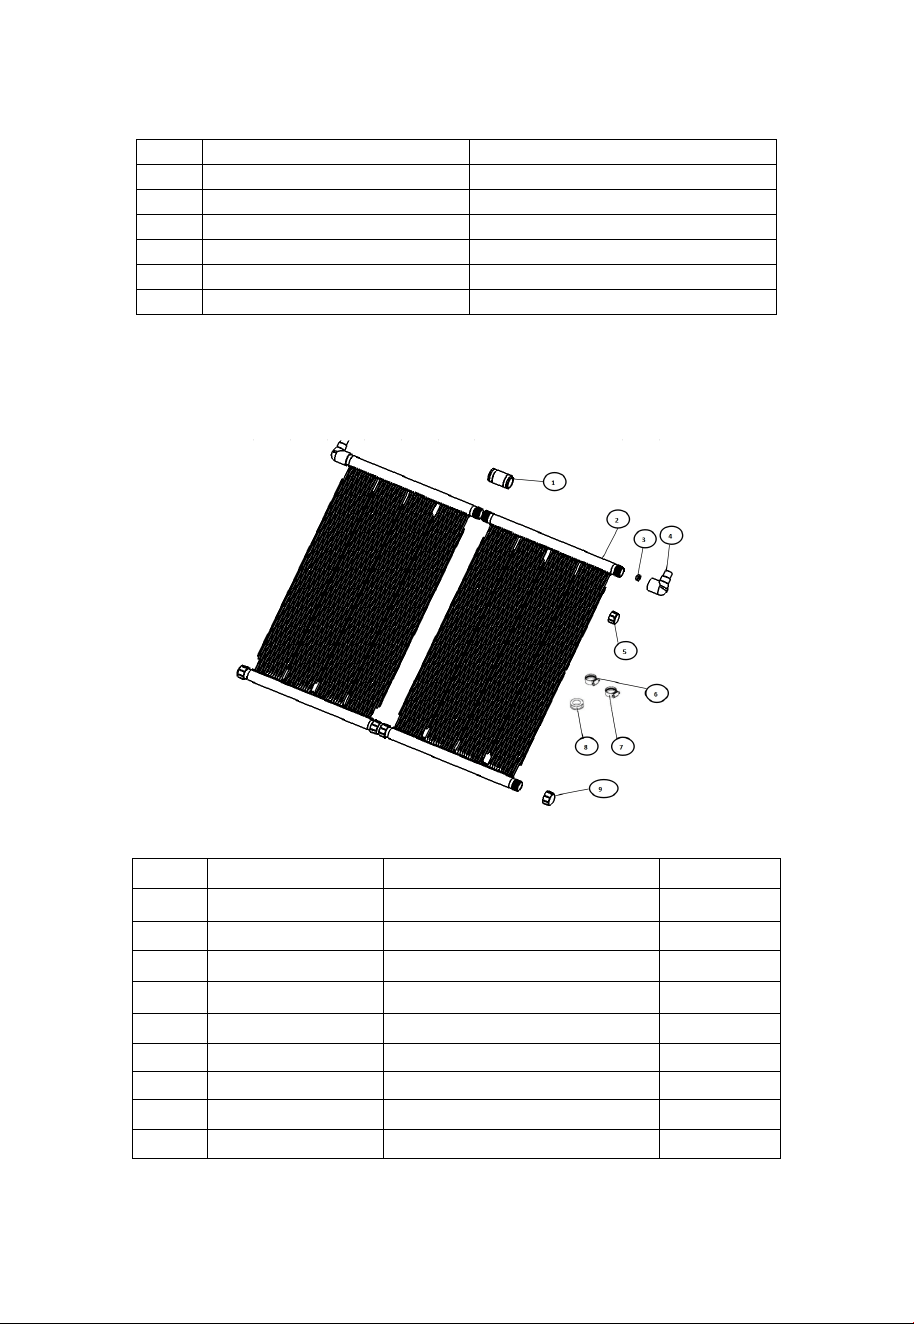
6. Product Explosion Diagram and List of Accessories
NO. Part No. Description Qty
1 5434038080 rubber hose connector 1
2 647061171000 solar heating panel 2
3 47061106080
sealing gasket
1
4 47061103001
PVC elbow
2
5 47061102080 soft cap 4
6 5021004000
1-1/2" stainless steel clamp
2
7 5021007000
2-1/4" stainless steel clamp
4
8 5757001001 Teflon tape 1
9 47061101001 PVC end cap 4