Loading ...
Loading ...
Loading ...
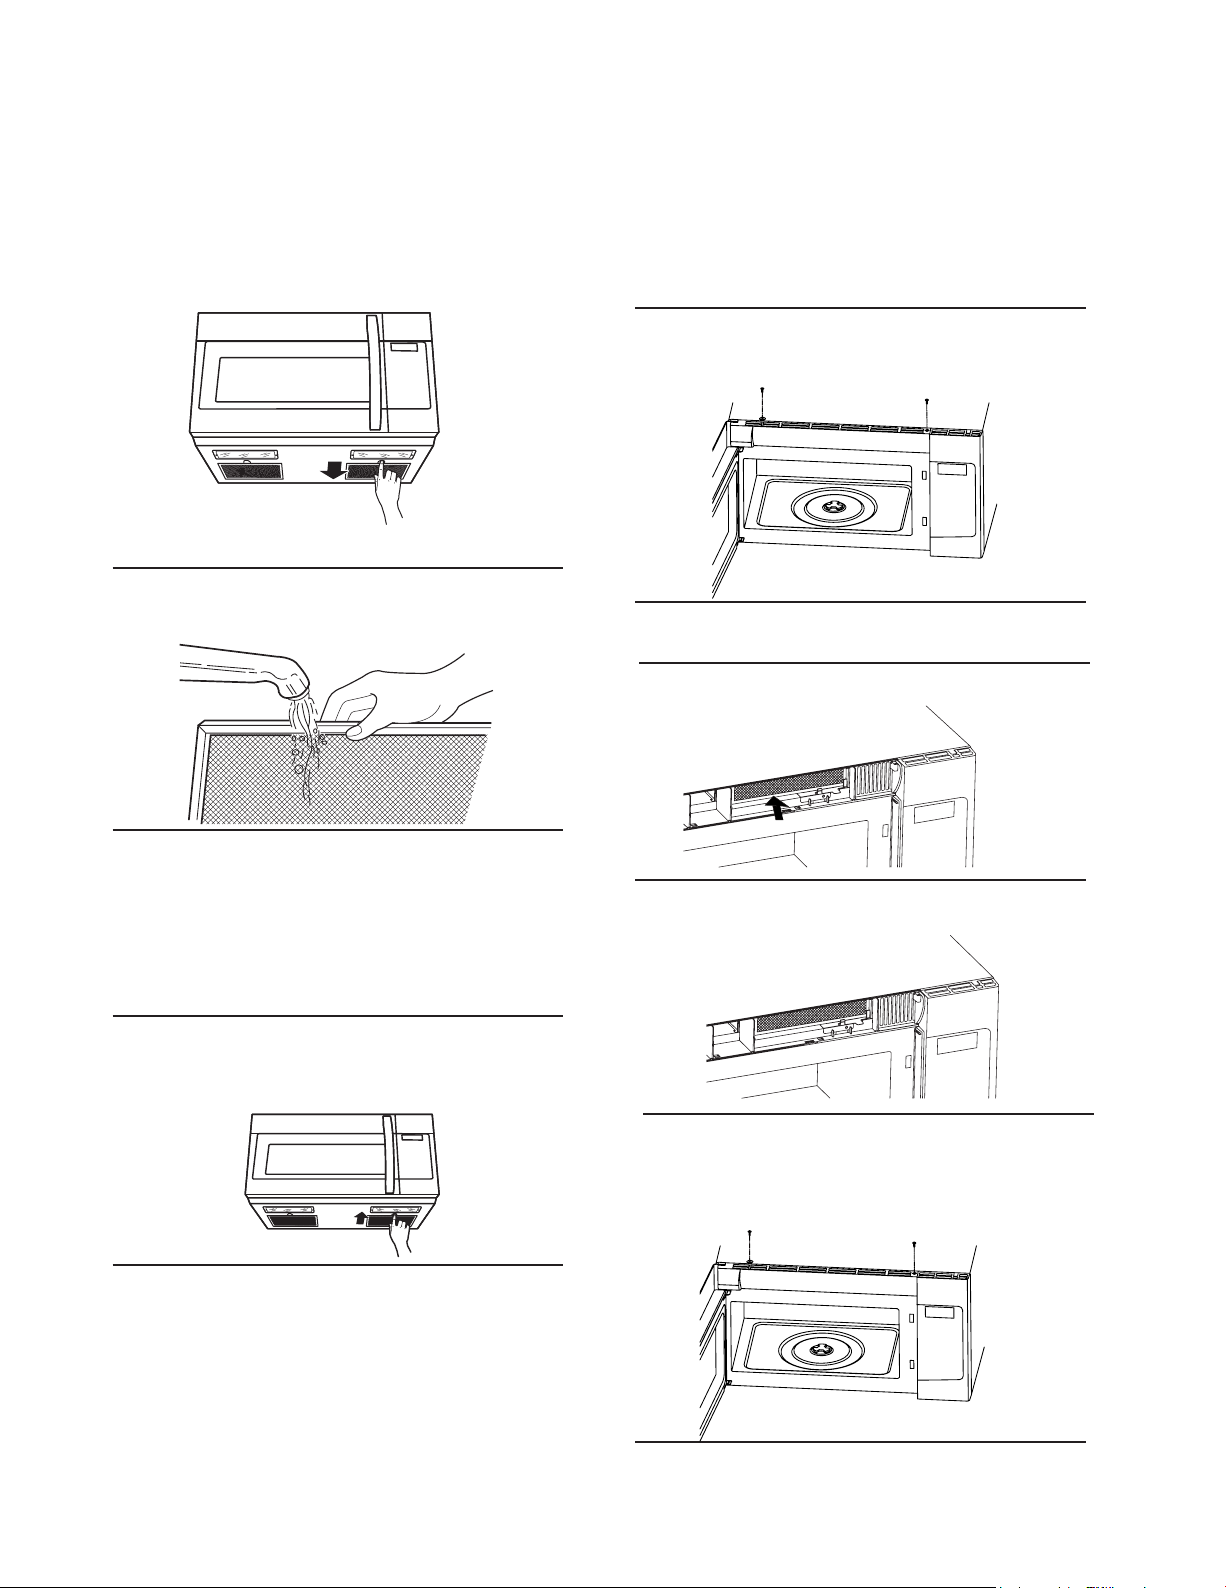
CARING FOR THE FILTERS
7KHJUHDVHoOWHUVVKRXOGEHUHPRYHGDQGFOHDQHGRIWHQDWOHDVWRQFHDPRQWh.
NOTE:
FDQQRWEHFOHDQHGDQGVKRXOGEHUHSODFHGHYHry 6 to 12 months.
smoke and odors. Replacement oOWHU
*UHDVHoOWHUV3DUW1R &KDUFRDOoOWHUV3DUW1R
1.
2. TRUHPRYHJUHDVHoOWHUsVOLGHHDFKILOWHUWRWKH
side. PXOOILOWHUVGRZQZDUGDQGSXVKWRWKHRWKHU
side7KHoOWHUZLOOGURSRXt.
3.6RDNJUHDVHoOWHUVLQKRWZDWHUDQGDPLOG
detergent. Scrub and swish to remove
embedded dirt and grease. Rinse well and
shake to dry'RQRWFOHDQoOWHUVZLWK
ammonia, corrosive cleaning agents, such
4. TRUHSODFHJUHDVHoOWHUsVOLGHoOWHULQWKHIUDPH
slot on one side of the opening. PXVKoOWHU
upward and push to the other side to lock
into place.
5. Plug in microwave oven or reconnect power.
1. Unplug microwave oven or disconnect power.
2. Open the microwave door and remove the two
Unplug microwave oven or disconnect power.
as lye-based oven cleaners, or place them
in a dishwasher. The filters will turn black or
become damaged.
vent mounting screws located on top of the microwave
using a ## 1# Phillips screwdriver.
#
NOTE: Do not operate the hood without the
JUHDVHoOWHUVLQSODFe.
s are available from Sears by calling 1-800-4-MY-HOME. The charcoal filter
Models are shipped for recirculating exhaust (To duct air outside reference the Installation Instructions
book included with your microwave.). Some models have a disposable charcoal filter installed to help remove
5.6OLGHDQHZFKDUFRDOoOWHULQWRSODFe7KHoOWHU
should rest like the picture shown below.
7. Close the microwave door. Plug in microwave
oven or reconnect power.
#
3. Slide the vent left and tip forward. Lift out to
remove.
4./LIWWKHE RIWKHFKDUFRDOoOWHr6OLGHWKHoOWHU
straight out.
RWWRP
6. Reinstall the vent by sliding the bottom of the
vent into place. Push the vent top into position
mounting
1
#
Phillips screwdriver.#
and slide right into place. Replace the two vent
screws located on top of the microwave #
using a #
EN-27
Loading ...
Loading ...
Loading ...