Loading ...
Loading ...
Loading ...
8
Complete the Installation
WARNING
Electrical Shock Hazard
Plug into a grounded 3 prong outlet.
Do not remove ground prong.
Do not use an adapter.
Do not use an extension cord.
Failure to follow these instructions can result in death,
fire, or electrical shock.
1. Plug into a grounded 3–prong outlet.
NOTE: Allow 24 hours to produce the first batch of ice.
Discard the first three batches of ice produced. Allow 3 days to
completely fill the ice storage bin.
2. Flush the water system. See “Water and Ice Dispensers.”
REFRIGERATOR FEATURES
Crisper Humidity Control
You can control the amount of humidity in the moisture-sealed
crisper. Depending on your model, adjust the control to any setting
between Fruit and Vegetables or Low and High.
� Fruit/Low (open) for best storage of fruits and vegetables with
skins.
� Vegetables/High (closed) for best storage of fresh, leafy
vegetables.
For information on additional features for your appliance, see
online "Feature Guide."
Ice Maker and Storage Bin (on some
models)
Ice Production Rate
Allow 24 hours to produce the first batch of ice. Discard the first
three batches of ice produced.
Allow 3 days to completely fill the ice storage bin. The ice maker
should produce approximately 3 lbs (1.4 kg) (8 to 12 batches) of
ice in a 24-hour period.
To increase ice production, lower the freezer and refrigerator
temperature, or see “Control Panel Descriptions” in the Quick
Start Guide for details. Wait 24 hours between adjustments.
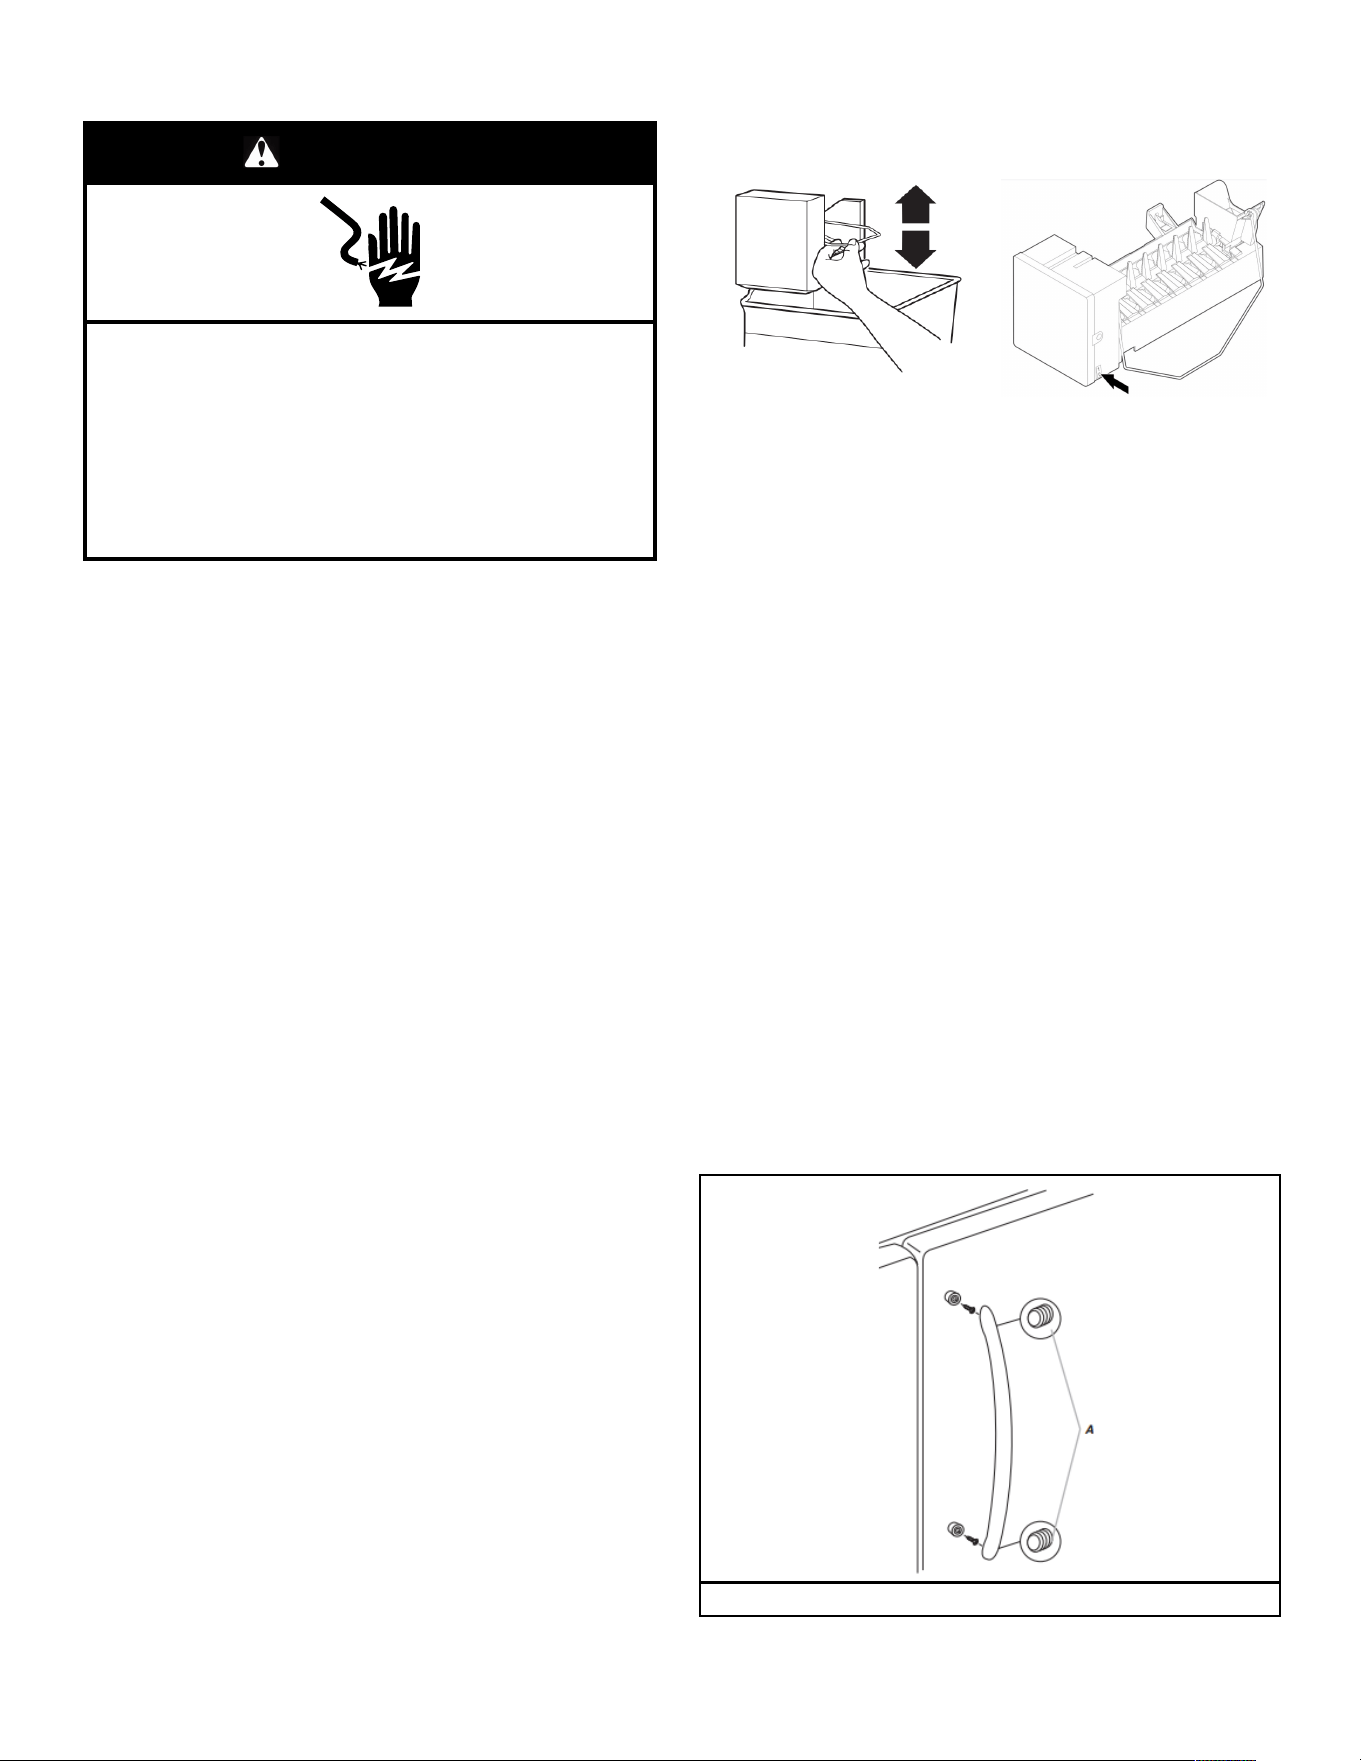
Ice Maker in the Freezer
Turn the Ice Maker On/Off:
Turn the Ice Maker On/Off for Icemaker without a switch:
To turn on the ice maker, simply lower the wire shutoff arm.
To manually turn the ice maker off, lift the wire shutoff arm to the
off (arm up) position and listen for the click.
Your ice maker has an automatic shutoff. As ice is made, the ice
cubes will fill the ice storage bin and the ice cubes will raise the
wire shutoff arm to the off (arm up) position. Do not force the wire
shutoff arm up or down.
For icemakers with a switch:
For icemakers with a switch, use the switch to turn ON or Off the
icemaker.
Without switch With switch
NOTE: Turn off the ice maker before removing the ice storage bin
to serve ice or to clean the bin. This will keep the ice cubes from
dropping out of the ice maker and into the freezer compartment.
After replacing the ice storage bin, turn on the ice maker.
Wash the ice storage bin with mild soap and warm water.
Slide the ice storage bin under the ice maker and push it toward
the back as far as it will go.
DOOR AND HANDLE
INSTRUCTIONS
Refrigerator Doors and Drawer
TOOLS NEEDED: 5/16", 3/8", 1/4" hex head socket wrench, a
Torx† T20 screwdriver, a #2 Phillips screwdriver, and a flat-blade
screwdriver
IMPORTANT:
� Your refrigerator may have a standard reversible refrigerator
door with either a freezer door or freezer drawer, or French
doors. Follow the instructions specific to the door style of your
model.
� If you only want to remove and replace the doors, see
“Remove Doors and Hinges” and “Replace Doors and Hinges.”
� Before you begin, turn the refrigerator control Off, and remove
food and adjustable door or utility bins from the doors.
Remove and Replace Door Handles
REFRIGERATOR DOOR HANDLES
Refrigerator Door Handle Style 1
A. 3/32" Setscrew
Loading ...
Loading ...
Loading ...