Loading ...
Loading ...
Loading ...
en Causes of damage
8
Measures to be noted during
transport
Secure all mobile parts in and on the appliance using
an adhesive tape that can be removed without leaving
any traces. Push all accessories (e.g. baking tray) into
the corresponding slots with cardboard at the edges, in
order to avoid damaging the appliance. Place
cardboard or similar between the front and rear side to
prevent knocks against the inside of the glass door.
Secure the door and, if available, the top cover to the
appliance sides using adhesive tape.
Keep the original appliance packaging. Only transport
the appliance in the original packaging. Observe the
transport arrows on the packaging.
If the original packaging is no longer
available
pack the appliance in protective packaging to
guarantee sufficient protection against any transport
damage.
Transport the appliance in an upright position. Do not
hold the appliance by the door handle or the
connections on the rear, as these could be damaged.
Do not place any heavy objects on the appliance.
Installation
This appliance is supplied with a set of adjustable feet
and a glass cover. The glass cover is prefitted.
Fitting the adjustable feet
1. Remove all parts that are not permanently fixed,
especially the pan supports and burners.
2. Remove any accessories from the oven.
3. Lift one side of the appliance off the floor and tilt it
slightly.
4. Screw the adjustable feet into the mounting holes on
the underside of the appliance.
Note: If the appliance needs to be moved again,
screw the adjustable feet in fully.
5. Only finally level the appliance once the electricity
and gas have been connected and all of the
installation work is complete.
Positioning and levelling
Positioning the appliance
When installing the appliance, make sure that there is
enough space in the final installation location to pull the
appliance forwards for cleaning and maintenance work.
The ground underneath must be hard and firm. The wall
immediately behind the appliance must be made from
non-flammable material, e.g. tiles.
If you need to move the appliance in order to position it,
make sure that the adjustable feet are fully screwed in.
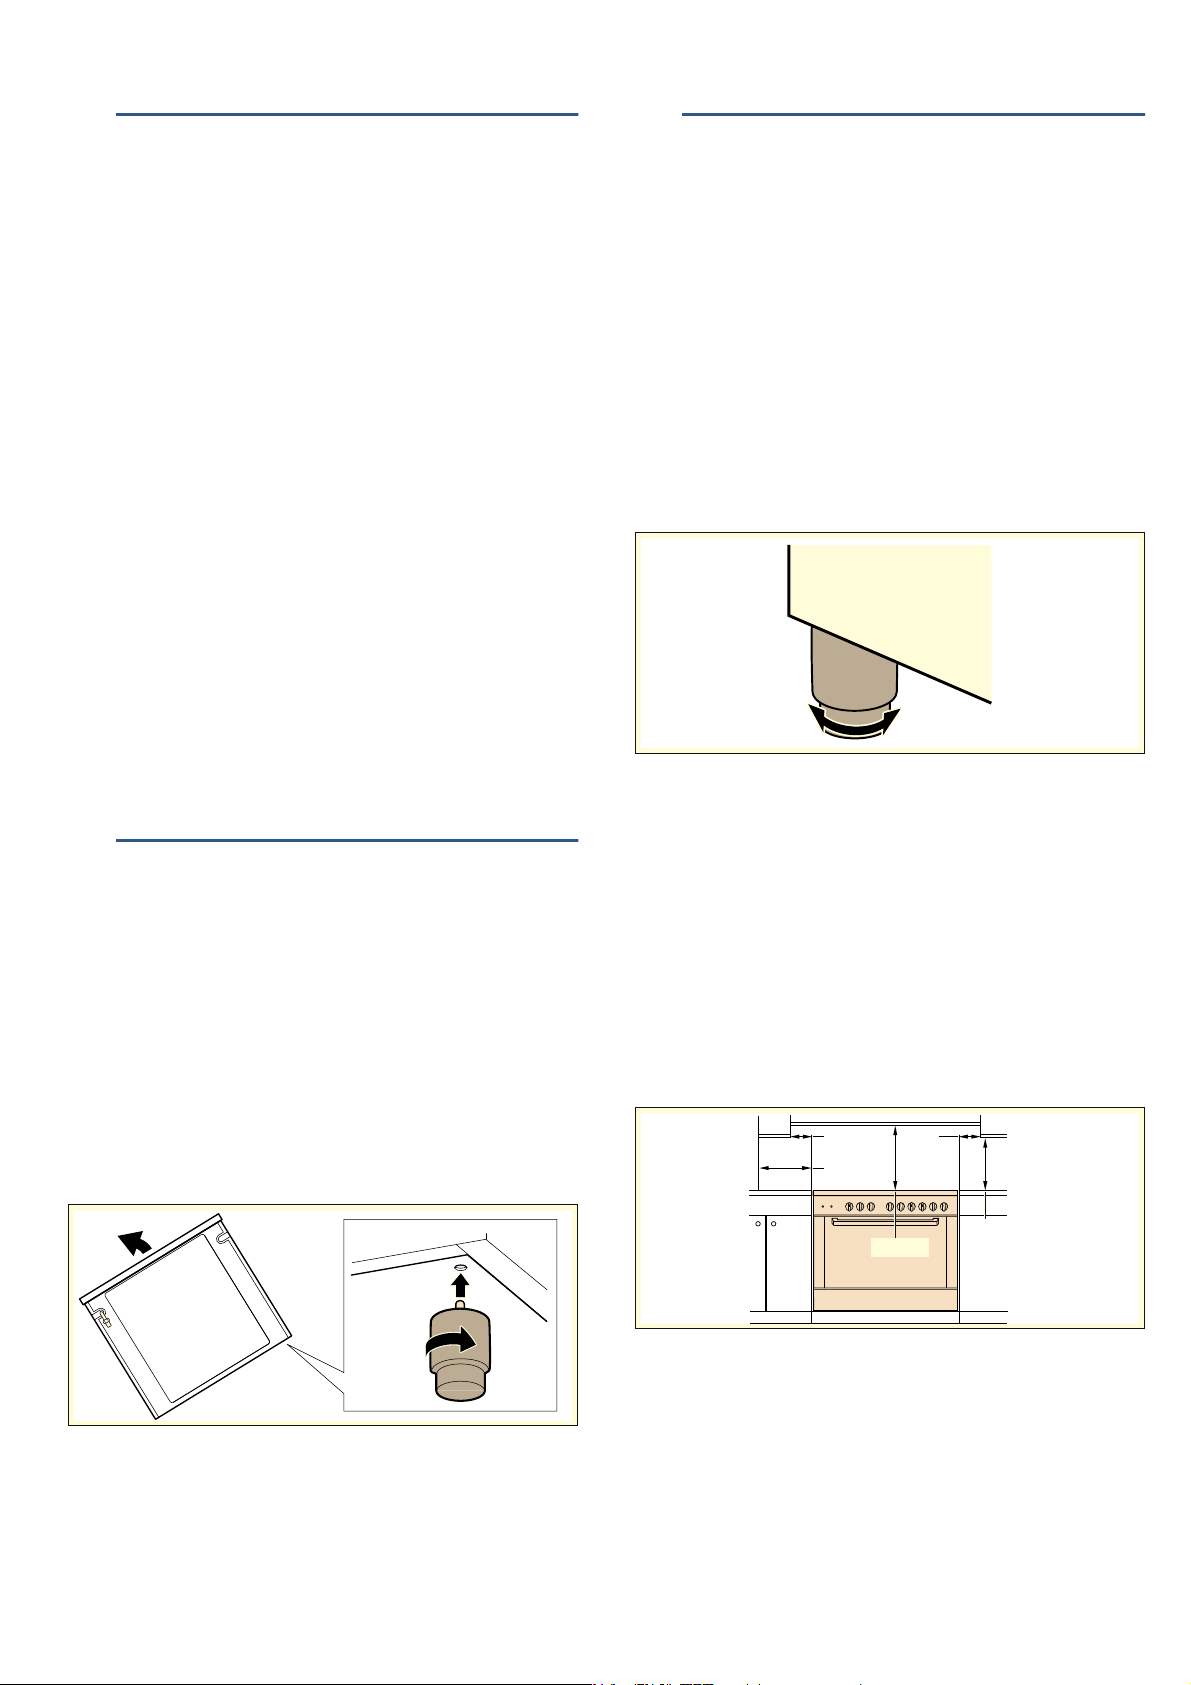
Aligning the appliance
Turn the adjustable feet to align the appliance.
Note: Do not align the appliance until all other work has
been completed.
The adjustable feet can be used to elevate the
appliance by a maximum of 50 mm.
Check the alignment of the appliance once it has been
installed in the intended place.
Adjacent units
Any adjacent units must not be made of flammable
materials. The fronts of any adjacent units must be heat-
resistant up to at least 90 °C. If the appliance is
installed very close to any other units, the minimum
clearances given in the figure must be maintained.
Wall fixing
To prevent the cooker from tipping over, you must fix it
to the wall using the enclosed bracket. Please observe
the installation instructions for fixing the oven to the
wall.
PLQ
PLQ
PLQ
PLQ
PLQ
Loading ...
Loading ...
Loading ...