Loading ...
Loading ...
Loading ...
Installation Instructions
• Select a suitable location, making sure you have easy access to an electrical outlet (avoid the use of extension cords).
• Make sure there are no obstructions restricting airfl ow through the front air intake grill. Maintain a minimum clearance
of at least 20 cm (8”) between adjacent walls and the back of the unit, to allow for proper air circulation and maximum
effi ciency. To achieve maximum operating effi ciency from your dehumidifi er, the recommended (room ambient) operating
temperatures should be between 5°C (41°F) and 35°C (95°F).
• It is important to remember the effi ciency of a dehumidifi er will be affected by the rate at which new humid air (moisture)
is allowed to infi ltrate the same area. To maintain effi ciency, the dehumidifi er must be operated in an enclosed area. Keep
all doors and windows closed.
• Do not use this unit outdoors. This dehumidifer is intended for indoor residential applications only. This dehumidifi er
should not be used for commercial or industrial applications.
• Place the dehumidifi er on a smooth, level fl oor strong enough to support the unit with a full bucket of water.
• This unit has 4 castors which can move freely. Do not force castors to move over carpet, and refrain from moving the
unit with water in the bucket (the unit may tip over and spill water). Protect wood fl oors from possible spillage or scratches
when moving unit.
• Remove accessory bag from bucket and store it in a safe place.
LOCATION
FEATURES
4
CASTOR INSTALLATION (some models)
Castor installation is recommended to avoid damage to fl oors.
1. Remove the castors from the bucket of the dehumidifi er.
2. Position the dehumidifi er on its side.
3. Locate the arrow on the bottom of the dehumidifi er and insert the castor
according to the arrow direction.
4. Slide the castor in as far as it will go. The castor will snap into place.
5. Repeat steps 1 to 4 for the other 3 castors.
1
3
4
5
2
6
10
9
7
8
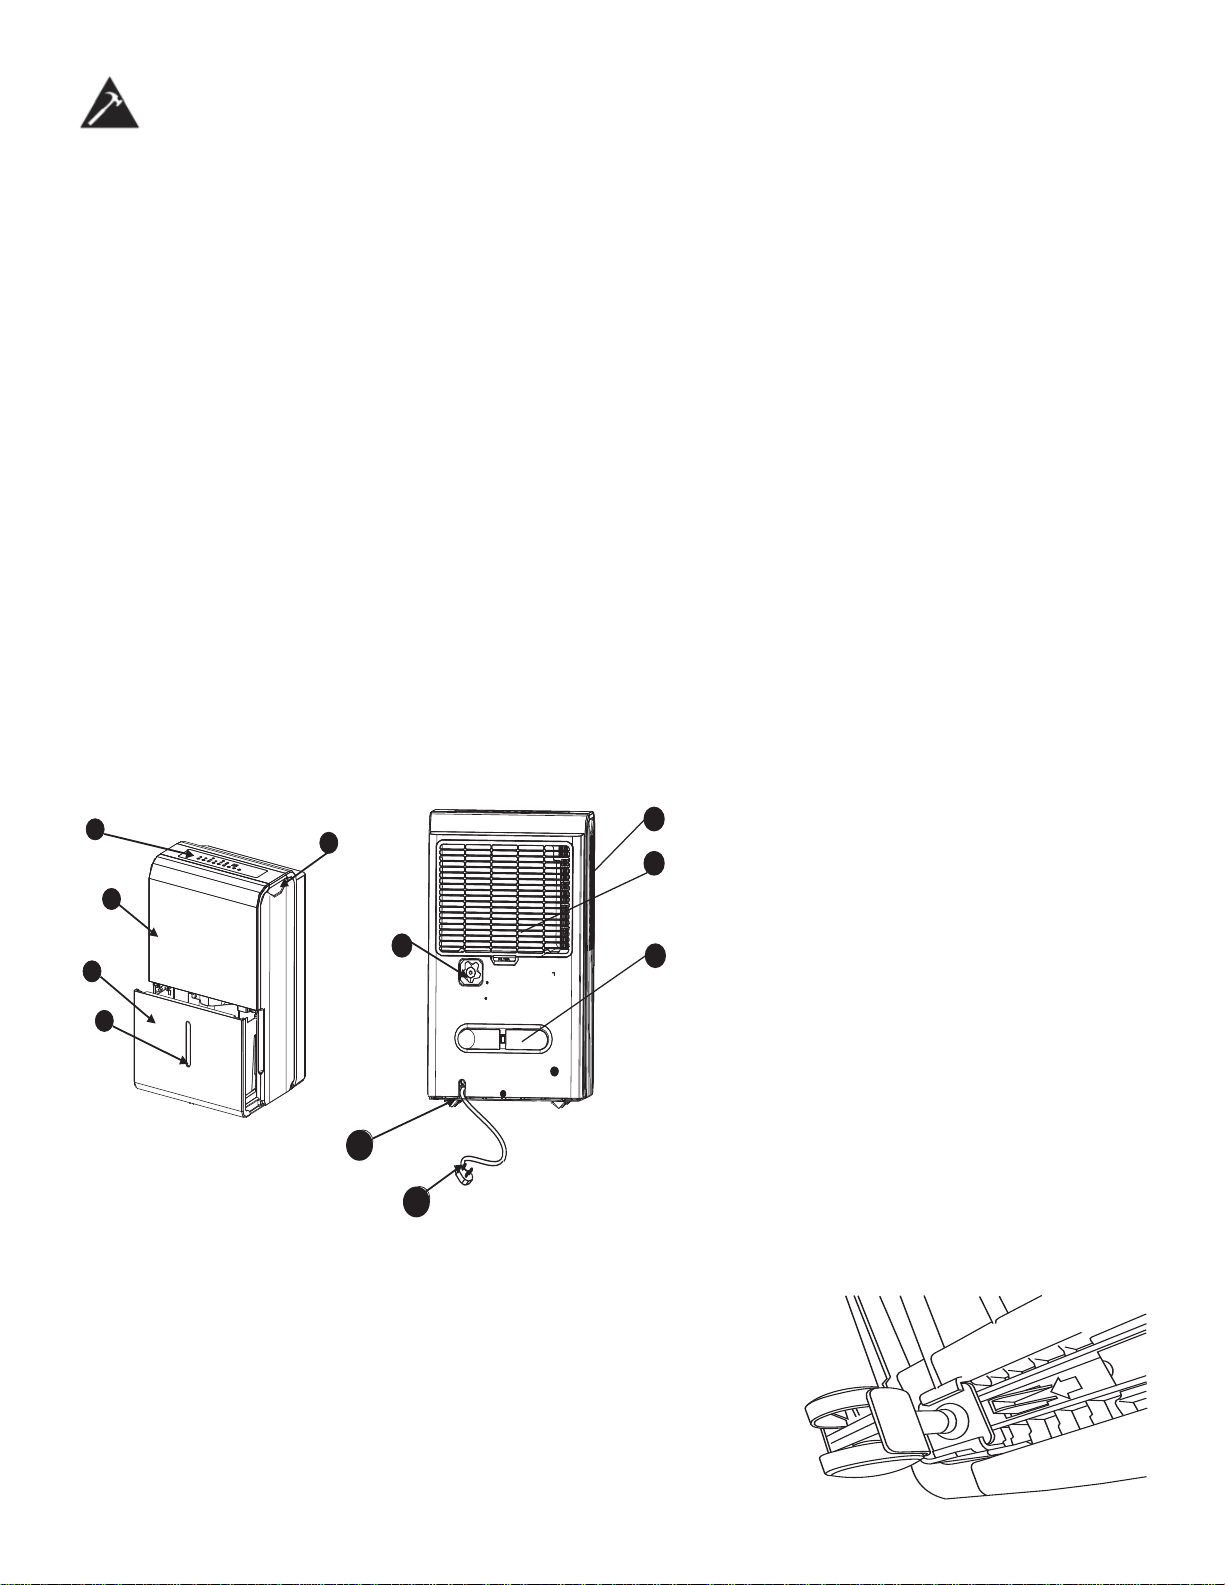
11
1. Control Panel
2. Front Panel
3. Water Bucket
4. Water Level Window
5. Carrying Handle (both sides)
6. Continuous Drain Hose Outlet
7. Air Outlet Grill
8. Air Filter
9. Power Cord Buckle
10. Caster
11. Power Cord and Plug
Loading ...
Loading ...
Loading ...