User Manual Hoover FH53000PC Carpet Cleaner
What's in the Box?

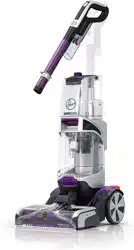
Getting to Know Your HOOVER SmartWash Pet Complete

Tool & Acessories

Before You Begin Cleaning:
Vacuum carpet and upholstery thoroughly with a HOOVER vacuum before use
Don't use the carpet cleaner as a traditional vacuum cleaner
Use your HOOVER carpet cleaner only if upholstery fabric is marked with a "W for wet clean) or "SW" (for solvent/dry or wet clean. Don't clean fabric marked "S"
Test for colorfastness in a small, hidden area. Gently rub surface with a dampened white cloth. Wait ten minutes and check for color removal or bleed with a white paper towel.
More furniture out of area to be cleaned Place aluminum foil or wax paper under legs of furniture too heavy to move prevent wood finishes from staining carpet. Pin up furniture skirts and draperies
Pretreating:
For best results, pretreat stains with a HOOVER® spot treatment (See HOOVER Cleaning Solutions Guide) to help loosen and remove even the most stubborn stains.
Available at additional cost if not included with your model.
NOTE: To prevent staining, use plastic or aluminum foil to protect wood or metal surfaces from possible water spray.
NOTE: To avoid damage to wood floors underneath area rugs or carpet, place waterproof material (ex plastic) underneath them before cleaning
CAUTION
Do not clean over floor electrical outlets Water will drip from the brushes and underside of the product after use and may puddle. To avoid damage to wood and laminate flooring and to avoid potential slip hazard, after use (al do not leave the product on wood and laminate surfaces and move to a hard surface and (bi place cleaner on an absorbent material (such as a towell to soak up drigs
IMPORTANT: For full suction, it is important that the Dirty Water Tank is property secured before cleaning.
Continue using dry strokes until little water is visibly passing through the Nozzle
For best results, HOOVER recommends rinsing carpet with water only. This removes residual carpet cleaning solution. Remove Solution Tank and repeat. For heavily soiled areas, repeat. Avoid saturating carpet.
NOTE Empty Dirty Water Tank when the motor sound becomes higher pitched and there is a less in suction see Automatic shut-off). You will also see the oat rise and shut off suction at the same time
Getting Started With Your SmartWash Carpet Cleaner:
ASSEMBLY
1. Slide the handle into the base until you hear a "click"

2. Wrap the power cord around the card hooks for convenient storage

FILL THE CLEAN WATER TANK.
1. Lift up to remove the Clean Water Tank

2. Remove the cap and add warm water to the top of tank Replace cap

3. Align Clean Water Tank with the body of the cleaner and press FIRMLY into place

FILL THE SOLUTION TANK
1. Remove the Solution Tank from the back of the cleaner.

2. Remove the cap and fill with HOOVER Cleaning Solution to the top of the tank Replace cap

3. Place the Solution Tank back into the cleaner and press FIRMLY into place

Using Your SmartWash Pet Complete Carpet Cleaner
CAUTION
Not to be used for grooming a pet.
1. Unwrap the power cond and plag cleaner in an electrical outlet

2. Step on the Handle Release .Pedal to recline the cleaner to cleaning position

3. Step on the On/Off Pedal to turn ON

4. . Slowly move forward. The cleaner will automatically dry your carpets by extracting the water and cleaning solution

5. Slowly full backward. The cleaner will automatically disperse the aptimal amount of water and cleaning solution

6. When you finish cleaning but further drying is required press the DRY ONLY BUTTON .The Dry Only mode will extra remaining water from your carpet. Continue in this mode until the water is visibly passing through the Nozell

7. For best results HOOVER recommends rising the carpet with clear water only This will remore residual carpet cleaning solution from your carpets To rinse with clean water only remove the Solution Tank and the repeat steps & through 6.

How to Empty
This product contains ne serviceable parts. appliance is not working as it should, has been drapped, damaged, left autdoors, or drapped into water, call customer service at 1-800-844-9200 prior to continuing use
1. Turn the cleaner off and srplug from electrical outlet

2. Grab the Dirty Water Tank handle and put up t elease Remove Tank trom carpet cleaner base at an argle

3. Place on a flat surface and unlatch Dirty Water Tank id to remove top of tank

4. Empty tank, inse, wipe filter clean allow to air dry

Auto Shet Off Float: Your carpet cleaner is equipped with a shut off float within your Dirty Water Tark. When the Dirty Water Tank will rise chatting all the air flow through the Nozzle. Once the air flow is shut off, ompty the Dirty Water Tank
How to Remove and Clean Nozzle
1. To prevent possible leaking remove and empty Clean Water Tank, Dirty Water Tank and Solution Tank

2. With handle in upright position, lift up on the houthe salease thengt Nozie forward to remove from carpet cleaner CAUTION pull Nozzle carefully utwards and carefully outwards and not upward.

WARNING
Risk of personal injury-Brush roll may suddenly restart-unplug before cleaning or servicing.
3. Rinse debris from Nozzle

4. Position Nazzle onto fool making sure to align the tabs at the top of the Nozzle with the notches inside the foot

IMPORTANT
The Nozzle must be in the proper position for the cleaner to have proper suction.
5. Side Nozzle forward to snap into position

How to Change and Clean Brushes
HOW TO REMOVE
1. To prevent possible leaking remove Clean Water Tank, Dirty Water Tank and Solution Tank

2. With handle in upright posities tollow "Nozzle How to Remove and Clean instructions page 15

STORAGE
Before storing Empty Clean Water Tark and let air dry, Replace on citare Emply Dirty Water Tank, clean filter of dirtidebris, rinse tank and lid thoroughly with clean water and let air dry. Emply Solution Tank, titse tank with clean water and let air dry
Allow brushes and underside carpet cleaner to air dry thoroughly before storing carpet cleaner an a carpeted or wed surface.
WARNING
Risk of personal injury-Brush roll may suddenly restart-unplug before cleaning or servicing
3. Grab Side A and pull up to remove. Repeat on the other brusk

4. The brushes can be cleaned under running water

CORD STORAGE
Wrap the power cord around the cart tooks for convement storage. Altach the plug end to the cord
HOW TO REPLACE
1. At an angle, align side B on the brush to the drive gear.

2. Press Tab & down unti brush snaps is place

LUBRICATION
The rolor and brush rolls are equipped with bearings which contan sufficient lubrication for their lifetime.
The addition of lubricant could cause damage. Da net ade lubricant in mater bearings or brush mils
HOW TO ATTACH HOSE
1. Open Hose Connection Pot sel hese end inserting FINLY into HoseSolution Part

CAUTION
Always turn off this product before connecting or disconnecting hose.
HOW TO REMOVE HOSE
1. Press triggerontol to ensure all fluid has discharged from the host.
Press button an end of hose and pull to remase hose and solution carnection from unit. into place. Make sure to close

2. Close the Hose Port Door back into place. Make sure to close door to sure proper suction. Cleaner may lose suction if not close properly

How to Attach Tools
1. To ensure maximum performance and to protect your carpet, be sure to place the handle in the upright position while using the hose. Placing the handle in the upright pesitios shuts off the Reforce PET PowerBrushes

2. Connect tool to hose by sliding it onto the connectar until it securely locks into place.

CAUTION
Not to be used for grooming a pet.
3. Using your thumb, push forward and up on the latch to remove toel.

NOTE Do not place cleaner at top of stairway. To avoid falling down stairs, place cleaner at bottom of stairs and work sp.
How to Use the Pretreat Wand
1. With the Spot Chaser Pretreat Wand installed into the machine, press both latches and pull down to release .Pretreal Bottle

2. Unscrew cap and fill with & HOOVER spot treatment (See page instructions)

3. Resintall. Bottle by pressing the bottle up into the Dpot Chaser handle grip.

4. Press and release the "Wand Release" button next to the Spot Chaser Wand. Next, pull the ward out.

5. Press the button on the front of the Spot Chaser wand to dispense Pretreat selution

6. Wall 5-10 minutes bele using SmartWash over the treated areas

NOTE: Install two AAA batteries before use
REMOVING BATTERY
1. Remove battery by removing screws with a phillips head screwdriver

2. Use 2A4A batteries

3. Replace battery door

CAUTION
Use extra care when cleaning on stairs. To avoid personal injury or damage, and to prevent the cleaner from talling, always place cleaner at the bottom of stairs or on floor. Do not place cleaner on stairs or furniture, as it may result in injury or damage.
Cleaning Carpeted Stairs and Upholstery
Tools and Accessories
CAUTION
Use extra care when cleaning on stairs. To avoid personal injury or damage, and to prevent the cleaner from falling, always place cleaner at the bottom of stairs or on floor. Do not place cleaner on stairs or furniture, as it may result in injury or damage.
Cleaning Carpeted Stairs and Upholstery
- Read "Before you Begin Cleaning instruction on page 9.
- Attach hose as instructed (page 18).
- Place handle in upright position. FlexForce™ PET PowerBrushes will not rotate while handle is in the upright position.
- Fill Clean Water Tank according to instructions.
- Fill Solution Tank with HOOVER" solution according to instructions on page 10
- Attach tool to end of hose.
- Dry hands and plug cleaner into a properly grounded outle.
- Turn cleaner ON.
- Pre-spray the area by holding the tool about one inch above the carpet and push it forward while pressing the trigger
- Slightly press the tool switch into area cleaning. Press the trigger and pull the tool slowly over the carpet. Release trigger at end of stroke
- Lift tool, and position it against Nozzle. Pull tool slowly over carpet without pressing trigger.
- Overlap strokes by ½ inch to help prevent streaking.
- It is best to alternate wet and dry strokes as described in steps.


Tips
- To avoid saturating carpet, do not use more than & wet strokes over any one area. Always end with dry strokes.
- If additional cleaning is necessary, wait until the carpet is completely dry before using the tool again.
- Empty Dirty Water Tank when the motor sound becomes higher pitched and there is a loss of suction. You will also see the float rise and shut off suction at the same time.
- When finished cleaning, follow "After Cleaning" and "After Using Tool" instructions
Troubleshooting
Cleaner won’t run
1. Not firmly plugged in
2. No voltage in wall plug
- Check fuse or breaker in home.
3. Blown fuse or tripped breaker
- Replace fuse or reset breaker in home.
4. Fuse in cleaner blown
5. On/Off pedal not depressed
Low suction
1. Dirty Water Tank full/automatic shut off engaged
- Remove and empty Dirty Water Tank. See "How to Empty" page 13.
2. Blockage in tool on end of hose
- Remove tool and clear blockage.
3. Dirty Water Lid not on correctly
- Make sure lid is on securely. See “How to Empty” page 13.
4. Dirty Water Tank Debris Filter clogged
- See "How to Clean" page 13.
5. Blockage in Nozzle
- See "How to Clean" page 15.
6. Dirty Water Tank not properly secured
- Replace Dirty Water Tank and secure Dirty Water Tank latch.
7. Dirty Water Nozzle not on correctly
- Remove and replace Dirty Water Nozzle. See “How to Clean & Remove Nozzle” page 15.
8. Blockage in hose
- Drop a coin through, clear with broom handle.
Hose Nozzle stops spraying liquid during use
1. Clean Water Tank or Detergent Container is empty
- Turn off Cleaner and fill Clean Water Tank & Detergent Container.
2. Loose connection to solution port on foot of cleaner
- Check for secure connection to solution port on body of Cleaner.
Accessory Tool will not spray after filling the Clean Water Tank or Solution Tank
1. Air is trapped in the hose & pump
- Turn on the Cleaner. If hose does not spray, prime the pump by lowering the hose down to the floor and hold the trigger for up to one minute.
- Aim downward & squeeze trigger.
Hose will not spray after priming pump
1. Pump is defective
- Call for service: 1-800-944-9200.
2. Not connected properly
Clean water won’t dispense
1. Clean Water Tank or Solution Tank not firmly in place 1
- Make sure tank is securely locked in position.
2. Clean Water Tank or Solution Tank empty
- Refill container according to cleaning instructions.
Solution won’t dispense
1. Cleaner is not moving in forward direction
- Must be moving the machine forward to properly dispense water and solution.
Brushes won’t rotate during floor cleaning
1. Brushroll stall protection activated
- Turn the unit off and back on, then inspect and clean for jams.
2. Unit in upright position
- Brushes will not rotate in upright position. Step on handle release to start cleaning.
Water is leaking out of Carpet Cleaner
1. Clean Water Tank, Solution Tank or Dirty Water Tank not FIRMLY in place
- Make sure the lark is secure
- Carper Cleaner may drip residual moisture after use. Allow cleaner and heashes to dry before storing on hard floor saface
Spot Chaser Pretreat Wand will not dispense
1. Batteries installed incorrectly or need to be replaced Spray will start to lessen as the batery gris case to dead
- "How to use Spot Chaser Pretreat" Page 9
2. Spray tip clogged
WARRANTY
LIMITED WARRANTY FOR HOOVER PRODUCT
FIVE YEAR LIMITED WARRANTY (DOMESTIC USE)
If this product is not as warranted, contact TTI Floor Care North America Customer Service at 1-800-406-2005. Please have available the proof of purchase and model number for the warranted product.
WHAT THIS WARRANTY COVERS
This limited warranty provided by Royal Appliance Mfg. Co., doing business as TTI Floor Care North America referred to hereafter as Warrantor") applies only to products purchased in the U.S. (including its territories and possessions), a U.S. Military Exchange, or Canada. When used and maintained in normal household use and in accordance with the Owner's Guide, this product is warranted against original defects in material and workmanship for FIVE year from the date of original purchase (the "Warranty Period"). If Warrantor determines that the issue you are experiencing is covered under the terms of this warranty (a "covered warranty claim"), we will at our sole discretion and free of charge (subject to the cost of shipping), either (i) repair your product; i) ship you a replacement product, subject to availability; or (iii) in the event that the applicable parts or replacement are not reasonably available, ship you a similar product of equal or greater value. In the unlikely event that we are unable to repair your product or ship a replacement or similar product, we reserve the right. at our sole discretion, to issue you a refund or store credit (if applicable) of the actual purchase price at the time of the original purchase as ceflected on the original sales receipt. Parts and replacements may be new, refurbished, lightly used, er remanufactured, in Warranter's sole discretion.
WHO THIS LIMITED WARRANTY COVERS
This limited warranty extends only to the original retail purchaser, with original proof of purchase from Warrantor or an authorized dealer of Warranter products, in the U.S., U.S. Military Exchanges, and Canada.
WHAT THIS WARRANTY DOES NOT COVER
This warranty does not cover use of the product in a commercial operation (such as maid, janitorial, and equipment rental services, or any other income-generating activ tyl: improper maintenance of the product: the product if it has been subject to misuse, negligence, neglect, vandalism, or the use of veltages other than that on the data plate of this product. This warranty does not cover damage resulting from an act of God, accident, owner's acts or omissions service of this product by other than Warrantor ar a Warrantor authorized service provider it applicablel, or other acts beyond the control of Warrantor. This warranty also does not cover use outside the country in which the product was initially purchased, or resale of the product by the original owner
Pick-up, deuvely, transportation, and house calls are not covered by this warranty: In addition, this warranty does not cover any product that has been altered or modified, or repairs made necessary by normal wear or the use of other
WHO THIS LIMITED WARRANTY COVERS
This limited warranty extends only to the original retail purchaser, with original proof of purchase from Warrantor or an authorized dealer of Warranter products, in the U.S., U.S. Military Exchanges, and Canada.
WHAT THIS WARRANTY DOES NOT COVER
This warranty does not cover use of the product in a commercial operation (such as maid, janitorial, and equipment rental services, or any other income-generating activ tyl: improper maintenance of the product: the product if it has been subject to misuse, negligence, neglect, vandalism, or the use of veltages other than that on the data plate of this product. This warranty does not cover damage resulting from an act of God, accident, owner's acts or omissions service of this product by other than Warrantor ar a Warrantor authorized service provider it applicablel, or other acts beyond the control of Warrantor. This warranty also does not cover use outside the country in which the product was initially purchased, or resale of the product by the original owner
Pick-up, deuvely, transportation, and house calls are not covered by this warranty: In addition, this warranty does not cover any product that has been altered or modified, or repairs made necessary by normal wear or the use of other products, parts, or accessories which are either incompatible with this product or adversely affect this product's operation, performance, or durability. Normal wear items are not covered under this warranty. Depending on the product, normal wear items may include, but are not limited to, belts, filters, brush rolls, blower fans, blower and vacuum tubes, and vacuum bags and straps.
OTHER IMPORTANT TERMS
This warranty is net transferable and may not be assigned; any assignment made in contravention of this prohibition is void. This warranty shall be governed and construed under the laws of the state of North Carolina . The Warranty Period will not be extended by any replacement of batteries, parts, or products or by virtue of any repair performed under this warranty.
THIS LIMITED WARRANTY IS THE EXCLUSIVE WARRANTY AND REMEDY, AND ALL EXPRESS AND IMPLIED WARRANTIES OTHER THAN THE LIMITED WARRANTY SET FORTH ABOVE, INCLUDING IMPLIED WARRANTIES OF MERCHANTABILITY AND FITNESS FOR A PARTICULAR PURPOSE, ARE EXPRESSLY DISCLAIMED IN NO EVENT WILL WARRANTOR BE LIABLE FOR ANY SPECIAL, INDIRECT, INCIDENTAL OR CONSEQUENTIAL DAMAGES OF ANY KIND OR NATURE TO OWNER OR ANY PARTY CLAIMING THROUGH OWNER, WHETHER BASED IN CONTRACT NEGLIGENCE, TORT, OR STRICT PRODUCTS LIABILITY OR ARISING FROM ANY CAUSE WHATSOEVER, EVEN IF THIS WARRANTY FAILS OF ITS ESSENTIAL PURPOSE. TO THE EXTENT PERMITTED BY APPLICABLE LAW, NO WARRANTIES THAT ARISE BY OPERATION OF LAW, IF APPLICABLE, SHALL EXCEED THE DURATION OF THE LIMITED WARRANTY PROVIDED HEREIN, Warrantor's liability for damages to you for any costs whatsoever arising out of this statement of limited warranty shall be limited to the amount paid for this product at the ti time of original purchase.
Some states de net allow the exclusion or limitation of incidental or consequential damages, disclaimers of implied warranties, or limitations on the duration of implied warranties, so the above exclusions, disclaimers and for limitations may not apply to you. This warranty gives you specific legal rights, and you may also have ather rights, which vary from state to state.
GENUINE PARTS AND ACCESSORIES
We recommend using only with genuine HOOVER solutions for carpet and spot cleaners) parts, and accessories. Damage caused by use with other than genuine HOOVER" solutions, parts, and accessories is not covered by and may void your warranty