The information and specifications included in this publication were in effect at the time of approval for printing. Honda Motor Co., Ltd., reserves the right,
however, to discontinue or change specifications or design at any time without notice and without incurring any obligation.
Accessories Precautions
The GPS antenna is located in the dashboard. Metallic front or side window tinting can seriously degrade or obstruct GPS reception.
Signal noise from devices such as radar detectors, vehicle tracking devices, remote starters, and additional amplifiers can disrupt the navigation system. If you
install any such item, install it away from the navigation display and antenna.
Important Safety Information
Avoid focusing on the screen or manually operating the system controls while driving.
Certain on-screen controls are disabled when driving, but most of the audible instructions and voice commands continue to function. Pull to the side of the road
if you need to devote more attention and time to look at the screen or access additional menus.
Route guidance may conflict with street closures, road construction, detours, and out-of-date map data.
The system itself may also have limitations. Verify route information by carefully observing roads, signs, and signals. Always use your own judgment and obey
traffic laws.
2
System Limitations P. 174
NOTICE
This vehicle’s navigation display, if so equipped, includes mercury-containing components. Upon removal, please reuse, recycle, or dispose of as hazardous waste.
Clean the screen with a soft, damp cloth. You may use a mild cleaner intended for use on navigation screens.
Using the navigation system while driving can take your
attention away from the road, causing a crash in which you
could be seriously injured or killed.
Only operate system controls when the conditions permit you
to safely do so.
WARNING
FIT_KA-31TK6830.book 0 ページ 2011年7月4日 月曜日 午後2時45分
2013 Fit Navigation Online Reference Manual
QRG
Index
Home

Contents
2 System Setup P. 17
Start-up 18 Voice Control System 20 Interface Settings 22 Personal Information 30
Routing & Guidance 40 Clock Adjustment 47 Vehicle 50 Data Reset 53
2 Navigation P. 55
Entering a Destination 56 Calculating the Route 77 Driving to Your Destination 80 Map Menu 85
Changing Your Route 99 Changing Your Destination 106 Resuming Your Trip 110
2 Audio P. 111
Audio System 112 Playing FM/AM Radio 114 Playing a Disc 119 Playing an iPod® 123
Playing a USB Flash Drive 127 Playing Bluetooth® Audio 131 Adjusting the Sound 134 Audio Remote Controls 135
2 Bluetooth® HandsFreeLink® P. 137
Bluetooth®
HandsFreeLink® 138
Pairing a Phone 140 Setting Up Speed Dialing 145 Editing Phone
Information 148
Phone Setup 149 Making a Call 150 Receiving a Call 153 HFL Menus 154
2 Other Features P. 157
Information Functions 158
2 Troubleshooting P. 159
Troubleshooting 160 Error Messages 166
2 Reference Information P. 171
System Initialization 172 System Limitations 174 Customer Assistance 176 Legal Information 179
2 Voice Commands P. 183
Voice Commands 184
Quick Reference Guide
P.2
System Setup
P.17
Navigation
P.55
Audio
P.111
Bluetooth
® HandsFreeLink®
P.137
Other Features
P.157
Troubleshooting
P.159
Reference Information
P.171
Voice Commands
P.183
Index
P.194
FIT_KA-31TK6830_TOC.fm 1 ページ 2011年7月4日 月曜日 午後2時49分
QRG
Index
Home
2013 Fit Navigation Online Reference Manual
QRG
Quick Reference Guide
Index
Index
Home
Book Table of Contents
TOC
Chapter Table of Contents
Navigation Key
Voice
Commands

2
Overview—Functions at a Glance
Navigation
You can select any place/landmark as a destination by using voice control or the touch screen. The navigation
system gives you turn-by-turn driving directions to your destination.
Store home addresses (P36)
Register
2 home addresses.
Store contacts (P31)
Store up to
200 contacts in 2 address books.
Enter destination (P56)
Select your destination using
11 methods.
Select route (P78)
Set route preferences and select one of
3 routes.
Track route (P80)
Follow your route in real-time with voice guidance.
Avoid certain areas (P100)
Set streets and areas to detour around.
Add waypoints (P101)
Add up to
4 “pit stops” along your route.
FIT_KA-31TK6830.book 2 ページ 2011年7月4日 月曜日 午後2時45分
QRG
Index
Home
Quick Reference Guide - 2013 Fit

3
Audio
The advanced audio system provides clear, well-defined sound and makes the most of your music.
Enjoy listening to a variety of audio sources, such as:
AM/FM Radio (P114)
Compact Disc (P119)
iPod® (P123)
USB Flash Drive (P127)
Bluetooth® Audio (P131)
Voice Control (P20)
Use voice commands to control the system while driving. You can operate all key functions of
the navigation and audio systems.
Bluetooth® HandsFreeLink® (P138)
Pair a compatible cell phone to receive incoming and make outgoing calls. You can operate the
phone features without ever taking your hands off the wheel.
FIT_KA-31TK6830.book 3 ページ 2011年7月4日 月曜日 午後2時45分
QRG
Index
Home
Quick Reference Guide - 2013 Fit
4
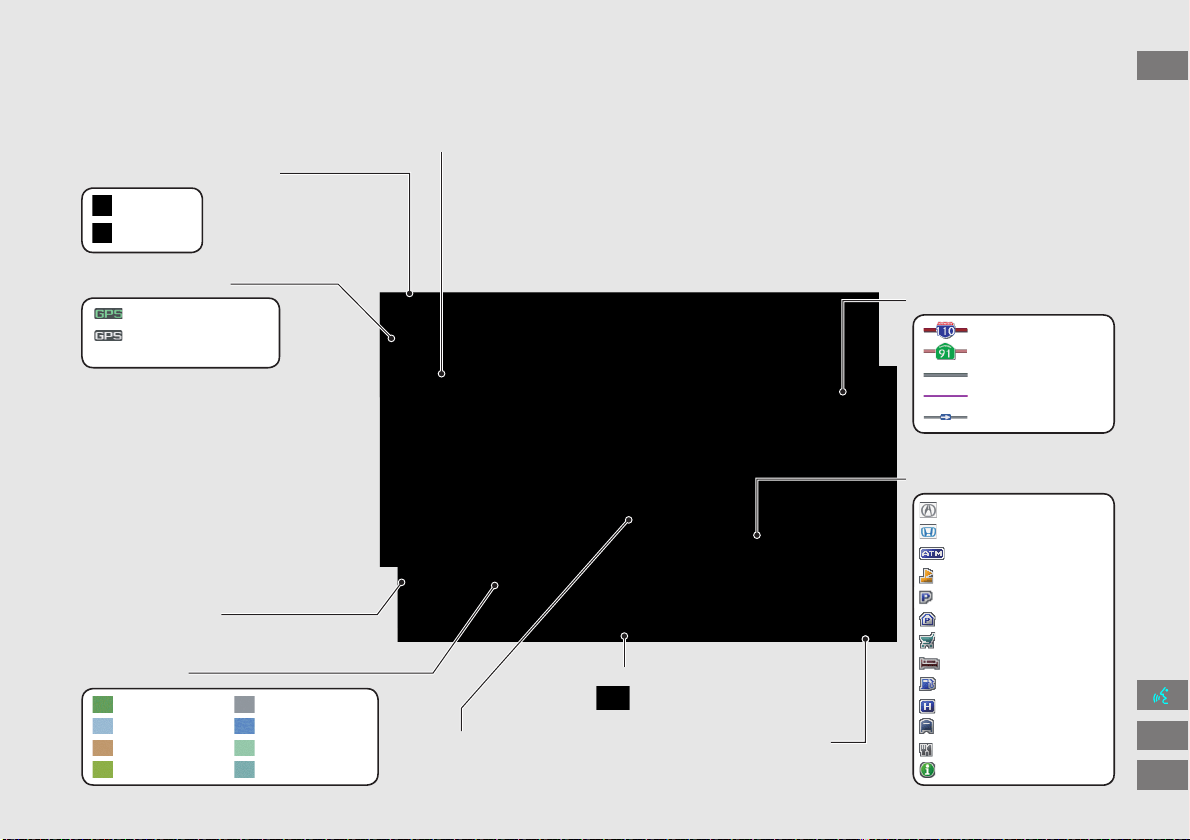
System Controls
3 CD/AUX Button (P119)
1 E (Eject) Button
2 FM/AM Button
(P114)
Navigation Screen
(Touch Screen)
Audio
Navigation
Voice Control/
Bluetooth® HandsFreeLink®
6 Disc Slot (P6)
4 AUDIO Button (P6)
5 SEEK/SKIP Button (P114)
7 a (Display Mode)
Button
(P27)
lb DEST Button (P56)
9 PHONE Button (P138)
la MAP/GUIDE Button (P90)
le CANCEL Button
lc INFO Button
(P10)
ld ZOOM IN/OUT Button (P95)
lf Joystick/ENT Button
8 VOL 9 Knob
(P6)
Press ENTER
Selects map location
or list item.
Move up Move Left Move down Move right
Scrolls map or list.
FIT_KA-31TK6830.book 4 ページ 2011年7月4日 月曜日 午後2時45分
QRG
Index
Home
Quick Reference Guide - 2013 Fit
5
lg Microphone
(P20)
lh MODE Button (P135)
li VOL (Volume) Button
(P136)
ma h (Pick-Up) Button (P153)
md K (Back) Button (P5)
mc d (Talk) Button (P5)
mb j (Hang-Up) Button (P153)
lj CH (Channel) Button
(P136)
Voice Control Operation
The audio system is muted during voice control mode.
Say “Help” to see all supported commands. A voice help
tutorial is also available.
Voice Help (P13)
Carefully read the usage note for the voice control.
Voice Control System (P20)
a Press and release the d (Talk) button.
The icon is displayed and the system beeps when ready for a
command. Press the K (Back) button to cancel.
Available voice commands are highlighted on the screen.
b Say a voice command.
Voice Command (P183)
d (Talk) Button
A helpful prompt asks what you
would like to do. Press and release
the d (Talk) button again to bypass
this prompt.
FIT_KA-31TK6830.book 5 ページ 2011年7月4日 月曜日 午後2時45分
QRG
Index
Home
Quick Reference Guide - 2013 Fit
6
Audio System
You can play music from a wide array of media sources. You can also control the audio system using voice commands.
Basic Operation
a Press the VOL 9 (Volume/Power) button to turn the audio
system on or off.
b Press the AUDIO button and select SOURCE on the screen.
c Select the audio source.
Or, press the FM/AM button or CD/AUX button repeatedly to
select the audio source.
d Rotate the VOL 9 (Volume/Power) knob to adjust
the volume.
Audio source
Audio Control Display
Press the AUDIO button to display the audio system on the
navigation screen.
Track list
Open icon
Audio source
Displays selected source.
Music
information
Close icon
Sound
preferences
Folder/Track tab
Displays the list.
Repeat and random play
Play mode
Displays or hides the
music information.
Audio control
FIT_KA-31TK6830.book 6 ページ 2011年7月4日 月曜日 午後2時45分
QRG
Index
Home
Quick Reference Guide - 2013 Fit
7
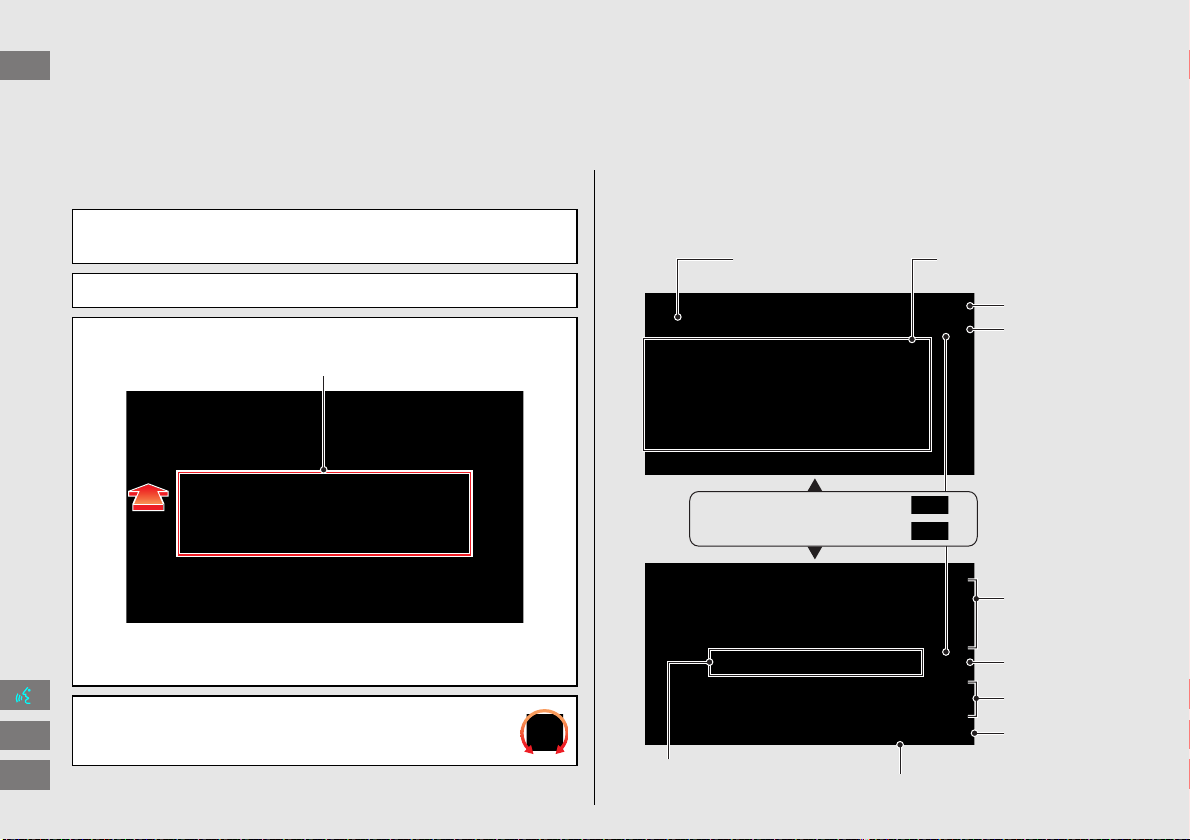
Map Screen Legend
Map orientation (P97)
GPS signal strength
North up
Heading up
Best reception
Good reception
No icon: Poor/No reception
Current map scale
Current street name/audio control
(Select to switch the display.)
Map menu (P85)
Map scale (P95)
Current vehicle position
(P98)
Feature areas
Streets
Landmark icons (P92)
Park
Hospital
Shopping Mall
Golf Course
Airport
Water Area
Cemetery
University
Freeways
State routes
Verified streets
Unverified streets
One-way streets
Acura dealer
Honda dealer
ATM
School
Parking lot
Parking garage
Grocery store
Hotel/Lodging
Gas station
Hospital
Post office
Restaurant
Freeway exit information
FIT_KA-31TK6830.book 7 ページ 2011年7月4日 月曜日 午後2時45分
QRG
Index
Home
Quick Reference Guide - 2013 Fit
8
During Route Guidance
During route guidance, route information is displayed on the map/guidance screen.
Press the MAP/GUIDE button to display the guidance screen.
Map Screen
Guidance Screen
Calculated route
(P80)
Destination direction
indicator
Direction “as the crow
flies.”
Guidance indicator
Distance to the next
guidance point.
Distance to destination
Distance of the actual
route.
Estimated time to
destination
Waypoint (P101)
Destination icon
(P79)
Calculated route
(unverified roads)
(P82)
Street name of
guidance point
Route guidance list scroll bar
Select R or U to scroll the list of
guidance points.
Route progress bar
Distance to
guidance point
No entry icon
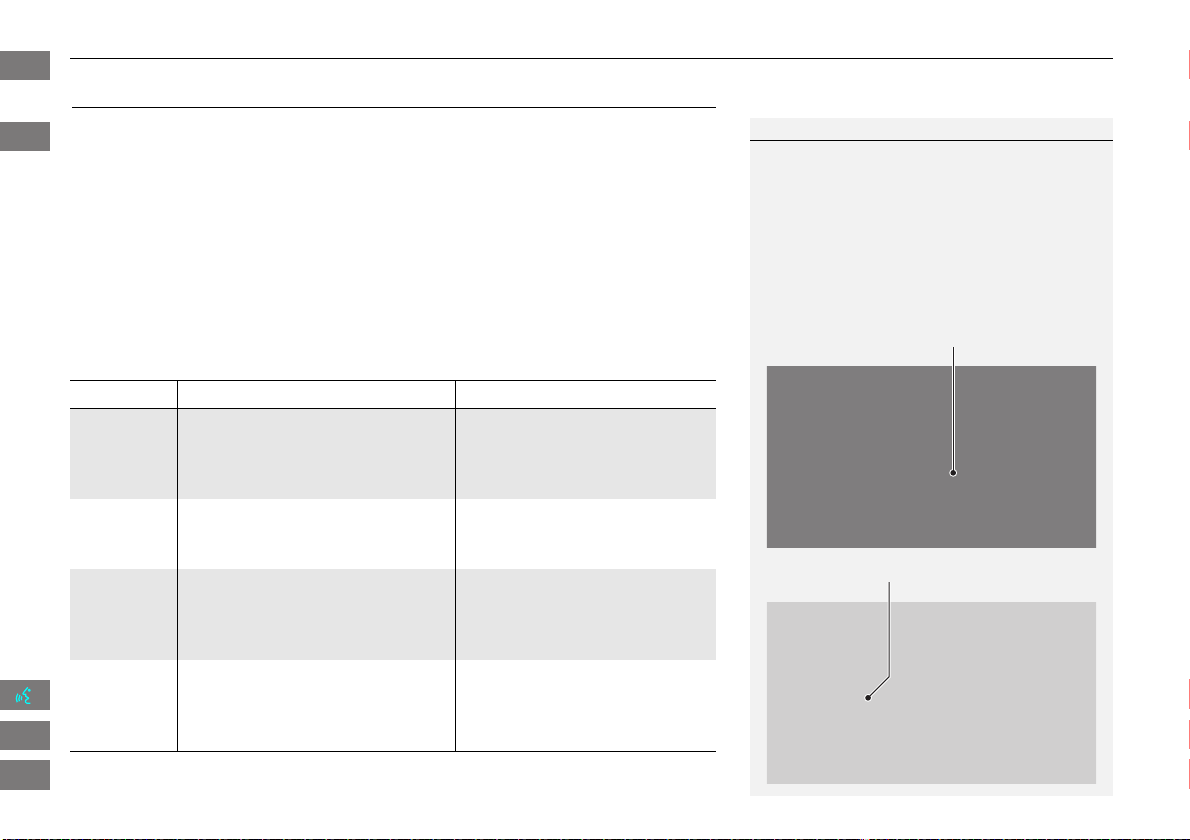
Day or Night Mode
Press the a (Display mode) button
to manually switch between day and
night mode.
Night mode
Day mode
FIT_KA-31TK6830.book 8 ページ 2011年7月4日 月曜日 午後2時45分
QRG
Index
Home
Quick Reference Guide - 2013 Fit
9
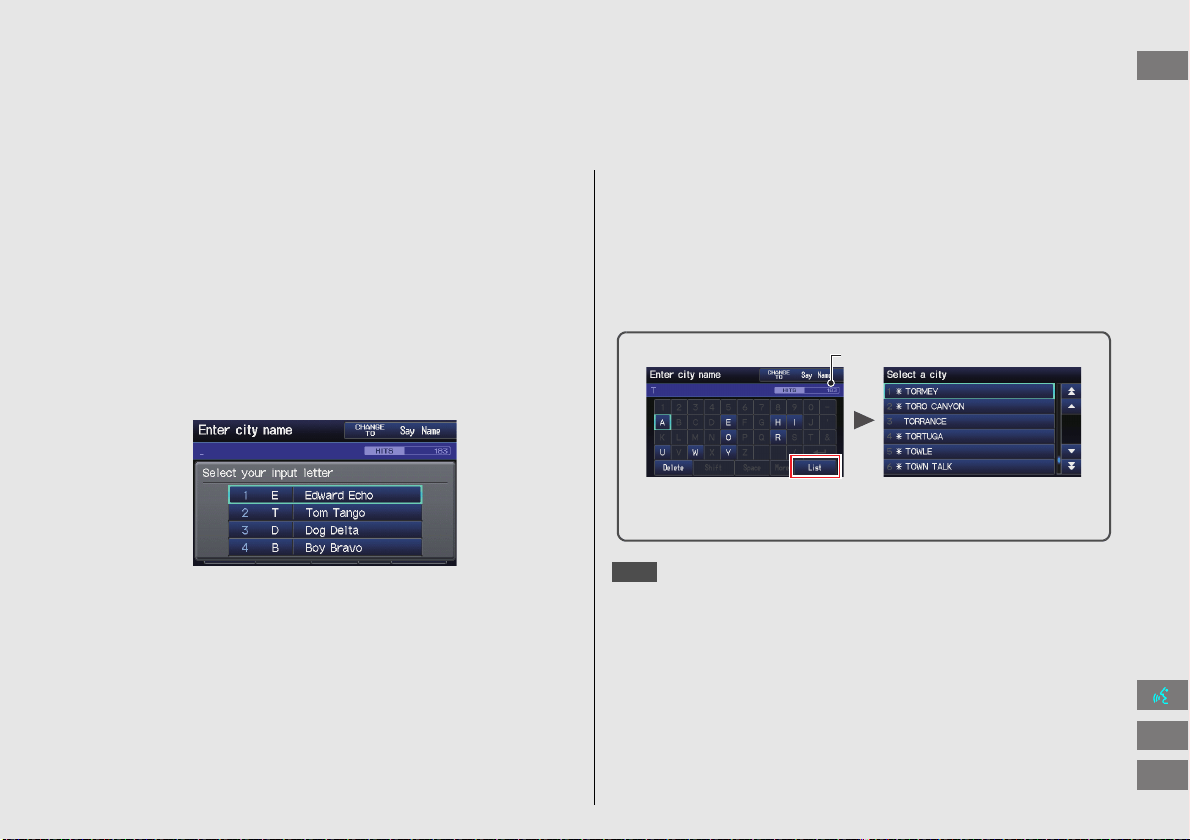
How to Enter Information
You can enter information (e.g., city names, street names, personal names, and business names comprising letters, numbers, and symbols)
when prompted on input screens by two different methods.
Using Voice Control
When you see d in this manual, voice commands are available for
that feature.
Say the letter, number, or symbol (e.g., say d “A”).
Use spelling assist (e.g., say d “Alpha” to enter the letter “A” or
d “Hyphen” to enter a hyphen).
The system beeps if you say an unavailable (grayed out) letter or
number.
If a voice command is not recognized, a list is displayed with
possible options.
On list screens:
Say the number of the list item (e.g., say d “Five” to select item
5).
Say d “Up” or d “Previous” to scroll up one page.
Say d “Down” or d “Next” to scroll down one page.
Using the Touch Screen
Touch a character or icon on the screen to select it.
Select Delete to remove the last entered character.
Select Shift to display accented and upper/lower case characters.
Select Space to enter a space character.
Select More to display symbols.
You can also use the joystick to enter information.
2 System Controls P. 4
On list screens:
Scrolling through lists or tabs is limited while the vehicle is moving.
Certain touch screen functions are limited or inoperable while the
vehicle is moving. For these functions, use available voice
commands or pull over to proceed.
Number of Hits
On input search screens, the number of hits in the map database is
displayed. Select List to display a list of possible entries.
NOTE
FIT_KA-31TK6830.book 9 ページ 2011年7月4日 月曜日 午後2時45分
QRG
Index
Home
Quick Reference Guide - 2013 Fit
10
Navigation—Home Addresses and Going Home
The “Home” feature automatically routes you to your home address from any location simply by selecting Go Home 1 or 2, or saying d “Go
Home.” You can store two home addresses as Home Address 1 and Home Address 2. (P36)
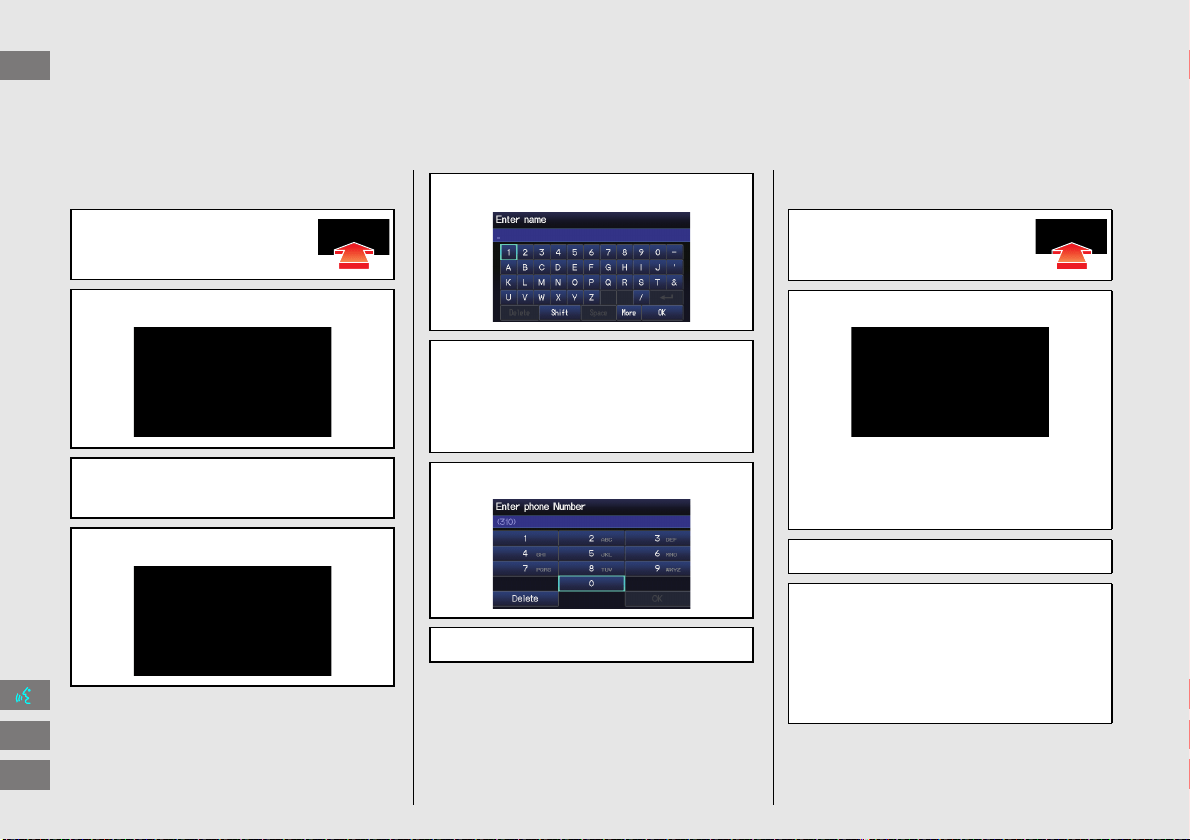
Storing Your Home Address
a Press the INFO button.
b Select Setup.
c Select Personal Information.
d Select Home Address 1.
e Select Edit Name.
f Enter a name and select OK.
g Select Edit Address.
h Select Address.
i Enter an address.
j Select Edit Phone No.
k Enter a phone number and select OK.
l Select OK.
Going Home
a Press the DEST button.
b Select Go Home 1.
Alternatively, you can say d “Go
Home” from any screen. Your home
address is displayed on the Calculate
Route screen.
c Select Set as Dest.
The following voice commands are
available: say d “Go Home,” d “Go
Home 1,” d “Go Home 2.”
If you have two home addresses stored,
saying d “Go Home” will select Home
Address 1.
FIT_KA-31TK6830.book 10 ページ 2011年7月4日 月曜日 午後2時45分
QRG
Index
Home
Quick Reference Guide - 2013 Fit
11
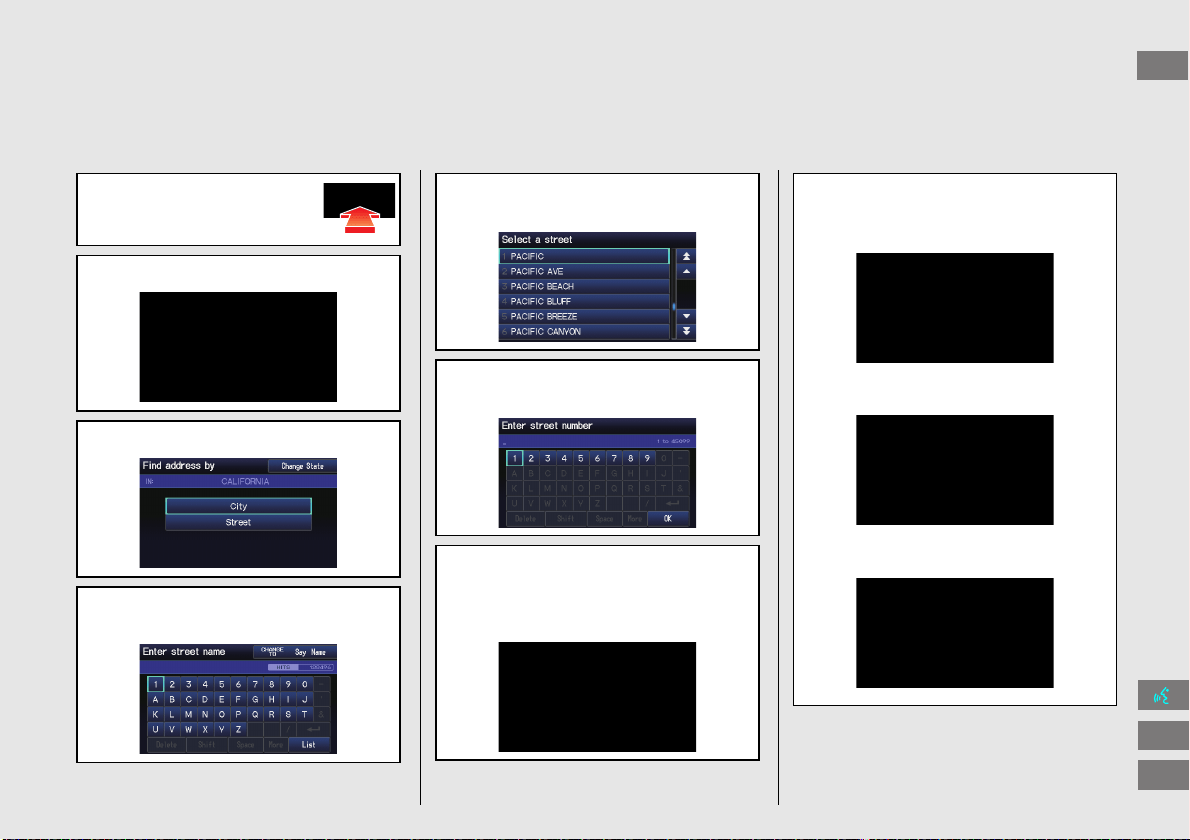
Navigation—Entering a Destination
Enter your destination using one of several methods, then follow route guidance on the map or guidance screen to your destination. You
can also perform these steps using d voice control.
a Press the DEST button.
b Select Address.
c Select Street.
d Enter the name of your destination
street and select List if necessary.
e Select your destination street from
the list.
f Enter the street number. Select OK
when finished.
g If there is more than one city with the
specified street, a list of cities is
displayed. Select the desired city from
the list.
h Select Set as Dest.
Route guidance to the destination
begins.
View Routes: Choose one of three
routes.
Route Pref.: Choose MAX or MIN for
the three settings.
FIT_KA-31TK6830.book 11 ページ 2011年7月4日 月曜日 午後2時45分
QRG
Index
Home
Quick Reference Guide - 2013 Fit
12
Navigation—Changing Route or Destination
You can alter your route by adding waypoints to visit, adding streets to avoid, or changing your destination during route guidance.
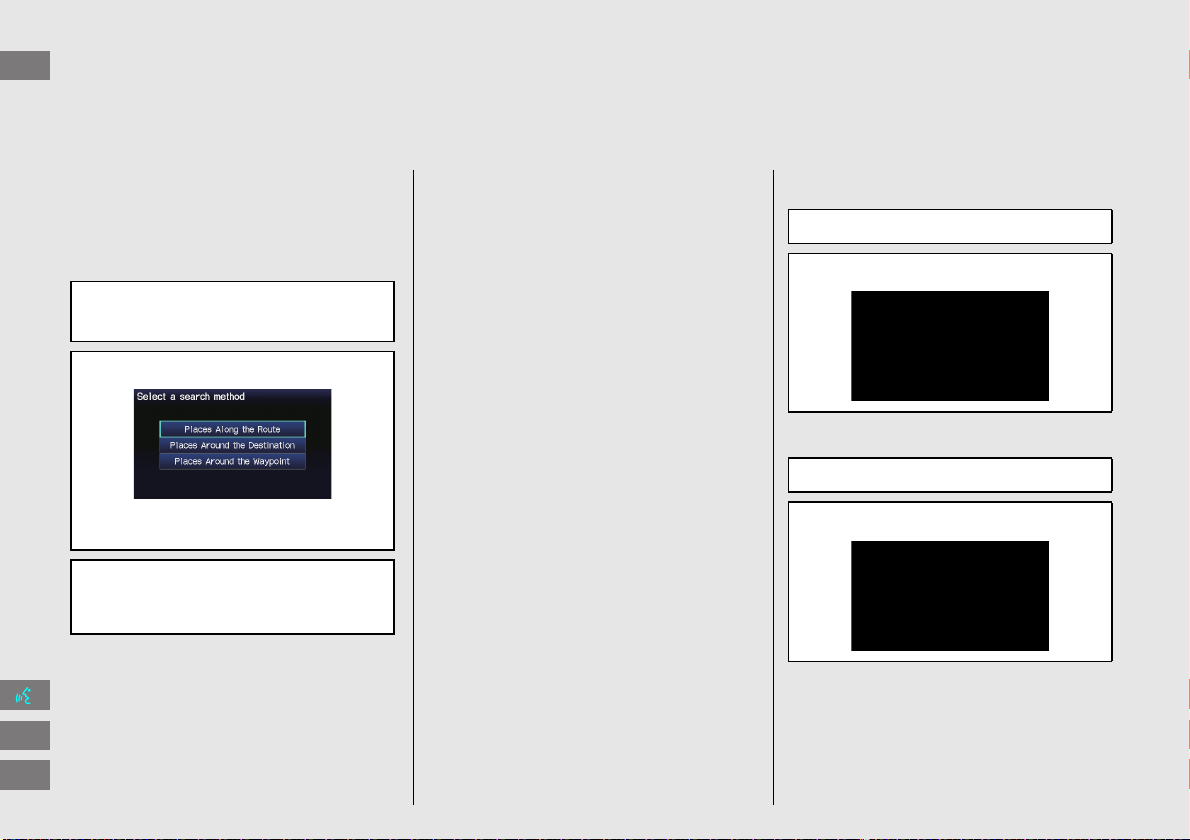
Adding a Waypoint
(“Pit Stop”)
You can add up to four waypoints along
your route. (P101)
a Press the DEST button.
b Select Waypoint.
c Select search method.
When you select Places Around the
Waypoint, select the desired waypoint.
d Select the icon category and location
to add to the destination list when
prompted.
Changing Your
Destination
There are four methods you can use to
specify a new destination during route
guidance.
Say d “Find Nearest…” (P106)
Searches for the nearest place/landmark
on the map screen (e.g., d “Find
nearest gas station”).
Say d “Go Home” (P10)
Routes to your home address.
Selecting an icon on the map (P107)
Scroll the map to position the cursor over
a place/landmark icon or a new area on
the map. Press the Enter button twice.
Entering a new destination (P108)
Press the DEST button. Select DEST
Menu1/2 and enter a new destination.
Canceling Your Route
From the map screen:
a Press the DEST button.
b Select Cancel Route.
a Select MAP MENU.
b Select Cancel Route.
FIT_KA-31TK6830.book 12 ページ 2011年7月4日 月曜日 午後2時45分
QRG
Index
Home
Quick Reference Guide - 2013 Fit
13
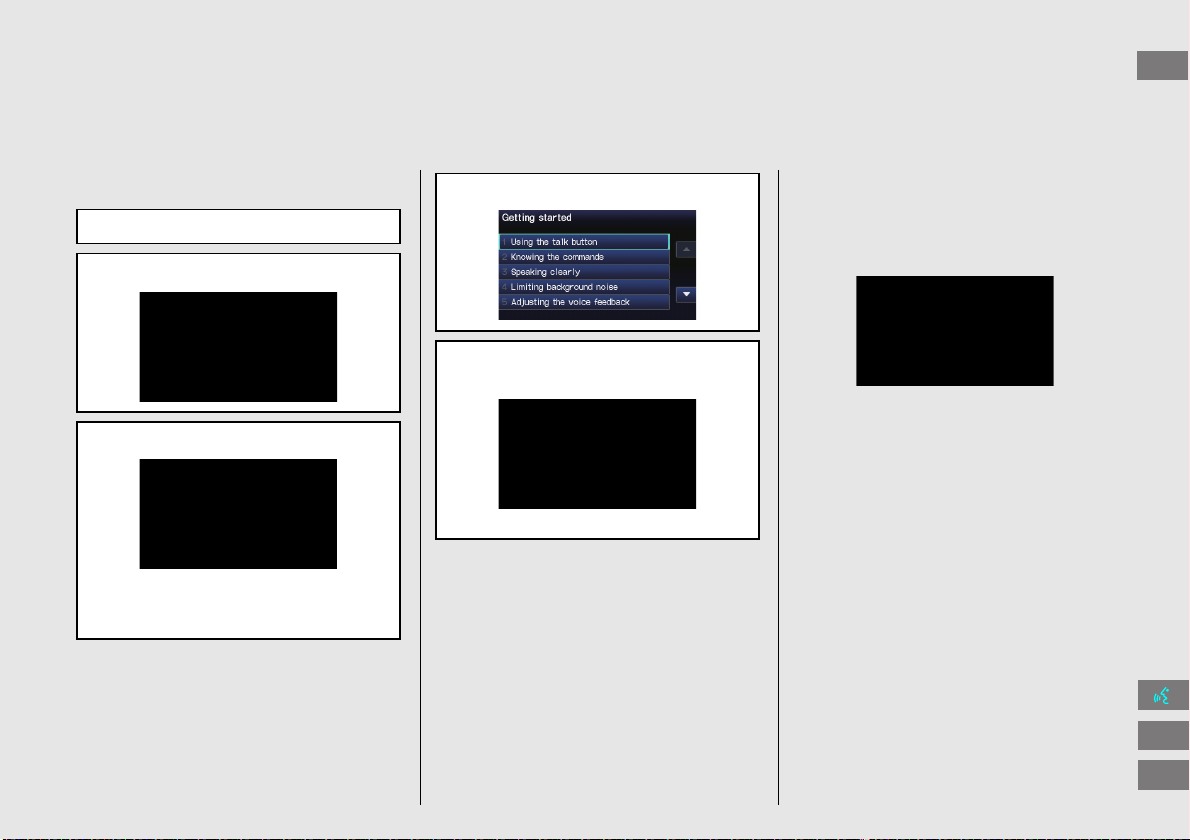
Voice Help
This navigation system comes with voice help information, which tells you how to use the voice command functions.
Go to Voice Info for tips when using the voice command functions.
Getting Started Tutorial
a Press the INFO button.
b Select Voice Info.
c Select Getting started.
You can also view the available
command list for each system. See
Command Help on this page.
d Select Using the talk button.
e Select Read to hear the tutorial read
aloud.
Select Stop to stop the tutorial.
Command Help
For “Command Help” menu items, all voice
commands that are available for that
system are listed.
Select Read to hear the commands in the
list read aloud.
Voice Commands (P183)
FIT_KA-31TK6830.book 13 ページ 2011年7月4日 月曜日 午後2時45分
QRG
Index
Home
Quick Reference Guide - 2013 Fit
14
Troubleshooting For more Information (P159)
Why does the vehicle position icon on the map “lag” a
short distance behind my actual position, especially at
intersections?
This is normal. The navigation system is unaware of the
width of intersections. Large differences in vehicle position
can indicate a temporary loss of the GPS signal.
Why does the “time to destination” display sometimes
increase even though I am getting closer to my
destination?
The “time to destination” is based on the posted road
speed signs and your actual road speed to give you a
better estimate of arrival time.
Why does my clock frequently change the time forward
and backward by one hour?
The clock setting is automatically updated based on your
GPS location. If you normally drive between two time
zones, the clock may keep adjusting the time. You can
turn this feature off.
2
Clock Adjustment P. 47
How do I specify a destination when an entered city or
street could not be found?
Try entering the street first. Some cities are lumped in with
a major metro area. In rural “unverified” areas or new
subdivisions, streets may be missing or only partially
numbered.
How do I turn on the navigation system voice guidance?
1. Press the INFO button. Select Setup. Check that
Volume is not set to Off.
2. Select Other, then Basic Settings. Set Voice
Recognition Tutor to On if you want the system to
provide confirmations and system prompts.
My battery was disconnected or went dead, and the
navigation system is asking for a code. Where do I find it?
Your vehicle comes with a label in the Owner’s Manual kit
that includes the system’s security code and serial number.
You should keep this label in a safe place outside your
vehicle. If you cannot find it, contact your dealer.
FIT_KA-31TK6830.book 14 ページ 2011年7月4日 月曜日 午後2時45分
QRG
Index
Home
Quick Reference Guide - 2013 Fit
15
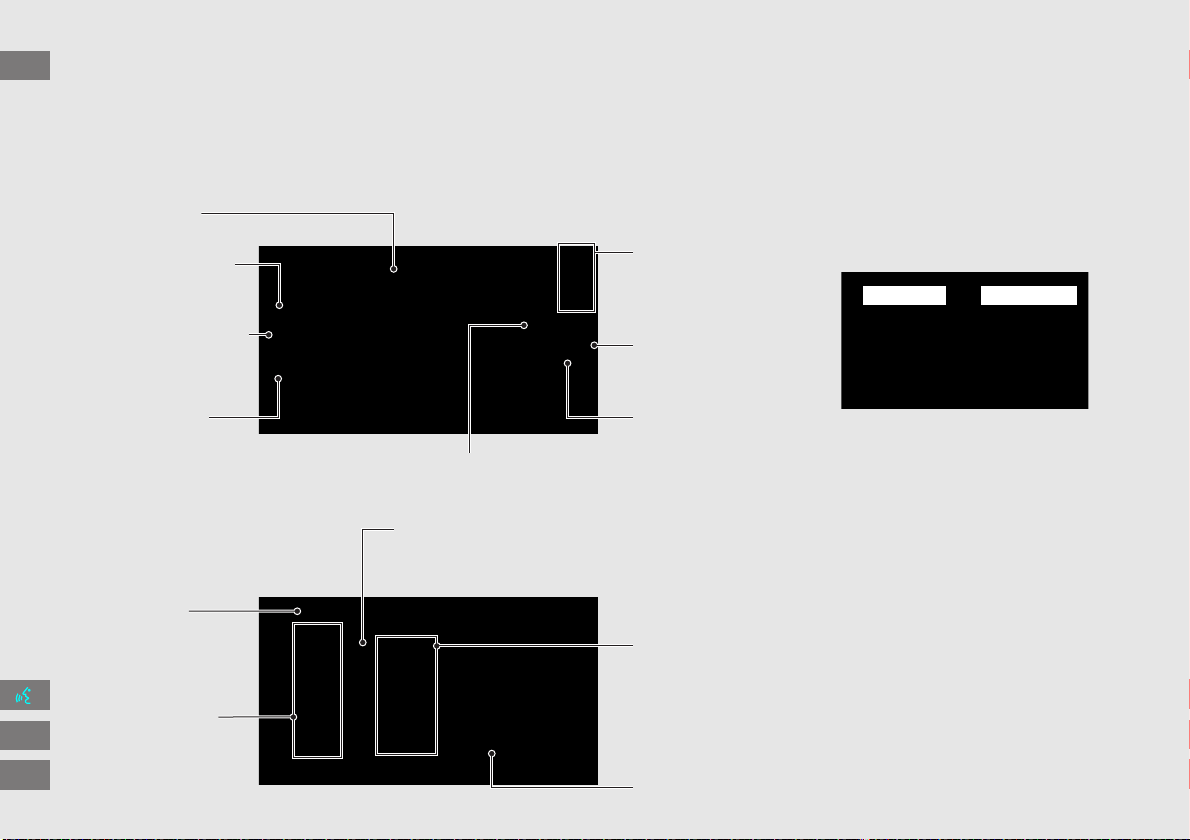
How to Use This Manual
This section explains different methods on how you can easily find information in this manual.
More Detailed
Contents
Go to the
Next Page
Searching the Table of Contents
(P1)
Two types of Tables of Contents help
you find your desired information.
First, find the general chapter related to
what you are looking for (e.g., entering
a destination from the Address Book).
Then, go to that chapter to view a more
specific table of contents.
Searching the Index (P194)
Menu items displayed on the
navigation screen (e.g., Address Book)
can be found individually in the Index.
This more detailed table of contents
shows you exactly what information is
listed by section and title.
The Index consists of
main terms and sub-
entries. The sub-entries
help you get to the
desired page depending
on what you are looking
for.
Table of Contents Chapter Contents
Navigation Screen
Index
FIT_KA-31TK6830.book 15 ページ 2011年7月4日 月曜日 午後2時45分
QRG
Index
Home
Quick Reference Guide - 2013 Fit

16
DEST button
Menu Tree
The menu tree helps guide you
through the system’s menu options.
To get to your desired function, follow
the menu tree in order of the steps
shown.
NOTE:
All menu options can also be
activated with voice commands.
Press the hard button on the
system control panel.
Press the DEST button.
Select the menu option.
Select Address Book.
After following the menu
tree, step-by-step
instructions explain how to
achieve the desired result.
Sample pages and images in this section may differ from the actual ones.
FIT_KA-31TK6830.book 16 ページ 2011年7月4日 月曜日 午後2時45分
QRG
Index
Home
Quick Reference Guide - 2013 Fit

17
System Setup
This section describes the start-up procedure and the navigation and
setup functions.
Start-up ................................................... 18
Voice Control System ............................. 20
Command Input .................................... 20
Voice Recognition .................................. 21
Interface Settings ................................... 22
Display and Volume Settings .................. 22
Guidance Prompts.................................. 23
Basic Settings......................................... 24
Color ..................................................... 25
Language............................................... 29
Personal Information.............................. 30
Address Book......................................... 31
Home Addresses .................................... 36
PIN Numbers.......................................... 37
User Name..............................................38
Previous Destinations ..............................39
Routing & Guidance ................................40
Rerouting................................................41
Unverified Area Routing..........................42
Edit Avoid Area.......................................44
Edit Waypoint Search Area......................46
Clock Adjustment ....................................47
Adjust Time ............................................48
Resetting the Clock Settings....................48
Setting the Clock Type ............................49
Vehicle ......................................................50
Off-road Tracking ...................................51
Correct Vehicle Position ..........................52
Data Reset ............................................... 53
Reset Factory Default Settings ................ 53
Clear All Speed Dial................................ 54
FIT_KA-31TK6830.book 17 ページ 2011年7月4日 月曜日 午後2時45分
QRG
Index
Home
2013 Fit Navigation

18
System Setup
Start-up
The navigation system starts automatically when you turn the ignition to
ACCESSORY (I) or ON (II). At start-up, the following Confirmation screen is displayed.
1. Select Change Language.
If you do not need to change
the system language, proceed to
step 3.
2. Select the system language.
3. Select OK.
Your current position is
displayed on the map screen.
1 Start-up
If the navigation system loses power at any time,
you may need to press and hold the VOL 9
(Volume/Power) button for more than two
seconds, or you may be prompted for the 5-digit
security code.
2 System Initialization P. 172
You can change the system language at any
time.
2 Language P. 29
“OK” on the Confirmation screen cannot be
selected by using a voice command. If you do not
select OK within 30 seconds, the screen turns
dark and you cannot use voice commands. Press
any navigation or voice control button to
continue.
2 Clock Adjustment P. 47
2 Setting the Clock Type P. 49
FIT_KA-31TK6830.book 18 ページ 2011年7月4日 月曜日 午後2時45分
QRG
Index
Home
TOC
2013 Fit Navigation

19
Start-up
System Setup
Certain manual functions are disabled
or inoperable while the vehicle is in
motion. You cannot select a grayed-
out option until the vehicle is stopped.
Voice commands are still operable
while the vehicle is in motion.
■ Limitations for Manual Operation
Disabled Option
FIT_KA-31TK6830.book 19 ページ 2011年7月4日 月曜日 午後2時45分
QRG
Index
Home
TOC
2013 Fit Navigation

20
System Setup
Voice Control System
Your vehicle has a voice control system that allows hands-free operation of most of
the navigation system functions. You can also control the audio system, and make
and receive phone calls using Bluetooth® HandsFreeLink®.
The voice control system uses the d (Talk) and K (Back) buttons on the steering
wheel and a microphone near the map lights on the ceiling.
A “Voice Info” feature provides a tutorial that explains how to use the voice control
system.
2 Voice Help P. 13
Command Input
If the system does not understand a command or you wait too long to give a
command, it responds with “Pardon? No command was heard. Please press the talk
button and say a command.”
When you give a command, the system generally either repeats the command as a
confirmation or asks you for further information. If you do not wish to hear this
feedback, you can turn it off. However, listening to the feedback will help familiarize
you with the way the system expects commands to be phrased.
2 Basic Settings P. 24
If the system cannot perform a command or the command is not appropriate for the
screen you are on, the system beeps.
If the system responds with prompts such as “Please use the touch screen to…” or
“Please use the joystick to…,” the system is asking for input that cannot be
performed using the voice control system.
On character input screens, a list of possible characters is displayed if the system
does not recognize your command.
You can find out which voice commands are available for a particular screen using
the d Help command. The system will display and read the list of available
commands to you.
1 d (Talk) Button
When you press the d (Talk) button, a helpful
prompt asks what you would like to do. Press
and release the d (Talk) button again to bypass
this prompt and give a command.
1 Command Input
The audio system is muted while using the voice
control system.
FIT_KA-31TK6830.book 20 ページ 2011年7月4日 月曜日 午後2時45分
QRG
Index
Home
TOC
2013 Fit Navigation

21
Voice Control System
Voice Recognition
System Setup
Voice Recognition
To achieve optimum voice recognition when using either the navigation voice
control system or Bluetooth® HandsFreeLink®:
• Make sure the correct screen is displayed for the voice command that you are
using.
2 Voice Commands P. 184
• Close the windows and moonroof.
• Adjust the dashboard and side vents so air does not blow onto the microphone on
the ceiling.
• Speak clearly in a clear, natural speaking voice without pausing between words.
• Reduce any background noise if possible. The system may misinterpret your
command if more than one person is speaking at the same time.
• Refer to the Voice Info tutorial.
2 Voice Help P. 13
FIT_KA-31TK6830.book 21 ページ 2011年7月4日 月曜日 午後2時45分
QRG
Index
Home
TOC
2013 Fit Navigation

22
System Setup
Interface Settings
Display and Volume Settings
H INFO button
Setup
Use the Main Setup screen to adjust the display and volume.
Select b or n to adjust the desired
item.
The following items are available:
• Brightness: Adjusts the screen’s brightness.
• Contrast: Adjusts the screen’s contrast.
• Black Level: Adjusts the screen’s black level.
• Volume: Adjusts the navigation system volume level.
1 Display and Volume Settings
You can set separate daytime and nighttime
settings for Brightness, Contrast, and Black
Level. Adjust each setting when the display is in
either daytime or nighttime mode.
You can set the display and volume settings
using voice commands.
2 Main Setup Screen Commands P. 189
Volume
If you set Volume to Off, you will not hear route
guidance or voice command confirmations. If
you then select VOICE on the map menu, you
will hear route guidance at the default volume.
FIT_KA-31TK6830.book 22 ページ 2011年7月4日 月曜日 午後2時45分
QRG
Index
Home
TOC
2013 Fit Navigation

23
Interface Settings
Guidance Prompts
System Setup
Guidance Prompts
H INFO button
Setup
Set the number of guidance prompts before you get to the guidance point.
Select an option.
The following options are available:
1 Guidance Prompts
To replay voice guidance, select VOICE on the
map menu.
2 Listening to Voice Guidance P. 84
You can turn voice guidance off if you prefer.
2 Display and Volume Settings P. 22
Items
Distance from Guidance Point
About 1/2 mile About 1/4 mile Just before
MIN Yes
NORMAL
(factory default)
Yes Yes Yes
MAX Yes Yes Yes
FIT_KA-31TK6830.book 23 ページ 2011年7月4日 月曜日 午後2時45分
QRG
Index
Home
TOC
2013 Fit Navigation

24
Interface Settings
Basic Settings
System Setup
Basic Settings
H INFO button
Setup
Other
Basic Settings
Set the map units to either miles or kilometers, and control the voice feedback from
the navigation system.
Select an item.
The following items are available:
• Keyboard Layout: Sets the type of keyboard screen to either Alphabet (factory
default) or QWERTY.
• Units: Sets the map units to either miles (factory default) or kilometers.
• Voice Recognition Tutor: Turns the voice feedback feature on or off.
On (factory default): Provides voice control system confirmation or prompts.
Off: Disables the feature.
• Display Voice Command Tips: Alerts you when manual control of the system is
disabled to prevent distraction while driving. Only voice commands are available.
On (factory default): Displays a message.
Off: Disables the message, but some options may be grayed out on the screen.
FIT_KA-31TK6830.book 24 ページ 2011年7月4日 月曜日 午後2時45分
QRG
Index
Home
TOC
2013 Fit Navigation

25
Interface Settings
Color
System Setup
• Verbal Reminder: Turns the verbal reminders on or off.
On (factory default): Provides warning voice messages when:
– Driving with the parking brake on
– Driving without wearing the driver and/or passenger seat belt
Off: Disables the feature.
Color
H INFO button
Setup
Other
Color
Choose the color of the navigation map and system menus.
Select an item.
The following items are available:
• Map: Sets the color of the map screen.
2 Map Color P. 26
• Menu: Sets the color of the menu screens.
2 Menu Color P. 26
FIT_KA-31TK6830.book 25 ページ 2011年7月4日 月曜日 午後2時45分
QRG
Index
Home
TOC
2013 Fit Navigation

26
Interface Settings
Color
System Setup
H INFO button
Setup
Other
Color
Map
Set separate map colors for Day and Night modes.
Select a color for the map screen.
H INFO button
Setup
Other
Color
Menu
Set separate menu colors for Day and Night modes.
Select a color for the menu screens.
■ Map Color
1 Map Color
For Day mode
Set to White (factory default is Beige) to obtain
the best daytime display contrast.
For Night mode
Set to Black (factory default) to obtain the best
nighttime display contrast.
■ Menu Color
1 Menu Color
For Day mode
Set to Black (factory default is Blue) to obtain
the best daytime display contrast.
For Night mode
Set to Black (factory default is Blue) to obtain
the best nighttime display contrast.
FIT_KA-31TK6830.book 26 ページ 2011年7月4日 月曜日 午後2時45分
QRG
Index
Home
TOC
2013 Fit Navigation

27
Interface Settings
Color
System Setup
Set the screen brightness separately for Day and Night modes. Press the
a
(Display mode) button to cycle through the display modes (Day to Night to Off).
1. Press the a button.
The Brightness bar is displayed
for a few seconds.
2. Press the a button again.
Repeat the procedure to switch
the display modes.
Select b or n to adjust the
brightness.
■ Switching Display Mode Manually
1 Switching Display Mode Manually
A visual guide helps you see the difference
between Day and Night modes.
2 Day or Night Mode P. 8
Recommended Settings
• Select mid-range for the dash illumination.
• Select White for the map Day display and
Black for the map Night display.
Continued
FIT_KA-31TK6830.book 27 ページ 2011年7月4日 月曜日 午後2時45分
QRG
Index
Home
TOC
2013 Fit Navigation
28
Interface Settings
Color
System Setup
Illumination
control
Priority Operation
a button 1 Selects Day, Night, or Off display mode. This button has
the highest priority and overrides all other display control
adjustments listed below.
Sunlight sensor
(see your
Owner’s Manual
for location)
2 If the sunlight sensor detects daylight and the headlights
are turned on, the system automatically overrides the
Night display and displays the Day display mode.
Remember: If desired, use the a button to override
this automatic choice.
Dash illumination
adjustment
buttons (see your
Owner’s Manual
for location)
3 When the headlights are turned on, and you wish to have
the Day display mode, adjust the illumination to full
brightness (beeps).
Remember: Adjust the dash brightness back to mid-range
to allow auto switching by sensing the headlights are on or
off.
Headlights
(Auto/On/Off)
4 When turned on, the display changes to Night display
mode. The previous three controls listed above can
“cancel” this function.
Remember: Use the a button, or adjust the dash
illumination to full brightness, to set the display to your
desired choice.
Screen color
choice
N/A The user can select the color of the screen that will be
displayed for the Day and Night display modes described
above.
Remember: For best contrast, ensure that the map color is
white for Day and black for Night.
FIT_KA-31TK6830.book 28 ページ 2011年7月4日 月曜日 午後2時45分
QRG
Index
Home
TOC
2013 Fit Navigation

29
Interface Settings
Language
System Setup
Language
H INFO button
Setup
Other
Language
Set the system language used on all screens. You can choose from three languages:
English, Français (French), Español (Spanish).
Select the system language.
1 Language
Voice confirmation of cities and streets only
occurs when English is the system language.
When Français or Español is selected, some
messages continue to be displayed in English.
FIT_KA-31TK6830.book 29 ページ 2011年7月4日 月曜日 午後2時45分
TOC
QRG
Index
Home
2013 Fit Navigation

30
System Setup
Personal Information
H INFO button
Setup
Personal Information
Use the personal information menu to select and set your address books, home
addresses, and PINs. You can also delete unwanted destinations from the list of
previously routed destinations.
Select an item.
The following items are available:
• Address Book: Stores new addresses or edits your address book.
2 Address Book P. 31
• Home Address 1: Sets or edits your home address.
2 Home Addresses P. 36
• Home Address 2: Sets or edits another home address.
2 Home Addresses P. 36
• PIN Number: Sets or changes your PIN.
2 PIN Numbers P. 37
• User Name: Sets or changes your user name.
2 User Name P. 38
• Previous Destinations: Deletes the destination history.
2 Previous Destinations P. 39
1 Personal Information
Personal information cannot be backed up or
moved to another navigation system.
FIT_KA-31TK6830.book 30 ページ 2011年7月4日 月曜日 午後2時45分
QRG
Index
Home
TOC
2013 Fit Navigation

31
Personal Information
Address Book
System Setup
Address Book
H INFO button
Setup
Personal Information
Address Book
Store up to 200 address entries in two address books (User 1 and User 2). You can
add, edit, and delete information in the address books.
Select the user name to edit the user
address book.
Displays the address book.
Select the user name to change the
user address book.
Select the category tab to display
only the address in the selected
category.
1 Address Book
The number of addresses is shared by the two
address books. For example, if User 1 has 150
addresses, User 2 can only have 50.
If you have PIN-protected your address book,
enter your PIN when prompted. Select OK. PINs
are optional.
2 PIN Numbers P. 37
Any address book categories you create are also
displayed on the Select an Address screen.
2 Selecting an Address Book Category P. 34
FIT_KA-31TK6830.book 31 ページ 2011年7月4日 月曜日 午後2時45分
QRG
Index
Home
TOC
2013 Fit Navigation

32
Personal Information
Address Book
System Setup
H INFO button
Setup
Personal Information
Address Book
This section explains how to enter the name and address.
1. Select New Address.
2. Select an item.
The following items are available:
• Edit Name: Edits the name of the entry.
• Edit Address: Edits the address of the entry.
• Edit Phone No.: Edits the phone number of the entry.
• Edit Category: Specifies the category of the entry.
• Delete: Deletes the entry.
■ Adding an Address Book Entry
1 Adding an Address Book Entry
If you do not give the address a name, one is
automatically assigned (e.g., Address 001). You
can re-enter, edit, or make changes to any entry.
“Address” is the only required field.
FIT_KA-31TK6830.book 32 ページ 2011年7月4日 月曜日 午後2時45分
QRG
Index
Home
TOC
2013 Fit Navigation

33
Personal Information
Address Book
System Setup
3. Select Edit Name.
4. Enter a name or title. Select OK.
5. Select Edit Address.
6. Select an item for specifying the
address.
The following items are available:
• Current Position: Select your current location.
• Address: Enter an address on the character input screen when prompted.
2 Address P. 58
• Previous Destinations: Select a previous destination.
2 Previous Destinations P. 64
• Place Name: Enter the name of a place/landmark.
2 Place Name P. 65
• Place Category: Select a category to search for a place/landmark (e.g., Banking,
Lodging).
2 Place Category P. 67
• Place Phone Number: Enter the phone number of a place/landmark.
2 Place Phone Number P. 72
1 Adding an Address Book Entry
When you use Place Name or Place Category,
the name and phone number are automatically
entered.
FIT_KA-31TK6830.book 33 ページ 2011年7月4日 月曜日 午後2時45分
QRG
Index
Home
TOC
2013 Fit Navigation
34
Personal Information
Address Book
System Setup
H INFO button
Setup
Personal Information
Address Book
1. Select the address to edit.
2. Enter the name, address, phone
number, and category fields.
2 Adding an Address Book Entry
P. 32
3. Select OK.
H INFO button
Setup
Personal Information
Address Book
1. Select an address.
2. Select Edit Category.
3. Select BUSINESS, PERSONAL, or a
category you created.
■ Editing an Address Book Entry
1 Editing an Address Book Entry
The entered contents are displayed on the Edit
address screen.
■ Selecting an Address Book Category
1 Selecting an Address Book Category
You can have up to 100 categories (including
“UNFILED”). These categories can be shared with
User 1 and User 2. For example, if User 1 creates
some categories, User 2 can also use them.
If you delete a category that is used by other
addresses, the category type for those addresses
changes to “UNFILED.”
Category Icons
The following icons can be selected for a
category:
FIT_KA-31TK6830.book 34 ページ 2011年7月4日 月曜日 午後2時45分
QRG
Index
Home
TOC
2013 Fit Navigation

35
Personal Information
Address Book
System Setup
■ Creating a New Category
1. Select New Category.
2. Enter a name and select an icon when prompted. Select OK.
The created category is displayed in the list of categories.
■ Deleting or Editing a Category
1. Select Edit Category.
2. Select Edit Category or Delete.
3. Delete an existing category, or change the name and icon.
H INFO button
Setup
Personal Information
Address Book
1. Select the address to delete.
2. Select Delete.
3. Select Yes.
■ Deleting an Address Book Entry
1 Deleting an Address Book Entry
When you transfer the vehicle to a third party,
delete all address book entries.
FIT_KA-31TK6830.book 35 ページ 2011年7月4日 月曜日 午後2時45分
QRG
Index
Home
TOC
2013 Fit Navigation

36
Personal Information
Home Addresses
System Setup
Home Addresses
H INFO button
Setup
Personal Information
Home Address 1 or Home
Address 2
Set two home addresses that you frequently use.
1. Edit the name, address, and phone
number the same way as an
address in the address book.
2 Adding an Address Book Entry
P. 32
2. Select OK.
1 Home Addresses
If you have PIN-protected your home addresses,
enter your PIN when prompted. Select OK. PINs
are optional.
2 PIN Numbers P. 37
If your home street is not in the system database,
park on the nearest verified street to your home.
When entering the “Address” field, select
Current Position to use your current location as
the home address.
You can delete a home address if necessary.
Select Delete. Select Yes.
When you transfer the vehicle to a third party,
delete all home addresses.
The home icon is shown on the map screen on 5
mile or less map scales.
FIT_KA-31TK6830.book 36 ページ 2011年7月4日 月曜日 午後2時45分
QRG
Index
Home
TOC
2013 Fit Navigation

37
Personal Information
PIN Numbers
System Setup
PIN Numbers
H INFO button
Setup
Personal Information
PIN Number
Set a 4-digit PIN for protecting personal addresses and your home addresses. Once
you set a PIN, you are prompted to enter it whenever you access a personal address
or a home address.
1. Select the PIN to create.
2. Select the user name (when
selecting Address Book PIN).
3. Enter a 4-digit PIN.
4. Re-enter the new PIN when
prompted to confirm the number
you just entered.
If you do not enter the same
number both times, an
“INCORRECT PIN” message is
displayed. Enter your PIN again.
1 PIN Numbers
PIN
Personal Identification Number (PIN) is a
password used to access some personal data.
PINs are optional. If you choose to use a PIN,
keep a note of the number in a secure location. If
you forget your PIN, your dealer will have to reset
the navigation system and all of your stored
information will be erased. The factory default is
no PIN.
Go Home PIN
Go Home PINs are shared with User 1 and User
2. If either User 1 or User 2 sets a Go Home PIN,
both of them need to enter the PIN when:
• selecting Go Home for a destination
• selecting Home Address for editing
If you want to stop using a PIN, select Do not
use PIN.
FIT_KA-31TK6830.book 37 ページ 2011年7月4日 月曜日 午後2時45分
QRG
Index
Home
TOC
2013 Fit Navigation

38
Personal Information
User Name
System Setup
User Name
H INFO button
Setup
Personal Information
User Name
Change the user name (“User 1” or “User 2”) to your desired name.
1. Select the name to change.
2. Enter a name. Select OK.
FIT_KA-31TK6830.book 38 ページ 2011年7月4日 月曜日 午後2時45分
QRG
Index
Home
TOC
2013 Fit Navigation
39
Personal Information
Previous Destinations
System Setup
Previous Destinations
H INFO button
Setup
Personal Information
Previous Destinations
The navigation system maintains a list of your previously routed destinations as a
shortcut for entering the same destination in the future. You can delete some or all
of your previous destinations from the list.
1. Select the destination to delete.
Repeat the procedure as
necessary.
Items to be deleted are indicated
with a trash icon.
2. Select OK to delete the selected
destinations.
1 Previous Destinations
Up to 50 destinations can be stored.
The list of previous destinations is shared with
User 1 and User 2. For example, if User 1 deletes
some previous destinations, they are deleted for
User 2 as well.
To cancel the selection of a previous destination,
select the destination again.
Selecting Delete All allows you to delete all
destinations.
Trash icon
FIT_KA-31TK6830.book 39 ページ 2011年7月4日 月曜日 午後2時45分
QRG
Index
Home
TOC
2013 Fit Navigation

40
System Setup
Routing & Guidance
H INFO button
Setup
Other
Routing & Guidance
Choose various settings that determine the navigation system functionality during
route guidance.
Select an item.
The following items are available:
• Rerouting: Sets the route recalculation to automatic or manual mode.
2 Rerouting P. 41
• Unverified Area Routing: Sets whether you use the route guidance in
unverified
areas
.
2 Unverified Area Routing P. 42
• Edit Avoid Area: Specifies areas to avoid when calculating a route.
2 Edit Avoid Area P. 44
• Edit Waypoint Search Area: Sets the distance from the route to find waypoints.
2 Edit Waypoint Search Area P. 46
• Guidance Mode: Sets whether to display only the map screen or a split
2 Guidance Mode P. 90
FIT_KA-31TK6830.book 40 ページ 2011年7月4日 月曜日 午後2時45分
QRG
Index
Home
TOC
map-guidance screen.
2013 Fit Navigation

41
Routing & Guidance
Rerouting
System Setup
Rerouting
H INFO button
Setup
Other
Routing & Guidance
Set whether route recalculation occurs automatically or manually during route
guidance.
Select an option.
The following options are available:
• Automatic (factory default): The system calculates a new route automatically
when you deviate from the route. It is strongly recommended that you leave the
system set to Automatic.
• Manual: Disables route recalculation. The system beeps and “Off Route” is
displayed when you deviate from the route.
1 Rerouting
If you live in an area with poor mapping, you
may wish to set Rerouting to Manual to avoid
constant recalculation. You will need to select
Recalc. manually to make the system recalculate
your new route.
FIT_KA-31TK6830.book 41 ページ 2011年7月4日 月曜日 午後2時45分
QRG
Index
Home
TOC
2013 Fit Navigation
42
Routing & Guidance
Unverified Area Routing
System Setup
Unverified Area Routing
H INFO button
Setup
Other
Routing & Guidance
Receive turn-by-turn map and voice guidance in unverified areas.
Select On or Off.
1 Unverified Area Routing
Unverified roads are found in rural areas, and
typically include residential streets away from the
center of a town. They may not be accurate, and
can contain errors in location, naming, and
address range.
Unverified roads are shown only when viewing
the map in the 1/20, 1/8, 1/4, 1/2, 1, or 2 mile
map scales.
Vector line (dotted)
Blue-pink route line
Differences Off (factory default) On
On or Off? The driver wishes to manually
navigate using the navigation map
and choose the streets that lead to
the destination.
The driver chooses to let the
navigation system suggest
possible routing, knowing that the
guidance may not be accurate.
Route
calculation
Route is usually longer, using
verified roads whenever possible.
Route is shorter, but uses
unverified (purple) streets that
may not be accurate.
Route line A blue dotted vector line is displayed
on the map that continually points
to your destination.
A blue-pink dashed route line
highlights suggested unverified
streets on the map while traveling
to your destination.
Cautionary
messages
Cautionary pop-up screens and
voice announcements remind you to
obey all traffic restrictions.
Cautionary pop-up screens and
voice announcements remind you
to exercise additional caution and
obey all traffic restrictions.
FIT_KA-31TK6830.book 42 ページ 2011年7月4日 月曜日 午後2時45分
QRG
Index
Home
TOC
2013 Fit Navigation
43
Routing & Guidance
Unverified Area Routing
System Setup
Guidance
(map/voice)
There is no turn-by-turn map or
voice guidance.
Voice guidance commands end
with the phrase “if possible” to
remind you to verify all traffic
restrictions.
My
Destination
(Direction
list)
A direction list is typically not
available. However, depending on
your route, directions are provided
to help you reach the first available
verified road.
A direction list is provided
showing unverified street names
in blue boxes and turn symbols in
pink.
Differences Off (factory default) On
FIT_KA-31TK6830.book 43 ページ 2011年7月4日 月曜日 午後2時45分
QRG
Index
Home
TOC
2013 Fit Navigation

44
Routing & Guidance
Edit Avoid Area
System Setup
Edit Avoid Area
H INFO button
Setup
Other
Routing & Guidance
Edit Avoid Area
“Edit”
Specify up to five areas to avoid (e.g., road construction, closures), if possible, when
the system calculates routes to your destination.
1. Select New Area or an existing
area to edit.
2. Select Edit Name to label the area
to avoid.
3. Enter a name or title. Select OK
.
4. Select Edit Area to define the area
to avoid.
The following items are available (after an area is set):
• View Area Map: Displays the selected avoid area on the map.
• Delete: Deletes the selected avoid area.
1 Edit Avoid Area
The avoid areas are shared with User 1 and
User 2. For example, if User 1 specifies some
avoid areas, User 2 can also use them for setting
a route.
The maximum size of an “avoid area” is about 1
square mile.
If your selected area contains a freeway, you are
asked “Do you want to avoid freeways?”
Answering “No” allows you to use a route
through an avoid area on a freeway without any
pop-up messages.
You can select areas to avoid, however you
cannot select roads or areas that you want the
system to use for routing.
You can enter characters for the name until the
input field is full.
FIT_KA-31TK6830.book 44 ページ 2011年7月4日 月曜日 午後2時45分
QRG
Index
Home
TOC
2013 Fit Navigation

45
Routing & Guidance
Edit Avoid Area
System Setup
5. Select a method for specifying the
area.
The following items are available:
• Address: Specify the general area by entering an address.
2 Address P. 58
• Map Input: Specify the general area by map input.
2 Map Input P. 75
6. Scroll the map to position the
cursor over your desired start point,
adjusting the map scale as
necessary. Press the ENTER button
to mark the start point.
To redo the area selection, press
the CANCEL button.
7. Scroll the map to “draw” the area.
Press the ENTER button to mark the
end point.
8. Select OK.
The area you specify is displayed
in the list of areas to avoid.
Cursor
Avoid area
FIT_KA-31TK6830.book 45 ページ 2011年7月4日 月曜日 午後2時45分
QRG
Index
Home
TOC
2013 Fit Navigation

46
Routing & Guidance
Edit Waypoint Search Area
System Setup
Edit Waypoint Search Area
H INFO button
Setup
Other
Routing & Guidance
Edit Waypoint
Search Area “Edit”
Select the distance from your highlighted route line (on either side of your route)
that the system will search for a waypoint.
2 Adding Waypoints P. 101
You can specify a different search distance for freeways and surface streets.
1. Select a search distance.
2. Select OK.
The following options are available:
• On Freeways: 1, 2, 5, or 10 miles can be set. Factory default is 2 miles.
• On Surface Street: 1/2, 1, 2, or 5 miles can be set. Factory default is 1/2 mile.
1 Edit Waypoint Search Area
The search distance does not affect the search
range used for the Find Nearest voice commands
(e.g., say
d “Find nearest gas station”).
FIT_KA-31TK6830.book 46 ページ 2011年7月4日 月曜日 午後2時45分
QRG
Index
Home
TOC
2013 Fit Navigation

47
System Setup
Clock Adjustment
H INFO button
Setup
Other
Clock Adjustment
Clock Adjustment
Set the automatic adjustment of the system clock for daylight saving and
international time zones.
Select an item.
The following items are available:
• Auto Time Zone: The navigation system automatically adjusts the clock when
driving through different time zones.
On (factory default): Adjusts the clock automatically.
Off: Disables the feature.
• Clock Format: Sets the time notation to either 12-hour clock (12H, factory
default) or 24-hour clock (24H).
• Time Adjustment: Adjust the current time manually.
2 Adjust Time P. 48
• Reset: Reset the clock settings to the factory default.
2 Resetting the Clock Settings P. 48
1 Clock Adjustment
You can check the time and date from any
screen using voice commands.
2 Global Commands P. 184
Auto Daylight
This function is not activated in areas that have
not adopted daylight saving time, even if you
have set Auto Daylight to On.
Auto Time Zone
If you live and work in two different time zones,
you may want to turn Auto Time Zone to Off.
When driving near a time zone boundary, the
displayed time zone may fluctuate between the
two zone times.
FIT_KA-31TK6830.book 47 ページ 2011年7月4日 月曜日 午後2時45分
QRG
Index
Home
•
Auto Daylight: The navigation
system automatically adjusts
the clock (“spring ahead” or
“fall back” by one hour) when
a daylight saving time change
occurs.
On (factory default): Adjusts
the clock automatically.
Off: Disables the feature.
TOC
2013 Fit Navigation

48
Clock Adjustment
Adjust Time
System Setup
Adjust Time
H INFO button
Setup
Other
Clock Adjustment
Clock Adjustment
Adjust the current time (hours and minutes).
1. Select B or N to adjust the value.
2. Select OK on the top right of the
screen.
Resetting the Clock Settings
H INFO button
Setup
Other
Clock Adjustment
Clock Adjustment
Reset all clock settings to the factory defaults.
Select OK under Reset.
FIT_KA-31TK6830.book 48 ページ 2011年7月4日 月曜日 午後2時45分
QRG
Index
Home
TOC
2013 Fit Navigation

49
Clock Adjustment
Setting the Clock Type
System Setup
Setting the Clock Type
H INFO button
Setup
Other
Clock Adjustment
Clock Type
Set the design of the clock screen.
1. Select Clock Type or Background.
2. Select an option to change the
design.
3. Select OK.
FIT_KA-31TK6830.book 49 ページ 2011年7月4日 月曜日 午後2時45分
QRG
Index
Home
TOC
2013 Fit Navigation

50
System Setup
Vehicle
H INFO button
Setup
Other
Vehicle
Set the off-road tracking feature and correct the vehicle position displayed on the
map.
Select an item.
The following items are available:
• Off-road Tracking: Set whether to display the tracking dots on the map.
2 Off-road Tracking P. 51
• Current Vehicle Position: Adjust the position of the vehicle on the map.
2 Correct Vehicle Position P. 52
FIT_KA-31TK6830.book 50 ページ 2011年7月4日 月曜日 午後2時45分
QRG
Index
Home
TOC
2013 Fit Navigation

51
Vehicle
Off-road Tracking
System Setup
Off-road Tracking
H INFO button
Setup
Other
Vehicle
The navigation system can be set to display white off-road tracking dots
(“breadcrumbs”) on the map screen whenever you drive into an area approximately
1/2 mile away from a mapped road.
Select an option.
The following options are available:
• On: The system displays the white tracking dots.
2 Driving Off-road P. 83
• Off (factory default): Disables the feature.
1 Off-road Tracking
To clear existing breadcrumbs, set Off-road
Tracking to Off, exit the Setup screen, and then
set Off-road Tracking to On again.
FIT_KA-31TK6830.book 51 ページ 2011年7月4日 月曜日 午後2時45分
QRG
Index
Home
TOC
2013 Fit Navigation
52
Vehicle
Correct Vehicle Position
System Setup
Correct Vehicle Position
H INFO button
Setup
Other
Vehicle
Manually adjust the current position of the vehicle as displayed on the map screen if
the position appears to be incorrect.
1. Put the vehicle in Park.
2. Select ADJUST under Current
Vehicle Position.
3. Scroll the map to position the
arrowhead at your correct position.
4. Select or to position the
arrowhead in the correct direction
the vehicle is facing.
5. Select OK.
1 Correct Vehicle Position
An apparent position error can occur where
buildings, tunnels, and other objects block or
reflect the GPS signals, forcing the system to use
“dead reckoning” to determine your location
and direction.
Using this function to adjust vehicle position is
not recommended. When the system reacquires
a GPS signal, it will automatically place the
vehicle in the correct location.
If you continually have to adjust the vehicle
position, you may have problems with the GPS
reception or there may be database errors.
2 System Limitations P. 174
FIT_KA-31TK6830.book 52 ページ 2011年7月4日 月曜日 午後2時45分
TOC
QRG
Index
Home
2013 Fit Navigation

53
System Setup
Data Reset
Reset Factory Default Settings
H INFO button
Setup
Other
Reset Factory Default
Reset all the settings on the Setup screens to their factory defaults.
Select Yes.
1 Reset Factory Default Settings
The following settings are reset:
• Brightness, Contrast, Black Level, Volume,
Guidance Prompts
• Basic Settings: Keyboard Layout, Units, Voice
Recognition Tutor, Verbal Reminder, Display
Voice Commands Tips
• Routing & Guidance: Rerouting, Unverified
Area Routing, Edit Waypoint Search Area,
Guidance Mode
• Clock Adjustment: Auto Daylight, Auto Time
Zone, Clock Format Time, Clock Type
• Vehicle: Off-road Tracking
• Color: Map Color, Menu Color
When you transfer the vehicle to a third party,
reset all settings to default and delete all
personal data.
2 Deleting an Address Book Entry P. 35
2 Home Addresses P. 36
2 PIN Numbers P. 37
2 User Name P. 38
2 Previous Destinations P. 39
2 Edit Avoid Area P. 44
2 Deleting a Paired Phone P. 143
FIT_KA-31TK6830.book 53 ページ 2011年7月4日 月曜日 午後2時45分
QRG
Index
Home
TOC
2013 Fit Navigation

54
Data Reset
Clear All Speed Dial
System Setup
Clear All Speed Dial
H INFO button
Setup
Other
Clear All Speed Dial
Delete all registered speed dials stored in Bluetooth® HandsFreeLink®.
Select Yes.
1 Clear All Speed Dial
You can also delete a speed dial individually.
2 Setting Up Speed Dialing P. 145
FIT_KA-31TK6830.book 54 ページ 2011年7月4日 月曜日 午後2時45分
QRG
Index
Home
TOC
2013 Fit Navigation

55
Navigation
This section describes how to enter a destination, select a route to take,
and follow the route to your destination. It also describes how to change
your route or destination along the way.
Entering a Destination ........................... 56
Address ................................................. 58
Address Book......................................... 63
Previous Destinations ............................. 64
Place Name............................................ 65
Place Category....................................... 67
Place Phone Number.............................. 72
Coordinate ............................................ 73
Intersection............................................ 74
Map Input.............................................. 75
Calculating the Route ..............................77
Changing the Route Preference ..............78
Viewing the Routes.................................78
Calculating the Route on the Destination
Map......................................................79
Driving to Your Destination ...................80
Viewing the Route ..................................80
Listening to Voice Guidance....................84
Map Menu................................................85
Displaying the Map Menu .......................85
Guidance Menu ......................................87
Showing Icons on the Map .....................92
Map Legend ...........................................94
Changing Your Route ............................. 99
Canceling the Route............................. 100
Taking a Detour ................................... 100
Avoiding Streets................................... 100
Adding Waypoints ............................... 101
Editing My Destination ......................... 105
Changing Your Destination ................. 106
Find Nearest Place ................................ 106
Selecting a Destination on the Map...... 107
Entering a New Destination.................. 108
Resuming Your Trip .............................. 110
FIT_KA-31TK6830.book 55 ページ 2011年7月4日 月曜日 午後2時45分
QRG
Index
Home
2013 Fit Navigation

56
Navigation
Entering a Destination
H DEST button
This section describes how to enter a destination for route guidance.
Select an item.
Select DEST Menu 2 to display
additional menu entries.
The following items are available:
• Address: Sets a destination by entering an address.
2 Address P. 58
• Address Book: Sets a destination by selecting an address stored in your Address
Book.
2 Address Book P. 63
• Previous Destinations: Sets a destination by selecting a previous destination.
2 Previous Destinations P. 64
1 Entering a Destination
d “Display Menu”, d “Display Navigation”
If you press the DEST button when en route, the
Route Menu screen is displayed.
2 Changing Your Route P. 99
Prior to departure, you can set areas along your
route to avoid.
2 Avoiding Streets P. 100
Certain touchscreen functions are disabled while
the vehicle is moving.
2 Limitations for Manual Operation P. 19
FIT_KA-31TK6830.book 56 ページ 2011年7月4日 月曜日 午後2時45分
QRG
Index
Home
TOC
2013 Fit Navigation

57
Entering a Destination
Navigation
• Place Name: Sets a destination by entering a place name.
2 Place Name P. 65
• Place Category: Sets a destination by selecting a place/landmark.
2 Place Category P. 67
• Place Phone Number: Sets a destination by entering the phone number of a
place/landmark.
2 Place Phone Number P. 72
• Coordinate: Sets a destination by entering latitude and longitude.
2 Coordinate P. 73
• Intersection: Sets a destination (intersection) by entering two streets.
2 Intersection P. 74
• Map Input: Sets a destination by scrolling through the map.
2 Map Input P. 75
• Go Home 1 or 2: Sets your home address as a destination.
2 Going Home P. 10
FIT_KA-31TK6830.book 57 ページ 2011年7月4日 月曜日 午後2時45分
QRG
Index
Home
TOC
2013 Fit Navigation

58
Entering a Destination
Address
Navigation
Address
H DEST button
Address
Enter an address to use as the destination. The state or province you are currently in
is displayed (e.g., California).
Select an item.
The following items are available:
• City: Selects your destination city.
2 Selecting a City P. 60
• Street: Selects your destination street.
2 Selecting a Street P. 61
• Change State: Selects the state or province.
2 Selecting the State or Province P. 59
FIT_KA-31TK6830.book 58 ページ 2011年7月4日 月曜日 午後2時45分
QRG
Index
Home
TOC
2013 Fit Navigation

59
Entering a Destination
Address
Navigation
H DEST button
Address
Change State
1. Enter a state name.
Select List to display a list of
states.
2. Select a state from the list.
■ Selecting the State or Province
FIT_KA-31TK6830.book 59 ページ 2011年7月4日 月曜日 午後2時45分
QRG
Index
Home
TOC
2013 Fit Navigation

60
Entering a Destination
Address
Navigation
H DEST button
Address
City
The name of the city where you are currently located is displayed.
1. Enter the name of a different city,
or select List for the current city.
Select List to display a list of
cities.
2. Select your destination city from
the list.
A list of matching hits is
automatically displayed after
you enter several letters, with
the closest match at the top of
the list.
Next, you are prompted to enter
a street name.
2 Selecting a Street P. 61
■ Selecting a City
1 Selecting a City by Name
Vehicle position may not be displayed when:
• The automobile is traveling off-road.
• The vehicle position data cannot be updated.
Using Voice Command (English only)
Say d “City” on the Find address by screen, and
the following screen is displayed:
Say d “Current City” to select your current
location, or say the name of a different city.
2 Selecting a Street P. 61
If your city is not listed, it may be part of a larger
metropolitan area. Try entering the street first.
Non-detailed area mark: Try entering the
street first and then select the city.
FIT_KA-31TK6830.book 60 ページ 2011年7月4日 月曜日 午後2時45分
QRG
Index
Home
TOC
2013 Fit Navigation

61
Entering a Destination
Address
Navigation
H DEST button
Address
Street
1. Enter the name of your destination
street.
Do not enter the street type
(e.g., street, road, avenue) or
direction (e.g., north, south,
east, west).
Select List to display a list of
streets.
2. Select your destination street from
the list.
A list of matching hits is
automatically displayed after
you enter several letters, with
the closest match at the top of
the list.
■ Selecting a Street
1 Selecting a Street
When entering the names of major freeways,
you can use the following abbreviations. For
interstates, use an “I” (e.g., I-10). For U.S.
freeways, use “US” (e.g., US-18). For state
freeways, use the two-character state
designation (e.g., CA-101). For county roads, use
the appropriate designation (e.g., G-2).
Using Voice Command (English only)
Say d “Street” on the Find address by screen,
and the following screen is displayed:
• Say the name of your destination street, and
say the street number as a string of individual
numbers.
• Set the route to your destination.
2 Calculating the Route P. 77
Continued
FIT_KA-31TK6830.book 61 ページ 2011年7月4日 月曜日 午後2時45分
QRG
Index
Home
TOC
2013 Fit Navigation

62
Entering a Destination
Address
Navigation
3. Enter the street number. Select OK.
Only valid street numbers can be
entered.
4. Set the route to your destination.
2 Calculating the Route P. 77
1 Selecting a Street
If you did not select a city first and there is more
than one city with the specified street, a list of
cities is displayed.
Select the desired city from the list.
FIT_KA-31TK6830.book 62 ページ 2011年7月4日 月曜日 午後2時45分
QRG
Index
Home
TOC
2013 Fit Navigation

63
Entering a Destination
Address Book
Navigation
Address Book
H DEST button
Address Book
Select an address stored in your address book to use as the destination.
1. Select your user name.
2. Select your destination from the
list.
3. Set the route to your destination.
2 Calculating the Route P. 77
Select C or X to display only
the entries in a category: ALL
,
BUSINESS, PERSONAL, or other
categories you have created.
2 Selecting an Address Book
Category
P. 34
1 Address Book
If you have PIN-protected your address book,
enter your PIN when prompted. Select OK. PINs
are optional.
2 PIN Numbers P. 37
You can select New Address on the Select an
address screen to add an entry to the address
book.
2 Adding an Address Book Entry P. 32
To switch the list between User 1 or User 2,
select the user name on the top right of the
screen.
FIT_KA-31TK6830.book 63 ページ 2011年7月4日 月曜日 午後2時45分
QRG
Index
Home
TOC
2013 Fit Navigation

64
Entering a Destination
Previous Destinations
Navigation
Previous Destinations
H DEST button
Previous Destinations
Select an address from a list of your 50 most recent destinations to use as the
destination. The list is displayed with the most recent destination at the top.
1. Select a destination from the list.
2. Set the route to your destination.
2 Calculating the Route P. 77
1 Previous Destinations
Your home addresses and addresses stored in
your address book are not added to the list of
previous destinations.
You can delete unwanted previous destinations
from the list.
2 Previous Destinations P. 39
FIT_KA-31TK6830.book 64 ページ 2011年7月4日 月曜日 午後2時45分
QRG
Index
Home
TOC
2013 Fit Navigation

65
Entering a Destination
Place Name
Navigation
Place Name
H DEST button
Place Name
Enter the name of a place (e.g., business, hotel, restaurant) stored in the map
database to use as the destination.
1. Enter a place name.
2. Select List to display a list of
matching hits.
3. Select a place name from the list.
If the place name is in multiple
categories, the categories are
displayed when you select it.
2 Place Name in Multiple
Categories
P. 66
4. Set the route to your destination.
2 Calculating the Route P. 77
1 Place Name
This option is convenient if you know the exact
name of a place.
Select More to enter symbols and accented
letters, select Space to enter a space character,
or select Delete to remove the last character.
Once a name is entered and selected, select
SORT BY Name or SORT BY Distance.
Matching letters are in yellow.
FIT_KA-31TK6830.book 65 ページ 2011年7月4日 月曜日 午後2時45分
QRG
Index
Home
TOC
2013 Fit Navigation

66
Entering a Destination
Place Name
Navigation
If the place name is in multiple categories in the map database, the following screen
is displayed.
1. Select a place name.
2. Select a subcategory.
3. Set the route to your destination.
2 Calculating the Route P. 77
■ Place Name in Multiple Categories
1 Place Name in Multiple Categories
Select SORT BY Name or SORT BY Distance.
Matching letters are in yellow.
FIT_KA-31TK6830.book 66 ページ 2011年7月4日 月曜日 午後2時45分
QRG
Index
Home
TOC
2013 Fit Navigation

67
Entering a Destination
Place Category
Navigation
Place Category
H DEST button
Place Category
Select the category of a place (e.g., Banking, Lodging, Restaurant) stored in the map
database to search for the destination.
1. Select a category.
2. Select a subcategory.
Select b or n to change the
main category.
2 List of Categories P. 193
1 Place Category
This option is convenient if you do not know the
exact name of a place or if you want to narrow
down the number of matches returned for places
with a common name.
You can store up to 30 favorite subcategories.
Select Fav. Subcategory to access your
favorites.
2 Favorite Subcategories P. 69
Advanced helps you to search the subcategory.
When you enter a keyword and select List, the
list of appropriate subcategories is displayed.
Continued
FIT_KA-31TK6830.book 67 ページ 2011年7月4日 月曜日 午後2時45分
QRG
Index
Home
TOC
2013 Fit Navigation

68
Entering a Destination
Place Category
Navigation
3. Select an item.
The following items are available:
• Place Name: Searches for a place in the subcategory by name. Enter a city name
when prompted.
• Sort by Distance to Travel: Displays all the places in the subcategory sorted by
distance from your current location. The closest place is displayed at the top.
• City Vicinity: Searches for a place in the subcategory within a 20-mile radius of a
specific city. Enter a city name and then a place name when prompted. Only the
first approximately 1000 matching places/landmarks are displayed.
• Search by Keyword: Searches for a place by keyword when you do not know the
exact category. Select Sort by Distance to Travel for locations near your current
location, or select City Vicinity for locations in a specific city. Enter a keyword
when prompted. Select List to view a list of possible locations if one is not found
automatically.
1 Place Category
Sort by Distance to Travel
For locations sorted by distance to travel, you can
select More to increase the scope of the search.
The number of locations increases to 100, 200,
and up to approximately 1000. When the
number of locations is 100 or less, you can
increase the scope to 500 miles, 1000 miles, or
all of U.S.
FIT_KA-31TK6830.book 68 ページ 2011年7月4日 月曜日 午後2時45分
QRG
Index
Home
TOC
2013 Fit Navigation

69
Entering a Destination
Place Category
Navigation
4. Select a place name from the list.
5. Set the route to your destination.
2 Calculating the Route P. 77
H DEST button
Place Category
Fav. Subcategory
Store up to 30 favorite subcategories.
1 Place Category
The straight line distance (as the crow flies, not
driving distance) and direction to the destination
are shown for the highlighted place.
■ Favorite Subcategories
Continued
FIT_KA-31TK6830.book 69 ページ 2011年7月4日 月曜日 午後2時45分
QRG
Index
Home
TOC
2013 Fit Navigation

70
Entering a Destination
Place Category
Navigation
■ To store a subcategory in favorites:
1. Select a category on the Category
screen.
2. Select Add to Fav. Subcategory
.
3. Select the favorite subcategories to
add. Select OK.
1 Favorite Subcategories
Stored categories
A subcategory stored in Fav. Subcategory has a
star at the end of the line.
FIT_KA-31TK6830.book 70 ページ 2011年7月4日 月曜日 午後2時45分
QRG
Index
Home
TOC
2013 Fit Navigation

71
Entering a Destination
Place Category
Navigation
■ To delete a subcategory from favorites:
1. Select Delete on the Favorite
Subcategory screen.
2. Select the subcategories to delete.
Repeat the procedure as
necessary.
Items to be deleted are indicated
with a trash icon.
3. Select OK.
1 Favorite Subcategories
Deleting categories
You can also delete a favorite subcategory on
any Subcategory screen. Select R or U to
select a favorite subcategory (which has a star at
the end of line) and select Delete from Fav.
Subcategory.
Trash icon
FIT_KA-31TK6830.book 71 ページ 2011年7月4日 月曜日 午後2時45分
QRG
Index
Home
TOC
2013 Fit Navigation

72
Entering a Destination
Place Phone Number
Navigation
Place Phone Number
H DEST button
DEST Menu 2
Place Phone Number
Select a destination by phone number. Only phone numbers in the database are
recognized.
1. Enter the area code and phone
number. Select OK.
2. Set the route to your destination.
2 Calculating the Route P. 77
1 Place Phone Number
All 10 digits must be entered.
Phone numbers of private residences entered in
your address book are not stored in the database
and thus cannot be used to search for a
destination.
A list is displayed if there are multiple locations in
the database with the same phone number.
Select a place from the list.
FIT_KA-31TK6830.book 72 ページ 2011年7月4日 月曜日 午後2時45分
QRG
Index
Home
TOC
2013 Fit Navigation

73
Entering a Destination
Coordinate
Navigation
Coordinate
H DEST button
DEST Menu 2
Coordinate
Specify a location using latitude and longitude map coordinates.
1. Enter the latitude. Select OK.
2. Enter the longitude. Select OK.
3. Scroll the map to position the
cursor over your desired
destination, adjusting the map
scale as necessary. Press the ENTER
button.
If the address is not the desired
location, scroll to another
location and try again.
4. Press the ENTER button again to
display the route calculation menu.
2 Calculating the Route P. 77
5. Select Set as Dest.
1 Coordinate
Latitude and longitude must be entered up to
the seconds’ value.
A yellow box (shown at scales above 1/4 mile)
denotes the area that can be viewed when you
press the ENTER button on the current map.
Information icons are displayed at scales from 1
mile to 1/4 mile. Place/landmark icons are
displayed at 1/8 mile or less. Roads are displayed
at 1/4 mile or less.
If you select multiple icons within the cursor
radius, you are prompted to select one of the
items from a list.
FIT_KA-31TK6830.book 73 ページ 2011年7月4日 月曜日 午後2時45分
QRG
Index
Home
TOC
2013 Fit Navigation

74
Entering a Destination
Intersection
Navigation
Intersection
H DEST button
DEST Menu 2
Intersection
Select the intersection of two streets as the destination. The state or province for
your current location is displayed at the top of the screen (e.g., California).
1. Select the intersection search
method.
2. Set the route to your destination.
2 Calculating the Route P. 77
The following items are available:
• City: Selects the city where the intersection is located. You are prompted to enter
the name of the two intersecting streets.
2 Selecting a City P. 60
• Street: Selects the two intersecting streets. The city or cities that the streets are
located in are displayed.
2 Selecting a Street P. 61
• Change State: Selects the state or province.
2 Selecting the State or Province P. 59
1 Intersection
It is usually easier to select Street to find the
streets first. The city or cities that the streets are
in will be displayed. If you select City and your
city is not listed, it may be part of a larger
metropolitan area. Try entering the street first.
If the intersection is outside the state you are
currently in, select Change State.
2 Selecting the State or Province P. 59
If there is more than one intersection, you are
prompted to select the intersection. If the two
streets that you have selected do not intersect,
no intersection is entered.
FIT_KA-31TK6830.book 74 ページ 2011年7月4日 月曜日 午後2時45分
QRG
Index
Home
TOC
2013 Fit Navigation

75
Entering a Destination
Map Input
Navigation
Map Input
H DEST button
DEST Menu 2
Map Input
Use the joystick to manually select an icon or a location on the map screen as the
destination.
You are prompted to define the map area to display.
1. Select an item.
The following items are available:
• Current Position: Your current location is centered on the map.
• City: You are prompted to select the city.
2 Selecting a City P. 60
• State: You are prompted to select the state.
2 Selecting the State or Province P. 59
Continued
FIT_KA-31TK6830.book 75 ページ 2011年7月4日 月曜日 午後2時45分
QRG
Index
Home
TOC
2013 Fit Navigation

76
Entering a Destination
Map Input
Navigation
2. Scroll the map to position the
cursor over your desired
destination, adjusting the map
scale as necessary. Press the ENTER
button.
If the address is not the desired
location, scroll the map to
another location and try again.
3. Press the ENTER button again to
display the route calculation menu.
2 Calculating the Route P. 77
4. Select Set as Dest.
1 Map Input
A yellow box (shown at scales above 1/4 mile)
denotes the area that can be viewed when you
press the ENTER button on the current map.
Information icons are displayed at scales from 1
mile to 1/4 mile. Place/landmark icons are
displayed at 1/8 mile or less. Roads are displayed
at 1/4 mile or less.
If you select multiple icons within the cursor
radius, you are prompted to select one of the
items from a list.
2 Selecting a Destination on the Map P. 107
FIT_KA-31TK6830.book 76 ページ 2011年7月4日 月曜日 午後2時45分
QRG
Index
Home
TOC
2013 Fit Navigation

77
Navigation
Calculating the Route
This section describes how to calculate your route.
1. Select Set as Dest.
The system calculates and
displays the route line on the
map screen.
2 Route Line P. 82
The following items are available:
• Route Pref.: Changes the route preferences (calculating method).
2 Changing the Route Preference P. 78
• View Routes: Displays three different routes.
2 Viewing the Routes P. 78
• Destination Map: Displays a map of the destination.
2 Calculating the Route on the Destination Map P. 79
2. Follow the route guidance to your
destination.
2 Driving to Your Destination P. 80
The system provides you with
pop-up messages if your route
passes through unverified areas,
avoid areas, or areas with traffic
restrictions.
1 Calculating the Route
The current route preferences are displayed as
icons on the top right of the Calculate Route
screen. The straight line distance (as the crow
flies, not driving distance) and direction to the
destination are shown.
You cannot use voice commands while the
system is calculating the route.
Add to Address Book
You can add the destination address to the
address book.
2 Adding an Address Book Entry P. 32
Add to My Dest.
You can add the address to the destination list.
2 Editing My Destination P. 105
Call
You can place a telephone call to the destination
phone number.
2 Bluetooth® HandsFreeLink® P. 138
FIT_KA-31TK6830.book 77 ページ 2011年7月4日 月曜日 午後2時45分
QRG
Index
Home
TOC
2013 Fit Navigation

78
Calculating the Route
Changing the Route Preference
Navigation
Changing the Route Preference
Change the route preference by selecting minimum or maximum driving methods.
1. Select MIN or MAX for each item.
2. Select OK
.
Viewing the Routes
View three different routes to your destination.
1. Select a route on the list.
The travel distance and
estimated travel time is
displayed for each route.
The system calculates and
displays the route line on the
map screen.
2 Route Line P. 82
2. Select OK.
1 Changing the Route Preference
The calculated route may not be the route you
would choose. For safety reasons, the system
generally applies the following rules to your
route:
• Shortcuts through residential areas are
avoided.
• Right turns are favored over left turns or U-
turns.
• Time-restricted turns (turns prohibited at
certain times of the day) are not used.
1 Viewing the Routes
It is not unusual for some calculated route
options to be identical.
FIT_KA-31TK6830.book 78 ページ 2011年7月4日 月曜日 午後2時45分
QRG
Index
Home
TOC
2013 Fit Navigation

79
Calculating the Route
Calculating the Route on the Destination Map
Navigation
Calculating the Route on the Destination Map
Calculate the route from the map of the destination address.
Select Calculate the Route.
The system calculates and displays
the route line on the map screen.
2 Route Line P. 82
1 Calculating the Route on the Destination Map
d “Display Destination Map” (when en route)
FIT_KA-31TK6830.book 79 ページ 2011年7月4日 月曜日 午後2時45分
QRG
Index
Home
TOC
2013 Fit Navigation

80
Navigation
Driving to Your Destination
This section describes how to follow the route guidance to your destination, and
choose the icons displayed on the map screen.
Viewing the Route
After calculating the route to your
destination, the route is displayed on
the map screen.
2 Map Screen Legend P. 7
As you drive, the system tracks your
position on the map in real time and
provides guidance as you approach
each guidance point on the route.
■ Map Screen
1 Viewing the Route
d “Display Map”
You can change the map scale using voice
control commands (e.g., say d “Display 2 mile
scale”).
2 Map Scale Commands P. 185
You can also change the map scale by using the
ZOOM button.
You can control the icons displayed on the map
screen using voice control commands (e.g., say
d “Display post office”).
2 Map Display Commands P. 184
You can obtain information about the route
using voice control commands (e.g., say d
“How long to the destination?”).
2 Route Commands P. 186
You can display the next guidance point on the
map screen by saying d “Display Map Guide”
(when en route).
If you scroll the map while en route, the time and
distance to destination indicators are replaced
with an indicator showing distance from the
current vehicle position.
The map screen can be viewed in single-screen or
split-screen mode.
2 Guidance Mode P. 90
FIT_KA-31TK6830.book 80 ページ 2011年7月4日 月曜日 午後2時45分
QRG
Index
Home
TOC
2013 Fit Navigation

81
Driving to Your Destination
Viewing the Route
Navigation
The guidance screen offers an alternative way to view your route.
In single-screen mode, press the
MAP/GUIDE button to switch
between the map and guidance
screens.
In split-screen mode, press the
MAP/GUIDE button to switch
between the next guidance
direction and a list of guidance
directions.
■ Guidance Screen
1 Guidance Screen
A visual guide helps you check the guidance
screen.
2 Guidance Screen P. 8
Continued
FIT_KA-31TK6830.book 81 ページ 2011年7月4日 月曜日 午後2時45分
QRG
Index
Home
TOC
2013 Fit Navigation
82
Driving to Your Destination
Viewing the Route
Navigation
When driving on verified streets, the route line is light blue. The route line display
changes when driving on unverified streets:
If Unverified Area Routing is Off,
the route line uses verified streets
only (when possible). A dotted
“vector line” pointing directly
towards your destination is also
displayed.
If Unverified Area Routing is On,
the route line changes to a dashed
blue-pink line to indicate that the
route line uses unverified streets.
■ Route Line
1 Route Line
You can set Unverified Area Routing to Off to
follow your own route to the destination. If
Unverified Area Routing is On, be aware that
unverified streets may not be displayed
accurately.
2 Unverified Area Routing P. 42
You can always view the entire route by simply
saying d “Display entire route.”
Vector line (dotted)
Blue-pink route line
FIT_KA-31TK6830.book 82 ページ 2011年7月4日 月曜日 午後2時45分
QRG
Index
Home
TOC
2013 Fit Navigation

83
Driving to Your Destination
Viewing the Route
Navigation
If you leave the calculated route, the system automatically recalculates a route to the
desired destination based on your current location and direction.
2 Rerouting P. 41
If you leave all mapped (digitized) roads, the system automatically starts displaying a
series of dots (breadcrumbs) to track the path you are taking. If needed, you can
follow the dots back to the mapped road you originally left.
2 Off-road Tracking P. 51
■ Deviating From the Planned Route
1 Deviating From the Planned Route
If Rerouting is set to Manual and you go off
route, the system waits for you to manually
initiate recalculation. Select Recalc.
2 Rerouting P. 41
■ Driving Off-road
1 Driving Off-road
A message “Not on a digitized road” may appear
when you drive half a mile away from a mapped
road.
Breadcrumbs may occasionally be displayed in
urban areas, such as large parking lots in
shopping malls, in new subdivisions where the
roads are not yet in the database, or in areas
where a GPS signal is unavailable, such as in a
parking garage.
Off-road tracking breadcrumbs are limited to
approximately 150 miles. Breadcrumbs at the
beginning of the trail are deleted if you exceed
that distance.
Breadcrumbs are displayed only at 1/20, 1/8, 1/4,
and 1/2 mile map scales.
FIT_KA-31TK6830.book 83 ページ 2011年7月4日 月曜日 午後2時45分
QRG
Index
Home
TOC
2013 Fit Navigation

84
Driving to Your Destination
Listening to Voice Guidance
Navigation
Listening to Voice Guidance
H MAP MENU (on map)
VOICE
As you approach each guidance point, a pop-up window is displayed on the map
screen with instructions for you to follow. Voice guidance for each guidance point is
also provided.
Typically, you hear three prompts:
• 1/2 mile from the guidance point (2 miles on freeway)
• 1/4 mile from the guidance point (1.2 miles on freeway)
• Just before the guidance point
To replay voice guidance, select VOICE on the map menu.
If you select VOICE on the map menu between guidance points, voice guidance for
the next guidance point is provided.
1 Listening to Voice Guidance
d “Voice” (on the map screen)
You can turn voice guidance off if you prefer.
2 Display and Volume Settings P. 22
When driving in unverified areas, the phrase “if
possible” is inserted before each voice guidance
prompt.
VOICE on the map menu may be grayed out if
the vehicle is approaching or is in an unverified
area with Unverified Area Routing set to Off.
The timing of voice guidance varies depending
on the type of road you are on and the distance
to the next guidance point.
FIT_KA-31TK6830.book 84 ページ 2011年7月4日 月曜日 午後2時45分
QRG
Index
Home
TOC
2013 Fit Navigation

85
Navigation
Map Menu
Displaying the Map Menu
Use the Map Menu to control the icons displayed on the screen. You can also use
the Map Menu to find locations or to cancel the route.
1. On the map screen, select MAP
MENU (if displayed).
The Map Menu is displayed on
the map screen.
2. Select an item.
The following items are available:
• Cancel Route: Cancels your current route.
2 Canceling the Route P. 100
• Show icon on Map: Selects the icons to display on the map.
2 Showing Icons on the Map P. 92
• Map Legend: Displays an overview of the map features.
2 Map Legend P. 94
1 Map Menu
If you scroll the map while en route, press the
MAP/GUIDE (or CANCEL/BACK) button to return
to the current position map screen, then select
MAP MENU.
Continued
FIT_KA-31TK6830.book 85 ページ 2011年7月4日 月曜日 午後2時45分
QRG
Index
Home
TOC
2013 Fit Navigation

86
Map Menu
Displaying the Map Menu
Navigation
• Guidance Menu: Allows you to set or confirm the guidance points and freeway
exits for your route.
2 Guidance Menu P. 87
• Find Nearest…: Allows you to find the nearest place/landmark (e.g., nearest gas
station) by specifying a category. You can then add the location to the list of
destinations, set as a waypoint, or set as your destination.
2 Changing Your Destination P. 106
• Exit Info: Displays a list of the freeway exits.
2 Freeway Exit Information P. 89
FIT_KA-31TK6830.book 86 ページ 2011年7月4日 月曜日 午後2時45分
QRG
Index
Home
TOC
2013 Fit Navigation

87
Map Menu
Guidance Menu
Navigation
Guidance Menu
H MAP MENU (on map)
Guidance Menu
Display the guidance points and freeway exits for your route, and set the display
mode for the map and guidance screens.
Select an item.
The following items are available:
• Directions: Displays a list of the guidance points.
2 Directions P. 88
• Guidance Mode: Selects the guidance display mode.
2 Guidance Mode P. 90
FIT_KA-31TK6830.book 87 ページ 2011年7月4日 月曜日 午後2時45分
QRG
Index
Home
TOC
2013 Fit Navigation

88
Map Menu
Guidance Menu
Navigation
H MAP MENU (on map)
Guidance Menu
Directions
Display a list of the guidance points on your route for your confirmation.
Select R or U to scroll through the
list.
Press the MAP/GUIDE button to
return to the map screen.
■ Directions
1 Directions
Guidance points with exit information are
indicated by a (freeway exit information)
icon. Select Exit Information to display the exit
information.
2 Freeway Exit Information P. 89
The route guidance information is automatically
deleted when you reach your destination.
FIT_KA-31TK6830.book 88 ページ 2011年7月4日 月曜日 午後2時45分
QRG
Index
Home
TOC
2013 Fit Navigation

89
Map Menu
Guidance Menu
Navigation
H MAP MENU (on map)
Exit Info.
Display a list of the freeway exits for the route. You can view freeway exit
information (whether the exit is near gas stations, restaurants, ATMs, etc.) and add
new destinations or waypoints to the calculated route.
1. Select an exit from the list.
2. Select a list item.
Select C or X to display
information for different exits.
The location is displayed on the
Calculate Route screen.
2 Calculating the Route P. 77
■ Freeway Exit Information
1 Freeway Exit Information
d “Display Freeway Exit Information”
You can scroll the map and select a (freeway
exit information) icon on the map screen to
display the freeway exit information. The
icon is only displayed if there is exit information
available.
Icons are displayed only at 1/4, 1/2, or 1 mile
scale.
2 Showing Icons on the Map P. 92
The route guidance information is automatically
deleted when you reach your destination.
FIT_KA-31TK6830.book 89 ページ 2011年7月4日 月曜日 午後2時45分
QRG
Index
Home
TOC
2013 Fit Navigation

90
Map Menu
Guidance Menu
Navigation
H MAP MENU (on map)
Guidance Menu
Guidance Mode
Select the display mode during route guidance: single-screen mode (default) or split-
screen mode.
Select an option.
The following options are available:
• Single Screen: Displays the map and guidance screens on separate screens.
■ Guidance Mode
1 Guidance Mode
The guidance mode can also be selected from
the System Setup menu.
2 Routing & Guidance P. 40
Map screen
Press the
MAP/GUIDE
button
Guidance screen
Press the
MAP/GUIDE
button
Press the
MAP/GUIDE
button
Directions list screen
FIT_KA-31TK6830.book 90 ページ 2011年7月4日 月曜日 午後2時45分
QRG
Index
Home
TOC
2013 Fit Navigation
91
Map Menu
Guidance Menu
Navigation
• Split Screen: Displays the map and guidance information simultaneously on the
map screen.
1 Guidance Mode
Next guidance point
The next guidance point (the pop-up window) is
displayed on the map screen as you approach a
guidance point in the single-screen mode.
Next guidance point
Press the
MAP/GUIDE
button
Press the
MAP/GUIDE
button
Guidance direction list
Press the
MAP/GUIDE
button
Directions list screen
FIT_KA-31TK6830.book 91 ページ 2011年7月4日 月曜日 午後2時45分
QRG
Index
Home
TOC
2013 Fit Navigation

92
Map Menu
Showing Icons on the Map
Navigation
Showing Icons on the Map
H MAP MENU (on map)
Show icon on Map
The icon bar along the bottom of the screen allows you to select the icons that are
displayed on the map.
Select an icon in the icon bar.
Selecting toggles the icon display
on or off.
Repeat the procedure as necessary.
The following options are available:
• Icon check boxes: Displays or hides the landmark icons.
2 Map Screen Legend P. 7
• ALL OFF: Hides all icons.
• Icon Options: Fine-tunes the icon display.
2 Fine-tuning the Icons P. 93
1 Showing Icons on the Map
You can display or hide the icons using voice
commands on the map screen (e.g., say d
“Display hospital”).
2 Map Display Commands P. 184
FIT_KA-31TK6830.book 92 ページ 2011年7月4日 月曜日 午後2時45分
QRG
Index
Home
TOC
2013 Fit Navigation

93
Map Menu
Showing Icons on the Map
Navigation
H MAP MENU (on map)
Show Icon on Map
Icon Options
Icons in some categories can be fine-tuned to display or hide.
1. Select an icon category from the list
(e.g., Other Icons).
2. Select the icons to display on the
map.
Selecting toggles the icon
display on or off.
Repeat the procedure as
necessary.
3. Select OK.
■ Fine-tuning the Icons
1 Fine-tuning the Icons
To display the “Other Icons,” be sure to turn on
OTHER ICON in the icon bar.
FIT_KA-31TK6830.book 93 ページ 2011年7月4日 月曜日 午後2時45分
QRG
Index
Home
TOC
2013 Fit Navigation

94
Map Menu
Map Legend
Navigation
Map Legend
H MAP MENU (on map)
Map Legend
See an overview of the map lines, areas, routes, and navigation icons.
Select an item.
The system displays the map
legend.
1 Map Legend
A visual guide helps you see the map legend.
2 Map Screen Legend P. 7
FIT_KA-31TK6830.book 94 ページ 2011年7月4日 月曜日 午後2時45分
QRG
Index
Home
TOC
2013 Fit Navigation

95
Map Menu
Map Legend
Navigation
The functions that are available from the map screen depend on the map scale.
■ Map Scale and Functions
Function page
Map Scale (top: mile, bottom: metric)
1/20 1/8 1/4 1/2 1 2 5 15 50 150 350 1000
80 200 400 800 1.6 3 8 24 80 240 560 1600
Icon display
Landmark icon 7 ✔ ✔
Exit info. 7 ✔ ✔ ✔
One-way traffic 7 ✔
Waypoint
“flag”
8 ✔ ✔ ✔ ✔ ✔ ✔ ✔ ✔ ✔ ✔ ✔ ✔
Map orientation
Heading-up 97 ✔ ✔ ✔ ✔ ✔
North-up 97 ✔ ✔ ✔ ✔ ✔ ✔ ✔ ✔ ✔ ✔ ✔ ✔
Others
Off-road
tracking dots
83 ✔ ✔ ✔ ✔
Unverified road 7 ✔ ✔ ✔ ✔ ✔ ✔
Map features 7 ✔ ✔ ✔ ✔ ✔ ✔ ✔ ✔ ✔ ✔ ✔
Avoid areas 44 ✔ ✔ ✔
1 Map Scale & Functions
You can change the map scale using voice
commands on the map screen (e.g., say d
“Display 2 mile scale”).
2 Map Scale Commands P. 185
You can change between miles or kilometers.
2 Basic Settings P. 24
FIT_KA-31TK6830.book 95 ページ 2011年7月4日 月曜日 午後2時45分
QRG
Index
Home
TOC
2013 Fit Navigation
96
Map Menu
Map Legend
Navigation
Display or hide all icons on the map screen, with the exception of Honda/Acura
Dealer icons which are always shown.
■ Landmark icon
■ Map Icons and Functions
Type
Icon display
control
Icon
selectable
Icon
searchable
Honda/Acura dealer Always on Yes Yes
Hospital Yes Yes Yes
School Yes Yes Yes
ATM Yes Yes Yes
Gas station Yes Yes Yes
Restaurants Yes Yes Yes
Post office Yes Yes Yes
Grocery store Yes Yes Yes
Hotel/Lodging Yes Yes Yes
Police station No icon No Yes
Shopping, Tourist attraction, Bank No icon No Yes
Parking garage Yes Yes Yes
Parking lot Yes Yes Yes
Freeway exit info. Yes Yes No
1 Map Icons & Functions
You can display or hide the icons using voice
commands on the map screen (e.g., say d
“Display hospital”).
2 Map Display Commands P. 184
Some icons, like police stations, are not shown,
but you can still locate the nearest one with the
Find Nearest voice command (e.g., say d “Find
nearest police station”).
2 Find Place Commands P. 185
Icon display control
Icons that can be displayed or hidden.
Icon selectable
Icons that can be selected as a destination using
the joystick.
Icon searchable
Icons that can be searched using the d Find
Nearest voice command.
FIT_KA-31TK6830.book 96 ページ 2011年7月4日 月曜日 午後2時45分
QRG
Index
Home
TOC
2013 Fit Navigation
97
Map Menu
Map Legend
Navigation
Select the map orientation icon to change the map orientation.
■ Map Orientation
1 Map Orientation
d “Display Heading-up” (from map screen), d
“Display North-up” (from map screen)
The red arrow in the symbol always points North.
On scales greater than 1 mile, North-up mode is
always used.
Map orientation icon
North-up: Displays the map with
North always pointing up.
Map orientation icon
Heading-up: Displays the map
so that the direction you are
traveling is always pointing up.
Select
Select
FIT_KA-31TK6830.book 97 ページ 2011年7月4日 月曜日 午後2時45分
QRG
Index
Home
TOC
2013 Fit Navigation

98
Map Menu
Map Legend
Navigation
Display and save your current location for future use as a destination. The address,
latitude, longitude, and elevation of your current location are displayed.
■ To save your current location in the address book:
1. Select the vehicle icon on the map.
2. Select Save.
3. Edit the name, phone number, and
category.
2 Address Book P. 31
4. Select OK.
■ Current Location
1 Current Location
d “Display Current Location” (on map screen)
You can also save the current location by saying
d “Register the Current Location”.
If you have PIN-protected your address book,
enter your PIN when prompted. Select OK. PINs
are optional.
2 PIN Numbers P. 37
The elevation is not displayed if the system is
receiving insufficient GPS information. When
elevation is displayed, it may differ with roadside
elevation signs by ±100 feet or more.
Saving your current location does not change or
cancel your current route.
FIT_KA-31TK6830.book 98 ページ 2011年7月4日 月曜日 午後2時45分
QRG
Index
Home
TOC
2013 Fit Navigation

99
Navigation
Changing Your Route
H DEST button (when en route)
This section describes how to alter your route, add an interim “waypoint” (pit stop),
choose a different destination, cancel your current destination, and continue your
trip after stopping.
Select an item.
The following items are available:
• Cancel Route: Cancels the route guidance.
2 Canceling the Route P. 100
• Detour: Calculates a detour route.
2 Taking a Detour P. 100
• Avoid Streets: Avoids streets along your route.
2 Avoiding Streets P. 100
• Change Route Pref.: Changes the route preferences (calculating method).
2 Changing the Route Preference P. 78
• Waypoint: Sets waypoints along your route.
2 Adding Waypoints from the Route Menu P. 102
• My Destination: Shows a list of waypoints. You can delete waypoints or edit the
order of them.
2 Editing My Destination P. 105
1 Changing Your Route
d “Display Menu”, d “Display Navigation”
(when en route)
If you press the DEST button when not en route,
the Destination Menu screen is displayed.
2 Entering a Destination P. 56
FIT_KA-31TK6830.book 99 ページ 2011年7月4日 月曜日 午後2時45分
QRG
Index
Home
TOC
2013 Fit Navigation

100
Changing Your Route
Canceling the Route
Navigation
Canceling the Route
H DEST button (when en route)
Cancel Route
Cancel the route guidance and remove the destination and all waypoints from the
destination list. The system then returns to the map screen.
Taking a Detour
H DEST button (when en route)
Detour
Calculate a detour route manually. The system attempts to calculate a new route by
avoiding the next 5 miles (while on a freeway) or 1 mile (while on a surface street).
Avoiding Streets
H DEST button (when en route)
Avoid Streets
Select a street or streets along your route to avoid.
1. Select the street you want to avoid.
Repeat the procedure to avoid
other streets.
Streets to be avoided are
indicated with a trash icon.
1 Canceling the Route
You can also cancel your route from the Map
Menu.
2 Map Menu P. 85
1 Taking a Detour
The detour option is convenient if you encounter
an unexpected obstacle such as a road closure or
extremely heavy traffic congestion.
1 Avoiding Streets
Avoiding certain streets is convenient if you
know of road construction, road closures, or
excessive traffic along the route.
You cannot choose specific streets you want to
use, only those to avoid. However, you can select
intersections or waypoints (places/landmarks)
that the system will use in your route.
2 Adding Waypoints P. 101
You can store up to 10 streets to avoid. You
cannot avoid your current street or the streets of
your waypoint(s) or destination (system beeps if
selected).
FIT_KA-31TK6830.book 100 ページ 2011年7月4日 月曜日 午後2時45分
QRG
Index
Home
TOC
2013 Fit Navigation

101
Changing Your Route
Adding Waypoints
Navigation
2. Select OK.
The system calculates a new
route.
Adding Waypoints
Add up to four waypoints (pit stops) along the route to your destination.
Waypoints are displayed on the map
screen as small, numbered red flags.
The route follows the waypoints in
the order they are listed in the
destination list.
1 Adding Waypoints
Waypoints allow you to stop for gas or food, for
example, and then continue on to your
destination.
Press the MAP/GUIDE button to return to the
map screen without adding a waypoint at any
time.
The search corridor used for adding waypoints
can be adjusted.
2 Edit Waypoint Search Area P. 46
You can delete waypoints or edit the order of
waypoints in the destination list.
2 Editing My Destination P. 105
FIT_KA-31TK6830.book 101 ページ 2011年7月4日 月曜日 午後2時45分
QRG
Index
Home
TOC
2013 Fit Navigation
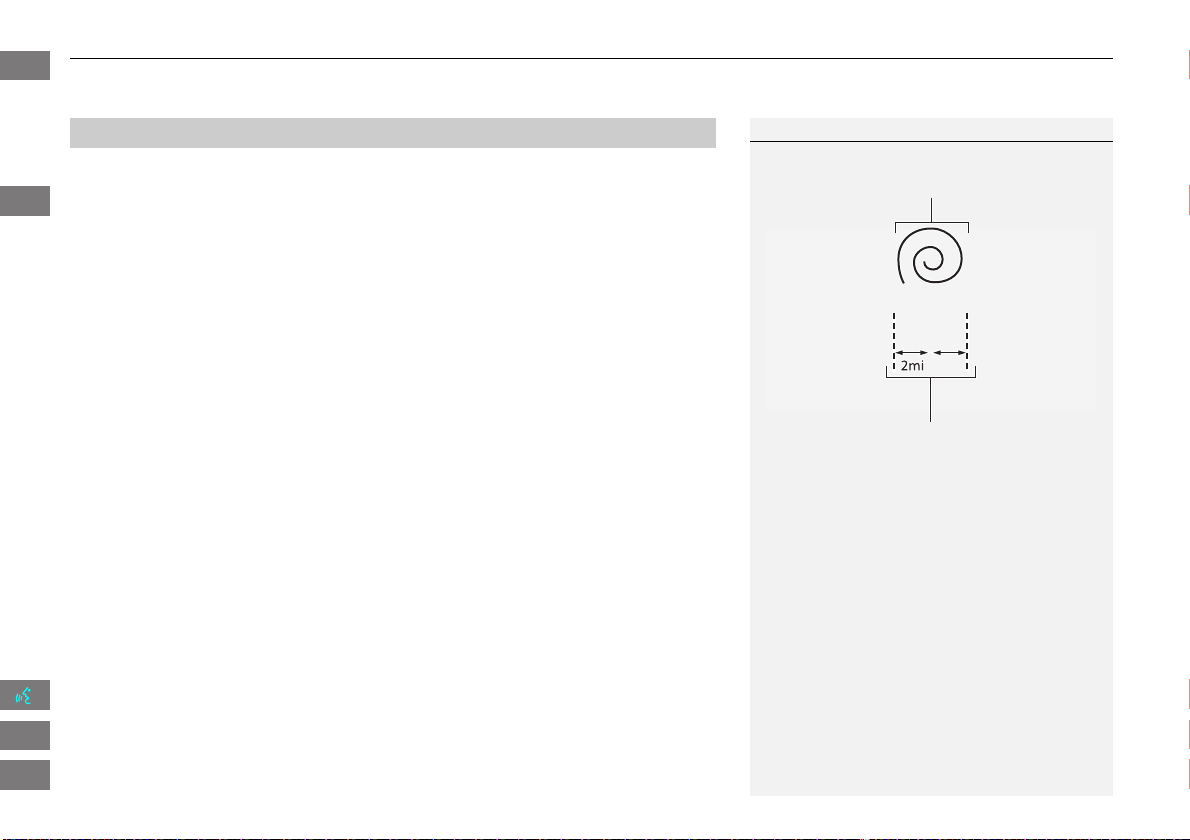
102
Changing Your Route
Adding Waypoints
Navigation
H DEST button (when en route)
Waypoint
1. Select a search method to add a
waypoint.
The following items are available:
• Places Along the Route: Searches within a “corridor” on either side of the
route.
• Places Around the Destination: Searches in a spiral pattern around the
destination.
• Places Around the Waypoint: Searches in a spiral pattern around the location
you select.
2. Select the location when you select
Places Around the Waypoint.
■ Adding Waypoints from the Route Menu
1 Adding Waypoints
Search method
The search corridor used for adding waypoints
can be adjusted.
2 Edit Waypoint Search Area P. 46
“Search around” method
“Search along” method
FIT_KA-31TK6830.book 102 ページ 2011年7月4日 月曜日 午後2時45分
QRG
Index
Home
TOC
2013 Fit Navigation

103
Changing Your Route
Adding Waypoints
Navigation
3. Select a waypoint category (e.g.,
Auto Service).
4. Select a waypoint subcategory
(e.g., GAS STATION).
5. Select a place.
The waypoint is added to the
destination list.
The route is automatically
recalculated and displayed on
the map screen.
FIT_KA-31TK6830.book 103 ページ 2011年7月4日 月曜日 午後2時45分
QRG
Index
Home
TOC
2013 Fit Navigation

104
Changing Your Route
Adding Waypoints
Navigation
1. Select a new address or location.
2. Select ADD TO My Dest.
3. Select R or U to select a location
in the destination list. Select OK.
4. Select OK.
The route is automatically
recalculated and displayed on
the map screen.
■ Adding Waypoints from the Calculate Route Screen
FIT_KA-31TK6830.book 104 ページ 2011年7月4日 月曜日 午後2時45分
QRG
Index
Home
TOC
2013 Fit Navigation

105
Changing Your Route
Editing My Destination
Navigation
Editing My Destination
H DEST button (when en route)
My Destination
Delete or edit the order of waypoints.
1. Select Edit.
Select Map to display the
destination and waypoints on
the map screen.
2. Select an item.
3. Select OK.
The route is automatically
recalculated and displayed on
the map screen.
The following items are available:
• Delete: Select a list item to delete.
• Edit Order: Select a list item to move, select R or U to select a new location.
FIT_KA-31TK6830.book 105 ページ 2011年7月4日 月曜日 午後2時45分
QRG
Index
Home
TOC
2013 Fit Navigation

106
Navigation
Changing Your Destination
There are several methods you can use to change the route destination.
Find Nearest Place
H MAP MENU (on map)
Find Nearest…
Search for the nearest place/landmark on the map screen and set it as your
destination.
1. Select Find Nearest….
2. Select a category type.
3. Select a subcategory.
4. Select a place.
5. Select Set as Dest.
6. Select an item to set the place as a
destination or add to the
destination list.
The system calculates the route.
2 Calculating the Route P. 77
1 Find Nearest Place
d “Find Nearest…” (on map screen)
The Find Nearest voice command is the fastest
method of specifying a place/landmark as your
destination. Many kinds of places can be found.
2 Find Place Commands P. 185
FIT_KA-31TK6830.book 106 ページ 2011年7月4日 月曜日 午後2時45分
QRG
Index
Home
TOC
2013 Fit Navigation

107
Changing Your Destination
Selecting a Destination on the Map
Navigation
Selecting a Destination on the Map
Select a new destination when en route by selecting a location on the map.
1. Scroll the map to position the
cursor over your desired
destination, adjusting the map
scale as necessary. Press the ENTER
button.
If the address displayed is not
the desired location, press the
CANCEL/BACK button and
repeat the procedure.
2. Press the ENTER button again.
3. Select a place.
4. Select Set as Dest.
2 Calculating the Route P. 77
1 Selecting a Destination on the Map
If there is more than one icon or street under the
map cursor, you are prompted to select the item
from a list.
• Select an item.
• If you select Map Icon, select a place.
Continued
FIT_KA-31TK6830.book 107 ページ 2011年7月4日 月曜日 午後2時45分
QRG
Index
Home
TOC
2013 Fit Navigation

108
Changing Your Destination
Entering a New Destination
Navigation
5. Select an option.
The route is automatically
recalculated and displayed on
the map screen.
The following options are available:
• Set as New Destination: Sets the location as your new destination.
• Add to My Destination: Sets the location as a new waypoint.
Entering a New Destination
H DEST button (when en route)
DEST Menu 1 or DEST Menu 2
Enter a new destination using the Destination Menu screen even when you are en
route.
1. Select a method to enter a new
destination.
2 Entering a Destination P. 56
After entering a new
destination, the address is
displayed on the Calculate
Route screen.
2. Select Set as Dest.
1 Entering a New Destination
d “Display Menu”, d “Display Navigation”
FIT_KA-31TK6830.book 108 ページ 2011年7月4日 月曜日 午後2時45分
QRG
Index
Home
TOC
2013 Fit Navigation

109
Changing Your Destination
Entering a New Destination
Navigation
3. Select an option.
The route is automatically
recalculated and displayed on
the map screen.
The following options are available:
• Set as New Destination: Sets the location as your new destination.
• Add to My Destination: Sets the location as a new waypoint.
FIT_KA-31TK6830.book 109 ページ 2011年7月4日 月曜日 午後2時45分
QRG
Index
Home
TOC
2013 Fit Navigation

110
Navigation
Resuming Your Trip
Stop your vehicle en route (e.g., to rest, stop for gas, etc.), and then continue on
your route.
If you did not complete your route, the Continue Trip screen is displayed when you
restart your vehicle.
Select OK.
You can continue on the same
route.
• Route Pref.: Changes the route preferences (calculating method).
2 Changing the Route Preference P. 78
• View Routes: Displays three different routes.
2 Viewing the Routes P. 78
• Destination Map: Display a map of the destination.
2 Calculating the Route on the Destination Map P. 79
1 Resuming Your Trip
The Continue Trip screen has the same options
as when you calculate a route.
2 Calculating the Route P. 77
To cancel your destination, press the CANCEL/
BACK button.
Add to Address Book
You can add the destination address to the
address book.
2 Adding an Address Book Entry P. 32
Call
You can place a phone call to the destination
phone number.
2 Bluetooth® HandsFreeLink® P. 138
FIT_KA-31TK6830.book 110 ページ 2011年7月4日 月曜日 午後2時45分
QRG
Index
Home
TOC
2013 Fit Navigation

111
Audio
This section describes how to operate the audio system. You can play
music from a wide array of media sources, and control the audio system
using the audio buttons, the touch screen, or voice control.
Audio System ........................................ 112
About Your Audio System.................... 112
Auxiliary Input Jack .............................. 112
System Theft Protection ....................... 113
Playing FM/AM Radio........................... 114
Selecting FM/AM Mode........................ 114
Audio Screen Control........................... 115
Audio Menu ........................................ 116
Radio Data System (RDS)...................... 117
Playing a Disc ........................................ 119
Selecting Disc Mode............................. 119
Audio Screen Control........................... 120
Playing MP3/WMA/AAC Discs .............. 121
Recommended Discs ............................ 122
Playing an iPod® ...................................123
Selecting iPod® Mode ..........................124
Audio Screen Control............................125
Searching for Music ..............................126
Playing a USB Flash Drive .....................127
Selecting USB Mode..............................128
Audio Screen Control............................129
Playing Tracks in Folders........................130
Playing Bluetooth® Audio ....................131
Selecting Bluetooth® Audio Mode........131
Switching to HFL Mode.........................132
Audio Screen Control............................133
Adjusting the Sound............................. 134
Audio Remote Controls ........................ 135
Steering Wheel Controls ...................... 135
FIT_KA-31TK6830.book 111 ページ 2011年7月4日 月曜日 午後2時45分
QRG
Index
Home
2013 Fit Navigation
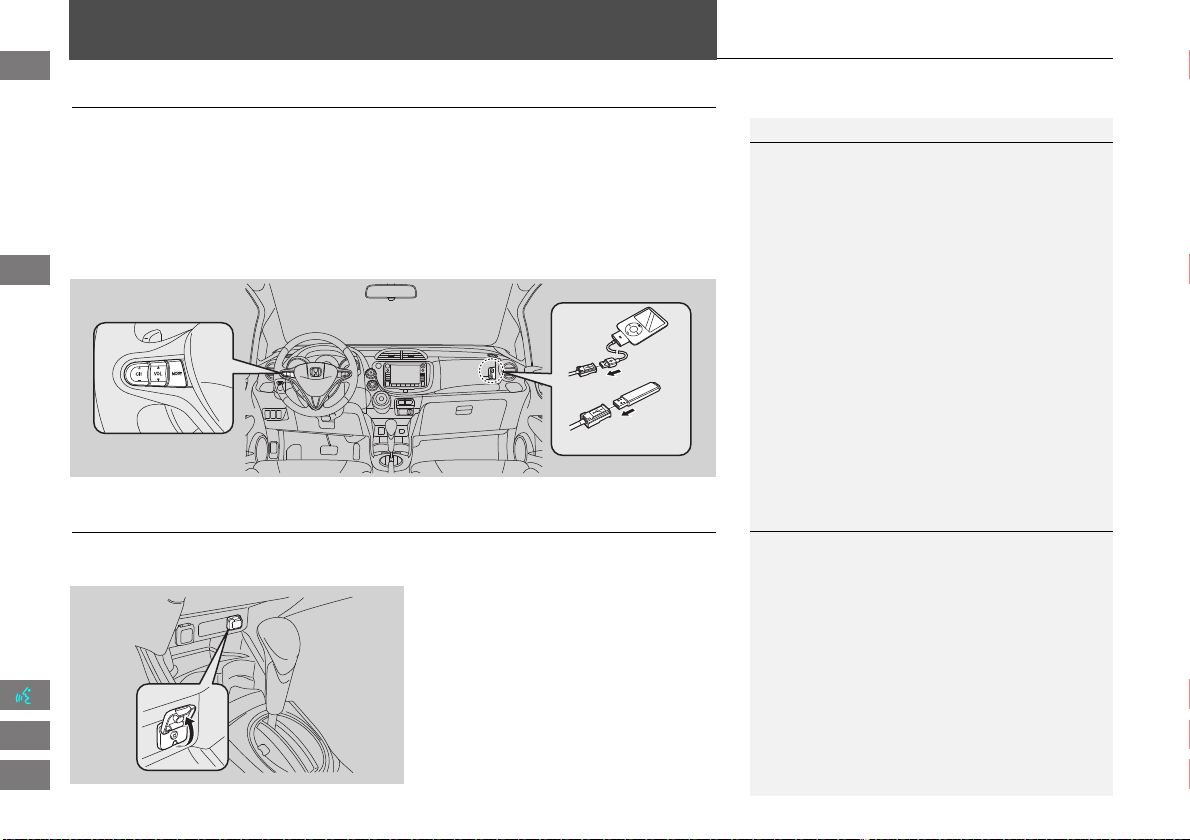
112
Audio
Audio System
About Your Audio System
The audio system features FM/AM radio. It can also play audio discs, WMA/MP3/
AAC tracks, iPods®, USB flash drives, and Bluetooth® devices.
The audio system is operable from the buttons and switches on the panel, or the
remote controls on the steering wheel.
2 Audio Remote Controls P. 135
2 Audio System P. 6
Auxiliary Input Jack
Use the jack in the console compartment to connect standard audio devices.
1. Open the AUX cover.
2. Connect a standard audio device to
the input jack using a 1/8 inch/3.5
mm stereo miniplug.
The audio system automatically
switches to the AUX mode.
1 About Your Audio System
Video CDs, DVDs, and 3-inch/8-cm mini discs are
not supported.
Do not leave the iPod® or USB flash drive in the
vehicle. Direct sunlight and high temperatures
may damage it.
iPod® is a registered trademark owned by Apple
Inc.
You can operate the audio system by voice
commands.
2 Audio Commands P. 186
Remote Control
iPod®
USB Flash
Memory
1 Auxiliary Input Jack
To switch the mode, press any of the other audio
mode buttons. You can return to the AUX mode
by pressing the AUX button.
FIT_KA-31TK6830.book 112 ページ 2011年7月4日 月曜日 午後2時45分
QRG
Index
Home
TOC
2013 Fit Navigation

113
Audio System
System Theft Protection
Audio
System Theft Protection
The system is disabled when it is disconnected from the power source, such as when
the battery is disconnected or goes dead.
■ Reactivating the system
1. Turn the ignition switch to ON (II), and turn on the system.
If you turn the ignition switch to ACCESSORY (I), you will be requested to enter
the security code. See step 3.
2. Press and hold the VOL 9 (Volume/Power) button again for more than two
seconds.
The system is reactivated when the system’s control unit recognizes that the
system is in your vehicle.
If the control unit fails to recognize, “ENTER CODE” appears on the navigation
screen.
3. Enter the security code. If you do not enter the code correctly after 10 tries, leave
the system for one hour before trying again, or visit a dealer to have the system
reset.
1 System Theft Protection
Find the audio system’s security code and serial
number label in your Owner’s Manual kit.
Do not store the label in your vehicle. If you lose
the label, you must first retrieve the serial
number, and then obtain the code from a dealer.
U.S. Only
You can register the security code at Owner Link
(owners.honda.com.). To find information on
how to retrieve the serial number and obtain the
code, visit radio-navicode.honda.com.
2 Entering the Security Code P. 172
FIT_KA-31TK6830.book 113 ページ 2011年7月4日 月曜日 午後2時45分
QRG
Index
Home
TOC
2013 Fit Navigation
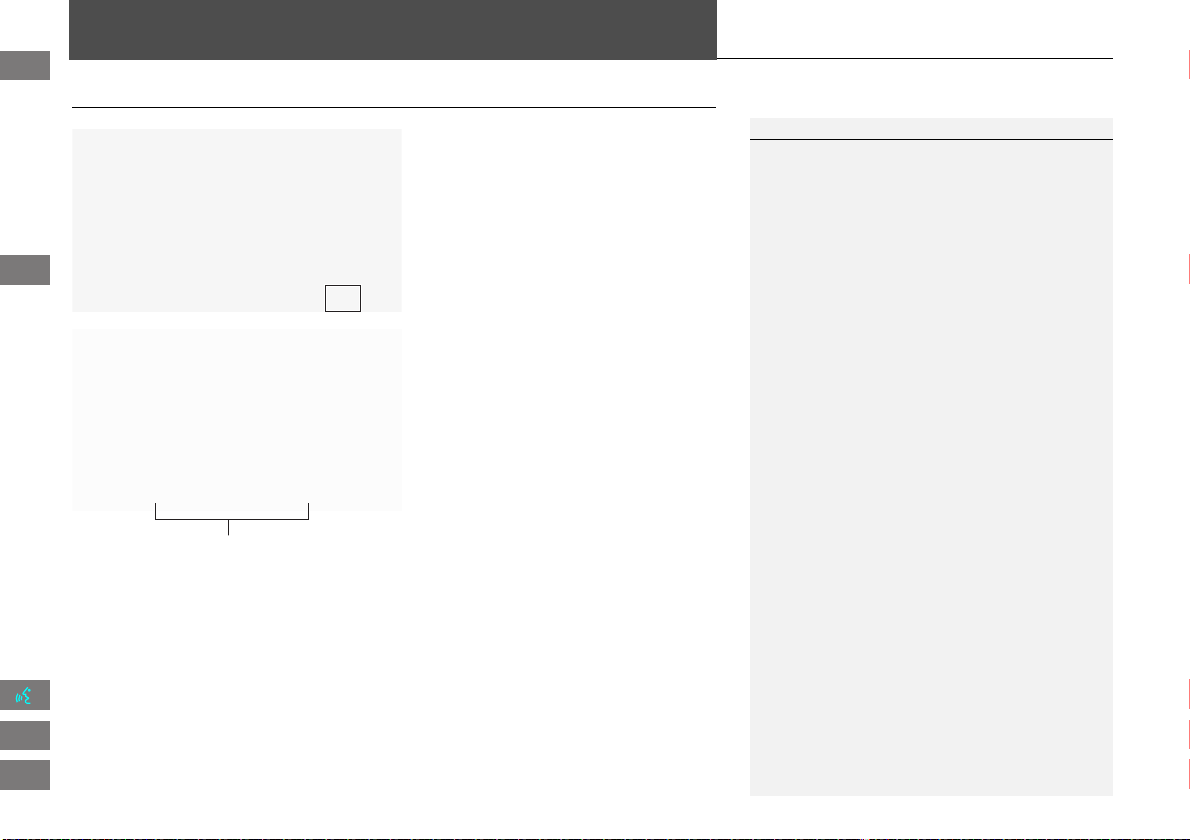
114
Audio
Playing FM/AM Radio
Selecting FM/AM Mode
1. Press the FM/AM button.
Press the FM/AM button again,
if necessary, to select the
frequency band (FM1, FM2,
AM).
The band and frequency are
displayed.
2. Select AUDIO/STREET until
AUDIO is highlighted in blue.
The preset keys are displayed at
the bottom of the screen.
The audio information is
displayed at the bottom of the
screen.
3. Select the preset key.
You can also select a station
using the SEEK/SKIP button.
1 Playing FM/AM Radio
d “Display audio screen”
You can control the radio using voice
commands.
2 Radio Commands P. 186
A visual guide helps you operate the audio
system.
2 System Controls P. 4
2 Basic Operation P. 6
The ST indicator comes on the display for stereo
FM broadcasts. Stereo reproduction in AM is not
available.
The radio can receive the complete AM and FM
bands:
AM band: 530 to 1710 kHz
FM band: 87.7 to 107.9 MHz
You can store six AM stations and 12 FM stations
in the preset buttons. FM1 and FM2 let you store
six stations each.
Preset keys
FIT_KA-31TK6830.book 114 ページ 2011年7月4日 月曜日 午後2時45分
QRG
Index
Home
TOC
2013 Fit Navigation

115
Playing FM/AM Radio
Audio Screen Control
Audio
Audio Screen Control
H AUDIO button (in FM/AM mode)
Control the audio system through the navigation screen.
1. Select a frequency band (AM,
FM1, or FM2).
2. Select a preset station.
Touch and hold a preset key
until a beep sounds to store the
current station in the key.
The following items are available:
• TUNE: Tunes the radio to the frequency you select. Select b or n to select a
frequency.
• SCAN: Scans for stations with a strong signal in the current band and plays a
Stop to stop scanning and play the current selection.
• AUTO SELECT: Scans and automatically stores up to six AM stations and 12 FM
stations with a strong signal in the preset buttons.
• AUDIO MENU: Sets the RDS options and sound preferences.
• SOURCE: Changes the source mode.
• Open/Close icon: Displays/hides the detailed information.
1 Audio Screen Control
The A.SEL indicator comes on the display when
AUTO SELECT is on. If you do not like the
stations Auto Select has stored, you can change
the frequencies stored in the preset buttons
manually.
Stereo indicatorFrequency band
Preset stations
Open/Close icon
FIT_KA-31TK6830.book 115 ページ 2011年7月4日 月曜日 午後2時45分
QRG
Index
Home
TOC
10-second sample. Select
2013 Fit Navigation

116
Playing FM/AM Radio
Audio Menu
Audio
Audio Menu
H AUDIO button (in FM/AM mode)
AUDIO MENU
Select an item.
The following items are available:
• RDS search: Searches for programs by RDS category.
2 Searching for Programs by RDS Category P. 117
• Radio Text: Displays the text information broadcast by the current RDS station.
2 Radio Text Display P. 118
• RDS INFO: Sets whether to display the RDS Information on the screen.
2 RDS Info Display P. 117
• SOUND: Displays the sound preferences screen.
2 Adjusting the Sound P. 134
FIT_KA-31TK6830.book 116 ページ 2011年7月4日 月曜日 午後2時45分
QRG
Index
Home
TOC
2013 Fit Navigation

117
Playing FM/AM Radio
Radio Data System (RDS)
Audio
Radio Data System (RDS)
Provides text data information related to your selected RDS-capable FM station.
When RDS INFO is set to ON, the name of the FM station is displayed. When set to
OFF, the frequency of the station is displayed.
H AUDIO button (in FM/AM mode)
AUDIO MENU
RDS search
Search for FM stations with a strong signal that broadcast the selected RDS category
information.
1. Select a search method (Seek up,
Seek down, Scan).
2. Select a category.
Scanning for stations in that
category begins. When an RDS
station is found, it begins to
play.
If there are no RDS-capable
stations in the area, “NOTHING”
briefly appears on the display.
■ RDS Info Display
■ Searching for Programs by RDS Category
FIT_KA-31TK6830.book 117 ページ 2011年7月4日 月曜日 午後2時45分
QRG
Index
Home
TOC
2013 Fit Navigation

118
Playing FM/AM Radio
Radio Data System (RDS)
Audio
H AUDIO button (in FM/AM mode)
AUDIO MENU
Radio Text
Display the radio text information of the selected RDS station.
■ Radio Text Display
1 Radio Text Display
The RDS indicator comes on the display when the
selected RDS station is broadcasting text data.
FIT_KA-31TK6830.book 118 ページ 2011年7月4日 月曜日 午後2時45分
QRG
Index
Home
TOC
2013 Fit Navigation
119
Audio
Playing a Disc
Selecting Disc Mode
1. Press the CD/AUX button.
2. Insert a disc into the disc slot.
The disc automatically begins
playing.
3. Select AUDIO/STREET until
AUDIO is highlighted in blue.
The audio information is
displayed at the bottom of the
screen.
4. Select c or x to select a track.
You can also select a track using
the SEEK/SKIP button.
The track number and elapsed
time are displayed on the
display. Text information stored
on MP3/WMA/AAC discs is also
displayed.
1 Playing a Disc
d “Display audio screen”
You can control the disc using voice commands.
2 Disc Commands P. 187
A visual guide helps you operate the audio
system.
2 System Controls P. 4
2 Basic Operation P. 6
In some cases, the name of the artist, album, or
track may not appear correctly.
Do not use discs with adhesive labels. The label
can cause the disc to jam in the unit.
WMA tracks protected by digital rights
management (DRM) cannot be played. The
audio system displays Unplayable File, then skips
to the next track.
If there is a problem, you may see an error
message on the display.
2 Error Messages P. 166
If you eject the disc but do not remove it from
the slot, the system reloads the disc automatically
after several seconds.
Audio control
FIT_KA-31TK6830.book 119 ページ 2011年7月4日 月曜日 午後2時45分
QRG
Index
Home
TOC
2013 Fit Navigation

120
Playing a Disc
Audio Screen Control
Audio
Audio Screen Control
H AUDIO button (in DISC mode)
Control the audio system through the navigation screen.
Select a track.
Select the Folder tab to display the
list of folders on MP3/WMA/AAC
discs having a folder structure.
2 Playing MP3/WMA/AAC Discs
P. 121
The following items are available, depending on the type of disc:
• FOLDER: Select b or n to select a folder on MP3/WMA/AAC discs having a
folder structure.
• SCAN:
S Scan Track: Scans all tracks on the disc (or in the selected folder) in the
order they were recorded (stored) and plays a 10-second sample. Select Stop to
stop scanning and play the current selection.
( Scan Folder: Scans the first track in each folder on the disc and plays a 10-
second sample. Select Stop to stop scanning and play the current selection.
• PLAY MODE:
" Random All: Plays all tracks on the current disc in random order.
# Random in Folder: Plays all tracks in the current folder in random order.
$ Repeat 1 Track: Repeats the current track.
% Repeat 1 Folder: Repeats all tracks in the current folder.
1 Repeat and Random Play
To stop repeat- or random-play, select the
current play mode button again.
Disc mode
Track list
Open/Close icon
FIT_KA-31TK6830.book 120 ページ 2011年7月4日 月曜日 午後2時45分
QRG
Index
Home
TOC
2013 Fit Navigation

121
Playing a Disc
Playing MP3/WMA/AAC Discs
Audio
• SOUND: Displays the sound preferences screen.
2 Adjusting the Sound P. 134
• SOURCE: Changes the source mode.
• Open/Close icon: Displays/hides the detailed information.
Playing MP3/WMA/AAC Discs
H AUDIO button (in DISC mode)
Folder
Change the folder on MP3/WMA/AAC discs that have tracks stored in a folder
structure.
1. Select a folder.
The system displays the track
list.
2. Select a track.
The system begins playing the
selected track.
1 Playing MP3/WMA/AAC Discs
Folder List
• Any tracks not in a folder are automatically
added to a “ROOT” folder, which is displayed
at the top of the Folder List.
• If the root folder has additional folders in a
lower layer, they are listed on the screen.
Back to Current Track: Displays the current
track at the top of the list.
Touch to close the folder.
Touch to open the folder.
Folder list
FIT_KA-31TK6830.book 121 ページ 2011年7月4日 月曜日 午後2時45分
QRG
Index
Home
TOC
2013 Fit Navigation
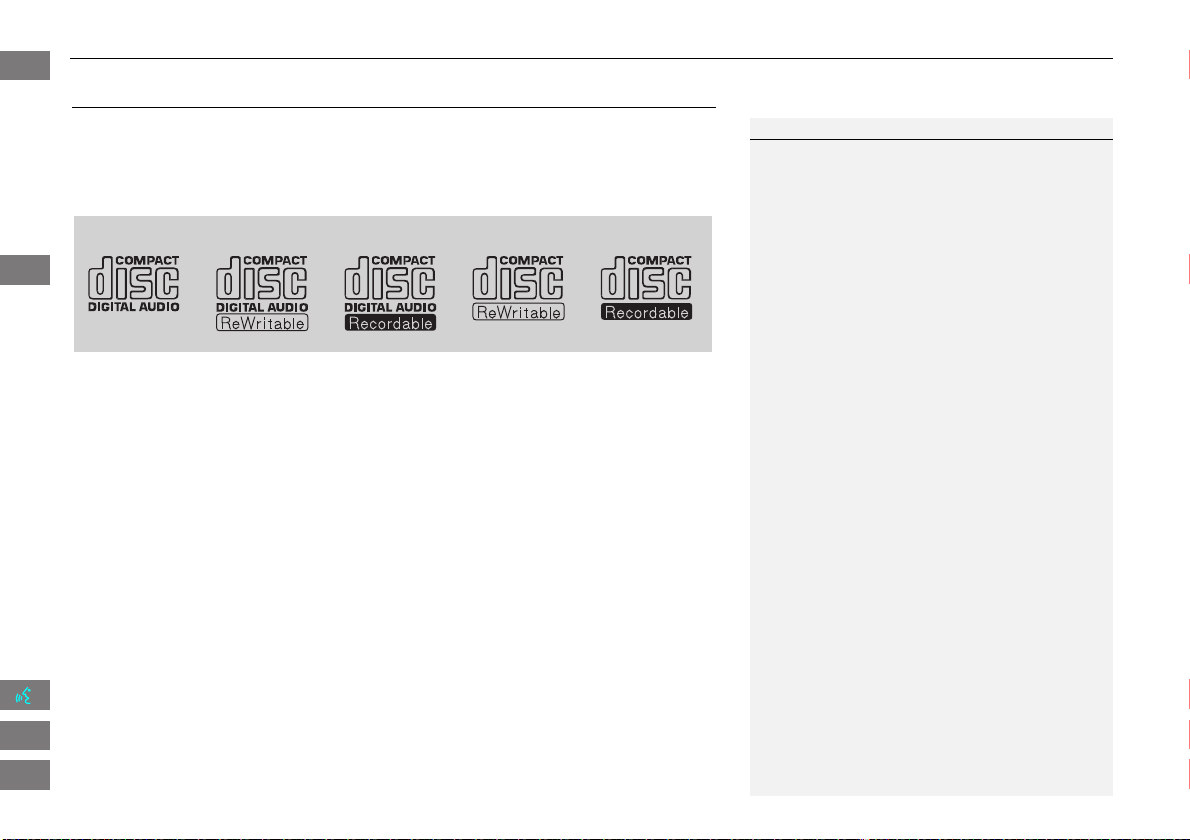
122
Playing a Disc
Recommended Discs
Audio
Recommended Discs
• Use only high-quality CD-R or CD-RW discs labeled for audio use.
• Use only CD-R or CD-RW discs on which the recordings are closed.
• Play only standard round-shaped discs.
■ Discs with MP3, WMA, or AAC Tracks
• Some software files may not allow for audio play or text data display.
• Some versions of MP3, WMA, or AAC formats may be unsupported. If an
unsupported track is found, the audio unit displays Unsupported, and then skips
to the next track.
1 Recommended Discs
A Dual-disc cannot play on this audio unit. If
recorded under certain conditions, a CD-R or CD-
RW may not play either.
The disc packages or jackets should have one of these symbols.
FIT_KA-31TK6830.book 122 ページ 2011年7月4日 月曜日 午後2時45分
QRG
Index
Home
TOC
2013 Fit Navigation
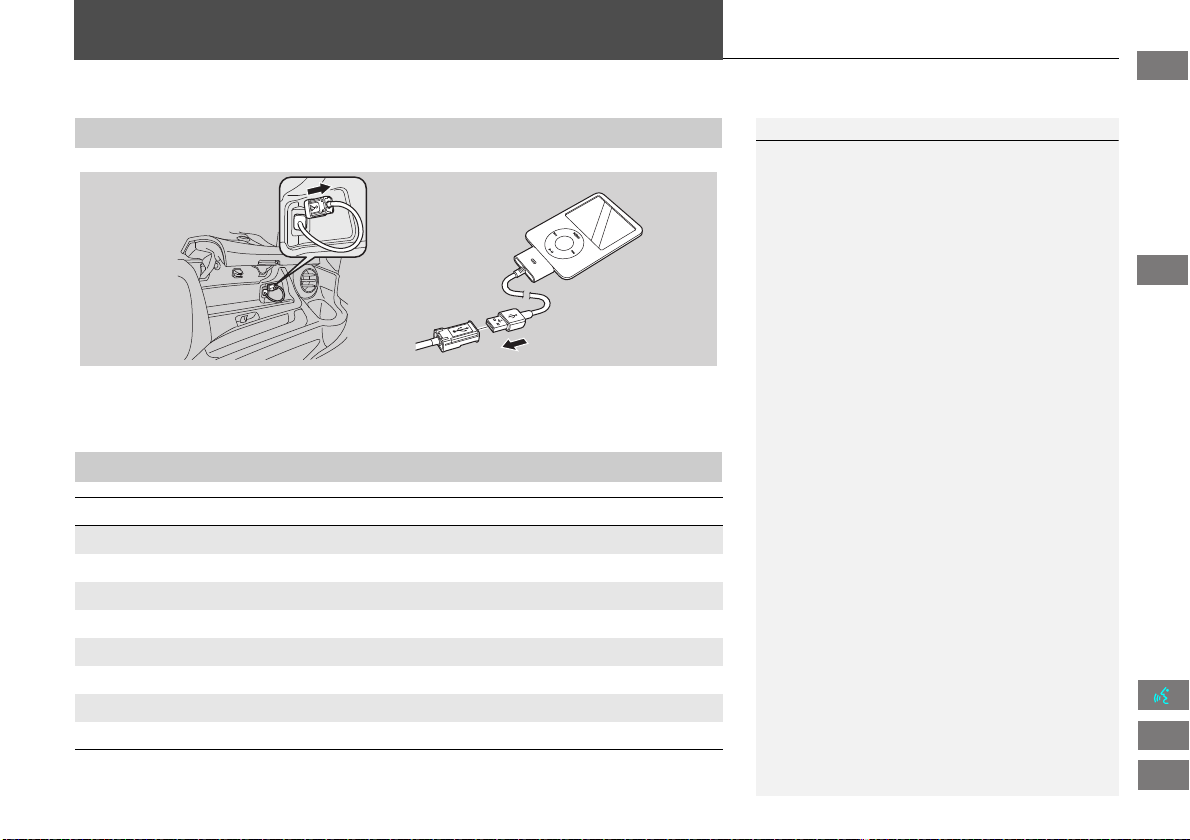
123
Audio
Playing an iPod®
1. Unclip the USB connector in the center console and loosen the adapter cable.
2. Install the iPod® dock connector to the USB connector.
■ Connecting an iPod®
1 Connecting an iPod®
• Do not use an extension cable with the USB
adapter cable.
• Do not connect the iPod® using a hub.
• Do not use a device such as a card reader or
hard disk drive, as the device or your tracks
may be damaged.
• We recommend backing up your data before
using the device in your vehicle.
• Displayed messages may vary depending on
the device model and software version.
Your audio system may not work with all
software versions of these devices.
If the audio system does not recognize the
iPod®, try reconnecting it a few times or reboot
the device.
■ Model Compatibility
Model
iPod (5th generation)
iPod classic 80GB/160GB
iPod classic 120GB
iPod classic 160GB (launch in 2009)
iPod nano
iPod touch
iPhone 3GS
iPhone 4
FIT_KA-31TK6830.book 123 ページ 2011年7月4日 月曜日 午後2時45分
QRG
Index
Home
TOC
2013 Fit Navigation
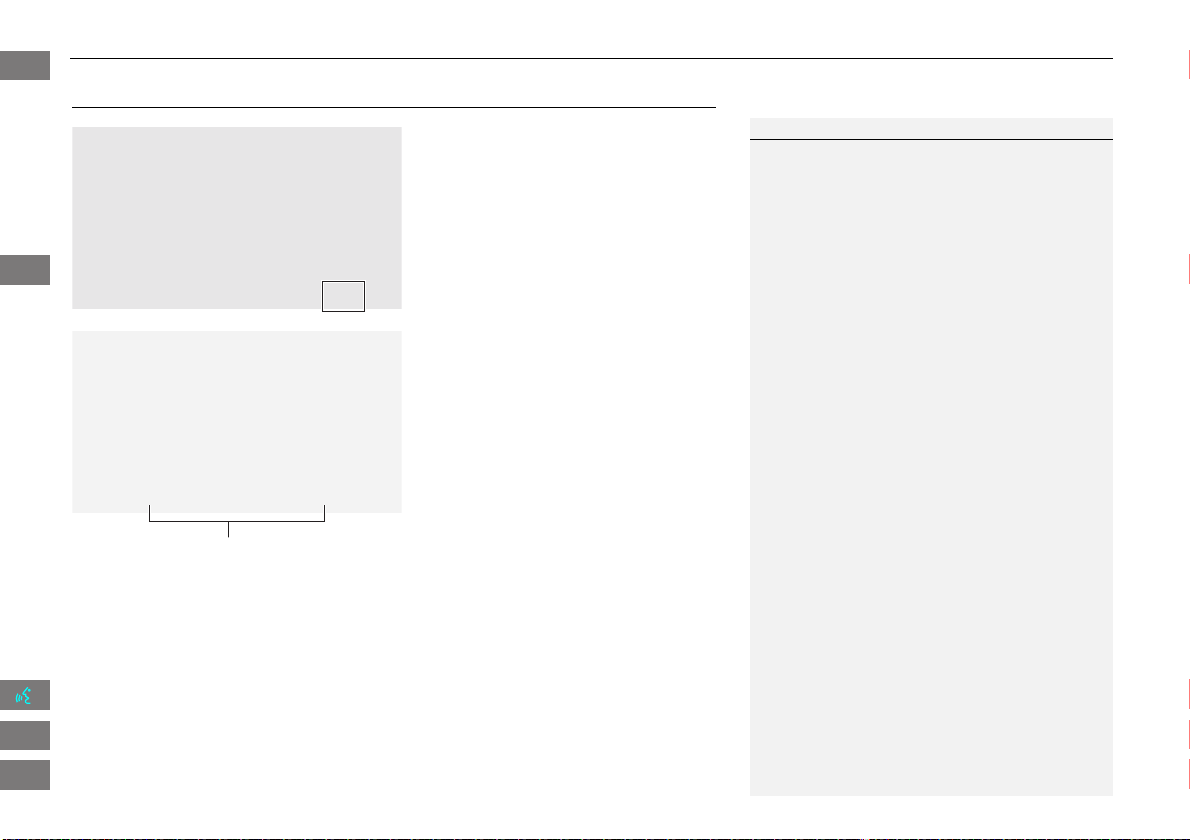
124
Playing an iPod®
Selecting iPod® Mode
Audio
Selecting iPod® Mode
1. Connect the iPod® to the USB
adapter cable in the center console.
2. Press the CD/AUX button until you
get to iPod® mode.
3. Select AUDIO/STREET until
AUDIO is highlighted in blue.
The audio information is
displayed at the bottom of the
screen.
4. Select c or x to select a track.
You can also select a track using
the SEEK/SKIP button.
The current track number and
total number of tracks are
displayed.
1 Playing an iPod®
d “Display audio screen”
You can control the iPod® using voice
commands.
2 iPod® Commands P. 188
A visual guide helps you operate the audio
system.
2 System Controls P. 4
2 Basic Operation P. 6
In some cases, the name of the artist, album, or
track may not appear correctly.
Available operating functions vary on models or
versions. Some functions may not be available on
the vehicle’s audio system.
If there is a problem, you may see an error
message on the display.
2 Error Messages P. 166
Audio control
FIT_KA-31TK6830.book 124 ページ 2011年7月4日 月曜日 午後2時45分
QRG
Index
Home
TOC
2013 Fit Navigation
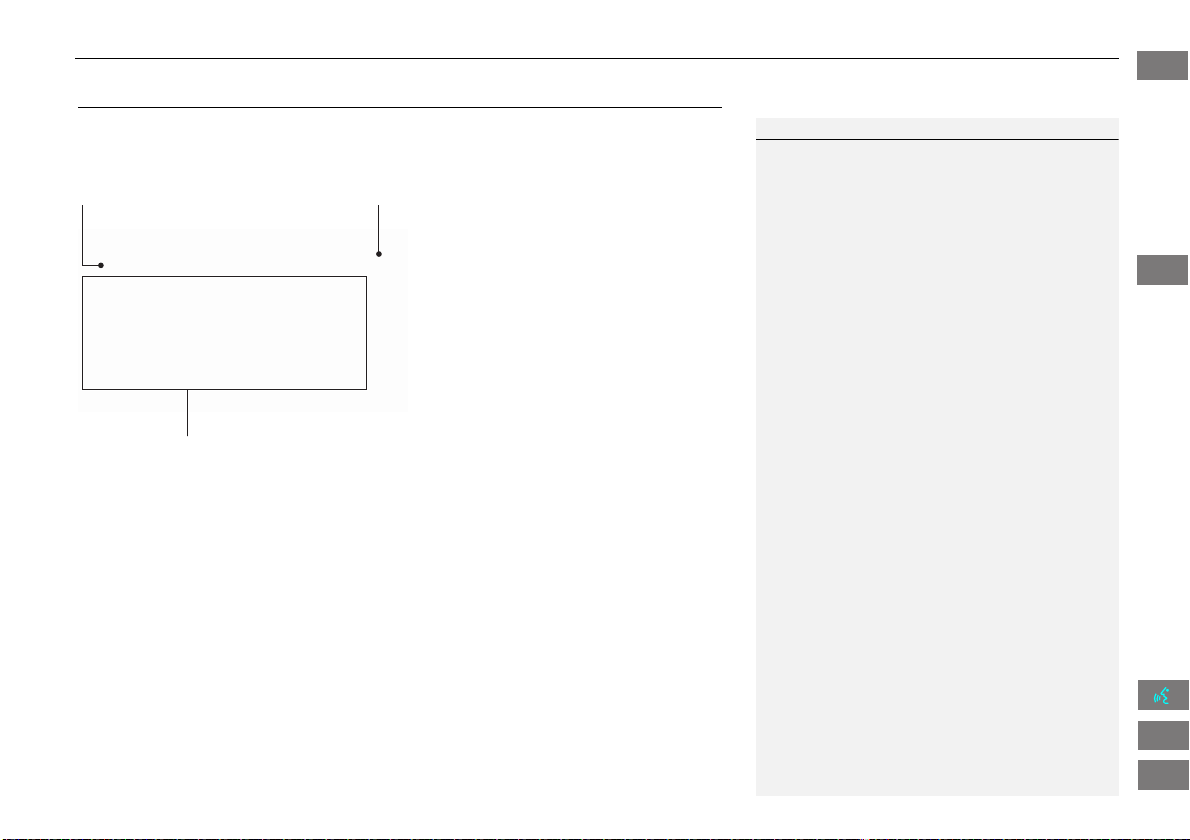
125
Playing an iPod®
Audio Screen Control
Audio Screen Control
H AUDIO button (in iPod® mode)
Control the audio screen through the navigation system.
Select a track.
Select the menu tab to change
songs in the track list.
2 Searching for Music P. 126
The following items are available:
• PLAY MODE
" Shuffle All: Plays all tracks in the track list in random order.
& Shuffle Album: Plays all tracks in the track list in random order by albums.
Each song in an album is played in the right order and only the order of albums is
randomized.
$ Repeat 1 Track: Repeats the current track.
• SOUND: Displays the sound preferences screen.
2 Adjusting the Sound P. 134
• SOURCE: Changes the source mode.
• Open/Close icon: Displays/hides the detailed information.
1 Repeat and Shuffle Play
To stop repeat- or shuffle-play, select the current
play mode button again.
iPod® mode
Track list
Open/Close icon
FIT_KA-31TK6830.book 125 ページ 2011年7月4日 月曜日 午後2時45分
QRG
Index
Home
Audio
TOC
2013 Fit Navigation

126
Playing an iPod®
Searching for Music
Audio
Searching for Music
H AUDIO button (in iPod® mode)
Search for music using the iPod® menu.
1. Select the menu tab.
2. Select a search category (e.g.,
Album).
3. Select an item.
The selection begins playing.
1 Searching for Music
The order of the track list displayed if you select
“All” on the iPod® menu varies depending on
the iPod® model and software.
Back to Current Track: Displays the current
track at the top of the list.
iPod® menu tab
FIT_KA-31TK6830.book 126 ページ 2011年7月4日 月曜日 午後2時45分
QRG
Index
Home
TOC
2013 Fit Navigation

127
Audio
Playing a USB Flash Drive
1. Unclip the USB connector in the center console and loosen the adapter cable.
2. Install the USB flash drive to the USB connector.
Use a recommended USB flash drive of 256 MB or higher.
Some digital audio players may not be compatible.
Some USB flash drives (e.g., a device with security lockout) may not work.
Some software files may not allow for audio play or text data display.
Some versions of MP3, WMA, or AAC formats may be unsupported.
■ Connecting a USB Flash Drive
1 Connecting a USB Flash Drive
• Do not use an extension cable with the USB
adapter cable.
• Do not connect the USB flash drive using a
hub.
• Do not use a device such as a card reader or
hard disk drive, as the device or your tracks
may be damaged.
• We recommend backing up your data before
using the device in your vehicle.
■ USB Flash Drives
FIT_KA-31TK6830.book 127 ページ 2011年7月4日 月曜日 午後2時45分
QRG
Index
Home
TOC
2013 Fit Navigation
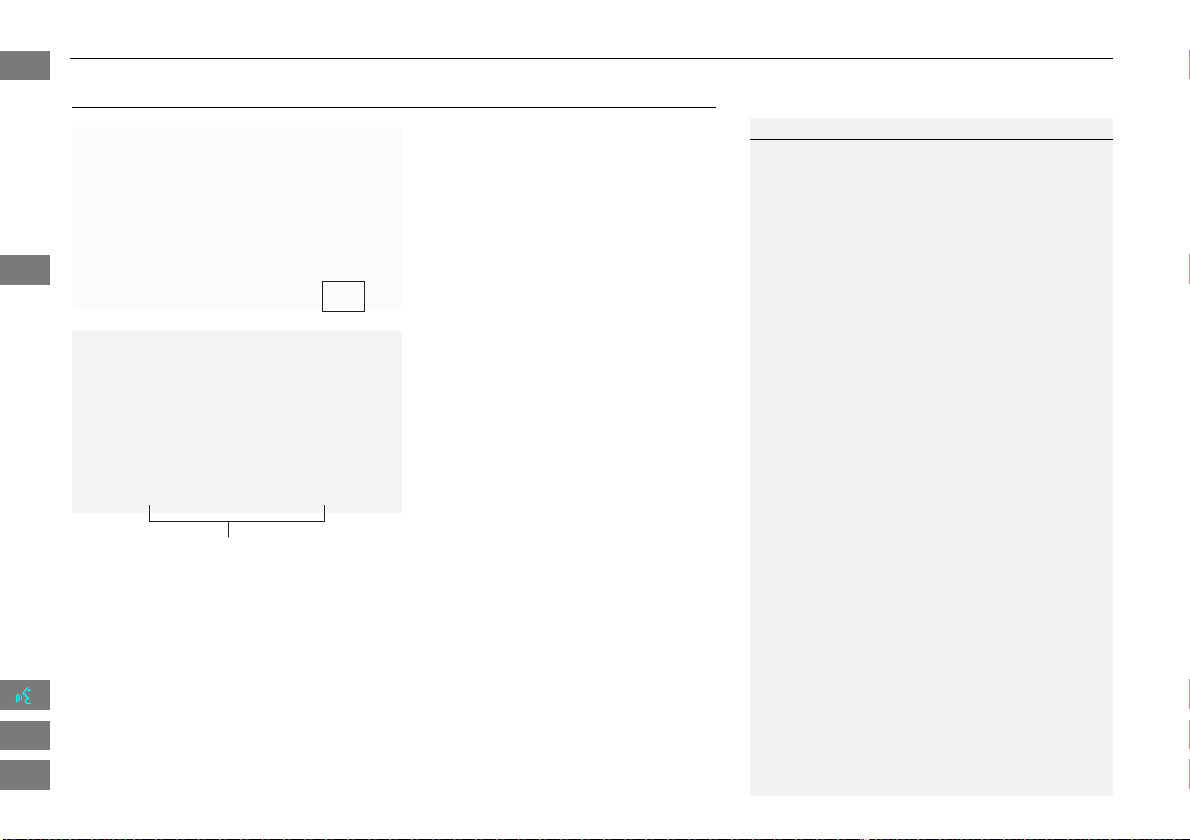
128
Playing a USB Flash Drive
Selecting USB Mode
Audio
Selecting USB Mode
1. Connect the USB flash drive to the
USB adapter cable in the center
console.
2. Press the CD/AUX button until you
get to USB mode.
3. Select AUDIO/STREET until
AUDIO is highlighted in blue.
The audio information is
displayed at the bottom of the
screen.
4. Select c or x to select a track.
You can also select a track using
the SEEK/SKIP button.
The current track number and
total number of tracks are
displayed.
1 Playing a USB Flash Drive
d “Display audio screen”
You can control the USB flash drive using voice
commands.
2 USB Commands P. 187
A visual guide helps you operate the audio
system.
2 System Controls P. 4
2 Basic Operation P. 6
In some cases, the name of the artist, album, or
track may not appear correctly.
Tracks on the USB flash drive are played in their
stored order. This order may be different from
the order displayed on your PC or device.
The audio system displays Unplayable File, and
then skips to the next track when the following
tracks are played:
• Tracks in WMA format protected by digital
rights management (DRM)
• Tracks in unsupported format
If there is a problem, you may see an error
message on the display.
2 Error Messages P. 166
Audio control
FIT_KA-31TK6830.book 128 ページ 2011年7月4日 月曜日 午後2時45分
QRG
Index
Home
TOC
2013 Fit Navigation
129
Playing a USB Flash Drive
Audio Screen Control
Audio
Audio Screen Control
H AUDIO button (in USB mode)
Control the audio screen through the navigation system.
Select a track.
Select the Folder tab to display the
folder list.
2 Playing Tracks in Folders P. 130
The following items are available:
• FOLDER: Select b or n to select a folder.
• SCAN:
S Scan Track: Scans all tracks in the current folder in the order they were
stored and plays a 10-second sample. Select Stop to stop scanning and play the
current selection.
( Scan Folder: Scans the first track in each folder on the USB flash drive and
plays a 10-second sample. Select Stop to stop scanning and play the current
selection.
USB mode
Track list
Open/Close icon
Continued
FIT_KA-31TK6830.book 129 ページ 2011年7月4日 月曜日 午後2時45分
QRG
Index
Home
TOC
2013 Fit Navigation

130
Playing a USB Flash Drive
Playing Tracks in Folders
Audio
• PLAY MODE:
" Random All: Plays all tracks on the USB flash drive in random order.
# Random in Folder: Plays all tracks in the current folder in random order.
$ Repeat 1 Track: Repeats the current track.
% Repeat 1 Folder: Repeats all tracks in the current folder.
• SOUND: Displays the sound preferences screen.
2 Adjusting the Sound P. 134
• SOURCE: Changes the source mode.
• Open/Close icon: Displays/hides the detail information.
Playing Tracks in Folders
H AUDIO button (in USB mode)
Folder
Change the folder if the tracks are stored in a folder structure.
1. Select a folder.
The system displays the track
list.
2. Select a track.
The system begins playing the
selected track.
1 Repeat and Random Play
To stop repeat- or random-play, select the
current play mode button again.
1 Playing Tracks in Folders
Folder List
• Any music tracks not in a folder are
automatically added to a “ROOT” folder,
which is displayed at the top of the Folder List.
• If the root folder has additional folders in a
lower layer, they are listed on the screen.
Back to Current Track: Displays the current
track at the top of the list.
Touch to close the folder.
Touch to open the folder.
Folder list
FIT_KA-31TK6830.book 130 ページ 2011年7月4日 月曜日 午後2時45分
QRG
Index
Home
TOC
2013 Fit Navigation
131
Audio
Playing Bluetooth® Audio
Your audio system allows you to listen to music tracks stored on your Bluetooth-
compatible phone.
This function is available when the phone is linked to the vehicle’s Bluetooth®
HandsFreeLink® (HFL) system.
2 Bluetooth® HandsFreeLink® P. 137
Selecting Bluetooth® Audio Mode
1. Make sure that your phone is on,
paired, and linked to HFL.
2 Pairing a Phone P. 140
2. Press the CD/AUX button until you
get to Bluetooth® Audio mode.
A Bluetooth® message and icon
are displayed on the display and
screen.
3. Select AUDIO/STREET until
AUDIO is highlighted in blue.
The audio information is
displayed at the bottom of the
screen.
1 Playing Bluetooth® Audio
d “Display audio screen”
You can control the Bluetooth® Audio using
voice commands.
2 Bluetooth® Audio Commands P. 188
Not all Bluetooth-enabled phones with
streaming audio capabilities are compatible. To
check if your phone is compatible:
• U.S.: Visit automobiles.honda.com/
handsfreelink.
• Canada: Visit www.handsfreelink.ca.
• Call HandsFreeLink customer support at
(888) 528-7876.
In some states, it may be illegal to perform some
data device functions while driving.
In some cases, the name of the artist, album, or
track may not appear correctly.
Only one phone can be used with HFL at a time.
When there are more than two paired phones in
the vehicle, the first paired phone the system
finds is automatically linked.
Continued
FIT_KA-31TK6830.book 131 ページ 2011年7月4日 月曜日 午後2時45分
QRG
Index
Home
TOC
2013 Fit Navigation
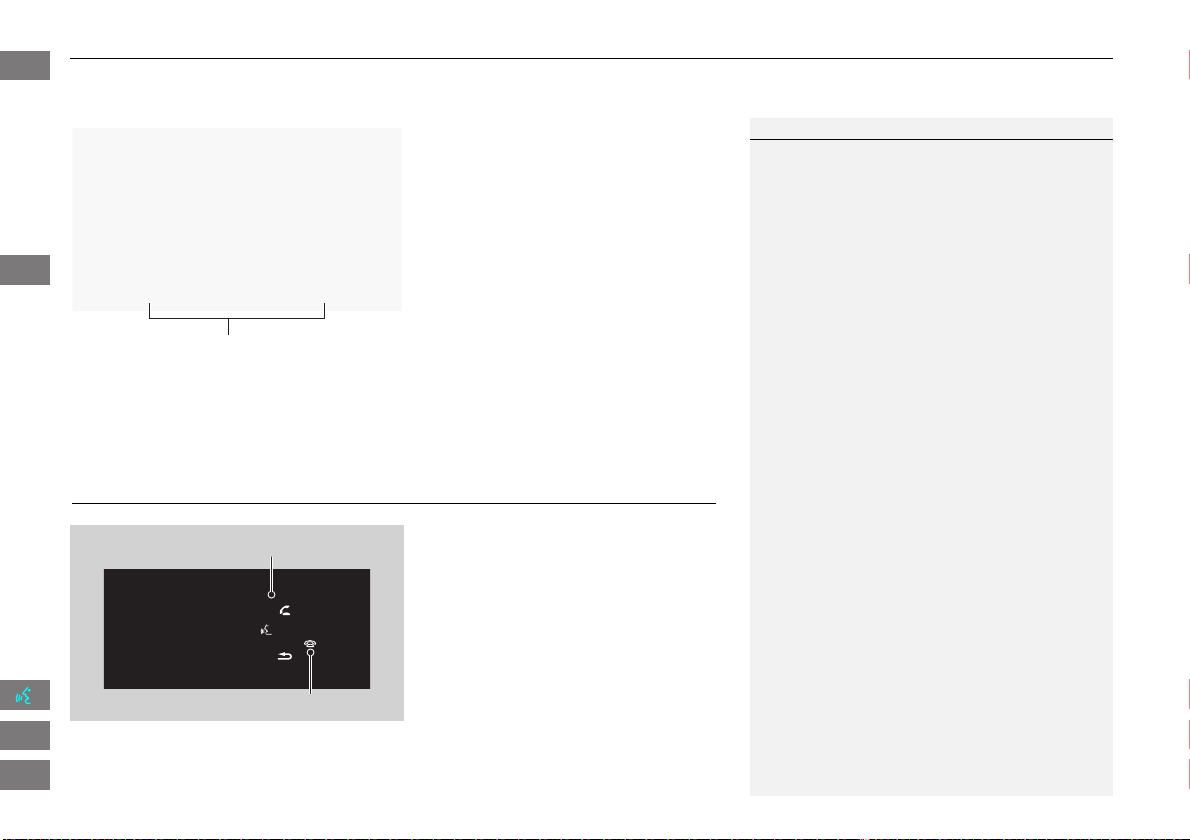
132
Playing Bluetooth® Audio
Switching to HFL Mode
Audio
4. Select c or x to select a track.
5. If necessary, follow the cell phone
operating instructions for playing
audio tracks.
Check the following if the phone is not recognized:
• Another HFL-compatible phone, which is not compatible for Bluetooth® Audio, is
already connected.
Switching to HFL Mode
1. If you receive a call when
Bluetooth® Audio is playing, press
the h (Pick-Up) button on the
steering wheel to answer the call.
2 Bluetooth® HandsFreeLink®
P. 138
2. Press the j (Hang-Up) button to
end the call, and Bluetooth® Audio
is resumed.
1 Playing Bluetooth® Audio
If more than one phone is paired to the HFL
system, there may be a delay before the system
begins to play.
A “NO CONNECT” message may be displayed if:
• The phone is not linked to HFL.
• The phone is not turned on.
• The phone is not in the vehicle.
• An incompatible phone is connected.
Audio control
h (Pick-Up) button
j (Hang-Up) button
FIT_KA-31TK6830.book 132 ページ 2011年7月4日 月曜日 午後2時45分
QRG
Index
Home
TOC
2013 Fit Navigation
133
Playing Bluetooth® Audio
Audio Screen Control
Audio
Audio Screen Control
H AUDIO button (in BT mode)
Control the audio screen through the navigation system.
Select an item.
The following items are available:
• GROUP: Select b or n to select a playlist, album, genre, etc.
• SOUND: Displays the sound preferences screen.
2 Adjusting the Sound P. 134
• SOURCE: Changes the source mode.
1 Audio Screen Control
The display items vary on the connected device.
The following functions may not be available on
some devices:
• Pause function
• Group selection
Bluetooth® Audio mode
Audio control
FIT_KA-31TK6830.book 133 ページ 2011年7月4日 月曜日 午後2時45分
QRG
Index
Home
TOC
2013 Fit Navigation

134
Audio
Adjusting the Sound
H AUDIO button (
AUDIO MENU )
SOUND
Adjust the sound bass, treble, fader, and balance. In addition, you can set Speed-
sensitive Volume Compensation (SVC).
1. Select the tab to adjust the desired
sound mode.
2. Adjust the desired level.
1 Adjusting the Sound
Fader adjusts the front-to-back strength, while
balance adjusts the side-to-side strength.
The SVC has four modes: Off, Low, Mid, and
High. SVC adjusts the volume level based on the
vehicle speed. The faster you go, the audio
volume increases. As you slow down, the audio
volume decreases. If you feel the sound is too
loud, choose Low, and vice versa.
FIT_KA-31TK6830.book 134 ページ 2011年7月4日 月曜日 午後2時45分
QRG
Index
Home
TOC
2013 Fit Navigation
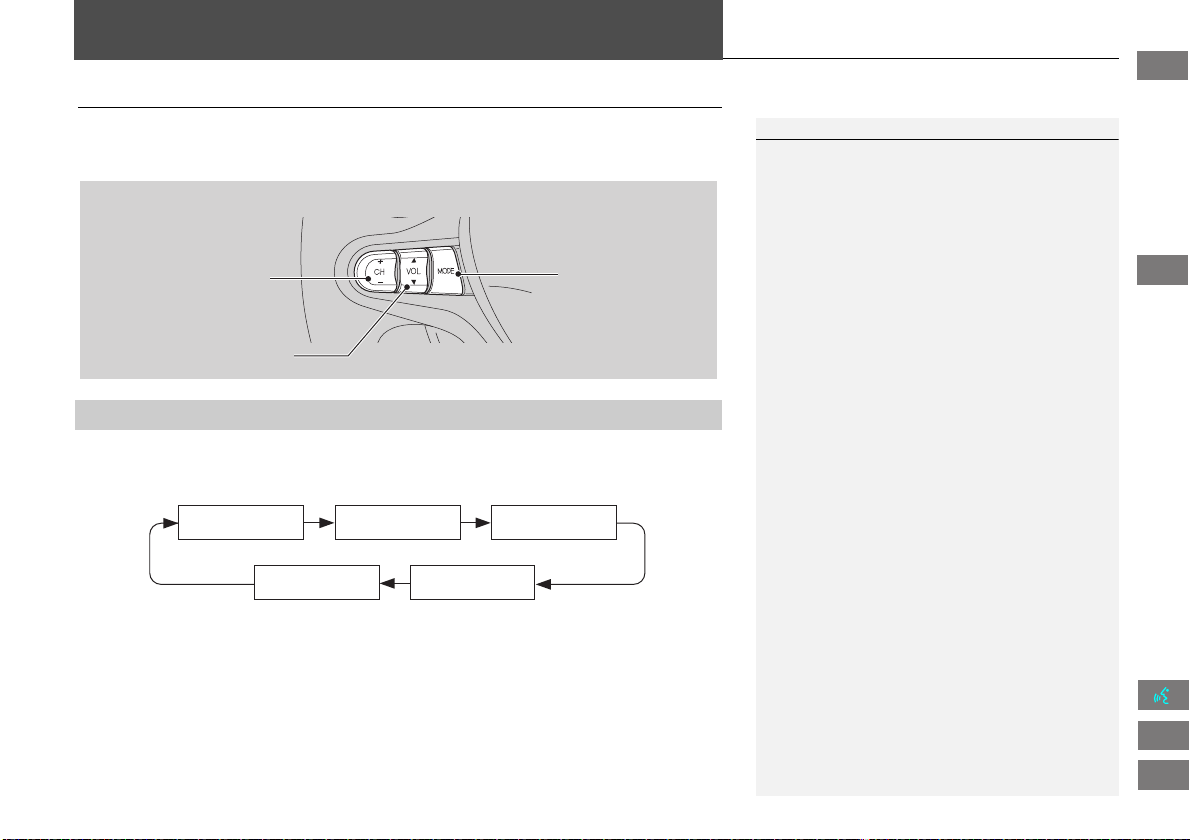
135
Audio
Audio Remote Controls
Steering Wheel Controls
Control basic audio system functions using the controls mounted on the steering
wheel.
Cycles through the audio modes as follows:
■ MODE Button
1 SOURCE Button
DISC mode appears only when a disc is loaded.
When in AUX mode, the following are operable
from the remote audio controls:
• iPod®/USB flash drive connected to the USB
adapter cable
• Bluetooth® Audio (not all phones support this
function)
VOL (Volume) button
CH (Channel) button
MODE button
FM2FM1 AM
DISCAUX
FIT_KA-31TK6830.book 135 ページ 2011年7月4日 月曜日 午後2時45分
QRG
Index
Home
TOC
2013 Fit Navigation

136
Audio Remote Controls
Steering Wheel Controls
Audio
Adjusts the volume.
• Press the R (Volume) button to increase the volume.
• Press the U (Volume) button to decrease the volume.
FM/AM
• Press the N (Channel) button to select the next preset station (channel).
• Press the B (Channel) button to select the previous preset station (channel).
• Press and hold the N or B button to skip to the next or previous station
(channel) in the frequency.
DISC, iPod®, USB, or Bluetooth® Audio
• Press the N button to skip to the next track.
• Press the B button to skip to the beginning of the current track. Press the B
button again to go to the beginning of the previous track.
• Press and hold the N or B button to skip up or down a folder (DISC/USB).
■ VOL (Volume) Button
■ CH (Channel) Button
FIT_KA-31TK6830.book 136 ページ 2011年7月4日 月曜日 午後2時45分
QRG
Index
Home
TOC
2013 Fit Navigation

137
Bluetooth® HandsFreeLink®
This section describes how to operate Bluetooth® HandsFreeLink®. You
can place and receive phone calls using your vehicle’s audio system
without handling your cell phone.
Bluetooth® HandsFreeLink® ............... 138
Pairing a Phone .................................... 140
Setting Up Speed Dialing...................... 145
Editing Phone Information.................... 148
Phone Setup ........................................ 149
Making a Call....................................... 150
Receiving a Call.................................... 153
HFL Menus........................................... 154
FIT_KA-31TK6830.book 137 ページ 2011年7月4日 月曜日 午後2時45分
QRG
Index
Home
2013 Fit Navigation

138
Bluetooth® HandsFreeLink®
Bluetooth® HandsFreeLink®
H PHONE button
Select an item.
The following items are available:
• Redial: Dials the last number.
• Call History: Displays the call history.
2 Using Call History P. 152
• Phonebook: Displays the cell phone’s imported phonebook.
2 Using the Phonebook P. 151
• Dial: Makes a call by entering the phone number.
2 Entering a Phone Number P. 151
• Phone Setup: Sets up the HFL features.
2 Pairing a Phone P. 140
• Speed Dial 1, 2: Makes a call to stored speed dial entries.
2 Using Speed Dial P. 152
2 Setting Up Speed Dialing P. 145
1 Bluetooth® HandsFreeLink®
You can control the HFL system using voice
commands.
2 HFL Menus P. 154
To use HFL, you need a Bluetooth-compatible
cell phone. For a list of compatible phones,
pairing procedures, and special feature
capabilities:
• U.S.: Visit automobiles.honda.com/
handsfreelink.
• Canada: Visit www.handsfreelink.ca.
• Call HandsFreeLink customer support at
(888) 528-7876.
Voice Control Tips
• Aim the vents away from the ceiling and close
the windows, as noise coming from them may
interfere with the microphone.
• Press and release the d (Talk) button before
giving a command. Speak clearly and naturally
after a beep.
2 Voice Control Operation P. 5
• If the microphone picks up voices other than
yours, the command may be misinterpreted.
• To change the volume level, use the audio
system’s volume knob or the remote audio
controls.
FIT_KA-31TK6830.book 138 ページ 2011年7月4日 月曜日 午後2時45分
QRG
Index
Home
TOC
2013 Fit Navigation

139
Bluetooth® HandsFreeLink®
Bluetooth® HandsFreeLink®
Say d “Hands-free help” or d “Help” any time to get help or hear a list of
commands.
2 Voice Help P. 13
■ Help Features
1 Bluetooth® HandsFreeLink®
Bluetooth® Wireless Technology
Bluetooth® name and logos are registered
trademarks owned by Bluetooth SIG, Inc., and
any use of such marks by Honda Motors Co.,
Ltd., is under license. Other trademarks and
trade names are those of their respective owners.
HFL Limitations
An incoming call on HFL will interrupt
Bluetooth® Audio when it is playing. Audio will
resume when the call is ended.
Certain touchscreen functions are disabled while
the vehicle is moving.
2 Limitations for Manual Operation P. 19
FIT_KA-31TK6830.book 139 ページ 2011年7月4日 月曜日 午後2時45分
QRG
Index
Home
TOC
2013 Fit Navigation

140
Bluetooth® HandsFreeLink®
Pairing a Phone
Bluetooth® HandsFreeLink®
Pairing a Phone
H PHONE button
When no Bluetooth-compatible phone has ever been paired to the system, the
following screen appears:
1. Select Yes.
2. Put your cell phone in “Discovery”
or “Search” mode.
3. Select OK.
The system begins to search for
your phone.
4. Select your phone in the list.
Select Find Another Phone if
your phone is not found.
Refer to your phone manual for
instructions on searching for a
Bluetooth® device.
5. Enter the 4-digit pairing code on
your phone when prompted to
complete the pairing process.
1 Pairing a Phone
Your Bluetooth-compatible phone must be
paired to HFL before you can make and receive
hands-free calls.
The maximum range between your phone and
vehicle is about 30 feet (10 meters).
Phone Pairing Tips
• You cannot pair your phone while the vehicle
is moving.
• Your phone must be in discovery or search
mode when pairing the phone. Refer to your
phone’s manual.
• Up to six phones can be paired.
• Your phone’s battery may drain faster when it
is paired to HFL.
• If your phone is not ready for pairing or not
found by the system within three minutes, the
system will time out and returns to idle.
• The default pairing code “0000” is used unless
you change the setting.
Pairing Code
You can change the pairing code setting.
2 Changing the Pairing Code P. 142
Delete a Phone
You can delete the paired phone.
2 Deleting a Paired Phone P. 143
FIT_KA-31TK6830.book 140 ページ 2011年7月4日 月曜日 午後2時45分
QRG
Index
Home
TOC
2013 Fit Navigation

141
Bluetooth® HandsFreeLink®
Pairing a Phone
Bluetooth® HandsFreeLink®
H PHONE button
Phone Setup
Use the Phone setup screen to pair an additional Bluetooth-compatible phone if a
phone has been previously paired to the system.
1. Select Add/Select a Phone under
Bluetooth setup.
2. Select Search.
3. Put your cell phone in “Discovery”
or “Search” mode.
4. Select OK.
The system begins to search for
your phone.
5. Select your phone in the list.
Select Find Another Phone if
your phone is not found.
Refer to your phone manual for
instructions on searching for a
Bluetooth® device.
6. Enter the 4-digit pairing code on
your phone when prompted to
complete the pairing process.
■ Pairing from Phone Setup
1 Pairing from Phone Setup
You can control the HFL system using voice
commands.
2 HFL Menus P. 154
If a prompt appears asking to connect to a
phone, select No and proceed with step 1.
FIT_KA-31TK6830.book 141 ページ 2011年7月4日 月曜日 午後2時45分
QRG
Index
Home
TOC
2013 Fit Navigation

142
Bluetooth® HandsFreeLink®
Pairing a Phone
Bluetooth® HandsFreeLink®
H PHONE button
Phone Setup
Add/Select a phone
1. Select Edit under Pairing Code.
2. Select an item.
The following items are available:
• Random: Uses a randomly generated pairing code.
• Fixed: Create your own pairing code.
■ Changing the Pairing Code
FIT_KA-31TK6830.book 142 ページ 2011年7月4日 月曜日 午後2時45分
QRG
Index
Home
TOC
2013 Fit Navigation

143
Bluetooth® HandsFreeLink®
Pairing a Phone
Bluetooth® HandsFreeLink®
3. If you select Fixed, enter a new
pairing code. Select OK.
Select Delete to remove the
current pairing code.
H PHONE button
Phone Setup
Add/Select a phone
1. Select List under Paired Phone
List.
2. Select a phone to delete.
The Bluetooth® icon indicates
the currently linked phone.
■ Deleting a Paired Phone
1 Deleting a Paired Phone
When you transfer the vehicle to a third party,
delete all paired phones.
Continued
FIT_KA-31TK6830.book 143 ページ 2011年7月4日 月曜日 午後2時45分
QRG
Index
Home
TOC
2013 Fit Navigation

144
Bluetooth® HandsFreeLink®
Pairing a Phone
Bluetooth® HandsFreeLink®
3. Select Delete this Phone.
4. Select Yes.
H PHONE button
Phone Setup
Add/Select a phone
1. Select List under Paired Phone
List.
2. Select a phone to connect.
3. Select Connect.
HFL disconnects the linked
phone and starts connecting to
another paired phone.
Bluetooth® icon
■ Changing the Currently Paired Phone
1 Changing the Currently Paired Phone
If no other phones are found or paired when
trying to switch to another phone, HFL will
inform you that the original phone is linked
again.
FIT_KA-31TK6830.book 144 ページ 2011年7月4日 月曜日 午後2時45分
QRG
Index
Home
TOC
2013 Fit Navigation

145
Bluetooth® HandsFreeLink®
Setting Up Speed Dialing
Bluetooth® HandsFreeLink®
Setting Up Speed Dialing
H PHONE button
Speed Dial 1 or Speed Dial 2
Create speed dial entries with voice tags for easy calling.
1. Select Add New.
2. Select a number entry option.
3. Select a number.
4. Select Voice Tag.
Select OK to store the speed dial
without a voice tag.
5. Follow the prompt to enter a voice
tag.
The following options are available:
• Phonebook: Adds a number from the imported phonebook.
• History: Adds a number from the last 20 numbers.
• Phone Number: Enters a number manually.
1 Setting Up Speed Dialing
You can control the HFL system using voice
commands.
2 HFL Menus P. 154
Up to 15 speed dial entries can be stored per
phone.
FIT_KA-31TK6830.book 145 ページ 2011年7月4日 月曜日 午後2時45分
QRG
Index
Home
TOC
2013 Fit Navigation
146
Bluetooth® HandsFreeLink®
Setting Up Speed Dialing
Bluetooth® HandsFreeLink®
H PHONE button
Speed Dial 1 or Speed Dial 2
1. Select a speed dial entry.
2. Select Edit Speed Dial.
3. Select Voice Tag.
4. Follow the prompt to enter a voice
tag.
■ Registering a Voice Tag to a Speed Dial Entry
1 Registering a Voice Tag to a Speed Dial Entry
• Avoid using duplicate voice tags.
• Avoid using “Home” as a voice tag.
• Avoid using voice tags that only contain
numbers.
• It is easier for HFL to recognize a longer name
(e.g., “John Smith” instead of “John”).
1 Deleting a Speed Dial Entry
1. Select Delete Speed Dial.
2. Select Yes.
FIT_KA-31TK6830.book 146 ページ 2011年7月4日 月曜日 午後2時45分
QRG
Index
Home
TOC
2013 Fit Navigation
Voice tags allow you to call speed dial entries
from any screen by saying d “Dial by voice tag”
and the voice tag, followed by d “Dial.”

147
Bluetooth® HandsFreeLink®
Setting Up Speed Dialing
Bluetooth® HandsFreeLink®
H PHONE button
Speed Dial 1 or Speed Dial 2
1. Select a speed dial entry.
2. Select Edit Speed Dial.
3. Select Voice Tag
.
4. Select an item.
The following items are available:
• Play Stored Voice Tag: Plays the stored voice tag.
• Record Voice Tag: Stores a voice tag. Follow the prompt to enter a voice tag.
• Delete Voice Tag: Deletes the stored voice tag. Select Yes.
■ Editing a Voice Tag
FIT_KA-31TK6830.book 147 ページ 2011年7月4日 月曜日 午後2時45分
QRG
Index
Home
TOC
2013 Fit Navigation

148
Bluetooth® HandsFreeLink®
Editing Phone Information
Bluetooth® HandsFreeLink®
Editing Phone Information
H PHONE button
Phone Setup
Add/Select a phone
List
Edit the user name of a paired phone, and protect the phonebook and speed dial
entries with a PIN.
1. Select a phone to edit.
2. Select an item.
The following items are available:
• Connect: Connects the selected
phone to the HFL.
• Edit Name: Enter a name.
• PIN: Enter a 4-digit PIN. Re-enter to confirm. You can select Do Not Use PIN to
remove a PIN.
• Replace this Phone: Deletes the selected phone and adds a new phone.
2 Pairing a Phone P. 140
• Delete this Phone: Deletes the user name, call history, and phonebook.
1 Editing Phone Information
You can control the HFL system using voice
commands.
2 HFL Menus P. 154
You can name up to six HFL users. Each can be
PIN protected, and have their own phonebook,
speed dial entries, and call history.
FIT_KA-31TK6830.book 148 ページ 2011年7月4日 月曜日 午後2時45分
QRG
Index
Home
TOC
2013 Fit Navigation

149
Bluetooth® HandsFreeLink®
Phone Setup
Bluetooth® HandsFreeLink®
Phone Setup
H PHONE button
Phone Setup
Set HFL options and features.
1. Select an item.
2. Select OK.
The following items are available:
• Bluetooth Setup: Pairs your phone to the system.
2 Pairing a Phone P. 140
• Bluetooth Connection: Turns the Bluetooth® connection on or off.
On: Connects your Bluetooth-compatible device to the system.
Off (factory default): Disables the feature.
• Auto Transfer: Sets whether to automatically transfer a call from your phone to
HFL when you enter and turn on the vehicle.
On (factory default): Automatically transfers your call to HFL.
Off: Disables the feature.
• Auto Answer: Sets whether to automatically answer an incoming call.
On: Automatically connects an incoming call after about five seconds.
Off (factory default): Disables the feature.
• Volume: Select B or N to adjust the receiver and ring volume. If you change
the volume during a call, it is maintained at that level until you change it again.
1 Phone Setup
You can control the HFL system using voice
commands.
2 HFL Menus P. 154
FIT_KA-31TK6830.book 149 ページ 2011年7月4日 月曜日 午後2時45分
QRG
Index
Home
TOC
2013 Fit Navigation

150
Bluetooth® HandsFreeLink®
Making a Call
Bluetooth® HandsFreeLink®
Making a Call
Make calls by entering a number or using the imported phonebook, call history, or
speed dial entries.
2 Using the Phonebook P. 151
2 Entering a Phone Number P. 151
2 Using Call History P. 152
2 Using Speed Dial P. 152
1 Making a Call
You can control the HFL system using voice
commands.
2 HFL Menus P. 154
When you say d “Call by number” or d “Dial
by voice tag” on most screens, the following
screen appears:
2 Registering a Voice Tag to a Speed Dial
Entry P. 146
Only one phone can be used with HFL at a time.
When there are more than two paired phones in
the vehicle, the first paired phone the system
finds is automatically linked.
FIT_KA-31TK6830.book 150 ページ 2011年7月4日 月曜日 午後2時45分
QRG
Index
Home
TOC
2013 Fit Navigation
Say the phone number or the voice tag (e.g., d
“John Smith”), followed by d “Dial.”
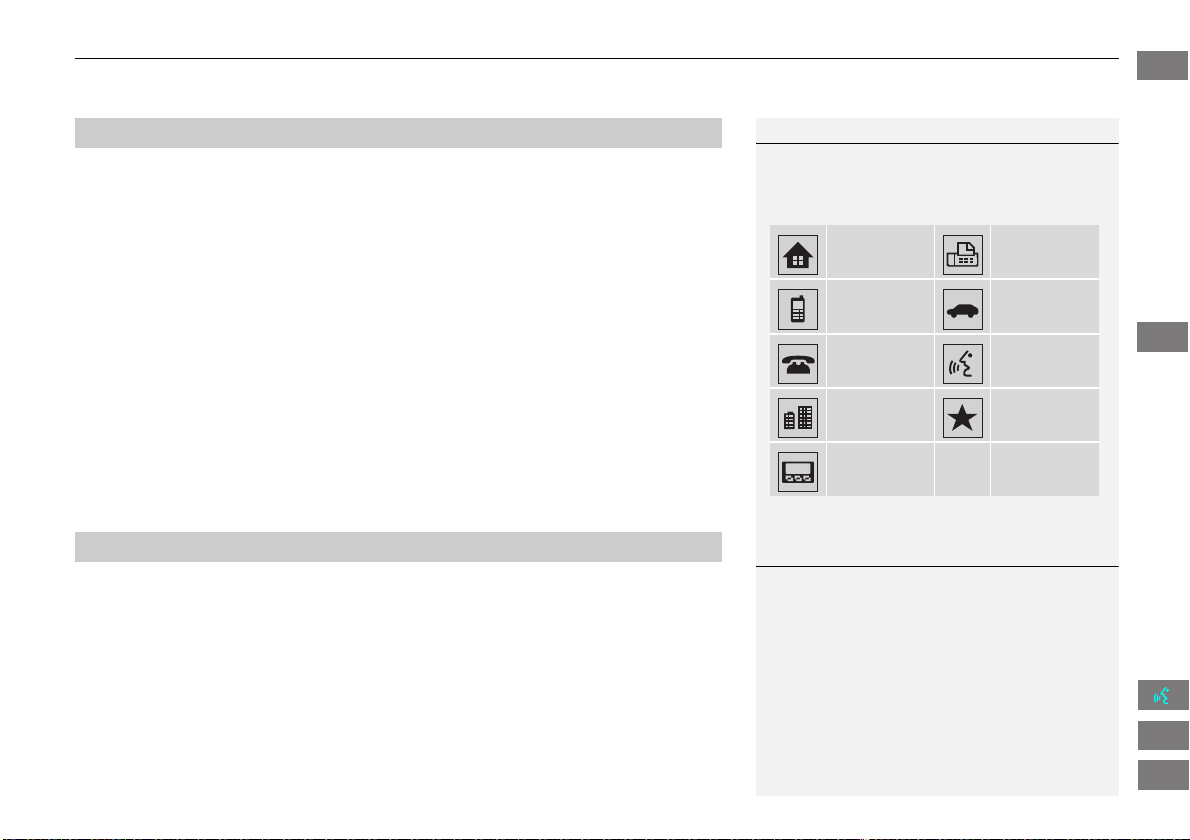
151
Bluetooth® HandsFreeLink®
Making a Call
Bluetooth® HandsFreeLink®
H PHONE button
Phonebook
1. Select a name.
Select alphabetical tabs to
display the entries in the group.
2. Select a number.
3. Select Call to begin dialing.
H PHONE button
Dial
1. Enter a phone number.
2. Select Dial to begin dialing.
■ Using the Phonebook
1 Using the Phonebook
Up to three icons are displayed for each
phonebook entry. If there are more than three
numbers for an entry, “…” is displayed.
This feature is not available on all phones.
Home Fax
Mobile Car phone
Other Voice
Work Preference
Pager
■ Entering a Phone Number
1 Entering a Phone Number
A command that consists of several numbers can
be spoken together.
FIT_KA-31TK6830.book 151 ページ 2011年7月4日 月曜日 午後2時45分
QRG
Index
Home
TOC
For example, say d “123-
456-7890” at once.
2013 Fit Navigation

152
Bluetooth® HandsFreeLink®
Making a Call
Bluetooth® HandsFreeLink®
H PHONE button
Call History
1. Select a call.
Select All, Dialed, Received,
Missed to view the call history
by category.
2. Select Call to begin dialing.
H PHONE button
Speed Dial 1 or Speed Dial 2
1. Select a speed dial entry.
2. Select Call to begin dialing.
■ Using Call History
1 Using Call History
The call history shows the last 20 calls from your
phone.
■ Using Speed Dial
1 Using Speed Dial
To make a call using speed dial, you need to
create speed dial entries.
2 Setting Up Speed Dialing P. 145
More Speed Dial Lists
You can make a call by using more speed dials
on the other phones.
1. Select another paired phone in the list.
2. Select a speed dial entry.
3. Select Call to begin dialing.
If the other phone is PIN-protected, enter the PIN
when prompted. Select OK. PINs are optional.
2 Editing Phone Information P. 148
FIT_KA-31TK6830.book 152 ページ 2011年7月4日 月曜日 午後2時45分
QRG
Index
Home
TOC
2013 Fit Navigation
153
Bluetooth® HandsFreeLink®
Receiving a Call
Bluetooth® HandsFreeLink®
Receiving a Call
1. Press the h (Pick-Up) button to
answer a call and display the
Calling screen.
2. Press the j (Hang-Up) button to
terminate the call.
The following options are available during a call:
• MUTE: Allows you to mute your voice.
• Touch Tones (available on some phones): Allows you to send numbers or names
during a call. This is useful when you call an automated phone system.
• Transfer Call: Allows you to transfer a call from HFL to your phone, or from your
phone to HFL.
1 Receiving a Call
An incoming call notification appears on the
navigation screen, and you hear an audible ring
tone.
If your phone has Call Waiting, press the h
button to put the original call on hold and
answer the incoming call. To return to the
original call, press the h button again. If you
want to hang up the original call and answer the
new call, press the j button.
To change the volume level of HFL, use the audio
system volume knob or the steering wheel
volume controls.
Some phones may send battery, signal strength,
and roaming status information to the screen.
Phonebook
Displays the cell phone’s imported phonebook.
2 Using the Phonebook P. 151
Call ID Bluetooth indicator Roaming status
Signal strength Battery level
FIT_KA-31TK6830.book 153 ページ 2011年7月4日 月曜日 午後2時45分
QRG
Index
Home
TOC
2013 Fit Navigation
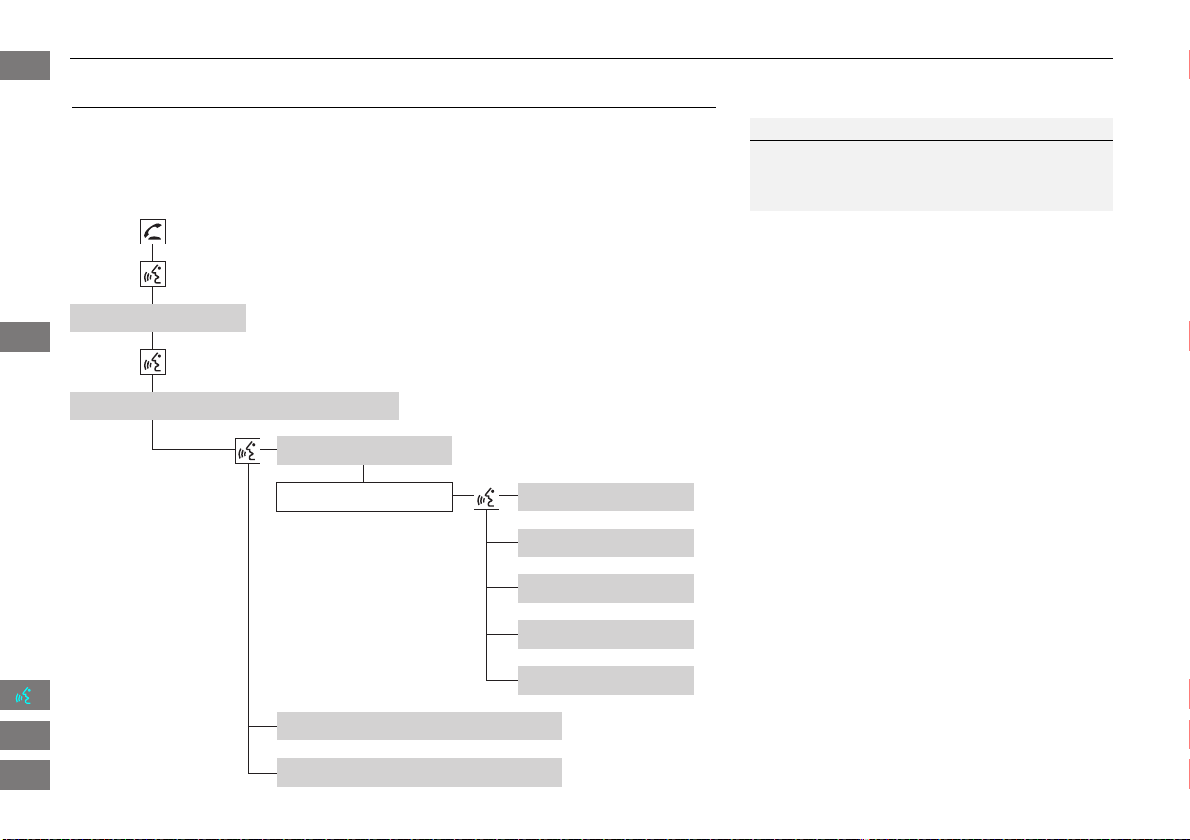
154
Bluetooth® HandsFreeLink®
HFL Menus
Bluetooth® HandsFreeLink®
HFL Menus
Use HFL when the vehicle’s ignition is in the ACCESSORY (I) or ON (II) position.
You can operate HFL by voice when on the PHONE screen. Below is the flow chart
showing available voice commands.
1 HFL Menus
To use HFL, you must first pair your Bluetooth-
compatible cell phone to the system while the
vehicle is parked.
“PIN”
“Replace this Phone”
“Delete this Phone”
“Phone Setup”
“Bluetooth Setup Add/Select a phone”
“Edit Name”
“Paired Phone List”
Select a phone
“Connect”
“Add a New Phone”
“Pairing Code”
Press the h (Pick-Up) button to display the PHONE screen.
Press the d (Talk) button each time you give a voice command.
Pair your phone to the system. 2 Pairing a Phone P. 140
Set a “fixed” or “random” pass-key code for phone pairing.
2 Changing the Pairing Code P. 142
Delete a previously paired phone.
2 Deleting a Paired Phone P. 143
Switch from a currently linked phone to another paired
phone. 2 Changing the Currently Paired Phone P. 144
Display the list of the paired phones.
Create a PIN for a paired phone.
Replace the previously paired phone with a new
phone.
Create a user name for a paired phone.
FIT_KA-31TK6830.book 154 ページ 2011年7月4日 月曜日 午後2時45分
QRG
Index
Home
TOC
2013 Fit Navigation
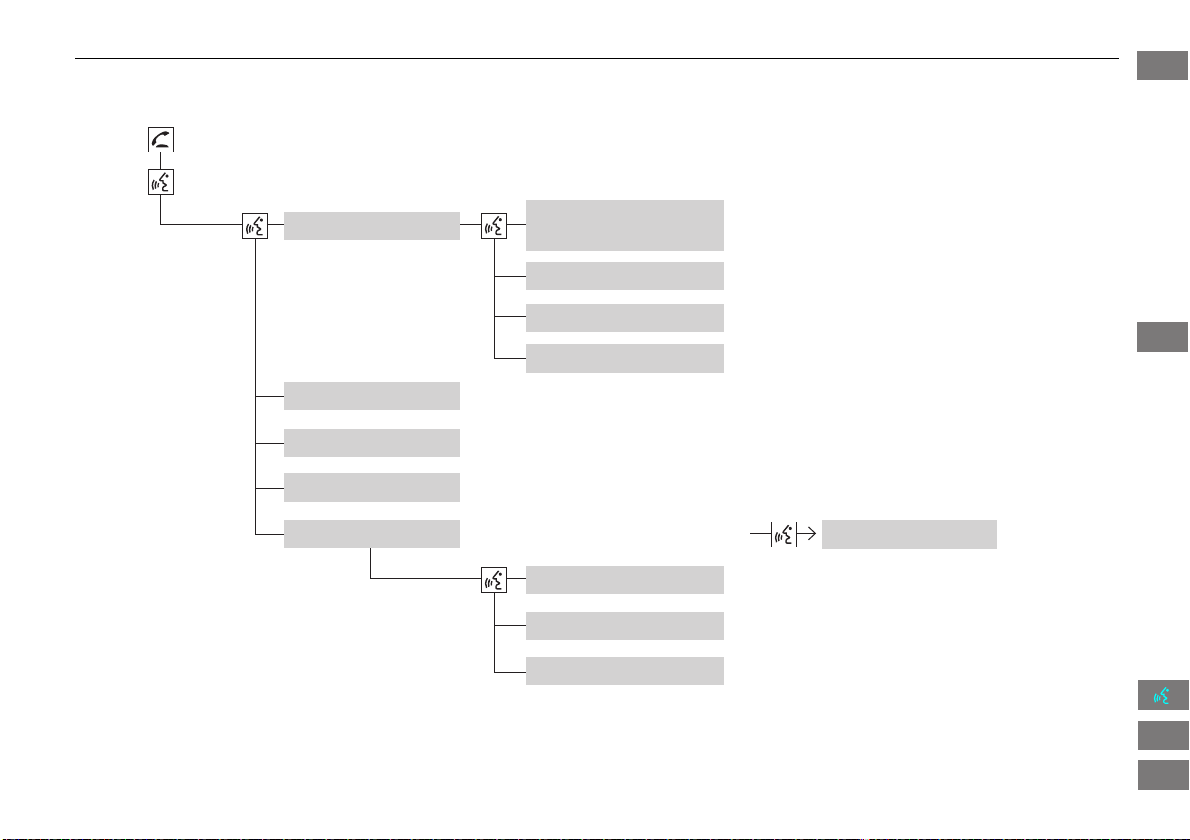
155
Bluetooth® HandsFreeLink®
HFL Menus
Bluetooth® HandsFreeLink®
“Auto Answer On/Off”
“Volume Plus/Minus”
“Auto Transfer On/Off”
“Bluetooth
Connection On/Off”
“MUTE”
“Touch Tones”
“Redial”
“Call History”
“Phonebook”
“Dial”
“Phone Setup”
“Transfer Call”
“Dial”
Press the h (Pick-Up) button to display the PHONE screen.
Press the d (Talk) button each time you give a voice command.
Turn the auto transfer on or off.
Adjust the HFL volume.
Display the last 20 incoming, outgoing, or missed calls.
2 Using Call History P. 152
Display the paired phone’s imported phonebook (or import a new one).
2 Using the Phonebook P. 151
Say a phone number to dial.
2 Entering a Phone Number P. 151
Dial the last phone number.
Send numbers or names during a call.
Mute your voice during a call.
Transfer a call from HFL to your phone, or from your
phone to HFL.
Turn the Bluetooth connection on or off.
Turn the auto answer on or off.
2 Phone Setup P. 149
Continued
FIT_KA-31TK6830.book 155 ページ 2011年7月4日 月曜日 午後2時45分
QRG
Index
Home
TOC
2013 Fit Navigation
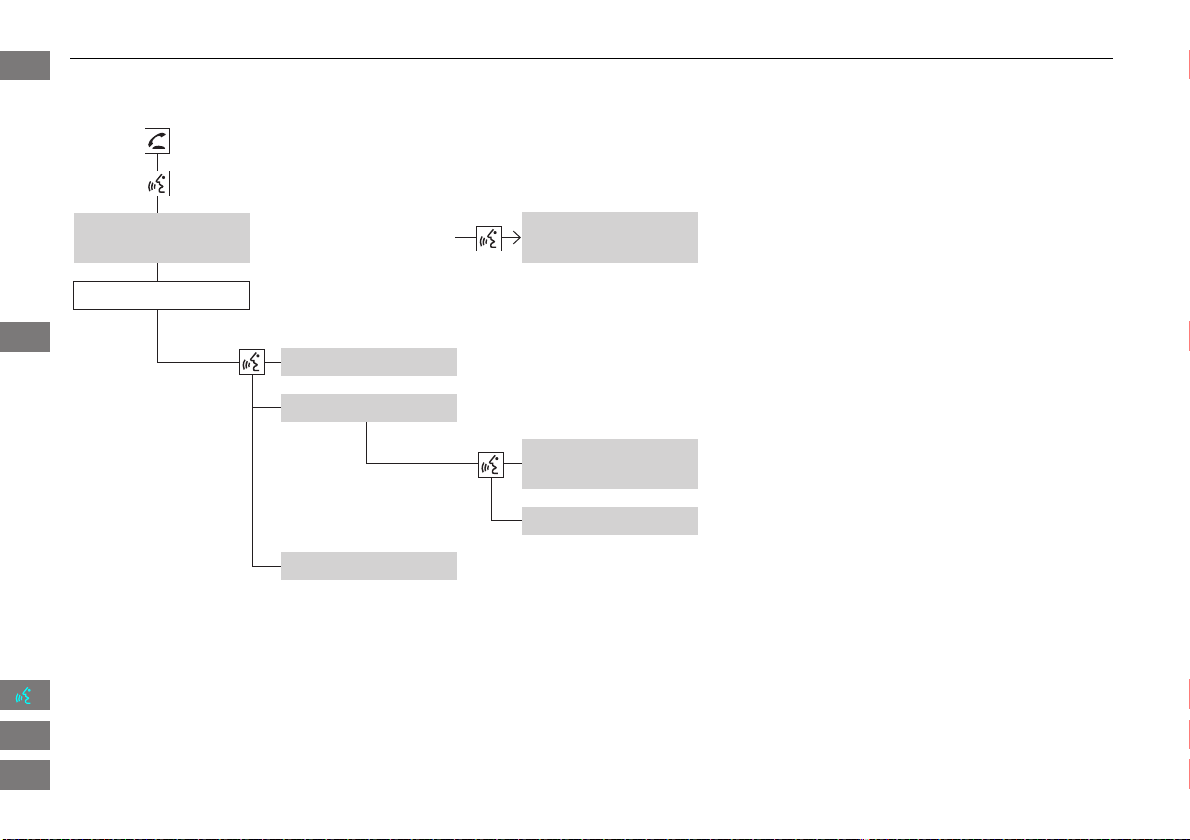
156
Bluetooth® HandsFreeLink®
HFL Menus
Bluetooth® HandsFreeLink®
“Speed Dial 1” or
“Speed Dial 2”
“Voice Tag”
“Edit Phone
Number”
“More Speed Dial
Lists”
“Edit Speed Dial”
“Delete Speed Dial”
“Call”
Select an entry
Dial the phone number of the selected speed dial entry.
Create a voice tag for a speed dial number.
2 Registering a Voice Tag to a Speed Dial Entry P. 146
Delete a previously stored speed dial number.
2 Setting Up Speed Dialing P. 145
Edit the phone number of the selected speed dial entry.
2 Using Speed Dial P. 152
Make a call by using another paired phone’s speed dial list.
(Speed Dial 2 only)
2 Using Speed Dial P. 152
Press the h (Pick-Up) button to display the Cellular Phone screen.
Press the d (Talk) button each time you give a voice command.
FIT_KA-31TK6830.book 156 ページ 2011年7月4日 月曜日 午後2時45分
QRG
Index
Home
TOC
2013 Fit Navigation

157
Other Features
This section describes the useful functions incorporated into the
navigation system.
Information Functions .......................... 158
System/Device Information ................... 158
Map Update......................................... 158
FIT_KA-31TK6830.book 157 ページ 2011年7月4日 月曜日 午後2時45分
QRG
Index
Home
2013 Fit Navigation

158
Other Features
Information Functions
System/Device Information
H INFO button
System/Device Information
View database, software, device, and vehicle identification information.
Map Update
H INFO button
Map Update
Update the map database.
1 System/Device Information
You will need this information when ordering a
map update.
2 Obtaining Navigation Update Data P. 177
1 Map Update
When you order a map update, it is mailed to
you on a USB flash drive.
2 Obtaining Navigation Update Data P. 177
FIT_KA-31TK6830.book 158 ページ 2011年7月4日 月曜日 午後2時45分
QRG
Index
Home
TOC
2013 Fit Navigation

159
Troubleshooting
Troubleshooting ................................... 160
Map, Voice, Entering Destinations........ 160
Guidance, Routing ............................... 162
Update, Coverage, Map Errors ............. 164
Display, Accessories.............................. 164
Miscellaneous Questions ...................... 165
Error Messages...................................... 166
Navigation System................................ 166
Disc Player............................................ 167
iPod® .................................................. 168
USB Flash Drive .................................... 169
FIT_KA-31TK6830.book 159 ページ 2011年7月4日 月曜日 午後2時45分
QRG
Index
Home
2013 Fit Navigation
160
Troubleshooting
Troubleshooting
Map, Voice, Entering Destinations
Problem Solution
The Startup Confirmation screen is displayed every
time I start the car.
This is normal. The Startup Confirmation screen reminds you and your guest drivers to
always operate the navigation system in a safe manner. If you do not select OK at
startup, voice commands will not work.
The navigation system reboots by itself (returns to the
opening screen).
A reboot can be caused by extreme temperatures or shock from bumpy roads, and
does not necessarily indicate a problem. If this happens frequently, please see your
dealer.
How do I specify a destination when an entered city or
street could not be found?
• Try entering the street first. Some cities are lumped in with a major metro area. In
rural “unverified” areas or new subdivisions, streets may be missing or only partially
numbered.
• Try selecting the destination directly from the map.
2 Map Input P. 75
Why do some letters become grayed out when I enter
an address?
As you enter each letter in an address or a place/landmark, the navigation system
looks in the database to see what letters are possible and grays out letters that do not
apply.
How do I delete Personal Addresses, Previous
Destinations, or the Home Address?
1. Press the INFO button. Select Setup > Personal Information to display the types
of information.
2. Select the type of address to delete.
3. Select Delete.
I cannot hear the navigation system voice. Press the INFO button. Select Setup and check that Volume is not set to Off.
2 Display and Volume Settings P. 22
The voice control system is having difficulty
recognizing my voice commands.
• Check that the vents are not blowing air onto the microphone on the ceiling, the
vehicle is as quiet as possible, and you are using the correct command when
speaking.
2 Voice Recognition P. 21
•Say d “Help” on any screen to see a list of the applicable voice commands.
The navigation system pronunciation of street names
in the guidance command or destination address
sounds strange.
The basic guidance phrases use a studio-recorded voice, but street names are
pronounced using a machine-generated voice. Consequently, the name may be
mispronounced or sound strange at times.
FIT_KA-31TK6830.book 160 ページ 2011年7月4日 月曜日 午後2時45分
QRG
Index
Home
TOC
2013 Fit Navigation
161
Troubleshooting
Map, Voice, Entering Destinations
Troubleshooting
I cannot give voice commands. Make sure you selected “OK” at the Startup Confirmation screen.
2 Start-up P. 18
I cannot select an option on the touch screen. To prevent driver distraction, certain touch screen functions and features are limited or
inoperable while the vehicle is moving. Use voice commands, or pull over to proceed.
The screen is bright when I drive at night. 1. Check that the nighttime dashboard brightness control is not set to maximum.
2. Press the INFO button. Select Setup > Other > Color > Map. Set the Night color to
Black for the best contrast.
2 Switching Display Mode Manually P. 27
The screen is dark when I drive during the day. Press the INFO button. Select Setup > Other > Color > Map. Set the Day color to
White for the best contrast.
2 Switching Display Mode Manually P. 27
How do I change or remove my PIN? 1. Press the INFO button. Select Setup > Personal Information > PIN Number > GO
Home 1 PIN or GO Home 2 PIN or Address Book PIN.
2. Enter your existing PIN. You then have the choice to change or remove the PIN.
2 PIN Numbers P. 37
I have forgotten my PIN. How do I reset the PIN for
Home or the PIN for personal addresses (User 1 or User
2)?
Your dealer must reset the PIN for you.
Why is Call grayed out on the Calculate Route screen? Your phone is not paired to Bluetooth® HandsFreeLink® or, if paired, your phone is in
use.
Problem Solution
FIT_KA-31TK6830.book 161 ページ 2011年7月4日 月曜日 午後2時45分
QRG
Index
Home
TOC
2013 Fit Navigation
162
Troubleshooting
Guidance, Routing
Troubleshooting
Guidance, Routing
Problem Solution
The navigation system does not route me the same
way I would go or the same way as other mapping
systems.
The navigation system attempts to generate the optimal route. You can change the
route preferences used when calculating a route.
2 Changing the Route Preference P. 78
The street I’m on is not shown on the map screen. The mapping database is constantly undergoing revision. You can access the most
recent information on the internet.
2 Map Coverage P. 177
The vehicle position icon is not following the road and
the “GPS icon” text in the upper left hand corner of
the screen is white or missing.
• Check that the GPS antenna (located in the dashboard) is not blocked. For best
reception, remove items from the dashboard, such as radar detectors, cell phones,
or loose articles.
• Metallic tinting or other aftermarket devices can interfere with the GPS reception.
Please consult your dealer.
2 GPS System P. 174
The blue highlighted route and voice guidance
stopped or turned into a blue/pink dashed line before I
got to my destination.
Your route has entered an unverified area.
2 Unverified Area Routing P. 42
How do I stop the map from rotating as I drive along? Select the map orientation icon on the map screen, or say d “Display north-up” to
change the map orientation.
Sometimes, I cannot select between the North-up and
Heading-up map orientations.
The Heading-up map orientation can only be shown in the lower scales (1/20 - 1 mile
scales).
2 Map Scale and Functions P. 95
The “time to destination” display sometimes increases
even though I am getting closer to my destination.
If your speed reduces due to slower traffic, the navigation system updates the “time to
destination” based on your actual road speed to give you a better estimate of arrival
time.
The vehicle position icon on the map “lags” a short
distance behind, especially when I arrive at an
intersection.
This is normal. The navigation system is unaware of the width of intersections. Large
differences in vehicle position can indicate a temporary loss of the GPS signal.
2 GPS System P. 174
FIT_KA-31TK6830.book 162 ページ 2011年7月4日 月曜日 午後2時45分
QRG
Index
Home
TOC
2013 Fit Navigation
163
Troubleshooting
Guidance, Routing
Troubleshooting
The screen is showing white dots as I drive along. These dots are called “breadcrumbs.” These are displayed if Off-road Tracking is set
to On and you drive more than 1/2 mile off mapped roads.
2 Off-road Tracking P. 51
How do I remove the white dots (“breadcrumbs”)
from my screen?
Press the INFO button. Select Setup > Other > Vehicle, and set Off-road Tracking
to Off, then return to the map.
2 Off-road Tracking P. 51
A road that I selected to avoid is being used when
routing.
When you “draw” your area to avoid, make sure to select sections of roads that
include at least one intersection.
2 Avoiding Streets P. 100
My elevation (shown when I display the current
position) seems to fluctuate even though my elevation
has not changed.
This is normal. The elevation can vary ±100 feet due to GPS calculation errors.
2 GPS System P. 174
My elevation is missing on the “current position”
screen.
The elevation is only displayed if the GPS antenna can receive signals from at least four
satellites. Try moving the vehicle into an open area. The elevation is also not displayed
if the calculated elevation is zero or below sea level.
Problem Solution
FIT_KA-31TK6830.book 163 ページ 2011年7月4日 月曜日 午後2時45分
QRG
Index
Home
TOC
2013 Fit Navigation
164
Troubleshooting
Update, Coverage, Map Errors
Troubleshooting
Update, Coverage, Map Errors
Display, Accessories
Problem Solution
My city is not part of a fully verified detailed coverage
area.
The mapping database is constantly undergoing revision. You can access the most
recent information on the internet.
2 Map Coverage P. 177
Does the navigation system work outside North
America?
The navigation system contains maps for the 50 U.S. states, Canada, and Puerto Rico.
The navigation system will not work in Mexico or other countries.
2 Map Coverage P. 177
Can I play video DVDs in my navigation system? No. The navigation system is designed only to read music discs. If you experience any
problems that you cannot resolve, please contact your dealer.
How do I report errors I find in the database? Minor errors are bound to occur in a large database. If you encounter major errors, see
2 Reporting Errors P. 176
Problem Solution
The display appears dim when starting the car in really
cold weather.
This is normal. The display will become brighter after a few minutes.
FIT_KA-31TK6830.book 164 ページ 2011年7月4日 月曜日 午後2時45分
QRG
Index
Home
TOC
2013 Fit Navigation

165
Troubleshooting
Miscellaneous Questions
Troubleshooting
Miscellaneous Questions
Problem Solution
My clock frequently changes forward and backward by
one hour.
The clock setting is automatically updated based on your GPS location. If you live and
work on the boundary between two time zones, you can turn off this feature.
2 Clock Adjustment P. 47
The clock changes even when I am not driving near a
time zone boundary.
The time zone boundaries are only approximated in the navigation system. Depending
on the geography of the time zone boundary, the switch to a different zone can be
erratic.
2 Clock Adjustment P. 47
My state does not observe daylight saving time. How
do I turn off this feature?
Press the INFO button. Select Setup > Other > Clock Adjustment > Clock
Adjustment, and set Auto Daylight to Off.
2 Clock Adjustment P. 47
Daylight saving time has started, but the navigation
system did not change time even though Auto
Daylight is set to ON.
The automatic daylight saving time feature does not work in regions where the
daylight saving time system has not been adopted.
The navigation system automatic daylight feature is
not switching the navigation system clock on the
correct dates.
Press the INFO button. Select Setup > Other > Clock Adjustment > Clock
Adjustment, and set Auto Daylight to On. Note that the automatic daylight feature
does not work in regions where the daylight saving time system has not been
adopted.
2 Clock Adjustment P. 47
The navigation system clock switched by one hour for
no apparent reason.
You may be driving near a time zone boundary.
2 Clock Adjustment P. 47
My battery was disconnected or went dead, and the
navigation system is asking for a code.
Your vehicle comes with a label in the Owner’s Manual kit that includes the system’s
security code and serial number. You should keep this label in a safe place outside
your vehicle. If you cannot find it, contact your dealer.
How do I change the interface language? Press the INFO button. Select Setup > Other > Language, and set the language to
English, Français, or Español.
FIT_KA-31TK6830.book 165 ページ 2011年7月4日 月曜日 午後2時45分
QRG
Index
Home
TOC
2013 Fit Navigation
166
Troubleshooting
Error Messages
Navigation System
Error Message Solution
The display temperature is too high! For protection,
the display will shut down.
This message appears briefly when the display temperature is too high. The navigation
system turns off until the display cools down. The system turns back on automatically
when the display cools down.
The navigation system is unable to start due to
excessive heat. The system will start after the system
cools.
The navigation system has difficulty accessing to the map database when the
temperature is high. The navigation system starts up automatically when the display
cools down.
Route has not been completed. Please try again from a
different location.
This message appears when you are on a route to or from a new area that is not in the
database. Try planning a different route to or from a different location. If the error
persists or is shown for a wide area, see your dealer.
Destination is not in this database version. Please set
from map.
The destination was not found in the database. Try another destination nearby, or
select the destination from the map using the joystick. If the error persists or is shown
for a wide area, see your dealer.
No POI found...
FIT_KA-31TK6830.book 166 ページ 2011年7月4日 月曜日 午後2時45分
QRG
Index
Home
TOC
2013 Fit Navigation
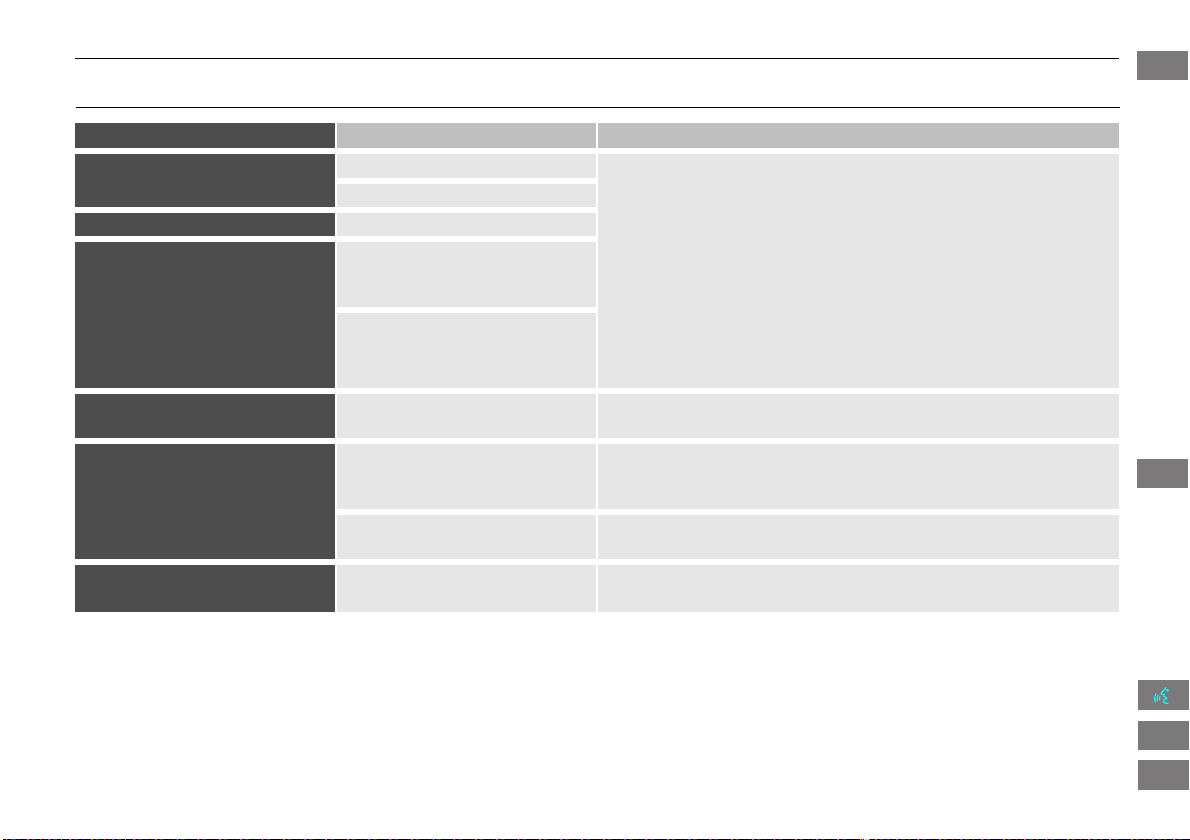
167
Error Messages
Disc Player
Troubleshooting
Disc Player
Error Message Cause Solution
Bad Disc
Please Check Owners Manual
Servo error • Press the E (Eject) button and remove the disc, and check that the
error message is cleared.
• Check that the disc is not damaged or deformed, and insert the disc
again.
2 Recommended Discs P. 122
• If the error message reappears, press the E button, and pull out
the disc.
• Insert a different disc. If the new disc plays, there is a problem with
the first disc.
• If the error message repeats, or the disc cannot be removed, contact
your dealer. Do not try to force the disc out of the player.
Mechanical error
Mecha Error Mechanical error
Check Disc Focus error
Disc violates copyright
Disc not supported
Load error
Unsupported Appears when an unsupported
disc is inserted.
• If it appears when a supported disc is inserted, reinsert the disc.
Unplayable File Appears when the tracks on the
disc are DRM or an unsupported
format.
• This error message appears for about three seconds, then plays the
next song.
The system cannot read the
track(s).
• Check the tracks on the disc. There is a possibility that the tracks
have been damaged.
Heat Error High temperature • Turn the audio system off and allow the player to cool down until
the error message is cleared.
FIT_KA-31TK6830.book 167 ページ 2011年7月4日 月曜日 午後2時45分
QRG
Index
Home
TOC
2013 Fit Navigation
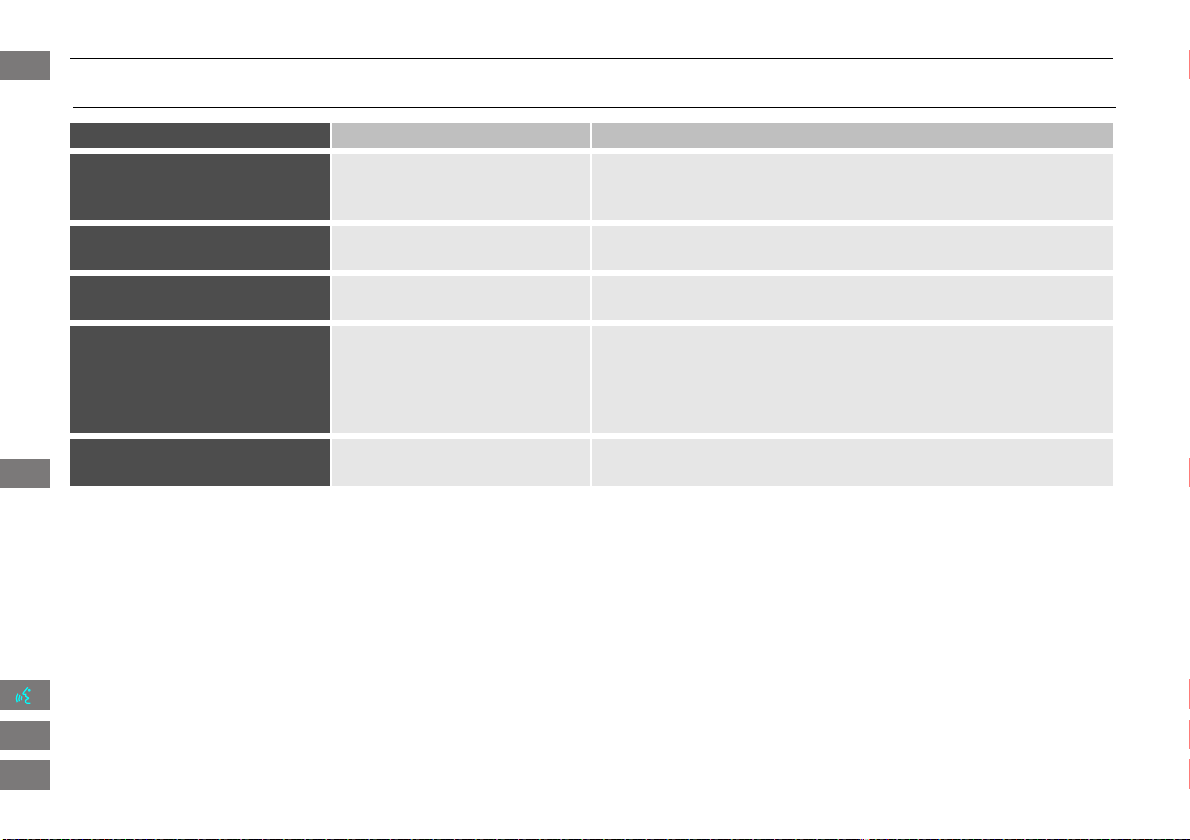
168
Error Messages
iPod®
Troubleshooting
iPod®
Error Message Cause Solution
Unsupported Appears when an unsupported
iPod® is connected.
• Update the iPod® software to the latest version.
• If it appears when a supported iPod® is connected, reconnect the
iPod®.
Connect Retry Appears when the iPod® cannot
be authenticated.
Reconnect the iPod®.
No Data Appears when there are no tracks
in the iPod®.
Store tracks in the iPod®.
Bad Use Device
Please Check Owners Manual
Appears when the overcurrent
protection feature of the system
stops supplying power to USB
because an incompatible iPod® is
connected.
Disconnect the iPod®. Turn the audio system off, and turn it on again.
Do not reconnect the iPod® that caused the error.
USB Error Appears when the internal USB
error occurs.
Try a different iPod®.
FIT_KA-31TK6830.book 168 ページ 2011年7月4日 月曜日 午後2時45分
QRG
Index
Home
TOC
2013 Fit Navigation
169
Error Messages
USB Flash Drive
Troubleshooting
USB Flash Drive
Error Message Cause Solution
Unsupported Appears when an unsupported
device is connected.
If it appears when a supported device is connected, reconnect the
device.
Unplayable File Appears when the tracks in the
USB flash drive are DRM or an
unsupported format.
This error message appears for about three seconds, then plays the
next song.
The system cannot read the
track(s).
Check the tracks in the USB flash drive. There is a possibility that the
tracks have been damaged.
No Data Appears when the USB flash drive
is empty or there are no tracks in
MP3, WMA, or AAC format in the
drive.
Save tracks in MP3, WMA, or AAC format in the USB flash drive.
Bad Use Device
Please Check Owners Manual
Appears when the overcurrent
protection feature of the system
stops supplying power to USB
because an incompatible device is
connected.
Disconnect the device. Turn the audio system off, and turn it on again.
Do not reconnect the device that caused the error.
USB Error Appears when the Internal USB
ROM error occurs.
Try a different USB flash drive.
FIT_KA-31TK6830.book 169 ページ 2011年7月4日 月曜日 午後2時45分
QRG
Index
Home
TOC
2013 Fit Navigation

170
FIT_KA-31TK6830.book 170 ページ 2011年7月4日 月曜日 午後2時45分
QRG
Index
Home
2013 Fit Navigation

171
Reference Information
System Initialization..............................172
Entering the Security Code....................172
Acquiring GPS Information....................172
Startup Confirmation Screen.................173
Map Matching ......................................173
System Limitations ................................174
GPS System...........................................174
Address Calculation ..............................174
Database ..............................................174
Customer Assistance .............................176
Resolving Problems ...............................176
Reporting Errors....................................176
Honda Automobile Customer Service
Contact Information............................176
Visiting Your Dealer ............................. 176
Map Coverage ..................................... 177
Obtaining Navigation Update Data....... 177
Operation in Alaska, Hawaii, Canada, and
Puerto Rico......................................... 178
Legal Information ................................. 179
END-USER TERMS ................................ 179
As required by the FCC ........................ 181
FIT_KA-31TK6830.book 171 ページ 2011年7月4日 月曜日 午後2時45分
QRG
Index
Home
2013 Fit Navigation

172
Reference Information
System Initialization
The navigation system must be initialized if
power to the navigation system is
interrupted for any reason (e.g., the
battery was disconnected).
Entering the Security Code
Find the navigation system’s security code
and serial number label in your Owner’s
Manual kit. Do not store the label in your
vehicle. If you lose the label, you must first
retrieve the serial number, and then obtain
the code. You can find out about your
serial number and security code from a
dealer.
1. Turn the ignition switch to ON (II), and
turn on the audio system.
If you turn the ignition switch to
ACCESSORY (I), and you will
requested to enter the security code.
See step 2.
2. Enter the security code.
If you do not enter the security code
correctly after 10 tries, leave the
system for one hour before trying
again, or visit a dealer to have the
system reset.
NOTE:
In the U.S., you can register the security
code on Owner Link (owners.honda.com.)
.
To find information on how to retrieve the
serial number and obtain the code, visit
radio-navicode.honda.com.
Acquiring GPS Information
Depending on the length of time the
power was interrupted, your system may
require GPS initialization.
If initialization is not necessary, the system
proceeds directly to the Startup
Confirmation screen.
If the system fails to locate a sufficient
number of satellites to locate your position
within 10 minutes, the following screen is
displayed.
FIT_KA-31TK6830.book 172 ページ 2011年7月4日 月曜日 午後2時45分
QRG
Index
Home
TOC
2013 Fit Navigation

173
System Initialization
Startup Confirmation Screen
Reference Information
If you are experiencing GPS reception
problems:
2 GPS System P. 174
Startup Confirmation
Screen
The Startup Confirmation screen is
displayed when initialization has
successfully completed. It is displayed every
time you start your vehicle. Select OK to
continue.
NOTE:
“OK” cannot be selected using a voice
command.
Map Matching
Map matching is the process of using the
acquired GPS information to locate your
position on the map screen. If you are on a
mapped road, the name of the road is
displayed along the bottom of the map
screen when map matching is completed.
Do not enter a destination until the road
name is displayed.
The system may initially show your location
on a different street (e.g., in urban areas
where streets are close together), may
show an incorrect elevation, or may delay
the display of the vehicle position icon at
intersections. This is normal; the system
will correct itself while you drive.
FIT_KA-31TK6830.book 173 ページ 2011年7月4日 月曜日 午後2時45分
QRG
Index
Home
TOC
2013 Fit Navigation

174
Reference Information
System Limitations
GPS System
The signals received from the GPS satellites
are extremely weak (less than a millionth
of the strength of a local FM station) and
require an unobstructed view of the sky.
The GPS antenna is located in the
dashboard. The signal reception can easily
be interrupted or interfered with by the
following:
• Metallic window tint on the front or side
windows
• Cell phones, PDAs, or other electronic
devices docked in a cradle or lying loose
on the dashboard
• Remote starters or “hidden” vehicle
tracking systems mounted near the
navigation unit
• Audio electronic devices mounted near
the navigation unit
• Trees, tall buildings, freeway overpasses,
tunnels, or overhead electrical power
wires
The GPS is operated by the U.S.
Department of Defense. For security
reasons, there are certain inaccuracies built
into the GPS for which the navigation
system must constantly compensate. This
can cause occasional positioning errors of
up to several hundred feet.
Address Calculation
The destination icon shows only the
approximate location of a destination
address. This occurs if the number of
possible addresses is different from the
number of actual addresses on a block. For
example, the address 1425 on a 1400
block with 100 possible addresses
(because it is followed by the 1500 block)
will be shown a quarter of the way down
the block by the system. If there are only
25 actual addresses on the block, the
actual location of address 1425 would be
at the end of the block.
Database
The digitized map database reflects
conditions as they existed at various points
in time before production. Accordingly,
your database may contain inaccurate or
incomplete data or information due to the
passage of time, road construction,
changing conditions, or other causes.
For example, some places/landmarks may
be missing when you search the database
because the name was misspelled, the
place was improperly categorized, or a
place/landmark is not yet in the database.
This is also true for police stations,
hospitals, and other public institutions. Do
not rely on the navigation system if you
need law enforcement or hospital services.
Always check with local information
sources.
FIT_KA-31TK6830.book 174 ページ 2011年7月4日 月曜日 午後2時45分
QRG
Index
Home
TOC
2013 Fit Navigation

175
System Limitations
Database
Reference Information
In addition, the map database contains
verified and unverified areas. Unverified
streets may be missing from the map, in
the wrong location, or have an incorrect
name or address range. A message will
warn you if your route includes unverified
streets. Exercise additional caution when
driving in unverified areas.
The database does not include, analyze,
process, consider, or reflect any of the
following categories of information:
• Neighborhood quality or safety
• Population density
• Availability or proximity of law
enforcement
• Emergency, rescue, medical, or other
assistance
• Construction work, zones, or hazards
• Road and lane closures
• Legal restrictions (such as vehicular type,
weight, load, height, and speed
restrictions)
• Road slope or grade
• Bridge height, width, weight, or other
limits
• Traffic facilities safety
• Special events
• Pavement characteristics or conditions
Every effort has been made to verify that
the database is accurate. The number of
inaccuracies you experience increases the
longer you go without obtaining an
updated map database.
2 Obtaining Navigation Update Data
P. 177
We assume no liability for any incident that
may result from an error in the program, or
from changed conditions not noted above.
FIT_KA-31TK6830.book 175 ページ 2011年7月4日 月曜日 午後2時45分
QRG
Index
Home
TOC
2013 Fit Navigation

176
Reference Information
Customer Assistance
Resolving Problems
If you run into a specific issue that you
cannot resolve, consult the following help
resources:
• For navigation system issues:
2 Troubleshooting P. 160
There are also FAQs available online at
automobiles.honda.com.
• For questions regarding Bluetooth®
HandsFreeLink:
2 Bluetooth® HandsFreeLink® P. 138
• For reporting issues with the database
or places/landmarks:
2 Reporting Errors P. 176
• Call Honda Automobile Customer
Service.
2 Honda Automobile Customer Service
Contact Information
P. 176
Reporting Errors
You can help to improve database
accuracy by reporting any errors you
encounter.
• Report errors in freeways and main
“verified” roads shown in black on the
map at http://mapreporter.navteq.com/
dur-web-external/.
• Please do not report errors in purple
“unverified” roads. Maps for these
areas are provided for reference only.
2 Unverified Area Routing P. 42
• Please do not report errors in places/
landmarks, such as changes in business
names. Information about points of
interest are constantly being updated.
An updated database is available for
purchase, usually in the fall of each year.
2 Obtaining Navigation Update Data
P. 177
• For vehicle position icon errors, screen
error messages, or other GPS-related
errors:
2 Troubleshooting P. 160
2 System Limitations P. 174
Honda Automobile
Customer Service Contact
Information
Honda Navi
American Honda Motor Co., Inc.
Honda Customer Service
Mail Stop 500-2N-7E
1919 Torrance Blvd.
Torrance, CA 90501-2746
Tel: (800) 999-1009
Fax: (310) 783-3273
Visiting Your Dealer
If you have a question that you cannot
resolve using the available help resources,
you can consult your dealer. Please identify
the specific issue (e.g., error occurs when
you enter a specific address, when driving
on a certain road, or just when it’s cold) so
that the service technician can refer the
issue to the factory so that a solution can
be found. Be patient, the service technician
may be unfamiliar with your specific issue.
FIT_KA-31TK6830.book 176 ページ 2011年7月4日 月曜日 午後2時45分
QRG
Index
Home
TOC
2013 Fit Navigation
177
Customer Assistance
Map Coverage
Reference Information
Map Coverage
The navigation system provides map
coverage for the contiguous United States,
Alaska, Hawaii, Canada, and Puerto Rico.
The map coverage consists of accurately
mapped (verified) metropolitan areas and a
less accurate (unverified) rural database.
Note that unverified areas are constantly
being reviewed and converted to verified
areas each year.
Contiguous United States
Puerto Rico
Canada
Hawaii
Alaska
Map coverage update information is
available from Honda Automobile
Customer Service or online at
www.hondanavi.com.
To find navigation system update
information:
1. Visit www.hondanavi.com.
2. Enter your vehicle model and model
year.
3. Click Map Coverage to display a list of
verified coverage areas on the most
recent update.
4. Click Map Coverage Details to display a
PDF document with a full listing of all
coverage areas.
Adobe® Reader® is required for
viewing and printing the Portable
Document Format (PDF) documents.
To download the latest version of
Adobe Reader, visit http://
get.adobe.com/reader/.
Obtaining Navigation
Update Data
Honda is continually expanding the scope
of the navigation system. Navigation
system software upgrades may be made
available periodically, usually in the fall of
each year.
To purchase an updated data file:
1. Obtain your vehicle’s VIN number and
the System/Device Information.
2 System/Device Information P. 158
2. Call the Honda Navigation Disc
Fulfilment Center at (888) 291-4675, or
order online at www.hondanavi.com.
Update data is not available from your
dealer. However, the dealer may assist you
in obtaining an update data for you out of
courtesy. There is no program for free
updates.
FIT_KA-31TK6830.book 177 ページ 2011年7月4日 月曜日 午後2時45分
QRG
Index
Home
TOC
2013 Fit Navigation

178
Customer Assistance
Operation in Alaska, Hawaii, Canada, and Puerto Rico
Reference Information
Operation in Alaska,
Hawaii, Canada, and
Puerto Rico
All roads displayed on the map screens are
verified roads. Information in this manual
relating to “unverified” roads or areas is
not applicable.
■ Map Coverage
Entering a destination address or place/
landmark on another island may result in a
screen caution message. This is because
there are no ferry routes between islands
in the database.
■ Address and Place Entry
Screens
FIT_KA-31TK6830.book 178 ページ 2011年7月4日 月曜日 午後2時45分
QRG
Index
Home
TOC
2013 Fit Navigation

179
Reference Information
Legal Information
END-USER TERMS
The data (“Data”) is provided for your
personal, internal use only and not for
resale. It is protected by copyright, and is
subject to the following terms and
conditions which are agreed to by you, on
the one hand, and NAVTEQ North
America, LLC (“NT”) and its licensors
(including their licensors and suppliers) on
the other hand.
© 2010 NAVTEQ. All rights reserved.
This data includes information taken with
permission from Canadian authorities,
including © Her Majesty the Queen in
Right of Canada, © Queen’s Printer for
Ontario, © Canada Post Corporation,
GeoBase®, © The Department of Natural
Resources Canada. All rights reserved.
NAVTEQ holds a non-exclusive license
from the United States Postal Service® to
publish and sell ZIP+4® information.
©United States Postal Service® 2010.
Prices are not established, controlled or
approved by the United States Postal
Service®. The following trademarks and
registrations are owned by the USPS:
United States Postal Service, USPS, and
ZIP+4.
Personal Use Only. You agree to use this
Data for the solely personal, non-
commercial purposes for which you were
licensed, and not for service bureau, time-
sharing or other similar purposes.
Accordingly, but subject to the restrictions
set forth in the following paragraphs, you
may copy this Data only as necessary for
your personal use to (i) view it, and (ii) save
it, provided that you do not remove any
copyright notices that appear and do not
modify the Data in any way. You agree
not to otherwise reproduce, copy, modify,
decompile, disassemble or reverse
engineer any portion of this Data, and may
not transfer or distribute it in any form, for
any purpose, except to the extent
permitted by mandatory laws. Multi-disc
sets may only be transferred or sold as a
complete set as provided by you and not as
a subset thereof.
Restrictions. Except where you have been
specifically licensed to do so by NT, and
without limiting the preceding paragraph,
you may not (a) use this Data with any
products, systems, or applications installed
or otherwise connected to or in
communication with vehicles, capable of
■ TERMS AND CONDITIONS
vehicle navigation, positioning, dispatch,
real time route guidance, fleet
management or similar applications; or (b)
with or in communication with any
positioning devices or any mobile or
wireless-connected electronic or computer
devices, including without limitation
cellular phones, palmtop and handheld
computers, pagers, and personal digital
assistants or PDAs.
Warning. The Data may contain
inaccurate or incomplete information due
to the passage of time, changing
circumstances, sources used and the
nature of collecting comprehensive
geographic data, any of which may lead to
incorrect results.
No Warranty. This Data is provided to
you “as is,” and you agree to use it at your
own risk. NT and its licensors (and their
licensors and suppliers) make no
guarantees, representations or warranties
of any kind, express or implied, arising by
law or otherwise, including but not limited
to, content, quality, accuracy,
completeness, effectiveness, reliability,
fitness for a particular purpose, usefulness,
use or results to be obtained from this
Data, or that the Data or server will be
uninterrupted or error-free.
FIT_KA-31TK6830.book 179 ページ 2011年7月4日 月曜日 午後2時45分
QRG
Index
Home
TOC
2013 Fit Navigation

180
Legal Information
END-USER TERMS
Reference Information
Disclaimer of Warranty: NT AND ITS
LICENSORS (INCLUDING THEIR LICENSORS
AND SUPPLIERS) DISCLAIM ANY
WARRANTIES, EXPRESS OR IMPLIED, OF
QUALITY, PERFORMANCE,
MERCHANTABILITY, FITNESS FOR A
PARTICULAR PURPOSE OR NON-
INFRINGEMENT. Some States, Territories
and Countries do not allow certain
warranty exclusions, so to that extent the
above exclusion may not apply to you.
Disclaimer of Liability: NT AND ITS
LICENSORS (INCLUDING THEIR LICENSORS
AND SUPPLIERS) SHALL NOT BE LIABLE TO
YOU: IN RESPECT OF ANY CLAIM,
DEMAND OR ACTION, IRRESPECTIVE OF
THE NATURE OF THE CAUSE OF THE
CLAIM, DEMAND OR ACTION ALLEGING
ANY LOSS, INJURY OR DAMAGES, DIRECT
OR INDIRECT, WHICH MAY RESULT FROM
THE USE OR POSSESSION OF THE
INFORMATION; OR FOR ANY LOSS OF
PROFIT, REVENUE, CONTRACTS OR
SAVINGS, OR ANY OTHER DIRECT,
INDIRECT, INCIDENTAL, SPECIAL OR
CONSEQUENTIAL DAMAGES ARISING OUT
OF YOUR USE OF OR INABILITY TO USE
THIS INFORMATION, ANY DEFECT IN THE
INFORMATION, OR THE BREACH OF THESE
TERMS OR CONDITIONS, WHETHER IN AN
ACTION IN CONTRACT OR TORT OR
BASED ON A WARRANTY, EVEN IF NT OR
ITS LICENSORS HAVE BEEN ADVISED OF
THE POSSIBILITY OF SUCH DAMAGES.
Some States, Territories and Countries do
not allow certain liability exclusions or
damages limitations, so to that extent the
above may not apply to you.
Export Control. You agree not to export
from anywhere any part of the Data
provided to you or any direct product
thereof except in compliance with, and
with all licenses and approvals required
under, applicable export laws, rules and
regulations.
Entire Agreement. These terms and
conditions constitute the entire agreement
between NT (and its licensors, including
their licensors and suppliers) and you
pertaining to the subject matter hereof,
and supersedes in their entirety any and all
written or oral agreements previously
existing between us with respect to such
subject matter.
Governing Law. The above terms and
conditions shall be governed by the laws of
the State of Illinois, without giving effect
to (i) its conflict of laws provisions, or (ii)
the United Nations Convention for
Contracts for the International Sale of
Goods, which is explicitly excluded. You
agree to submit to the jurisdiction of the
State of Illinois for any and all disputes,
claims and actions arising from or in
connection with the Data provided to you
hereunder.
Government End Users. If the Data is
being acquired by or on behalf of the
United States government or any other
entity seeking or applying rights similar to
those customarily claimed by the United
States government, this Data is a
“commercial item” as that term is defined
at 48 C.F.R. (“FAR”) 2.101, is licensed in
accordance with this End User License
Agreement, and each copy of the Data
delivered or otherwise furnished shall be
marked and embedded as appropriate
with the following “Notice of Use,” and
shall be treated in accordance with such
Notice:
FIT_KA-31TK6830.book 180 ページ 2011年7月4日 月曜日 午後2時45分
QRG
Index
Home
TOC
2013 Fit Navigation

181
Legal Information
As required by the FCC
Reference Information
If the Contracting Officer, federal
government agency, or any federal official
refuses to use the legend provided herein,
the Contracting Officer, federal
government agency, or any federal official
must notify NAVTEQ prior to seeking
additional or alternative rights in the Data.
CONTRACTOR (MANUFACTURER/
SUPPLIER) NAME: NAVTEQ
CONTRACTOR (MANUFACTURER/
SUPPLIER) ADDRESS: 425 West Randolph
St., Chicago, Illinois 60606
NOTICE OF USE
This Data is a commercial item as dened
in FAR 2.101 and is subject to the End
User License Agreement under which this
Data was provided.
© 2010 NAVTEQ - All rights reserved.
As required by the FCC
1)This device complies with Part 15 of the
FCC Rules and Canadian RSS-210/RSS-
Gen. Operation is subject to the following
two conditions: (1) this device may not
cause harmful interference, and (2) this
device must accept any interference
received, including interference that may
cause undesired operation.
2)The FCC requires the user to be notified
that any changes or modifications made to
this device that are not expressly approved
by the party responsible for compliance
may void the user's authority to operate
the equipment.
3)This product emits radio frequency
energy, but the radiated output power of
this device is far below the FCC and IC
radio frequency exposure limits. This
equipment complies with FCC and IC RF
radiation exposure limits set forth for an
uncontrolled environment. Nevertheless,
the device should be used in such a
manner that the potential for human
contact with the antenna during normal
operation is minimized.
FIT_KA-31TK6830.book 181 ページ 2011年7月4日 月曜日 午後2時45分
QRG
Index
Home
TOC
2013 Fit Navigation

182
FIT_KA-31TK6830.book 182 ページ 2011年7月4日 月曜日 午後2時45分
QRG
Index
Home
2013 Fit Navigation

183
Voice Commands
Voice Commands .................................. 184
Global Commands ............................... 184
Navigation Commands......................... 184
Audio Commands ................................ 186
Cellular Phone Commands ................... 188
Main Setup Screen Commands ............ 189
On-Screen Commands ......................... 189
Spelling Assistance ............................... 189
FIT_KA-31TK6830.book 183 ページ 2011年7月4日 月曜日 午後2時45分
QRG
Index
Home
2013 Fit Navigation

184
Voice Commands
Global Commands
The system accepts these commands on
any screen.
Help (displays available commands for
current screen)
Display map (equivalent to MAP)
Display menu (equivalent to DEST)
Display information (equivalent to INFO)
Display audio screen (equivalent to
AUDIO)
Back (equivalent to K (Back))
Cancel (equivalent to CANCEL)
What is today’s date?
What time is it?
Navigation Commands
The system accepts these commands on a
map/guidance screen.
Display menu (if en route, displays the
Route screen)
Display navigation (if en route, displays
the Route screen)
Display map
Display map guide (when en route,
shows the next guidance point)
Display information (or Information)
Display audio screen
Cancel
Backward (or Back)
What time is it?
What is today’s date?
Help (reads list of General and Map
Display Commands)
■ General Commands
Display current location (shows current
latitude, longitude, and elevation)
Display/Hide (specify icon type):
ATM
gas station
restaurant
post office
grocery store
lodging (hotel, motel)
parking garage
parking lot
school
hospital
freeway exit information
Go home 1
Go home 2
Register the current location (stores
current location in the Address Book)
■ Map Display Commands
FIT_KA-31TK6830.book 184 ページ 2011年7月4日 月曜日 午後2時45分
QRG
Index
Home
2013 Fit Navigation

185
Voice Commands
Navigation Commands
Display north up
Display heading up
Display zoom in
Display zoom out
Display (specify scale):
1/20 mile (80 m) scale
1/8 mile (200 m) scale
1/4 mile (400 m) scale
1/2 mile (800 m) scale
1 mile (1600 m) scale
2 mile (3 km) scale
5 mile (8 km) scale
15 mile (24 km) scale
50 mile (80 km) scale
150 mile (240 km) scale
350 mile (560 km) scale
1000 mile (1600 km) scale
Max zoom in
Max zoom out
■ Map Scale Commands
Find nearest (specify place):
Auto service center
ACURA dealers
HONDA dealers
Gas station
Hydrogen station
Auto parts & electronics shop
Auto repair & maintenance shop
Car wash & detailing shop
Motorcycle dealers
Other car dealers
Roadside assistance
Banking center
ATM
Bank
Check cashing
Community
Business
City hall
Civic center
Convention center
Court house
Higher education
Library
Post office
School
■ Find Place Commands
Emergency room
Hospital
Police station
Veterinarian
Lodging
Bed & breakfast
Hotel
Leisure center
Amusement park
Golf course
Historical monument
Marina
Movie theater
Museum
Park
Performing arts
Sports complex
Tourist attraction
Restaurant
American restaurant
Californian restaurant
Chinese restaurant
Coffee shop
Continental restaurant
Fast food restaurant
French restaurant
German restaurant
Greek restaurant
Continued
FIT_KA-31TK6830.book 185 ページ 2011年7月4日 月曜日 午後2時45分
QRG
Index
Home
2013 Fit Navigation

186
Voice Commands
Audio Commands
Ice cream shop
Indian restaurant
Italian restaurant
Japanese restaurant
Korean restaurant
Mexican restaurant
Pizza
Seafood restaurant
Thai restaurant
Vegetarian restaurant
Vietnamese restaurant
Other restaurant
Shopping area
Accessory store
Book store
Clothing store
Furniture store
Grocery store
Home improvement store
Mall
Office supply store
Pharmacy
Pet food store
Sewing store
Shoe store
Sporting goods store
Toy store
Travel center
Airport
Automobile club
Bus station
Camping
Commuter rail station
Ferry terminal
Named place
Park & ride
Parking garage
Parking lot
Rental car agency
Rest area
Ski area
Tourist information
Train station
Travel agency
Truck stop
The system accepts these commands
when a route is set.
How long to the destination?
How far to the destination?
Display destination map
Display entire route
■ Route Commands
Audio Commands
The system accepts these commands on
most screens.
Audio*
Audio on
Audio off
NOTE:
Audio volume levels cannot be controlled
using voice control.
Radio*
Radio on
Radio off
Radio select FM1
Radio select FM2
Radio select AM
Radio tune to # FM (#: frequency,
e.g., 95.5)
Radio tune to # AM (#: frequency,
e.g., 1020)
Radio seek up
Radio seek down
Radio next station
■ Radio Commands
FIT_KA-31TK6830.book 186 ページ 2011年7月4日 月曜日 午後2時45分
QRG
Index
Home
so the command may not match your intended action.
These commands toggle the function on and off, *
2013 Fit Navigation
so the command may not match your intended action.
These commands toggle the function on and off, *

187
Voice Commands
Audio Commands
Radio preset # (#: 1 to 6)
Radio FM preset # (#: 1 to 6)
Radio FM1 preset # (#: 1 to 6)
Radio FM2 preset # (#: 1 to 6)
Radio AM preset # (#: 1 to 6)
Radio auto select*
Radio scan*
DISC play
DISC play track # (#: 1 to 30)
DISC skip forward
DISC skip back
DISC track random*
DISC track repeat*
DISC track scan*
DISC folder up
DISC folder down
DISC folder random*
DISC folder repeat*
DISC folder scan*
DISC normal play (cancels random,
repeat, or scan play mode, resumes
normal play mode)
■ Disc Commands
USB play
USB play track # (#: 1 to 30)
USB skip forward
USB skip back
USB track random*
USB track repeat*
USB track scan*
USB folder up
USB folder down
USB folder random*
USB folder repeat*
USB folder scan*
USB normal play (cancels random,
repeat, or scan play mode, resumes
normal play mode)
■ USB Commands
FIT_KA-31TK6830.book 187 ページ 2011年7月4日 月曜日 午後2時45分
so the command may not match your intended action.
These commands toggle the function on and off, *
so the command may not match your intended action.
These commands toggle the function on and off, *
so the command may not match your intended action.
These commands toggle the function on and off, *
QRG
Index
Home
2013 Fit Navigation

188
Voice Commands
Cellular Phone Commands
iPod play
iPod play track # (#: 1 to 30)
iPod skip forward
iPod skip back
iPod track shuffle*
iPod album shuffle*
iPod track repeat*
iPod normal play (cancels repeat or
shuffle play mode, resumes normal play
mode)
■ iPod® Commands
Bluetooth audio play
Bluetooth audio skip forward
Bluetooth audio skip back
Bluetooth audio pause
Bluetooth audio resume
NOTE:
Bluetooth® Audio commands may not
work on some phones or Bluetooth®
audio devices.
AUX play (or Auxiliary play)
■ Bluetooth® Audio Commands
■ AUX Commands
Cellular Phone Commands
The system accepts these commands only
on the PHONE screen.
Redial
Call History
Phonebook
Dial
Phone Setup
Phone Menu
Speed Dial 1
Speed Dial 2
More Speed Dial Lists
These commands can be made from any
screen.
Dial/call by number
Dial/call by voice tag
FIT_KA-31TK6830.book 188 ページ 2011年7月4日 月曜日 午後2時45分
QRG
Index
Home
so the command may not match your intended action.
These commands toggle the function on and off, *
2013 Fit Navigation

189
Voice Commands
Main Setup Screen Commands
Main Setup Screen
Commands
The system accepts these commands on
the Main Setup screen.
Brightness up
Brightness down
Brightness minimum/min.
Brightness maximum/max.
Contrast up
Contrast down
Contrast minimum/min.
Contrast maximum/max.
Black level up
Black level down
Black level minimum/min.
Black level maximum/max.
Volume up
Volume down
Volume minimum/min.
Volume maximum/max.
Volume off
Guidance prompts normal
Guidance prompts maximum/max
Guidance prompts minimum/min
On-Screen Commands
The system accepts these commands on
any screen. There are over 100 on-screen
commands. Say what is written on the
screen to activate that selection. For lists,
you can say the list item number to select
that item.
Next/Previous
Right/Left
Up/Down
Return
OK (excluding Startup Confirmation
screen)
Delete
Spelling Assistance
The voice control system can also
recognize phonetic alphabet input for
numbers, letters, accented letters,
punctuation marks, and symbols.
NOTE:
When selecting letters using the voice
control system, a confirmation box may
pop up to confirm the entry.
FIT_KA-31TK6830.book 189 ページ 2011年7月4日 月曜日 午後2時45分
*
1
. To get to another tab.
*
2
. While driving, you can scroll down the list up to
three pages.
*
1
*
1
*
2
QRG
Index
Home
2013 Fit Navigation
190
Voice Commands
Spelling Assistance
■ Numbers
Say … Say … or Number …
1 One
2Two
3 Three
4 Four
5 Five
6Six
7 Seven
8Eight
9 Nine
0 Zero
■ Letters
Say … Or say…
A Alpha/Apple
BBravo/Boy
C Charlie
DDelta/Dog
E Echo/Edward
F Foxtrot/Frank
G Golf/George
H Hotel/Henry
I India/Igloo
J Juliet/John
K Kilo/King
L Lima/Larry
M Mike/Mary
N November/Nancy
O Oscar
P Papa/Paul
Q Quebec/Queen
R Romeo/Robert
S Sierra/Sam
T Tango/Tom
U Uniform/Uncle
VVictor
W Whiskey/William
X X-ray
Y Yankee/Yellow
Z Zulu/Zebra
Say … Or say…
FIT_KA-31TK6830.book 190 ページ 2011年7月4日 月曜日 午後2時45分
QRG
Index
Home
2013 Fit Navigation
191
Voice Commands
Spelling Assistance
■ Accented Letters
Say … Say … or Symbol …
À A grave
 A circumflex
Ä A umlaut
ÇC cedilla
È E grave
ÉE acute
Ê E circumflex
ËE umlaut
Ì I grave
ÎI circumflex
Ï I umlaut
ÔO circumflex
Ù U grave
Û U circumflex
Ü U umlaut
Say … Say … or Symbol …
■ Symbols
Say … Say … or Symbol …
@ At sign
^ Caret
* Asterisk
_ Underscore
` Back quote
, Comma
. Dot
Continued
FIT_KA-31TK6830.book 191 ページ 2011年7月4日 月曜日 午後2時45分
QRG
Index
Home
2013 Fit Navigation

192
Voice Commands
Spelling Assistance
? Question mark
: Colon
; Semicolon
+ Plus
-Hyphen
! Exclamation point
“ Double quote
# Pound
$Dollar
% Percent
&Ampersand
‘ Apostrophe
( Open parenthesis
) Close parenthesis
~Tilde
/ Slash
< Less than
> Greater than
{ Open brace
} Close brace
k Enter
Say … Say … or Symbol …
FIT_KA-31TK6830.book 192 ページ 2011年7月4日 月曜日 午後2時45分
QRG
Index
Home
2013 Fit Navigation
193
List of Categories
Auto Service Lodging Shopping
All Types (Auto Service) Car Wash & Detailing All Types (Lodging) Hotel/Motel All Types (Shopping)
Mall/Department Store
Honda Dealers* Motorcycle Dealers Bed & Breakfast Accessories/Jewelry
Office Supplies/Electronics
Acura Dealers* Other Car Dealers
Leisure
Auto Parts & Electronics
Pet Food/Supplies
Gas Station* Parking Garage/House All Types (Leisure) Museum Books/Music/Video Pharmacy/Drug Store
Hydrogen Station Parking Lot Amusement Park
Park/Recreation Area
Clothing/Shoes/Bags
Sewing/Linen
Auto Parts & Electronics Rental Car Agency Golf Course Performing Arts
Furniture/Home Furnishing
Sporting Goods
Auto Repair & Maintenance
Roadside Assistance
Historical Monument
Sports Complex
Groceries/Supermarket
Toys/Arts/Crafts
Banking
Marina Tourist Attraction Home Improvement
All Types (Banking)
Check Cashing/Money Transfer
Movie Theater
Travel
ATM*
Restaurant
All Types (Travel) Park & Ride
Bank
All Types (Restaurant)*
Indian Airport
Parking Garage/House
Community
American Italian Automobile Club Parking Lot
All Types (Community) Court House Café/Coffee Shop Japanese Bed & Breakfast Rental Car Agency
Business Higher Education Californian Korean Bus Station Rest Area
City Hall Library Chinese Mexican Camping Ski Area
Civic/Community Center Post Office Continental Pizza
Commuter Rail Station
Tourist Attraction
Convention/Exhibition Center
School Fast Food Seafood Ferry Terminal Tourist Information
Emergency
French Thai Hotel/Motel Train Station
All Types (Emergency) Roadside Assistance German Vegetarian Named Place Travel Agency
Hospital* Veterinarian Greek Vietnamese
Police Station Ice Cream/Dessert Other
FIT_KA-31TK6830.book 193 ページ 2011年7月4日 月曜日 午後2時45分
QRG
Index
Home
* Stored in “Fav. Subcategory” by factory default.
2013 Fit Navigation

194
Index
Symbols
K (Back) Button
....................................5
,
20
a (Display Mode) Button
......................27
j (Hang-Up) Button
............................5
,
153
h (Pick-Up) Button
...................... 5
,
153
,
154
d (Talk) Button
......................................5
,
20
A
A.SEL (Auto Select)
....................................115
Add to Address Book
..........................77
,
110
Add to Dest. List
.................. 77
,
104
,
108
,
109
Address
Editing Address Book
.................................33
Editing Avoid Area
......................................45
Setting Destination
.....................................58
Address Book
Editing Address Book
.................................31
Setting Destination
.....................................63
Address Book PIN
.........................................37
Adjust Time
...................................................48
Advanced (Place Category)
........................67
Audio
...........................................................111
Basic Operation
.............................................6
Remote Control
........................................135
Sound Setup
.............................................134
Voice Commands List
...............................186
AUDIO Button
................................................4
Audio Menu
Bluetooth® Audio
....................................133
FM/AM Radio
............................................116
Auto Answer
..............................................149
Auto Daylight
...............................................47
Auto Service (Place Category)
....................67
Auto Time Zone
.......................................... 47
Auto Transfer
............................................ 149
AUX
Input Jack
................................................. 112
Voice Commands List
.............................. 188
Avoid Streets
.............................................. 100
B
Banking (Place Category)
........................... 67
Basic Settings
......................................... 24
,
25
Black Level
.................................................... 22
Bluetooth Setup
........................................ 149
Bluetooth Connection
.............................. 149
Bluetooth® Audio
Playing
...................................................... 131
Voice Commands List
.............................. 188
Bluetooth® HandsFreeLink®
.................. 137
Editing Phone Info
................................... 148
Making a Call
........................................... 150
Pairing a Phone
........................................ 140
Phone Setup
............................................. 149
Receiving a Call
........................................ 153
Setting Speed Dials
.................................. 145
Brightness
............................................... 22
,
27
C
Call
Calculate Route Screen
...................... 77
,
110
Call History
................................................. 152
Cancel Route
.............................................. 100
Category
Editing Address Book
................................. 33
Place Category List
................................... 193
Setting Destination
..................................... 67
CD/AUX Button
..............6
,
119
,
124
,
128
,
131
CH (Channel) Button
................................. 136
Change Language
....................................... 18
Change Route Preference
.......................... 78
Change State
................................................ 59
City
................................................................ 60
City Vicinity
Setting Destination
..................................... 68
Clear All Speed Dial
.................................... 54
Clock Adjustment
........................................ 47
Adjust Time
................................................ 48
Auto Daylight
............................................. 47
Auto Time Zone
.......................................... 47
Clock Format
.............................................. 47
Resetting
.................................................... 48
Clock Format
................................................ 47
Clock Type
.................................................... 49
Color
.............................................................. 25
Map Color
.................................................. 26
Menu Color
................................................ 26
Community (Place Category)
..................... 67
Connect (Phone)
........................................ 148
Continue Trip
............................................. 110
Contrast
........................................................ 22
Coordinate
................................................... 73
Correct Vehicle Position
............................. 52
Current Location
.......................................... 98
Current Position
Editing Address Book
................................. 33
Setting Destination
..................................... 75
FIT_KA-31TK6830.book 194 ページ 2011年7月4日 月曜日 午後2時45分
QRG
Index
Home
A B C D E F G H I J K L M N O P Q R S T U V W X Y Z
2013 Fit Navigation

195
Index
D
Day Mode
Map Color
.................................................. 26
Menu Color
................................................ 26
Switching Display Mode
.............................27
Delete this Phone
......................................143
DEST Button
Changing Route
......................................... 99
Entering a Destination
................................56
DEST Menu 1
................................................ 56
DEST Menu 2
................................................ 56
Destination Map
.......................................... 79
Detour
......................................................... 100
Dial
..............................................................151
Directions
...................................................... 88
Disc
Playing
...................................................... 119
Voice Commands List
...............................187
Display Voice Command Tips
..................... 24
E
Edit Avoid Area
........................................... 44
Edit Speed Dial
........................................... 145
Edit Waypoint Search Area
........................ 46
Emergency (Place Category)
...................... 67
Error Messages
........................................... 166
Disc Player
................................................ 167
iPod®
........................................................ 168
Navigation System
....................................166
USB Flash Drive
......................................... 169
Exit Info.
....................................................... 89
F
Favorite Subcategory
..................................69
Find Nearest...
............................................106
FM/AM Button
.......................................6
,
114
FM/AM Radio
Playing
......................................................114
Voice Commands List
...............................186
Folder List
Disc
...........................................................121
USB Flash Drive
.........................................130
G
Go Home 1
....................................................10
Go Home 1 PIN
.............................................37
Go Home 2
....................................................10
Go Home 2 PIN
.............................................37
Guidance Menu
............................................87
Directions
....................................................88
Exit Info
.......................................................89
Guidance Mode
..........................................90
Guidance Mode
............................................90
Guidance Prompts
.......................................23
H
Heading-up
...................................................97
Home Address 1
.....................................10
,
36
Home Address 2
.....................................10
,
36
Honda Customer Services
.........................176
I
Icon Option
.................................................. 93
Intersection
.................................................. 74
iPod®
Connecting, Disconnecting
............. 123
,
127
Playing
...................................................... 123
Voice Commands List
.............................. 188
K
Keyboard Layout
......................................... 24
L
Language
..................................................... 29
Leisure (Place Category)
............................. 67
Lodging (Place Category)
........................... 67
M
Map Color
.................................................... 26
Map Input
Editing Avoid Area
..................................... 45
Setting Destination
.................................... 75
Map Legend
............................................. 7
,
94
Map Menu
................................................... 85
Map Screen
.................................................. 80
Icon
.................................................. 7
,
92
,
96
Orientation
................................................. 97
Scale
........................................................... 95
Map Update
Checking Version
..................................... 158
Obtaining Update Data
............................ 177
Viewing Update Status
............................ 158
FIT_KA-31TK6830.book 195 ページ 2011年7月4日 月曜日 午後2時45分
Index
A B C D E F G H I J K L M N O P Q R S T U V W X Y Z
QRG
Index
Home
2013 Fit Navigation

196
MAP/GUIDE Button
..................................8
,
90
Menu (DEST Menu 1)
..................................56
Menu (DEST Menu 2)
..................................56
Menu (Route)
...............................................99
Menu Color
...................................................26
MODE Button
.............................................135
Music Search
iPod®
........................................................126
Mute
............................................................153
My Destination
Adding Waypoint
.....................................101
Editing
.......................................................105
N
Night Mode
Map Color
...................................................26
Menu Color
................................................26
Switching Display Mode
.............................27
North-up
.......................................................97
O
Off-road Tracking
Driving
........................................................83
Setting
........................................................51
P
Pair Phone
...................................................140
Pairing Code
...............................................142
Personal Information
..................................30
Phone
Voice Commands List
...............................188
PHONE Button
................................................4
Phone Setup
............................................... 138
Phonebook
Making a Call
........................................... 151
PIN Numbers
Personal Info
.............................................. 37
Phone
....................................................... 148
Place Category
Editing Address Book
................................. 33
Place Category List
................................... 193
Setting Destination
.................................... 67
Place Name
Editing Address Book
................................. 33
Setting Destination
.............................. 65
,
68
Place Phone No.
Editing Address Book
................................. 33
Setting Destination
.................................... 72
Previous Destination
Deleting
...................................................... 39
Editing Address Book
................................. 33
Setting Destination
.................................... 64
R
Radio
FM/AM
..................................................... 114
Random (Pairing Code)
............................ 142
RDS Search
................................................. 117
Read Radio Text
........................................ 118
Recalculation
......................................... 41
,
83
Repeat
iPod®
....................................................... 125
USB Flash Drive
........................................ 130
Replace this Phone
.................................... 148
Rerouting
..................................................... 41
Reset Clock Settings
.................................... 48
Reset Factory Default
.................................. 53
Restaurant (Place Category)
...................... 67
Route (Menu)
............................................... 99
Route Pref.
................................................... 78
Routing & Guidance
.................................... 40
S
Scan
Disc
........................................................... 120
FM/AM Radio
........................................... 115
USB Flash Drive
......................................... 129
Search by Keyword
...................................... 68
Security PIN Code
...................................... 172
SEEK/SKIP Button
........................................... 4
Shopping (Place Category)
......................... 67
Show icon on Map
...................................... 92
Single Screen
................................................ 90
Sort by Distance to Travel
.......................... 68
Sound Setup
............................................... 134
Speed Dial
Making a Call
........................................... 152
Registering
................................................ 145
Split Screen
................................................... 91
Street
............................................................. 61
System/Device Information
...................... 158
T
Touch Tones
............................................... 153
Transfer Call
............................................... 153
Travel (Place Category)
............................... 67
Tune
FM/AM Radio
........................................... 115
FIT_KA-31TK6830.book 196 ページ 2011年7月4日 月曜日 午後2時45分
Index
Index
A B C D E F G H I J K L M N O P Q R S T U V W X Y Z
QRG
Index
Home
2013 Fit Navigation

197
U
Units (mile or km)
........................................ 24
Unverified Area Routing
............................42
Update System Software
Finding Update Information
..................... 177
Obtaining Update Data
............................177
USB Flash Drive
Connecting, Disconnecting
..............123
,
127
Playing
...................................................... 127
Voice Commands List
...............................187
V
Vehicle
.......................................................... 50
Correct Vehicle Position
.............................52
Off-road Tracking
....................................... 51
Verbal Reminder
.......................................... 25
View Area Map
............................................ 44
View Routes
................................................. 78
Voice
Map Menu
.................................................. 84
Voice Commands
Basic Operation
............................................ 9
Help
............................................................ 13
Voice Commands List
...............................184
Voice Control System
.................................20
Voice Control Operation
Basic Operation
............................................ 5
Voice Recognition Tutor
.............................24
Voice Tag
.................................................... 146
Editing
...................................................... 147
Registering
................................................ 146
VOL (Volume) Button
...............................136
VOL 9 (Volume/Power) Knob
.................... 6
Volume
..........................................................22
Guidance
....................................................22
Phone
........................................................149
W
Waypoint
Adding
......................................................101
Deleting, Ordering
....................................105
Z
ZOOM IN/OUT Button
.............................4
,
95
FIT_KA-31TK6830.book 197 ページ 2011年7月4日 月曜日 午後2時45分
Index
Index
A B C D E F G H I J K L M N O P Q R S T U V W X Y Z
QRG
Index
Home
2013 Fit Navigation