Loading ...
Loading ...
Loading ...
9
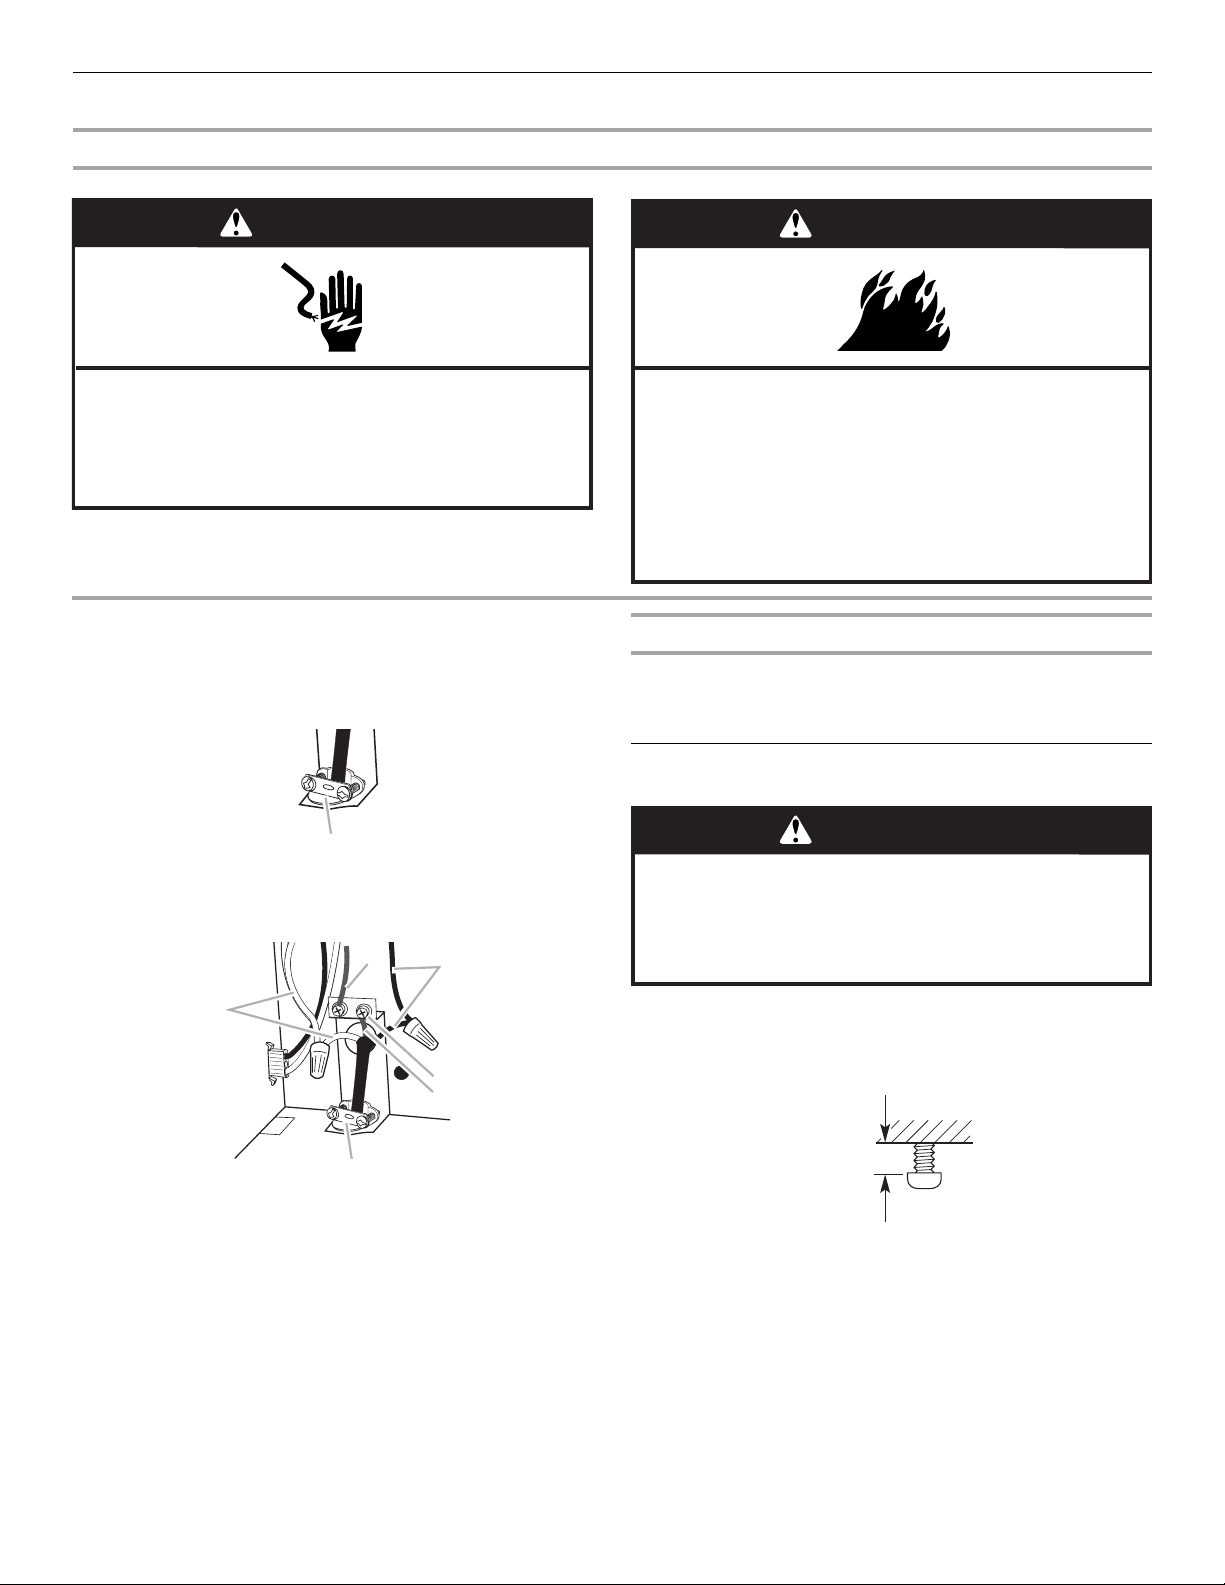
Make Electrical Connection
Direct Wire Installation
1. Disconnect power.
2. If not previously done, run wiring through wall or cabinets
according to electrical codes and ordinances.
3. Stand hood up. Feed the power supply cable through the
strain relief.
4. Use twist-on connectors and connect black wires together.
5. Use twist-on connectors and connect white wires together.
6. Connect the power supply ground wire to the green ground
connector and tighten securely.
7. Securely tighten the strain relief.
8. Replace the wiring cover.
UL-Listed Power Supply Cord Kit (U.S. Only)
1. Connect a UL-listed power cord kit (Part Number HOODPT3)
following the kit instructions for connecting the wires.
2. Replace the wiring cover.
Install Range Hood
1. Remove the 4 range hood mounting screws from the bag
containing parts and install in previously drilled ¹⁄₈" (3.0 mm)
pilot holes. Leave screw heads about ¹⁄₄" (6.4 mm) away from
shim strips.
2. Lift range hood into final position, feeding electrical wire
through wiring opening. To avoid damage, do not push on fan
blade.
3. Position the range hood so the that large end of the keyhole
slots are over the screws. Then push the hood toward the
wall so that the screws are in the neck of the slots.
WARNING
Electrical Shock Hazard
Disconnect power before servicing.
Replace all parts and panels before operating.
Failure to do so can result in death or electrical shock.
WARNING
Fire Hazard
Electrically ground the blower.
Use copper wire.
Connect ground wire to green ground screw in
terminal box.
Failure to do so can result in death, fire, or
electrical shock.
A. UL listed or CSA approved strain relief
A. White wires
B. Factory assembled ground connection
C. Black wires
D. Green ground screw
E. Ground wire
F. UL listed or CSA approved strain relief
A
A
B
C
D
E
F
WARNING
Excessive Weight Hazard
Use two or more people to move and install
range hood.
Failure to do so can result in back or other injury.
¹⁄₄"
(6.4 mm)
Loading ...
Loading ...
Loading ...