Loading ...
Loading ...
Loading ...
Operation
58
NOTE:
If the ambient temperature is 20 °C (68 °F) or
less, warm up the engine for an additional 5
minutes.
(3) Remove the seats. (See page 28 for seat
removal and installation procedures.)
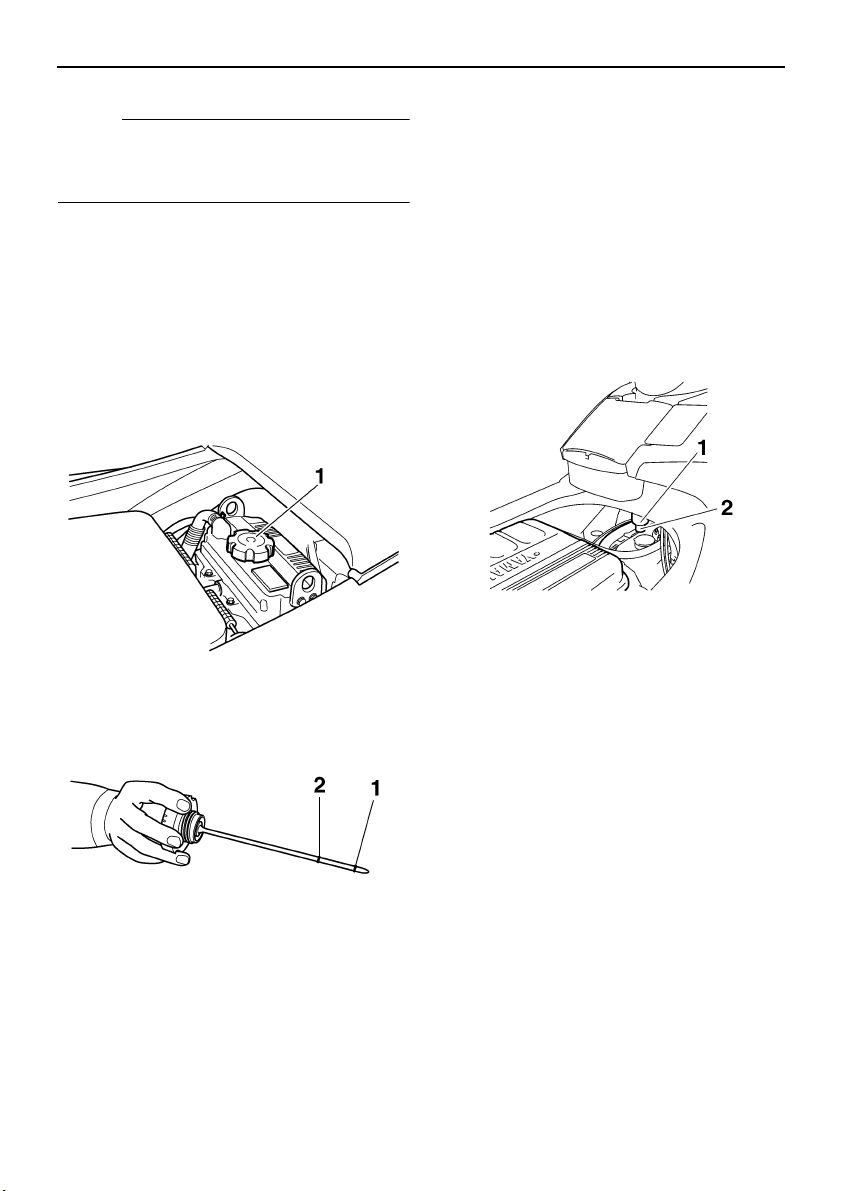
(4) Remove the oil tank filler cap, wipe the
dipstick clean, and then screw the filler
cap into the filler hole completely. Re-
move the filler cap again and check that
the engine oil level is between the mini-
mum level mark and maximum level
mark on the dipstick.
(5) If the engine oil level is below the mini-
mum level mark, add enough oil so that
the oil level is between the minimum and
maximum level marks on the dipstick,
and then install the filler cap. If the engine
oil level is significantly above the maxi-
mum level mark, the oil tank is overfilled.
Have a Yamaha dealer remove the ex-
cessive amount of engine oil.
EJU32420
Water separator
Check the water separator for water. The wa-
ter separator retains any water that may have
entered through the fuel tank breather hose if
the watercraft was capsized. Normally, the
water separator is empty.
If water remains in the water separator, drain
it by removing the drain screw. Place a drain
pan under the water separator to catch the
draining water or use a dry cloth to soak up
any water that could spill into the watercraft. If
any water spills into the watercraft, be sure to
wipe it up with a dry cloth. Also, be sure to in-
stall the drain screw after draining the water
separator.
EJU32450
Bilge
Check the bilge for moisture and fuel residue.
This watercraft is equipped with a convention-
al jet vacuum bilge draining system and an
electric bilge draining system. The electric
bilge draining system is operated when the
engine is running. When excess water reach-
es the water inlet of the electric bilge pump,
1 Oil tank filler cap
1 Minimum level mark
2 Maximum level mark
1 Water separator
2 Drain screw
UF1X12E0.book Page 58 Thursday, June 14, 2007 10:24 AM
Loading ...
Loading ...
Loading ...