Loading ...
Loading ...
Loading ...
6
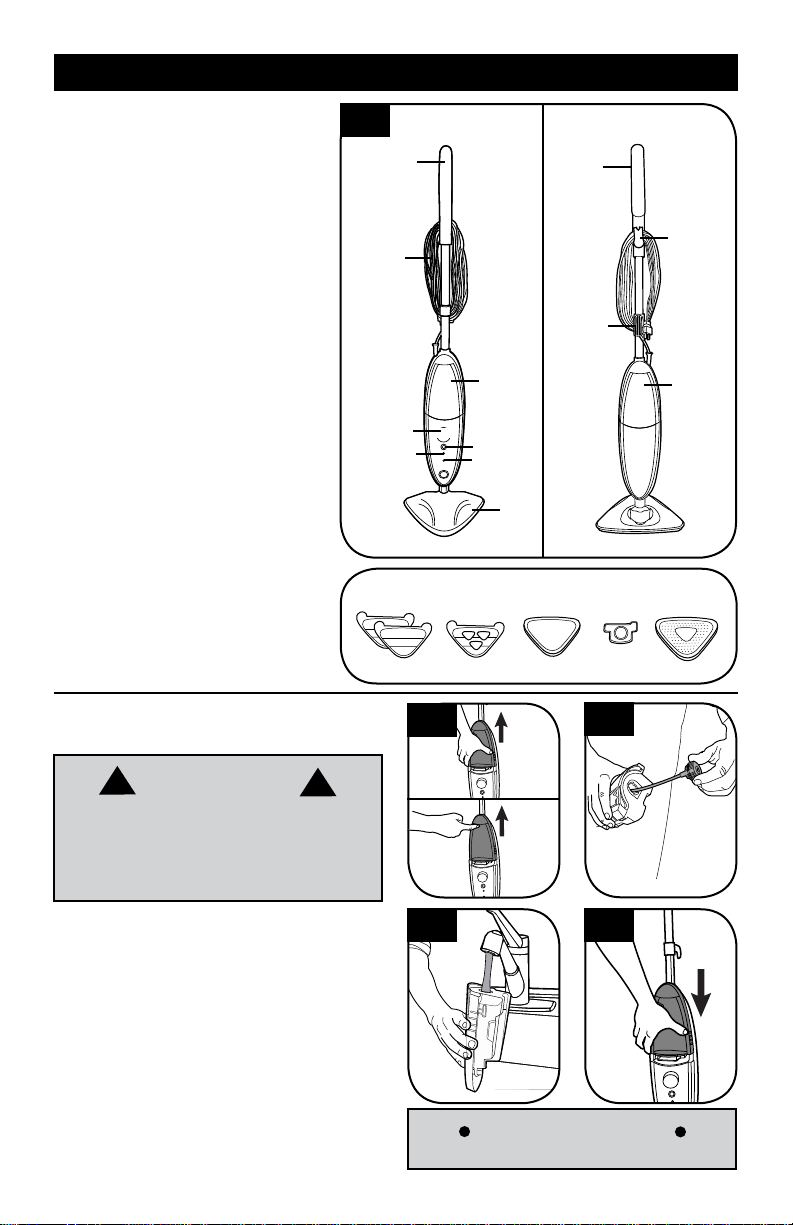
n Locate the water tank on the FRONT of
the Steam Mop and use the side grips (2.2,A) or
lip (2.2,B) on tank and remove.
n Twist the cap counter clockwise to remove (2.3).
n Hold water tank under sink faucet and fill with
water until full. Replace the water cap and twist
clockwise until tightly secure.
n Ensure Water Filter is in place (see 3.5).
n Slide the water tank down and snap
into place (2.5).
NOTE: When the tank is turned upright it may allow
a few drops to drip from cap. This is normal.
1. Handle
2. Upper Cord Hook (Rotating
Quick Release Cord Hook)
3. Lower Cord Hook (Fixed
Cord Hook)
4. Power Cord
5. Water Tank
6. Power Button
7. Mop Head
8. Steam Trigger
9. Solution Tank
10. Solution Control Dial
11. Power Indicator Light
Blue Light = Steam cleaner On
12. Steam Ready Indicator Light
Green Light = Steam Ready
No Light = Steam NOT Ready
Accessories
13. Multi-Surface Microfiber Pad (2)
14. Hard Floor Microfiber Pad
15. Carpet Glider
16. Water Filter (Pre-assembled in
steam cleaner, remove front
tank to expose filter)
17. Cooling Tray
1
4
5
6
7
10
11
12
Accessories
Front
13
14
15
16
WARNING
!
To reduce the risk of personal injury - Unplug
the steam cleaner when assembling the
steam cleaner.
Do not use hot or boiling water to fill water
tank.
!
2.3
2.4 2.5
STEAM CLEANER
DESCRIPTION
Back
2.1
2
3
8
9
17
FILLING WATER TANK
TECHNICAL SPECIFICATION
Model Number: WH20200
Input Power: AC 120V / 60Hz / 12A
2. HOW TO USE
IMPORTANT
DO NOT ADD SOLUTION TO WATER TANK.
2.2
A
B
BEFORE YOU BEGIN CLEANING
Loading ...
Loading ...
Loading ...