Loading ...
Loading ...
Loading ...
12
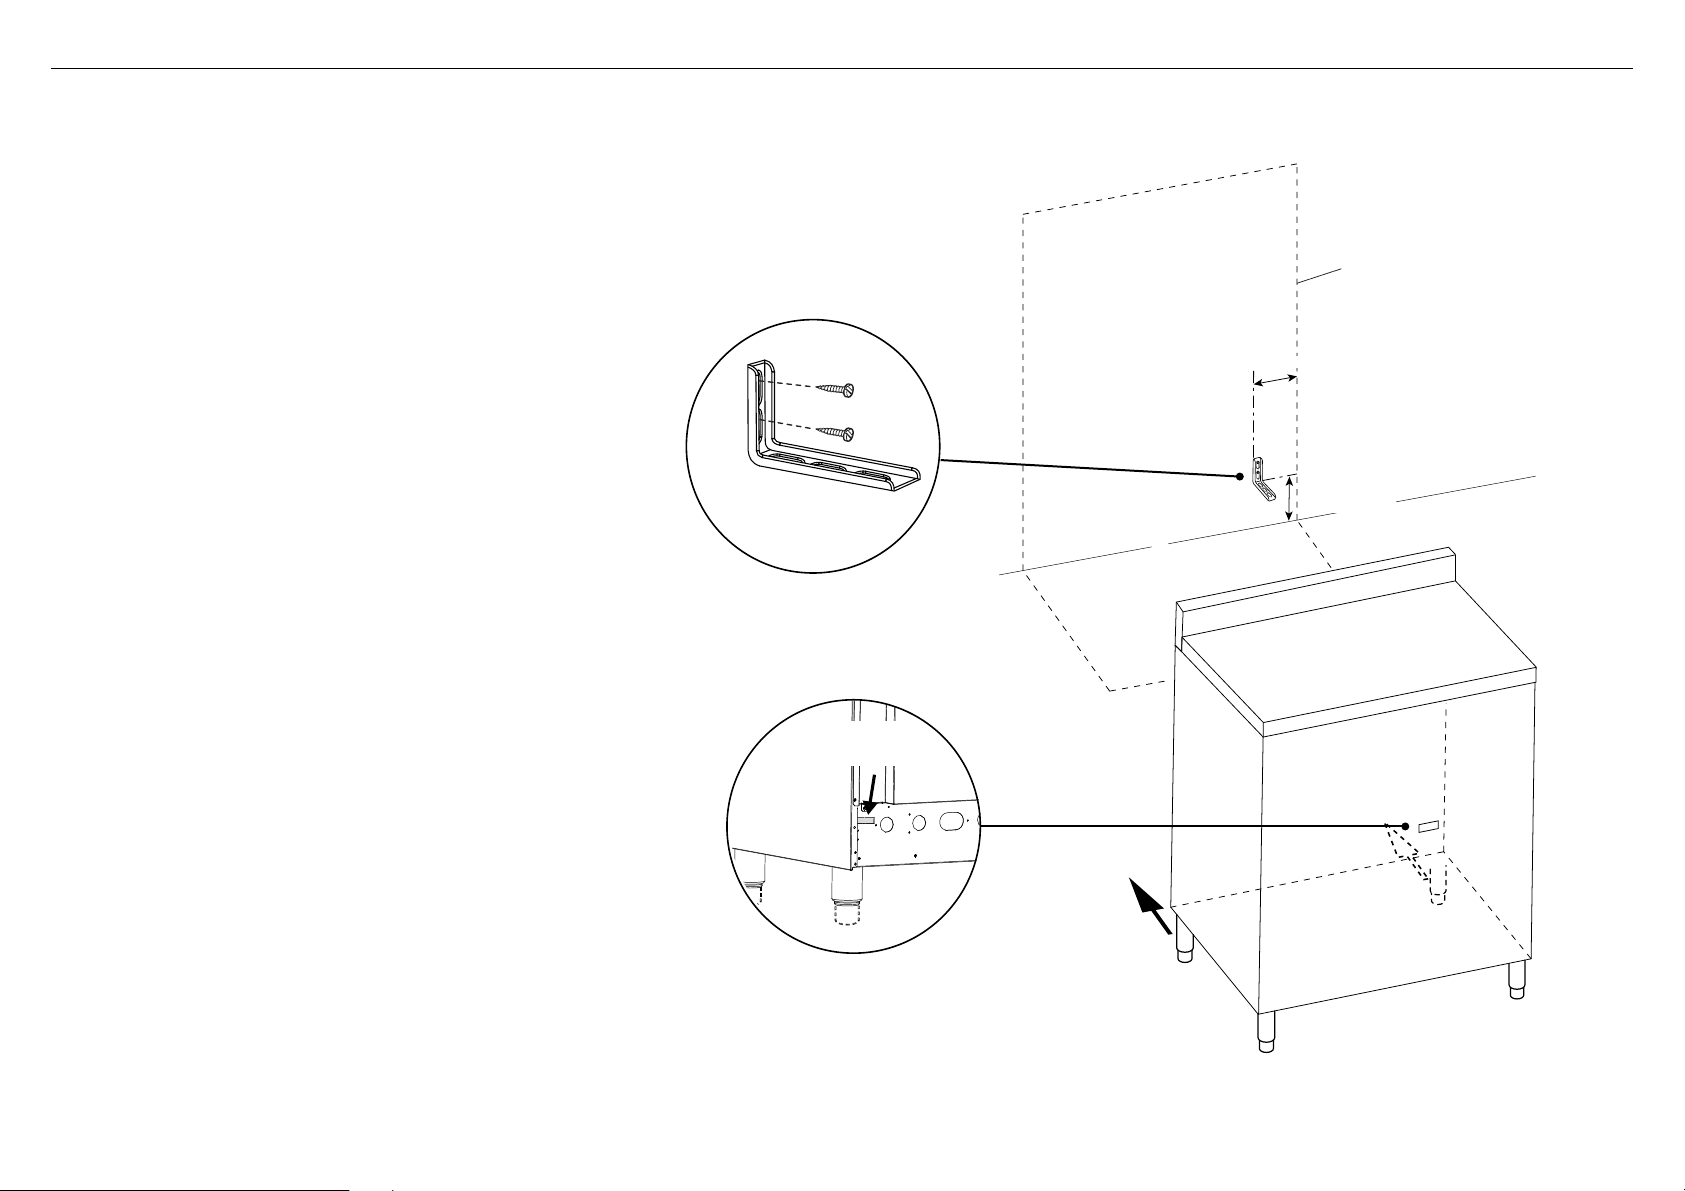
!3INSTALLING THE ANTI-TIP BRACKET
To fit the anti-tip bracket
1 Loosely fix the anti-tip bracket to the wall using the supplied screws.
●
Drill two 8mm diameter holes in the wall and insert the supplied
plastic sleeve anchors before inserting the screws.
2 Slide the cooker into place and adjust the height of the bracket so
that it will align with the slot on the back of the cooker.
3 Tighten the screws to fix the anti-tilt bracket in place.
4 Push the cooker back into place so that the bracket is fully inserted
into the slot on the back of the cooker.
Dotted line showing the position
of the cooker when installed
40mm
min. 167mm
max. 217mm
bracket slot at back
of the cooker
anti-tip bracket
IMPORTANT!
●
To restrain the cooker and prevent it tipping accidentally secure
the cooker to the wall using the supplied anti-tip bracket. Make
sure you also fit the supplied lock pin to the anti-tip bracket.
●
If installing the cooker above a plinth (without fitting the
adjustable feet) revise the installation dimensions for the anti-tip
bracket accordingly, considering that the feet have the following
measurements: min 85mm - max 133mm.
●
Before drilling and holes or inserting any screws into the floor or
wall check that you will not damage any wiring or pipes.
Loading ...
Loading ...
Loading ...