Loading ...
Loading ...
Loading ...
14
Setting Bake
The oven can be programmed to bake at any temperature
from 170°F to 550°F (77°C to 287°C). The factory preset
automatic bake temperature is 350°F (177°C).
To set Bake
1. Press Bake. “— — —” appears in the display.
2. Within 5 seconds, press the
or . The display
will show 350°F (177°C). By pressing and holding
the or , the temperature can then be adjusted
in 5°F increments (1°C if the control is set to display
Celsius).
3. As soon as the or pad is released, the oven
will begin heating to the selected temperature. When
the displayed temperature reaches the desired baking
temperature, the preheat indicator light will turn OFF
and the control will beep 3 times.
To change the oven temperature after bake has
started
1. Press Bake. Visually check the bake temperature and
that it needs to be changed.
2. Press the or pad to increase or decrease the
set temperature to the desired new oven temperature.
SETTING OVEN CONTROLS
Best results for baking
• Fully preheat the oven before baking items like cookies,
cakes, biscuits, and breads.
• When using any single rack, position the rack so that the
food is in the center of the oven
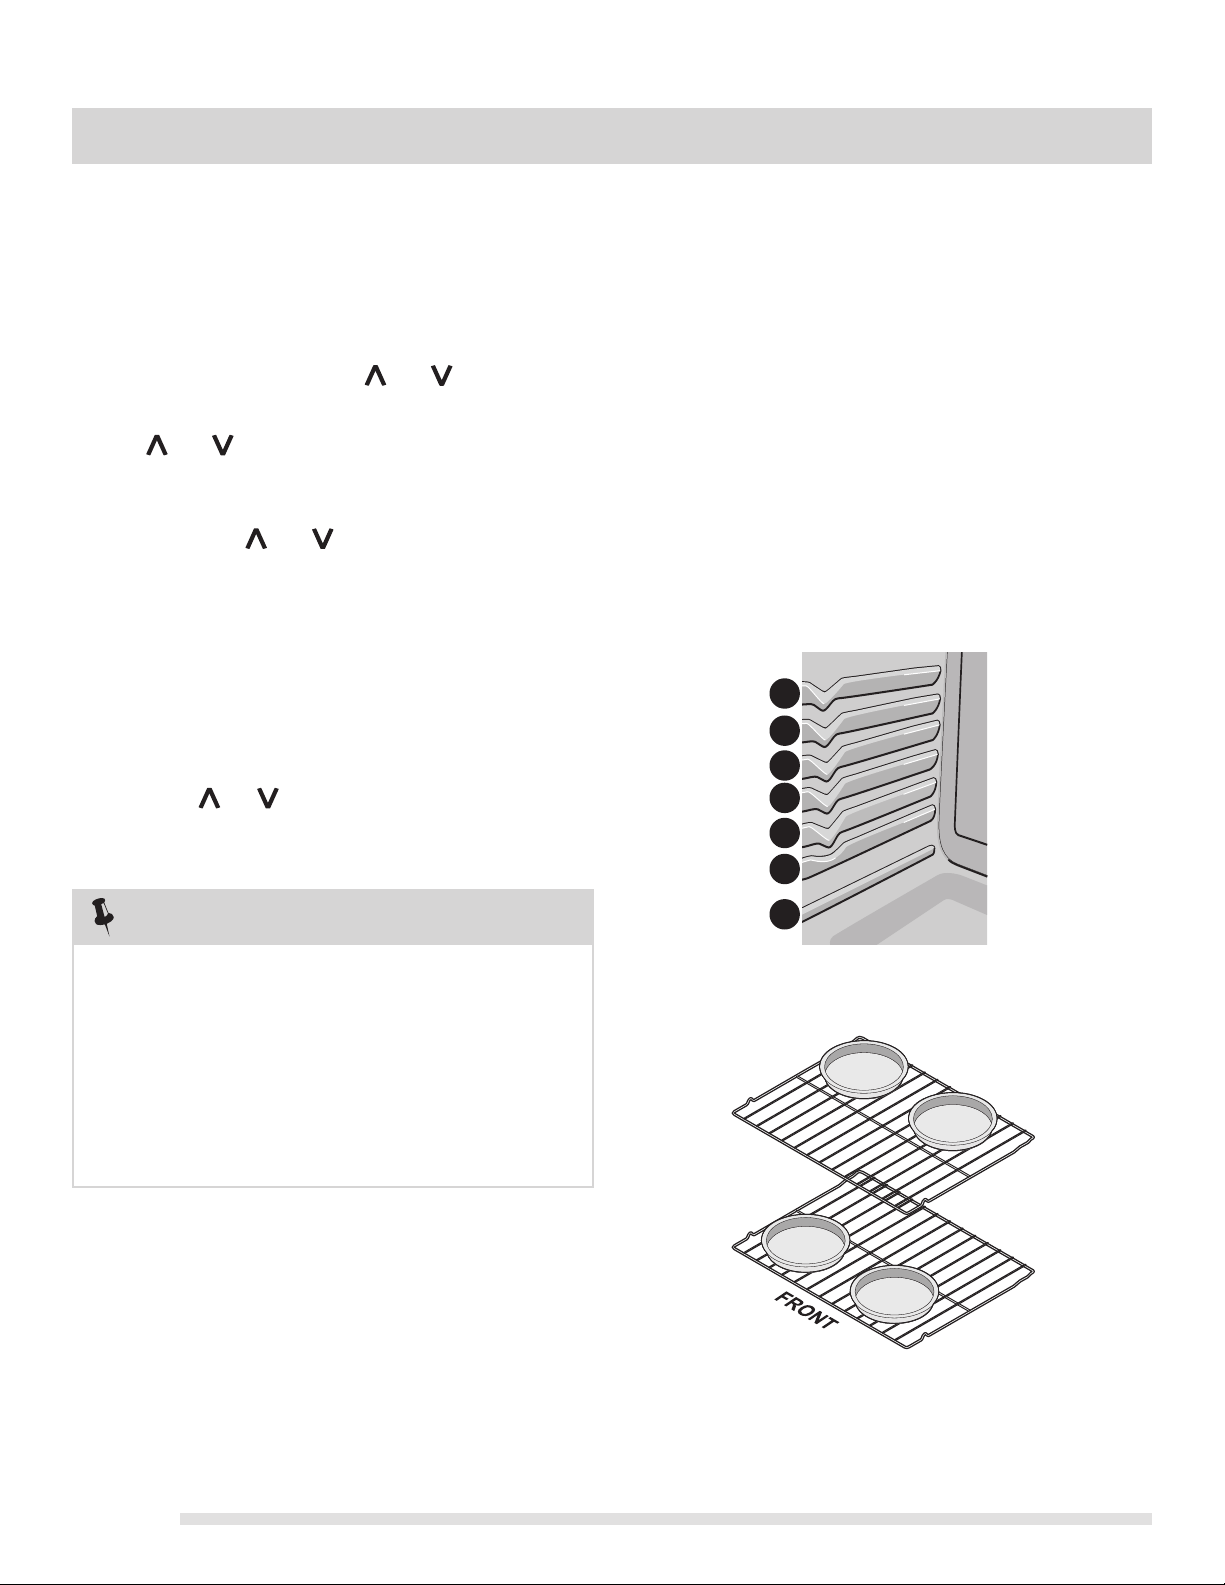
• For best results when baking cakes using two oven racks,
place racks in positions 2 and 5 (see Figure 1).
• When baking using 2 oven racks, position cookware as
shown in Figure 2. Allow at least 2 inches (5 cm) of
space between cookware for proper air circulation.
• Dark or dull pans absorb more heat than shiny bakeware
resulting in dark or overbrowning of foods. It may be
necessary to reduce the oven temperature or cook time
to prevent overbrowning of some foods. Dark pans are
recommended for pies. Shiny pans are recommended for
cakes, cookies and muffins.
NOTES
• The Oven indicator light on the electronic display will
turn ON and OFF when using the Bake feature and
during preheat. This is normal and indicates that the
oven is cycling to maintain the selected baking
temperature.
• When the Preheat indicator light turns OFF, your oven
is ready.
• To cancel baking at any time, press Clear/Off.
Fig. 2
Fig. 1
7
6
5
4
3
2
1
Loading ...
Loading ...
Loading ...