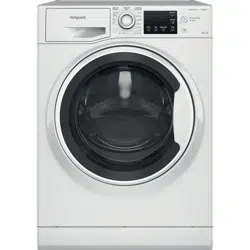
User manual Washer
Installation
! Keep this instruction manual in a safe place for future reference. Should the appliance be sold, transferred or moved, make sure the instruction manual accompanies the washerdryer to inform the new owner as to its opera- tion and features.
!Read these instructions carefully: they contain vital information on installation, use and safety
Unpacking and levelling
Unpacking
-268958.png)
! This is a separate part of the polystyrene base and should be removed with the base.
! IMPORTANT check when unpacking your machine.
-256376.png)
1. Unpack the washerdryer.
2. Check whether the washer-dryer has been damaged during transport. If this is the case, do not install it and contact your retailer.
3. Remove the 4 protective screws and the rubber bush with the respective spacer, situated on the rear of the appliance (see also the installation leaflet).
4. Seal the gaps using the plastic plugs provided.
5. Keep all the parts: you will need them again if the washer-dryer needs to be moved to another location.
! Packaging materials are not children’s toys.
Levelling
Your machine may make a considerable amount of noise if the two front feet have not been adjusted correctly.
-2278.png)
1. Install the washerdryer on a flat sturdy floor, without resting it up against walls, cabinets or anything else.
2. If the floor is not perfectly level, compensate for any unevenness by tightening or loosening the adjustable front feet (see figure); the angle of inclination, measured according to the worktop, must not exceed 2°.
Levelling your appliance correctly will provide it with stability and avoid any vibrations, noise and shifting during operation. If it is placed on a fitted or loose carpet, adjust the feet in such a way as to allow enough room for ventilation beneath the washer-dryer.
Electric and water connections
Connecting the water inlet hose
-111761.png)
1. Connect the supply pipe by screwing it to a cold water tap using a 3/4 gas threaded connection (see figure). Before performing the connection, allow the water to run freely until it is perfectly clear.
-744736.png)
2. Connect the other end of the water inlet hose to the washerdryer, screwing it onto the appliance’s cold water inlet, situated on the top right-hand side on the rear of the appliance (see figure).
3. Make sure there are no kinks or bends in the hose.
Note
! The water pressure at the tap must be within the values indicated in the Technical details table (on the page 5).
! If the water inlet hose is not long enough, contact a specialist store or an authorised serviceman.
! Ensure that the supply taps are allowing water through. Old taps may seize in the closed position and thus prevent water reaching the machine.
! Never use second-hand or old inlet hoses; use the products supplied with the machine.
Connecting the drain hose
-516136.png)
Connect the drain hose, without bending it, to a draining duct or a wall drain situated between 65 and 100 cm from the floor;
-597116.png)
The drain hose may be connected to an under-sink trap. Before connecting the drain hose from the machine ensure that any blanks or removable ends have been taken off the spigot.
-329280.png)
If it is placed over the edge of a basin or sink be sure the free end of the hose should not be underwater.
! We advise against the use of hose extensions; in case of absolute need, the extension must have the same diameter as the original hose and must not exceed 150 cm in length. Ensure that if the drain hose is pushed into a standpipe, that the end does not go down more than 15cms (6 inches). If the hose is pushed down too far, this may cause the machine to self -syphon ie. continuously empty as it is filling.
Electric connection
Before plugging the appliance into the mains socket, make sure that:
• the socket is earthed and in compliance with the applicable law;
• the socket is able to sustain the appliance’s maximum power load indicated on the Technical Data Plate fixed on the machine;
• the supply voltage is included within the values indicated on the Technical Data Plate fixed on the machine.
• the socket is compatible with the washerdryer’s plug. If this is not the case, replace the socket or the plug.
Your appliance is now supplied with a 13 amp fused plug it can be plugged into a 13 amp socket for immediate use. Before using the appliance please read the instructions below.
WARNING - THIS APPLIANCE MUST BE EARTHED.
THE FOLLOWING OPERATIONS SHOULD BE CARRIED OUT BY A QUALIFIED ELECTRI- CIAN.
Replacing the fuse:
When replacing a faulty fuse, a 13 amp ASTA approved fuse to BS 1362 should always be used, and the fuse cover re-fitted. If the fuse cover is lost, the plug must not be used until a replacement is obtained.
Replacement fuse covers:
If a replacement fuse cover is fitted, it must be of the correct colour as indicated by the coloured marking or the colour that is embossed in words on the base of the plug. Replacements can be obtained directly from your nearest Service Depot.
Removing the plug:
If your appliance has a non-rewireable moulded plug and you should wish to re-route the mains cable through partitions, units etc., please ensure that either: the plug is replaced by a fused 13 ampere rewireable plug bearing the BSI mark of approval.
or:
the mains cable is wired directly into a 13 amp cable outlet, controlled by a switch, (in compliance with BS 5733) which is accessible without moving the appliance.
Disposing of the plug:
Ensure that before disposing of the plug itself, you make the pins unusable so that it cannot be accidentally inserted into a socket.
Instructions for connecting cable to an alternati- ve plug:
Important: the wires in the mains lead are coloured in accordance with the following code:
-710822.png)
As the colours of the wires in the lead may not correspond with the coloured markings identifying the terminals in your plug, proceed as follows:
Connect Green & Yellow wire to terminal marked E or -494442.png) or coloured Green or Green & Yellow.
or coloured Green or Green & Yellow.
Connect Brown wire to terminal marked L or coloured Red.
Connect Blue wire to terminal marked N or coloured Black.
If a 13 amp plug (BS 1363) is used it must be fitted with a
13 amp fuse, either in the plug or adaptor or at the distribution board.
If you are in any doubt regarding the electrical supply to your machine, consult a qualified electrician before use.
How to connect an alternative plug:
The wires in this mains lead are coloured in accordance with the following code:
-399063.png)
Disposing of the appliance:
When disposing of the appliance please re- move the plug by cutting the mains cable as close as possible to the plug body and dispo- se of it as described on the previous page.
Note
! The washer-dryer should not be installed in an outdoor environment, not even where the area is sheltered, because it may be very dan- gerous to leave it exposed to damp, rain and thunderstorms.
! When the washer-dryer is installed, the mains socket must be within easy reach.
! Do not use extensions or multiple sockets
! The power supply cable must never be bent or dangerously compressed.
! The power supply cable must only be replaced by an authorised serviceman.
Warning! The company denies all liability if and when these norms are not respected.
The first wash cycle
Once the appliance has been installed, and before you use it for the first time, run a wash cycle with detergent and no laundry, using wash cycle number auto clean (see “Cleaning the washer-dryer”).
Care and maintenance
Cutting off the water and electricity supplies
- Turn off the water tap after every wash cycle. This will limit wear on the hydraulic system inside the washer-dryer and help to prevent leaks.
- Unplug the washer-dryer when cleaning it and during all maintenance work.
Cleaning the washer-dryer
- The outer parts and rubber components of the appliance can be cleaned using a soft cloth soaked in lukewarm soapy water. Do not use solvents or abrasives.
- The washer-dryer has a auto clean programme for its internal parts that must be run with no load in the drum.
To help the wash cycle you may want to use either the detergent (i.e. a quantity 10% the quantity specified for lightly-soiled garments) or special additives to clean the washer-dryer. We recommend running a cleaning program- me every 40 wash cycles.
To activate the programme, press the -170211.png) button for 5 seconds then press START/PAUSE to start the programme, which will last roughly 70 minutes.
button for 5 seconds then press START/PAUSE to start the programme, which will last roughly 70 minutes.
Cleaning the detergent dispenser drawer
-356020.png)
Remove the dispen- ser by raising it and pulling it out (see figure).
Wash it under running water; this operation should be repeated frequently
Caring for the door and drum of your appliance
- Always leave the porthole door ajar in order to prevent unpleasant odours from forming
Cleaning the pump
The washer-dryer is fitted with a self-cleaning pump which does not require any maintenan- ce. Sometimes, small items (such as coins or buttons) may fall into the pre-chamber which protects the pump, situated in its bottom part.
! Make sure the wash cycle has finished and unplug the appliance.
To access the pre-chamber:
-49128.png)
1. using a screwdriver, remove the cover panel on the lower front part of the washer-dryer (see figure);
-481926.png)
2. unscrew the lid by rotating it anticlockwise (see figure): a little water may trickle out. This is perfectly normal;
3. clean the inside thoroughly;
4. screw the lid back on;
5. reposition the panel, making sure the hooks are securely in place before you push it onto the appliance.
Checking the water inlet hose
Check the inlet hose at least once a year. If there are any cracks, it should be replaced immediately: during the wash cycles, water pressure is very strong and a cracked hose could easily split open.
! Never use second-hand hoses.
Description of the washer-dryer
Control panel
-329601.png)
Detergent dispenser drawer: used to dispense detergents and washing additives (see “Detergents and laundry”).
Programme Key: the Programme Key inside the detergent dispenser shows all the available programmes together with a graphical guide on how to use the individual dispenser compartments.
ON/OFF button -529270.png) : press this briefly to switch the machine on or off. The START/PAUSE indicator light, which flashes slowly in a green colour shows that the machine is switched on. To switch off the washer-dryer during the wash cycle, press and hold the button for approximately 3 seconds; if the button is pressed briefly or accidentally the machine will not switch off. If the machine is switched off during a wash cycle, this wash cycle will be cancelled.
: press this briefly to switch the machine on or off. The START/PAUSE indicator light, which flashes slowly in a green colour shows that the machine is switched on. To switch off the washer-dryer during the wash cycle, press and hold the button for approximately 3 seconds; if the button is pressed briefly or accidentally the machine will not switch off. If the machine is switched off during a wash cycle, this wash cycle will be cancelled.
WASH CYCLE SELECTOR KNOB: used to set the desired wash cycle (see “Table of programmes and wash cycles”).
FUNCTION button: press the button to select the desired function. The corresponding indicator light on the display will switch on.
AUTO CLEAN button: press to clean the machine’s internal parts (see “Cleaning the washer-dryer”).
DIRECT INJECTION button: press to select the DIRECT INJECTION option.
MULTI-RINSE button -681591.png) : press to select the desired rinse type.
: press to select the desired rinse type.
SPIN button -205532.png) : press to reduce or completely exclude the spin cycle - the value is indicated on the display.
: press to reduce or completely exclude the spin cycle - the value is indicated on the display.
TEMPERATURE button -486319.png) : press to decrease the temperature: the value will be shown on the display.
: press to decrease the temperature: the value will be shown on the display.
DRYING button -581731.png) : press to decrease or exclude drying; the selected drying level or time will appear on the display.
: press to decrease or exclude drying; the selected drying level or time will appear on the display.
DRY ONLY (DRYING ONLY) button -222795.png) : press to run the drying cycle only.
: press to run the drying cycle only.
KEY LOCK button -527705.png) : to activate the control panel lock, press and hold the button for approximately 2 seconds. When the display visualises “KEY LOCK ON” the control panel is locked (apart from the ON/OFF button). This means it is possible to prevent wash cycles from being modified accidentally, especially where there are children in the home. To deactivate the control panel lock, press and hold the button for approximately 2 seconds.
: to activate the control panel lock, press and hold the button for approximately 2 seconds. When the display visualises “KEY LOCK ON” the control panel is locked (apart from the ON/OFF button). This means it is possible to prevent wash cycles from being modified accidentally, especially where there are children in the home. To deactivate the control panel lock, press and hold the button for approximately 2 seconds.
DELAY button -761864.png) : press to set a delayed start time for the selected wash cycle. The delay time will be shown on the display.
: press to set a delayed start time for the selected wash cycle. The delay time will be shown on the display.
START/PAUSE button with indicator light: when the green indicator light flashes slowly, press the button to start a wash cycle. Once the cycle has started the indicator light will remain lit in a fixed manner. To pause the wash cycle, press the button again; the indicator light will flash in an orange colour. If the symbol -508692.png) is not illuminated, the door may be opened. To start the wash cycle from the point at which it was interrupted, press the button again.
is not illuminated, the door may be opened. To start the wash cycle from the point at which it was interrupted, press the button again.
Standby mode
This washer-dryer, in compliance with new energy saving regulations, is fitted with an automatic standby system which is enabled after about 30 minutes if no activity is detected. Press the ON-OFF button briefly and wait for the machine to start up again. Consumption in off-mode: 0,5 W Consumption in Left-on: 8 W
Display
-708240.png)
The display is useful when programming the machine and provides a great deal of information.
The following will appear in area A: the icon and programme selected, the washing and drying phases and time remaining to the end of the cycle.
Area B will include the two intensity levels relative to the DIRECT INJECTION option.
The indicator lights relative to the available functions appear in area C.
Area D will have the time remaining to the start of the selected programme if the DELAY function was set.
String E shows the maximum spin speed value (this depends on the selected wash cycle); if the programme does not include the spin cycle, the dimly lit “--” symbol will appear in the area.
Area F will visualise the temperature value selectable on the basis of the set programme; if the temperature of the programme cannot be set, the area will show the symbol “--” dimly lit.
Door locked symbol
If the symbol is lit, this indicates that the washer-dryer door is blocked to prevent it from being opened accidentally. To prevent any damage from occurring, wait for the symbol to switch itself off before opening the appliance door. N.B.: if the DELAY function has been activated, the door cannot be opened; pauses the machine by pressing the START/ PAUSE button if you wish to open it.
Note
! The first time the machine is switched on, you will be asked to select the language and the display will automatically show the language selection menu. To select the desired language press the X and Y buttons; to confirm the selection press the Z button. To change the language switch off the machine and press buttons G, H, I simultaneously until an alarm is heard: the language-selection menu will be displayed again.
! To change the display luminosity, which by default is set to the highest value, switch the machine off then simultaneously press buttons G, L and M until the buzzer sounds. Press buttons X and Y to choose the desired level of luminosity then confirm by pressing button Z.
! During the wash cycle or when the DELAY function has been enabled, if the user does not interact with the display for 1 minute the “SCREEN SAVER” activates. To return to the previous window, simply press any button.
Troubleshooting
Your washer-dryer could occasionally fail to work. Before contacting the Technical Assistance Service (see “ Product Guarantee and Repair Information”), make sure that the problem cannot be solved easily using the following list.
| Problem: |
Possible causes / Solutions: |
| The machine does not switch on. |
• The appliance is not plugged into the socket fully, or not enough to make contact.
• There is no power to the socket, or the fuse has blown in the mains plug.
|
| The wash cycle does not start. |
• The door is not closed properly.
• The ON/OFF button has not been pressed.
• The START/PAUSE button has not been pressed.
• The water tap has not been turned on to allow water to flow into the machine.
• A delayed start has been set.
|
| The machine does not dry. |
• Check the 2 sections above.
• DRYING is in the OFF position.
|
| The clothes are too hot when the drying cycle is finished. |
• A cooling-down period is always added to the end of each drying cycle. If the clothes appear too hot to handle leave the door open to allow to cool further before removing from the machine. |
| The washer-dryer does not take in water (the text “NO WATER, Turn tap on” appears on the display). |
• The water inlet hose is kinked.
• The water inlet hose is not connected to the water supply.
• The water pressure is too low.
• The water tap has not been turned on to allow water to flow into the machine.
• There is no water supply to the house.
• The inlet valve filter is blocked.
• The START/PAUSE button has not been pressed.
|
| The machine continuously fills with water and continually drains away or Water left in the drum or Stuck on wash. |
• The top of the drain hose is too low - It must be fitted at a height between 65 and 100 cm from the floor (see “Installation”).
• The drain hose is connected incorrectly to the sink trap allowing water to run into the machine, the drain hose must be positioned higher than the bottom of the sink to prevent water flowing down the drain hose.
• The end of the drain hose has been pushed too far down the standpipe, the ‘U’ bracket should be fitted 100 mm from the end of the drain hose.
|
| The machine does not drain or spin - (error lights flashing). |
• The Pump filter is blocked.
• The drain hose is kinked (see “Installation”).
• New Installation - The blanking cap or spigot has not been removed if connected under a sink.
• The drain hose or sink trap is blocked.
|
| The machine does spin. |
• The Spin Speed is set to “--”. |
| The machine does not heat or poor wash results. |
• The ‘Temperature’ is set to “--”. |
| The programme takes too long. |
• Programme times will vary due to water pressure, the incoming water temperature and if the wash load goes out of balance. This will increase the programme times accordingly (see ‘ The machine wont spin properly’ next page) |
| The Display sticks at one ‘time to end’ for more than 1 Minute or the Display changes the estimated ‘Time to End’ during the programme. |
• The display time is for guidance only - it is not a precise time to finish and may vary |
| The machine vibrates a lot during the spin cycle. |
• The feet have not been adjusted, enabling the machine to rock.
• New Installation - Either the Transit Bolts including the plastic spacers, or the Polystyrene Packaging have not been removed when installing the machine.
• The machine is trapped between cabinets and/or walls.
• The load is in a slight out of balance condition and machine is spinning, but at a lower speed
|
| The machine is noisy. |
• There will always be some motor, pump and drum noise during spin. |
| The machine wont spin properly. |
• Out of Balance detected when attempting to go into a spin cycle
- If this happens the machine will continue to try to repeat the distribution of the load required before the machine will go into higher spin speeds
- This will increase the programme time accordingly. This is a safety feature to prevent damage. Out of Balance can be caused by washing a single heavy item (eg duvet, quilt, etc).
- Try the programme again using a different load.
|
| The machine leaks from the dispenser. |
• The dispenser drawer is blocked with detergent and requires cleaning.
• The water pressure is too high and requires turning down - turn down the tap on the water supply pipe slightly and try again.
• The machine is tilting forwards - It must be level when in its final position
|
| The machine leaks (other than dispenser). |
• The fill hose is loose, check both the cabinet and tap ends.
• The fill hose is tight but still leaks, if so replace the rubber washers, or the fill hose is missing the rubber washer.
• The drain hose is not fixed in properly
|
| The machine is locked and the display flashes, indicating an error code (e.g. F-01, F-..). |
• Switch off the machine and unplug it, wait for approximately 1 minute and then switch back on again. If the problem persists contact Technical Assistance Centre. |
| The machine smells. |
• The machine requires a service wash. Run a auto clean wash cycle with detergent and no laundry. |
| The machine door cannot be opened. |
• The door will not open until the door lock indicator light goes out shortly after the program has finished.
• If there is no power to the machine you need to perform the manual unlocking procedure.
|
| Door Seal damaged at the bottom. |
• The door seal has drainage holes at the bottom - This is normal. |
| The water level is too low when the machine is washing. |
• The water level is correct if it can be seen at the bottom of the door. |
| There is too much foam. |
• The detergent is not suitable for machine washing (it should display the text ‘for washer-dryers’ or ‘hand and machine wash’ or the like).
• Too much detergent was used - less detergent is required in soft water.
|
| The machine just ‘beeps’ when a programme or option is selected (Key Lock led is lit). |
• Deactivate the Key Lock feature by pressing and holding in the ‘KEY LOCK’ button for 2 seconds. |
| After completing the programme, or before starting a programme, the machine has turned itself off (no lights). |
• To comply with new energy saving regulations the machine is fitted with an automatic standby system. Press ‘ON/OFF’ button for 3 seconds to activate the machine, it can then either be switched off or a new programme selected. |
| General. |
• Your washer-dryer contains sensors that monitor progress during the wash cycle (eg: Water Levels, Temperatures, Out of Balance loads, Wash time/progress). Normally, if your machine successfully completes the cycle, there is unlikely to be anything wrong! |
Remember, you will be charged for a service call for problems caused by incorrect installation, as indicated on pages 2 to 4.
Not emptying contents from pockets may cause pump or drain blockages, or may damage the machine.
Do not wash items which do not have a wash label, or wash items that are not intended as machine washable.