Use Manual Carpet Cleaner
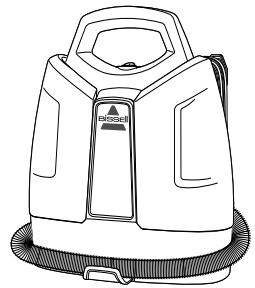
Product View
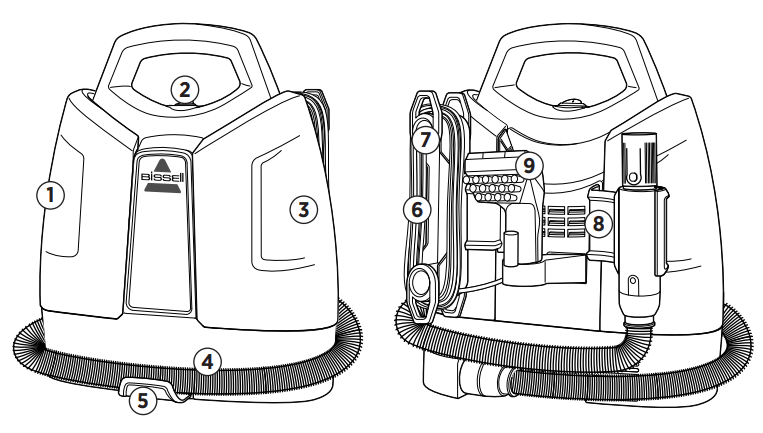
- Clean Water/Solution Tank
- Power Button
- Dirty Water Tank
- Flex Hose
- Flex Hose Clip
- Power Cord
- Quick Release™ Cord Wrap
- Hose Grip Bracket
WARNING:
To reduce the risk of fire and electric shock due to internal component damage, use only BISSELL® cleaning formula intended for use with this machine.
Keep plenty of genuine BISSELL Spot & Stain Cleaner formula for portable carpet cleaning machines on hand so you can clean whenever it fits your schedule. Always use genuine BISSELL cleaning formulas.
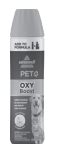
BISSELL Pet Oxy Boost Formula for carpet & upholstery
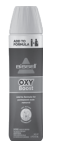
BISSELL Oxy Boost formula for carpet & upholstery
BISSELL Boost Pro formula for carpet & upholstery

BISSELL 2X® Pet Stain & Odor
BISSELL Professional Spot & Stain + Oxy
(Use Professional formula for optimal cleaning results!)
NOTICE: Use of cleaning formulas which contain lemon or pine oil may damage this appliance and void the warranty. Chemical spot cleaners or solvent-based soil removers also should not be used. These products may react with the plastic materials used in your cleaner, causing cracking or pitting.
Assembly
WARNING: Do not plug in your cleaner until you are familiar with all instructions and operating procedures
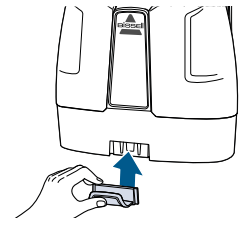
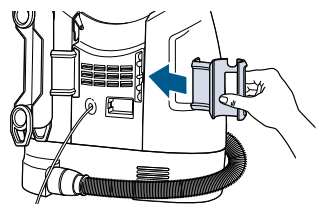
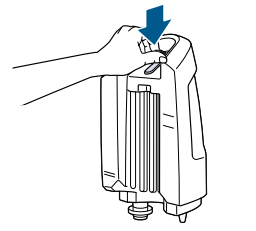
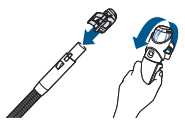
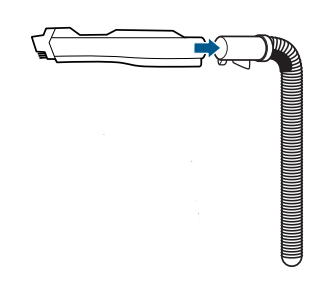
1. Slide the flex hose clip into opening on the front of the machine. You will hear a “snap” when it is locked into place.
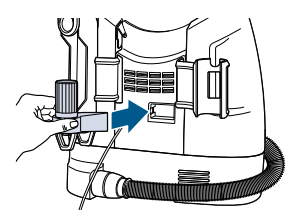
2. Attach Cord Wrap by snapping it into place on the Dirty Water Tank side of the machine.
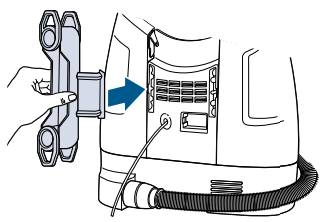
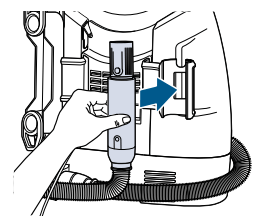
3. Snap the hose grip bracket into the back of the machine on the Clean Water/Solution Tank side.
4. Snap the second tool storage (select models) into the back between the Cord Wrap and hose grip bracket.
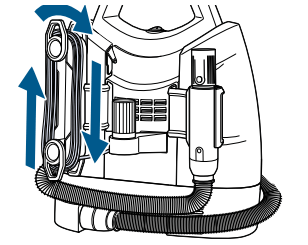
5. Then wrap the flex hose around the unit and snap hose grip into bracket.
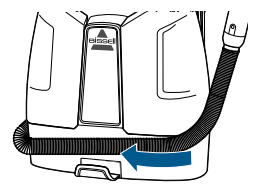
6. Wrap the power cord around the Cord Wrap.
Filling the Clean Water/Solution Tank
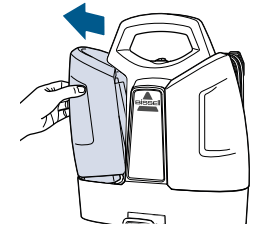
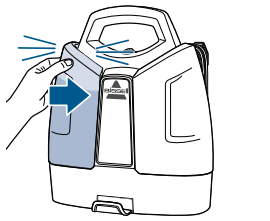
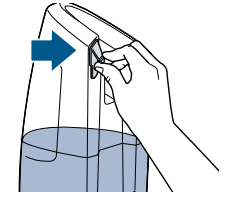
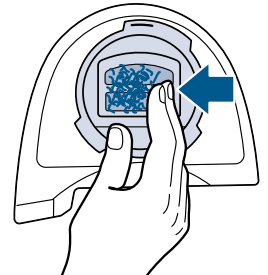
1. Remove the tank by pulling the top
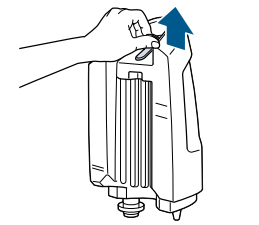
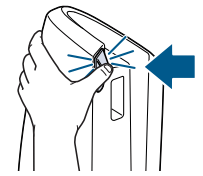
2. Pull black tab to reveal tank opening. The plug rotates out of the way for easy filling.
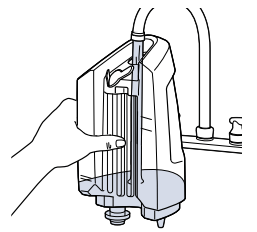
3. Add water to the indicated fill line on the solution tank.
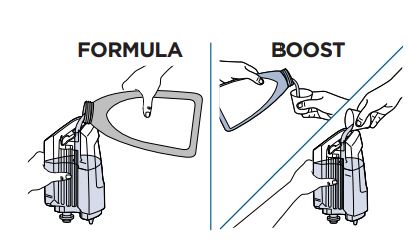
4. Add formula to the indicated fill line on the solution tank. Add 1 ounce of any BISSELL® Boost, if desired.
NOTE: Follow the fill lines on your Clean Water/Solution Tank to add the correct amount of hot tap water (140 degrees F / 60 degrees C MAX) and portable machine formula. Note: There are different directions on the tank for small and large messes. DO NOT BOIL OR MICROWAVE WATER.
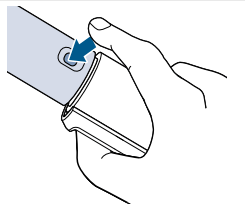
5. Replace the plug by rotating into place and pressing gently onto tank.
6. Replace tank by lining the bottom with indentations on machine. Push the top of the tank into place until you hear a “click”
Pre-Treating
IMPORTANT: Check the manufacturer’s tag before cleaning upholstery. “W” or “WS” on the tag means you can use your cleaner. If tag is coded with an “S” (with diagonal strike-through), or says “Dry Clean Only,” do not proceed. If manufacturer’s tag is missing or not coded, check with your furniture dealer.
WHY PRETREAT? Cleaning effectiveness will be enhanced if you pre-treat heavily stained or highly soiled areas.

1. Check the manufacturer’s tag before cleaning upholstery. “W” or “WS” on the tag means you can use your machine.
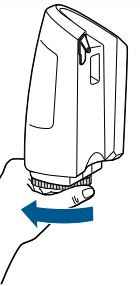
2. Twist the Quick Release™ Cord Wrap clockwise to quickly unwrap power cord. Plug in unit and press power button beneath the handle to turn it ON.
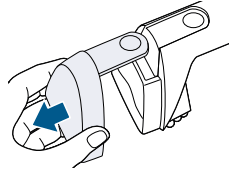
3. Release the flex hose from the hose grip bracket. Unwrap flex hose completely from around the unit.
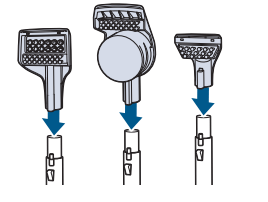
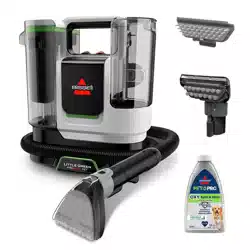
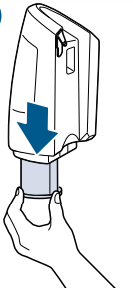
4. Select desired tool for spot cleaning, Insert tool on end of hose until it clicks into place.
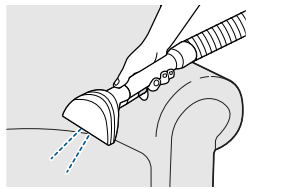
5. Hold the 3” Tough Stain Tool just above the carpet or upholstery to be cleaned. Press the trigger to mist solution over the soiled area.

6. Let cleaning solution set for 5 minutes before cleaning.
NOTE: When pre-treating with the Deep Reach Tool or Deep Stain Tool, it should be kept in contact with the carpet as noted on the next page.
WARNING: Keep spray away from face. Failure to do so may result in personal injury.
CLEANING WITH THE 3"/4” Tough Stain Tool
Cleaning with Tools WARNING Keep spray away from face. Failure to do so may result in personal injury. Attach the 3”/4” Tough Stain Tool to the handheld cleaning hose. Press the spray trigger to mist solution over and onto the soiled area. Release spray trigger and gently scrub the stain.
To lift the stain away, apply downward pressure on the tool and slowly pull it toward you. Then use “drying strokes” (by not pressing down trigger) to remove remaining moisture. Repeat as needed.
CLEANING WITH THE DEEP STAIN/REACH TOOL (select models)
Attach the Deep Stain/Reach Tool to the cleaning hose. Set the tool directly on top of the carpet before pulling the spray trigger to inject formula deep into the carpet fibers.
Always keep the tool in direct contact with carpeting to avoid over-spraying.
CLEANING WITH THE 3-N-1 STAIR TOOL (select models)
Attach the 3-n-1 Stair Tool to the cleaning hose. This versatile 3-way tool sprays, scrubs and suctions up dirt and stains from the outer curves, corner and tread of a carpeted stairs. Twist the tool head to desired setting to clean. The downward facing edge is the active cleaning mode: (a) use the flat area to clean top of stairs, (b) use pointed edge to clean inside crevice, (c) use indented area to clean outer corner.

CLEANING WITH THE HYDRORINSE™ TOOL (select models)
Attach the HyrdoRinse™ tool to the cleaning hose. Hold the hose and attachment in an upright position. Then hold down the trigger to rinse the hose for 30 seconds. The HydroRinse tool can be stored on the right handle or on the hose in between use.
NOTE: Ensure that the cleaning solution and water are in the tank before use.
WARNING: Keep spray away from face. Failure to do so may result in personal injury.
1. Attach the Stain Trapper Tool to the end of the hose.

2. Slowly move the tool back and forth over the stain. Be careful not to move the tool back and forth too quickly or soiled water will flow back into the hose.
3. To empty the Stain Trapper Tool, rotate the small tank on the bottom of the tool to unlock it.
4. Dump dirty water into a sink or toilet and rinse the tank out with clean water.
5. Replace the tank by lining up the locking teeth with their mating slots (make sure the two teeth that are closest together are pointed toward the brush). Turn the tank to lock it into place.
CLEANING THE STAIN TRAPPER TOOL: Clean the front of the tool by removing the plate over the suction plate. Pull down to remove and rinse with water. Then replace the plate by sliding back into place.
1. Pull tabs out of battery door area before use to activate. Connect to the end of the hose and the LED Light will automatically turn on. Pull the trigger to spray solution. Scrub and suction the area to lift and remove the stain.
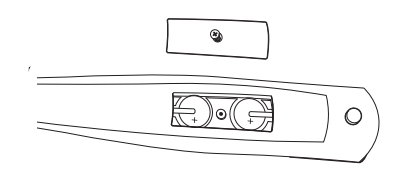
2. To replace LED battery, unscrew the small screw with a Phillips-head screwdriver. Pull cover off to reveal two batteries (CR1632 3V). Slide and pull out each battery and replace with new. Be sure the “+” sign on battery is facing out. Dispose of used battery promptly. Keep away from children. Do not disassemble and do not dispose of in fire.
Emptying the Dirty Water Tank
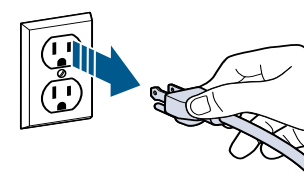
WARNING: To reduce the risk of electric shock, turn power OFF and disconnect from electrical outlet before performing maintenance or troubleshooting.
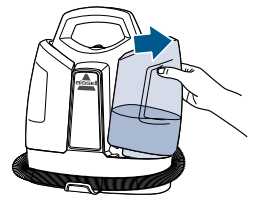
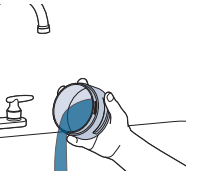
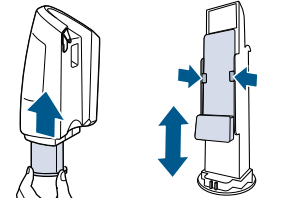
1. To remove the Dirty Water Tank simply pull the top of the tank to the right.
2. Pull tab to remove plug from tank.
3. Carefully empty Dirty Water Tank, as some water may potentially enter/drain from center float stack.
4. Close the tank plug and return tank to unit. Ensure tank is secure before use.
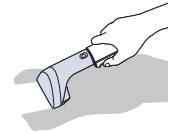
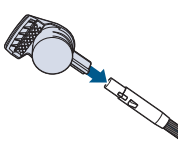
5. To disconnect the cleaning tools from the hose grip, push down on the button and pull straight off. (Do NOT twist tool to remove it.)
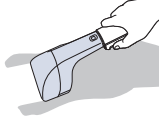
6. The front of the 3” Tough Stain Tool, Deep Stain Tool, 3-n-1 and Stain Trapper Tool (select models) can be removed for easy cleaning. Press the button on top of the tool and slide its front off the tool base. Rinse under water and return to tool.
NOTE: Store unit in protected, dry area at room temperature (40 degrees F to 110 degrees F).
NOTICE:To reduce the risk of a leaking condition, do not store unit where freezing may occur. Damage to internal components may result.
Cleaning the Float Stack
WARNING:To reduce the risk electric shock, turn power OFF and disconnect from electrical outlet before performing maintenance or troubleshooting.
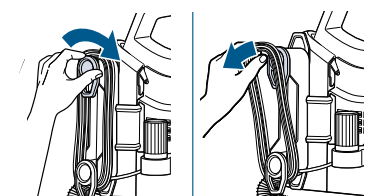
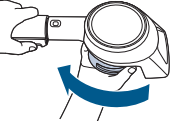
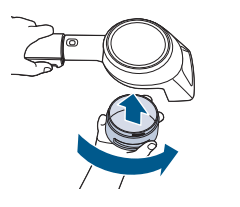
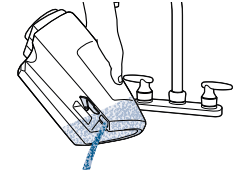
1. The float stack can be removed from the Dirty Water Tank for cleaning. Turn it counter-clockwise to remove it.
2. Remove the float stack from the Dirty Water Tank.
3. Rinse with water until all debris is removed and let air dry.
4. Return the float stack to the Dirty Water Tank. Ensure float is installed before returning the float stack to the Dirty Water Tank.
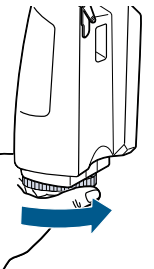
5. Turn the float stack clockwise to lock.
Thermal Protector
An internal thermal protector has been designed into your carpet cleaner to protect it from overheating. When the thermal protector activates, the suction motor will stop operating. If this happens proceed as follows:
1. Turn the cleaner OFF.
2. Unplug cleaner from the electrical outlet.
3. Check the end of the hose and tool for blockages and remove if necessary. Check the float stack for clogs and remove debris.
4, Let the motor cool for approximately 30 minutes. The thermal protector will automatically reset and cleaning may continue once plugged back in.
NOTE: If the thermal protector continues to activate after following the above steps, your cleaner may need servicing. Call BISSELL® Consumer Care or visit the website.
Troubleshooting
WARNING: To reduce the risk of electric shock, turn power switch OFF and disconnect from electrical outlet before performing maintenance or troubleshooting checks.
Reduced Spray or No Spray
Clean spray nozzle using an unfolded paper clip.
- Clean Water/Solution Tank empty.
Check/fill tank.
- Clean Water/Solution Tank insert clogged.
Clean insert at bottom of Clean Water/ Solution Tank.
Gently lift Clean Water/Solution Tank while depressing the spray trigger OR gently squeeze clean tank while depressing spray trigger.
- Clean Water/Solution Tank not fully seated.
Remove and reinstall Clean Water/Solution Tank.
Carpet Cleaner Won’t Pick Up Cleaning Solution
- Poor upholstery/carpet tool position.
Reposition upholstery/carpet tool on surface, follow recommended cleaning procedures.
- Dirty Water Tank is full.
Empty Dirty Water Tank.
- Excess solution in flex hose.
Lift tool and point upwards to allow water in hose to flow into the Dirty Water Tank.
- Incorrect cleaning formula.
Use BISSELL® 2X Portable Machine formulas only.
- Dirty Water Tank is improperly seated onto base.
Remove Dirty Water Tank and reseat onto unit.
- Dirty tank plug is unplugged.
Push in Dirty Water Tank plug until properly sealed.
Deep Reach Tool is Over-Spraying Formula (Formula is Spraying Out the Sides)
- Formula trigger is being pulled when tool is above carpeting.
Make sure the Deep Reach Tool’s formula injection needles are burrowed deeply within your carpeting before pressing the formula spray trigger. To avoid over-spraying, make sure the tool stays in direct contact with the carpet at all times.
- Deep Reach Tool is being used on upholstery.
The Deep Reach Tool is designed for highpile carpets and rugs. Switch to the 3” Tough Stain Tool for upholstery cleaning.
Dirty Water Tank Leaking
Clean the duckbill valve that is located at the bottom of the Dirty Water Tank. Once cleaned, make sure it is placed securely back in place.
- Float stack not fully locked on Dirty Water Tank.
Remove float stack and twist until arrow is aligned with lock symbol on Dirty Water Tank pg. 12.
- Dirty Water Tank not properly seated onto machine.
Remove and reseat onto unit.