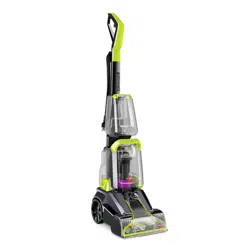
Owner 's Manual Pet Carpet CleanerAssembly
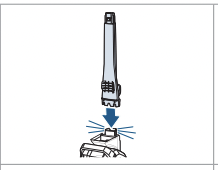
1. Slide Middle Handle onto Lower Body until it “clicks” into place.
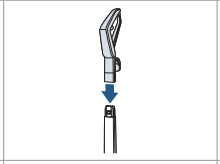
2. Slide Upper Handle into Middle Handle until it “clicks” into place.
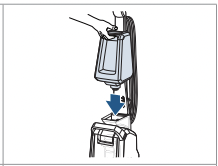
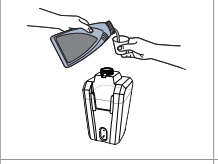
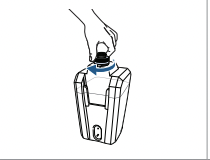
3. Place Clean Water Tank on handle and push down until it “clicks” into place.
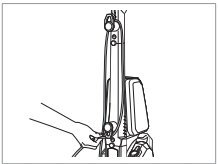
4. Wrap up power cord.
Keep plenty of BISSELL® formulas on hand so you can clean whenever it fits your schedule. Always use genuine BISSELL formulas in your machine. Other formulas may harm the machine and void the warranty.
Pretreat
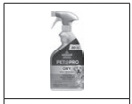
PET PRO OXY Stain Destroyer
Permanently removes tough pet stains & odors with OXY.
Machine Formula
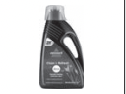
Clean + Refresh
Powerful cleaning and odor elimination with Febreze freshness
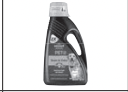
PET Stain & Odor
Removes tough pet stains. Includes StainProtect™ to protect against future stains.
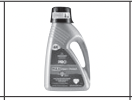
PRO MAX Clean + Protect
Our most powerful formula for tough, ground-in dirt & stains. Includes StainProtect to protect against future stains
PET PRO OXY Urine Eliminator
Our best formula for pet urine stains & odors. Includes StainProtect to protect against future stains
Certain trademarks used under license from The Procter & Gamble Company or its affiliates.
 WARNING To reduce the risk of fi re and electric shock due to internal component damage, use only BISSELL cleaning formulas intended for use with the carpet cleaning device.
Filling the Clean Water Tank
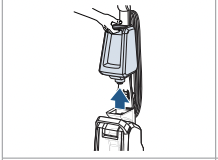
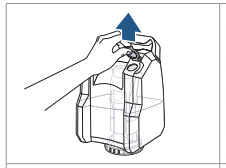
1. Remove the Clean Water Tank by lifting straight up and away from the machine.
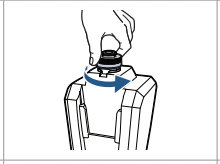
2. Unscrew the cap at the bottom of the tank.
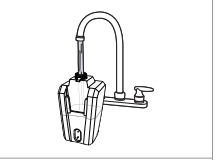
3. Fill with hot (140°F/60°C MAX) tap water to the WATER line. Do not use boiling water. Do not heat water and/or tank in the microwave.
4. Add BISSELL formula to the FORMULA line.
5. Replace and tighten the cap.

6. Replace the tank on the machine until it “clicks” into place.
Cleaning Your Carpet
Tips Before Cleaning
- If cleaning an entire room, consider moving your furniture to another area.
- Use a dry vacuum cleaner over area before using your deep cleaner.
- Remove any large, solid debris before wet cleaning.
- Pretreat stains with BISSELL® Pretreat to improve performance on coffee stains and ground-in dirt.
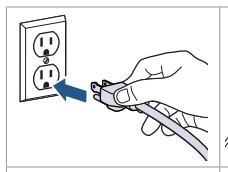
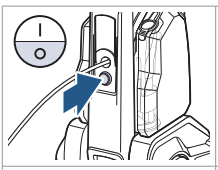
1. Plug into a proper outlet.
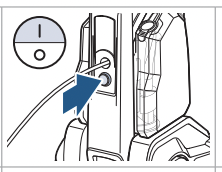
2. Turn the machine ON by pressing the power switch.

3. Step on the recline pedal located below the power switch, and pull back on handle to recline.
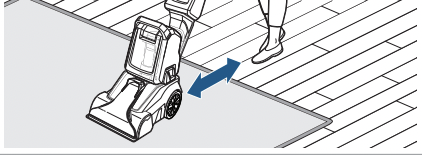
4. Make cleaning passes as described below. Repeat these passes until solution being pulled up appears clean. Empty the Dirty Water Tank and refill the Clean Water Tank as needed.
1. Hold Spray Trigger
• 1 pass forward
• 1 pass back
2. Release Spray Trigger
• 1 pass forward
• 1 pass back
Emptying the Dirty Water Tank
1. Turn OFF and unplug your machine.
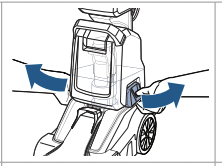
2. Release Dirty Water Tank by pulling out and up on the latches on the side.

3. Carefully remove tank by lifting up on the Dirty Water Tank Handle.
4. Lift tab on the top of the tank.
5. To empty, pour out dirty water using opening at back of tank. Rinse the tank thoroughly. Reinsert tab into tank.

6. To continue cleaning, align the bottom of the tank to the base and secure into place with latches.
IMPORTANT
» Please check manufacturer’s tag before cleaning area rugs for any specialized cleaning instructions. We do not recommend deep cleaning delicate, silk, wool, antique, or area rugs without a manufacturer’s tag.
» Do not overwet carpet. Be careful not to run over loose objects or edges of area rugs. Stalling the brush may result in premature belt failure.
After-Cleaning Care
1. Turn OFF and unplug your machine. Follow steps 2 & 3 in the section above to remove the Dirty Water Tank.
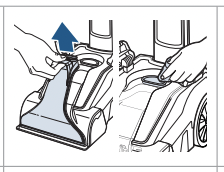
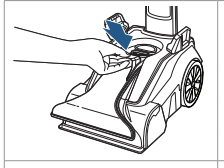
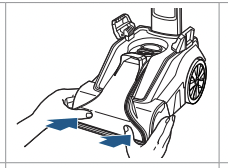
2. Grab the top of the Nozzle and pull it up and away from the machine. Rinse or wipe it clean. Use a cloth to wipe debris from the red filter.
3. Use cloth to wipe brush roll cover clean.
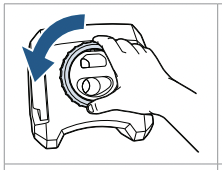
4. Ensure the Dirty Water Tank is empty by gently removing the float stack and unscrewing the ring at the bottom of the tank. Follow steps 4 & 5 on page 5.
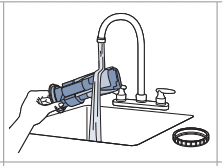
5. Clean and rinse debris from the float. Keeping the float clean prevents your Dirty Water Tank from overflowing and ensures the seal stays intact.
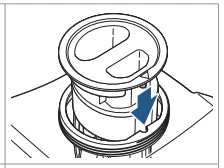
6. Once clean, assemble by aligning the arrow on the float with the notch on the tank. Then, return the ring and twist to lock. Make sure it’s fully aligned, so water doesn’t leak.
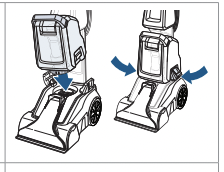
7. To replace the Nozzle, align top into channel in front of red filter and press in place.
8. Use both hands to push the bottom portion of Nozzle into place.
9. Once Dirty Water Tank is dry align the bottom of the tank to the base and secure into place with latches.
ATTENTION If you experience no suction, remove the Dirty Water Tank and ensure the Nozzle is secured and latched appropriately. Return Dirty Water Tank to the machine and try cleaning again.
 WARNING To reduce the risk of fi re, electric shock or injury, turn power OFF and disconnect plug from electrical outlet before performing maintenance or troubleshooting.
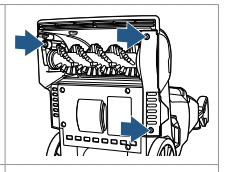
Replacing the Belt & Brush Roll
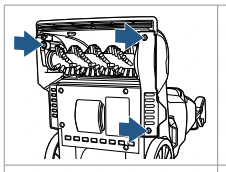
1. Turn OFF and unplug your machine. Use a Phillips-head screwdriver to remove the 3 screws.
2. Remove belt cover
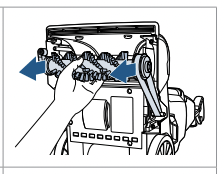
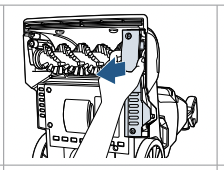
3. Pull Brush Roll out and remove belt from track.

4. Pull belt off of motor shaft

5. Wrap new belt around motor shaft.
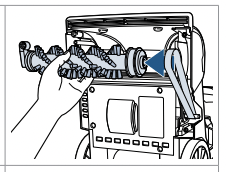
6. Put the belt on the Brush Roll track. Put the Brush Roll back into position.
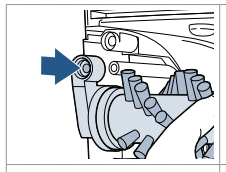
7. Align Brush Roll mount to screw post.
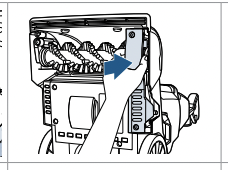
8. Reposition belt cover.
9. Reinstall 3 screws.
Any other maintenance or servicing not included in this manual should be performed by an authorized service representative.
WARNING To reduce the risk of fire, electric shock or injury, turn power OFF and disconnect plug from electrical outlet before performing maintenance or troubleshooting.
Storing Your Machine
Store your machine in a protected, dry area. When finished using the product, wrap cord around cord wrap for storage.
NOTICE: To reduce the risk of a leaking condition, do not store machine where freezing may occur. Damage to internal components may result.
Troubleshooting
This guide has everything you need to get ready for first use, including setting up, using and maintaining your machine, but online you’ll find additional resources like tips and troubleshooting, videos, product registration, parts, and more.
No power
Check for damage
- Unplug machine
- Run hand along entire length of power cord, it should be smooth
- Check plug for damage
- If either the cord (not smooth or exposed wires) or plug (prongs) are damaged > We can still help. Engage with BISSELL for additional resolutions specific to your product and issue.
Check outlet
- Check to see if outlet is working:
- Test this by plugging in a cell phone charger or small appliance
- If no power to outlet, test a different outlet in a separate room
- Reset circuit breaker if needed
- Plug machine in and turn on to test for power
No Suction
1. Remove and clean out dirty water tank
- See in the “Emptying the Dirty Water Tank” section.
2. Inspect dirty water tank
- Inspect dirty water tank for cracks or damage
- If damaged, replace dirty water tank
- Remove all debris from red filter

3. Test for suction
- Plug machine in & turn ON
- Put your hand over red filter to feel for suction
- Do you feel suction?
- Yes > Turn machine OFF & unplug, go to next step
- No > Sorry our troubleshooting steps have not resolved your issue. We can still help. Engage with BISSELL for additional resolutions specific to your product and issue.
4. Inspect float stack
- Remove float stack from dirty water tank unscrewing ring at bottom of tank

- Rinse float stack under water to remove any debris
- Ensure float stack can freely move up and down

- Put float stack back into dirty water tank aligning arrow on float with the notch on tank
- Twist ring into place to secure float

5. Clean nozzle area
- Grab top of nozzle & pull away to remove it

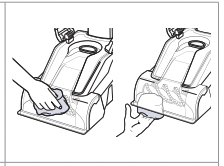
Rinse nozzle under water & wipe debris from machine where nozzle was

- Replace nozzle aligning top into channel in front of red filter, use both hands to push bottom portion of nozzle into place


- Return dirty water tank to machine, secure with latches


- Plug machine in & turn on
- Check for suction by performing a few wet & dry cleaning strokes
No or low spray
Remove upper handle
- Turn off & unplug machine
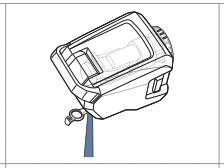
- Remove clean water tank lifting up on handle, set aside

- Turn upper cord wrap over & remove power cord, set aside
- Remove upper handle
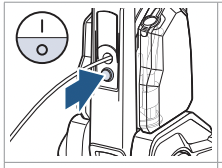
- Press black button below upper power cord wrap & pull up on handle

No or low spray
Make sure trigger is pressed down when performing wet passes
Remove upper handle
- Turn off & unplug machine
- Remove clean water tank lifting up on handle, set aside
- Turn upper cord wrap over & remove power cord, set aside
- Remove upper handle
- Press black button below upper power cord wrap & pull up on handle
Remove middle handle
- Remove middle handle
- Press black button below lower power cord wrap & pull up

- Slide middle handle back onto lower body of machine until it clicks

- Slide upper handle into middle handle until it clicks

Test trigger
- With machine unplugged & turned off pull trigger
- If there is pressure on trigger > Fill clean water tank
- If there is no pressure on trigger > Order new middle & upper handle
Inspect clean water tank
- Inspect clean water tank and cap for cracks, damage, or deformation > Shape change can impact how tank fits into machine & holds water
- If damaged or deformed, replace clean water tank or cap
- If cap is missing red gasket, replace cap
- Fill tank using warm water > Excessively hot water can cause deformation
Reinstall clean water tank
- Reseat clean water tank on machine until it clicks
- If tank does not click into place, order a new clean water tank

Test machine
- Plug machine in & turn on
- Check for spray by pressing down on the trigger and performing a few wet & dry cleaning strokes
Brush Not Turning
- Turn off and unplug machine
- Use a Phllips-head screwdriver to remove 3 screws, 2 in the belt cover and 1 on the brush roll mount
- Remove belt cover
- Set screws aside


- Pull brush roll out and remove the belt from track

- Remove belt off motor shaft

- Inspect belt for damage
- If damaged, order a new belt
- Test brush roll by holding one end and spinning the other
- If brush roll does not spin freely, order a new one
- Wrap belt around motor shaft

- Put the belt on the brush roll track
- Return the brush roll back to machine

- Align the brush roll mount with the screw post


- Plug machine in and turn on
- Check for brush roll turning