Loading ...
Loading ...
Loading ...
Icemaker Installation
Tighten any connections that leak.
Turn the water on at the shutoff valve
Reattach the access cover.
Arrange the coil of tubing so that it does not vibrate
against the back of the refrigerator or against the
wall. Push the refrigerator back to the wall.
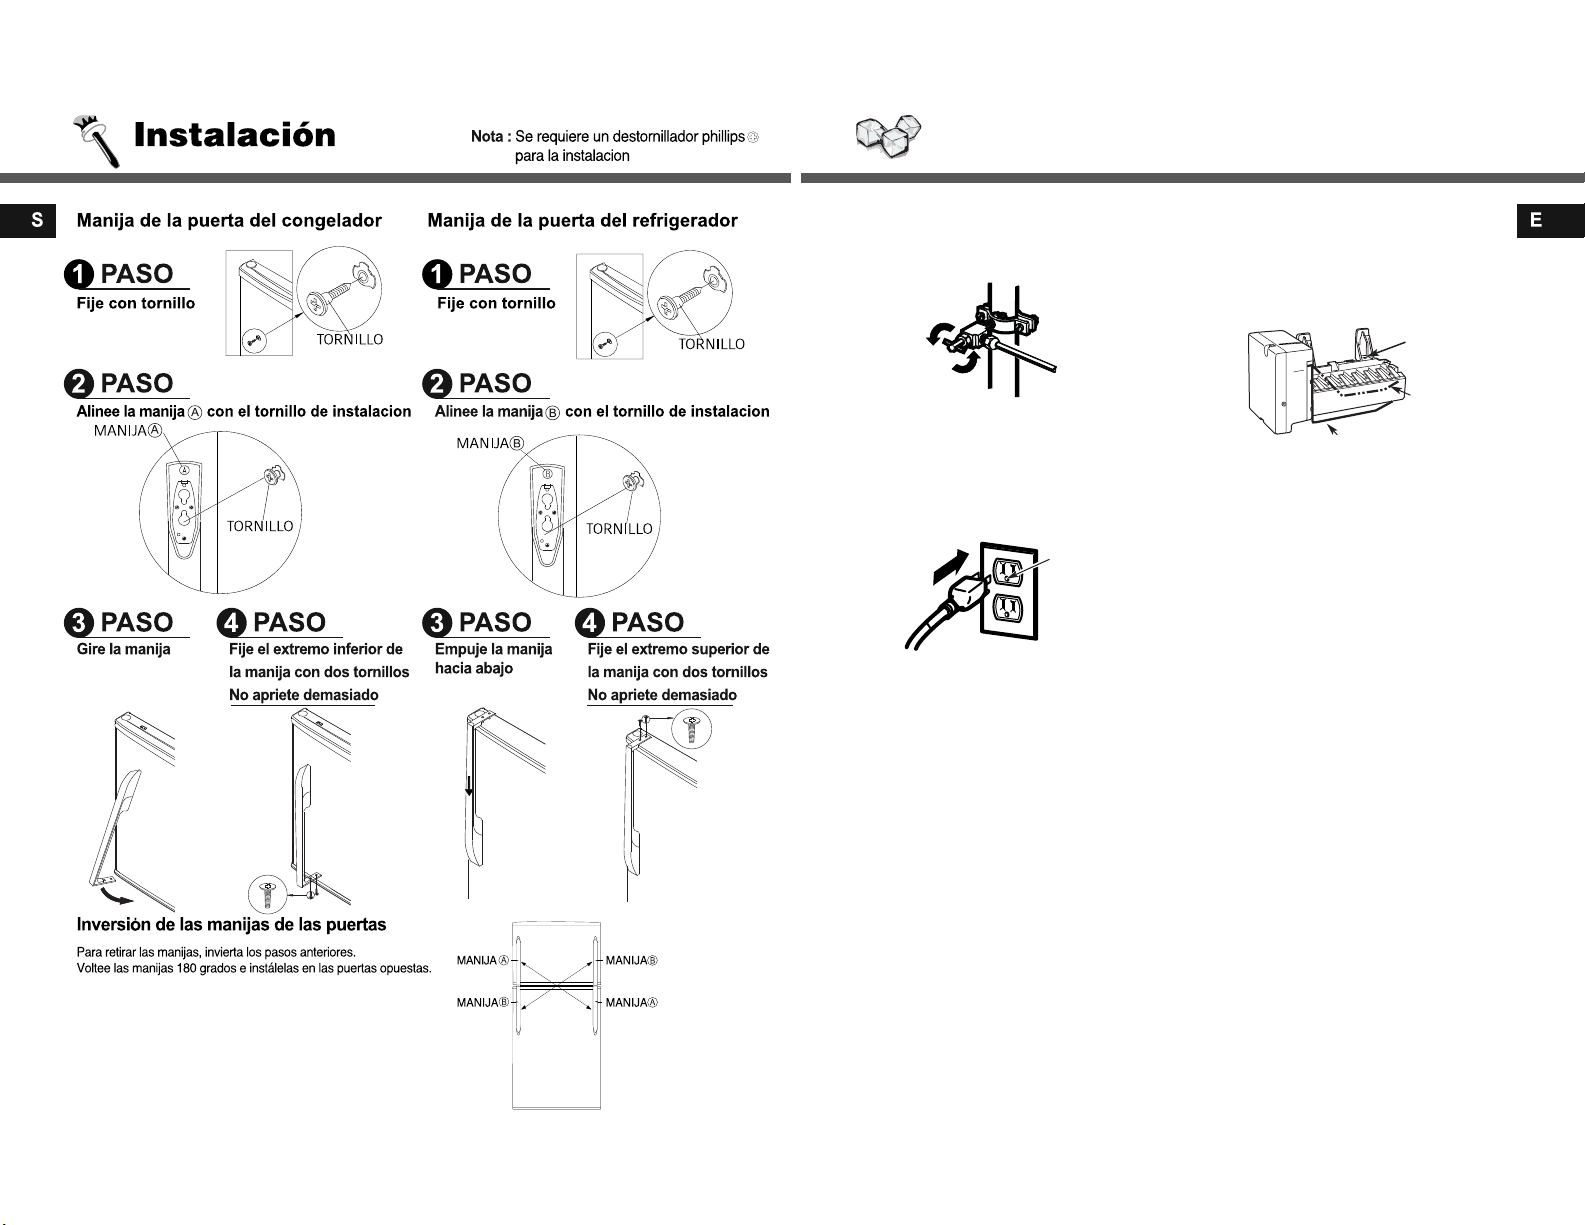
Plug in the refrigerator
Make sure proper
ground exists
before use.
Important: Please read carefully for personal
safety, this appliance must be properly grounded
The power cord of this appliance is equipped
with a 3-prong (grounding) plug that mates with
a standard 3-prong (grounding) wall receptacle
to minimize the risk of electric shock hazard from
this appliance. The customer should have the
wall receptacle and circuit checked by a qualified
electrician to make sure the receptacle is properly
grounded.
Where a standard two-prong wall receptacle is
encountered, it is the personal responsibility and
obligation of the customer to have it replaced with
a properly grounded 3-prong wall receptacle.
Do not, Under any circumstances, cut or remove
the third (ground) prong from the power cord.
NOTE: In lower water pressure conditions, the
water valve may turn on up to 3 times to deliver
enough water to the icemaker.
Move the feeler arm to the ON (down) position. The
icemaker will not begin to operate until it reaches
its operating temperature of 15°F (–9°C) or below.
It will then begin operation automatically.
Start the Icemaker
Hole for
wire tie
S
T
OP
Feeler arm in the STOP
(up) position.
Feeler arm in ON (down)
position.
29 22
Loading ...
Loading ...
Loading ...