Loading ...
Loading ...
Loading ...
Installation and connection en
7
Installation of cooktop into the kitchen
bench
Side clearances: If the distance measured from the
periphery of the nearest burner to any vertical surface is
less than 200 mm, the surface shall be protected in
accordance with clauses 6.10.1.2 of AS/NZS 5601.1.
Make an appropriate size cut in the worktop surface,
depending on the installation method. standard (a) or
flush (b). For flush installation:
■ All cuts in the worktop surface should be done by a
specialised shop.
■ The cuts should be clean and precise, as the cut
edge is on the surface. The stability of the furniture
should also be ensured after cutting work.
■ Use only specially designed work surfaces, resistant
to high-temperature and water (e.g. natural stone or
tiled).
■ Surrounding furniture must be resistant to
temperatures up to 90 °C.
On wood work surfaces, varnish the cutting surfaces
with a special glue. This protects them from moisture
which could collect under the work surface.
Note: Wear protective gloves to fit the hob.
A) Standard installation
Depending on the model, the adhesive seal may be
factory-fitted. If this is the case, it should not be
removed under any circumstances, since the adhesive
seal prevents leaks. If the seal has not been factory-
fitted, apply it to the underside of the hob.
Fitting the appliance onto the kitchen unit:
1. Remove the clips from the accessory bag and screw
them into the position indicated so that they can turn
freely.
2. Insert and centre the hob.
Press the sides of the hob until it is supported
around its entire perimeter.
3. Turn the clips and tighten them fully.
The position of the clips depends on how thick the
work surface is.
Do not stick the hob onto the worktop with silicone.
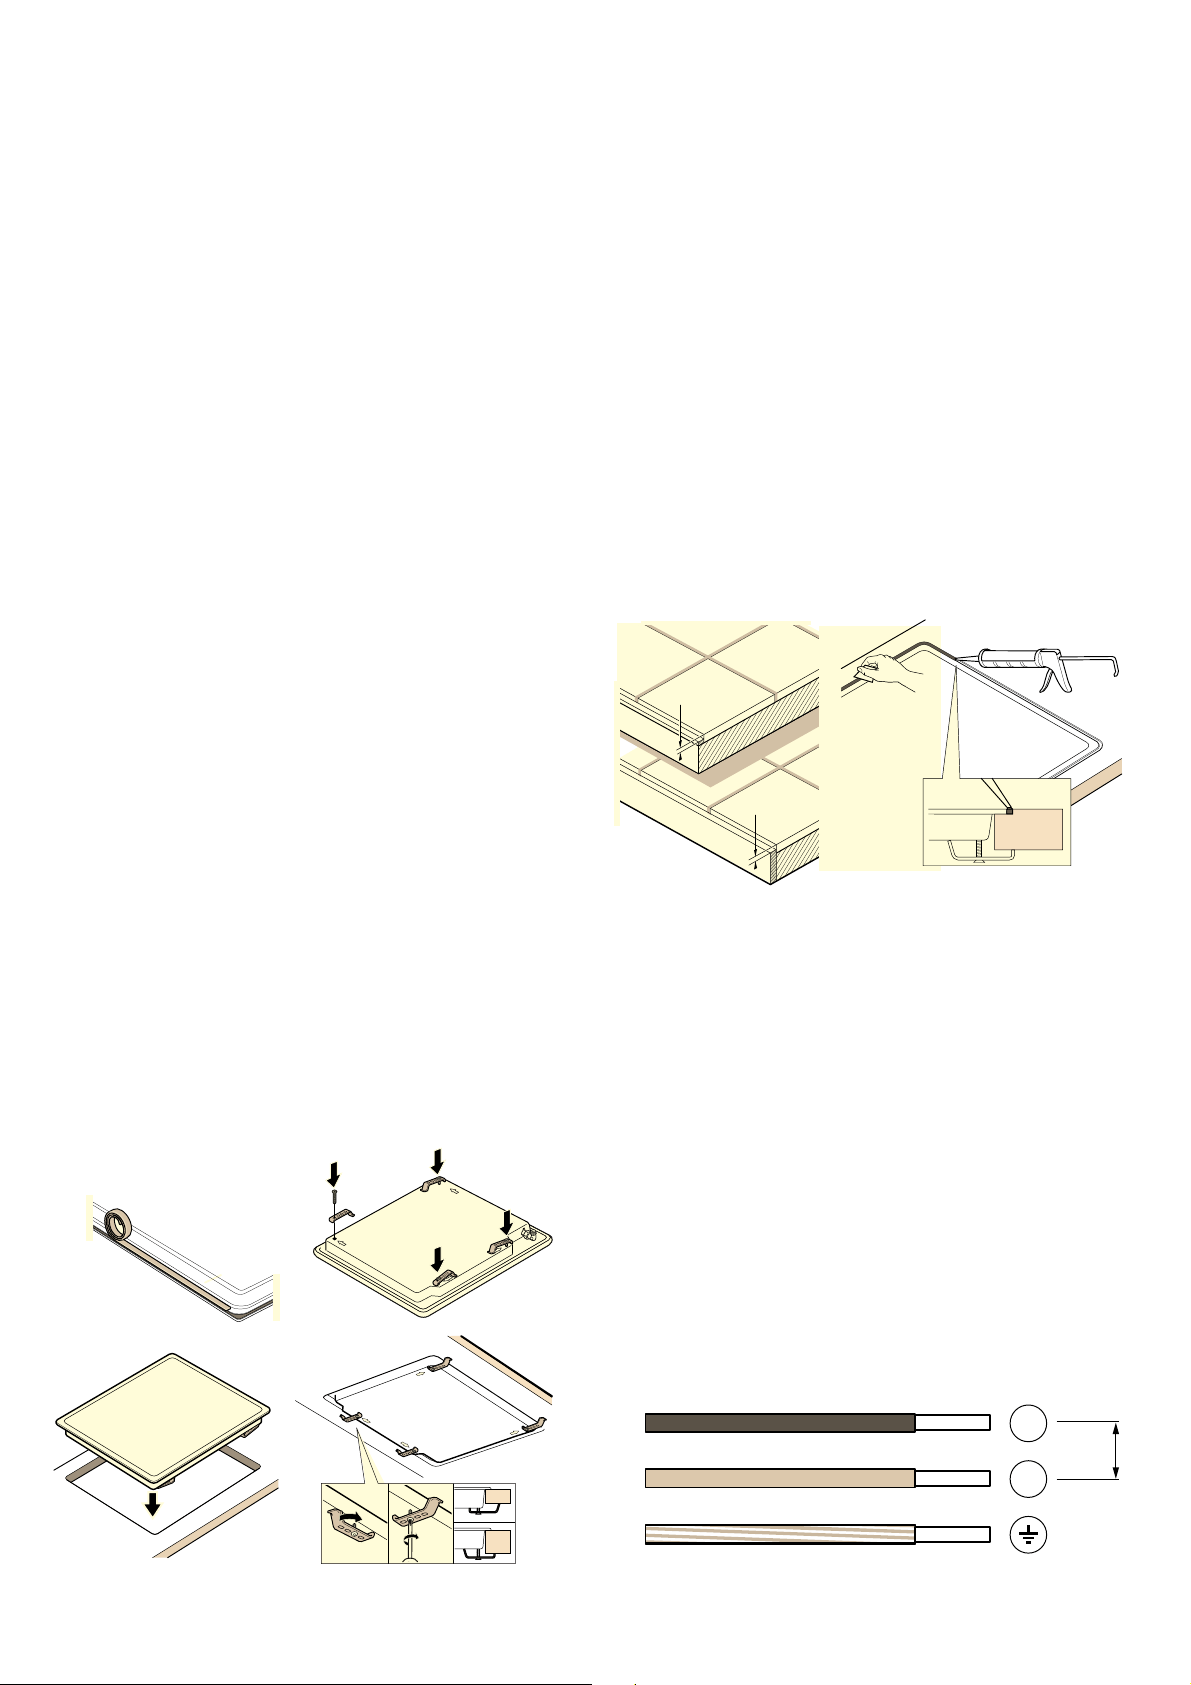
B) Flush installation
1. Complete a normal installation of the appliance making
sure that it is surrounded by a uniform slot. The hob
surface should be slightly below the work surface.
For tile worktops, if necessary, raise the bearing
surfaces with strips resistant to water and
temperatures.
2. Check the operation and position of appliance.
3. Fill the gap between the worktop and hob with
conventional silicone adhesive appropriate in the
colour you desire.
Note: If unsuitable silicone adhesive is used on
natural stone surfaces then this can produce colours
that can not be removed. Our Technical Assistance
Service can provide you with the most suitable glue
(code 310818). Please note the manufacturers
instructions for use.
4. Smooth the silicone adhesive with a scraper or wet
finger moistened with soap and water before it forms
a layer.
5. Allow the silicone adhesive to dry before using the
appliance.
Electrical connection
An electrical 10 amp socket needs to be within 1 m of
the hotplate to allow electrical connection. The socket
must remain accessible after installation of the
appliance.
Important notes:
■ This appliance is connected to the mains (240 VAC)
by means of the connecting lead which must be
fixed to the kitchen unit to prevent it from coming
into contact with hot parts of the cooktop (or an oven
installed underneath) and remain accessible after
installation of the cooktop.
When making this connection make sure that the lead
cannot come into contact with hot parts of the cooktop.
■ This appliance must be earthed. When connecting
the cooktop ensure that the earth wire is connected
first and that all wires are connected to the correct
terminals.
[
VLOLFRQH
/
9
9
1
99
a
Loading ...
Loading ...
Loading ...