Loading ...
Loading ...
Loading ...
8
Temperature cannot be set during AUTO mode but the signal
can be sent from the remote control to the unit to match the
unit’s set temperature with that of the remote control.
Centrigrade setting range is 16-30; Fahrenheit setting range
is 61-86.
6. - Button: When the unit is on, press this button to decrease
temperature. Pressing this button for more than 2 seconds,
will rapidly change the temperature. Discontinue pressing
the button and the display °C (°F) will be displayed continu-
ously.
Temperature cannot be set during AUTO mode but the signal
can be sent from the remote control to the unit to match the
unit’s set temperature with that of the remote control.
7. TIMER Button: Pressing this button while the unit is OFF, the
AUTO-ON time sequence can be initiated. Setting range is
from 0.5 to 24 hours. After pressing this button, the characters
“T-ON” and “H” will flash for 5 seconds. Within those 5 sec-
onds, press the TIMER button once to complete the setting
and to send a signal to your unit. If the setting is valid, the set
time will be displayed for 2 seconds before displaying the
temperature message.
During the flash, pressing the “+” button will increase the time
or by pressing “-”, the time will decrease. Each press will
increase/decrease the auto-timed setting in 0.5 hour incre-
ments.
Note: Pressing the “+” or “-” button continuously will change
the time value rapidly. The remote control can increase the
set time by 0.5 hours every 0.25 seconds.
After turning on the unit, the default is no timer setting and
there is no display of “T-ON” or “H”. Press the ON/OFF button
to turn on the unit and cancel the AUTO turn on.
After the temperature display is constant, press this button
again to display the remaining set time. The time value, “T-
ON” and “H” will display constantly for 2 seconds. After 2
seconds, the preset temperature will be displayed.
NOTE: Within these 2 seconds, pressing this button again will
cancel the AUTO turn on request.
By pressing this button while the unit is on, you may set the
time for AUTO turn off. The same method is used for setting
the AUTO turn on.
ADDITIONAL INFORMATION
• The remote control will operate all the control panel features.
Instructions will be the same.
• The “COOL” circuit has an automatic 3 minute time de-
layed start if the unit is turned off and on quickly. This
prevents overheating of the compressor and possible cir-
cuit breaker tripping.
NOTE: The fan will continue to run during this time.
• The control will maintain any set temperature between 60°F
and 90°F (cooling), 55°F and 80°F (heating).
• The control is capable of displaying temperature in degrees
(Fahrenheit) or degrees (Celsius). To convert from one to the
other, press and hold the UP and DOWN Temperature Selec-
tion Pads at the same time for 3 seconds.
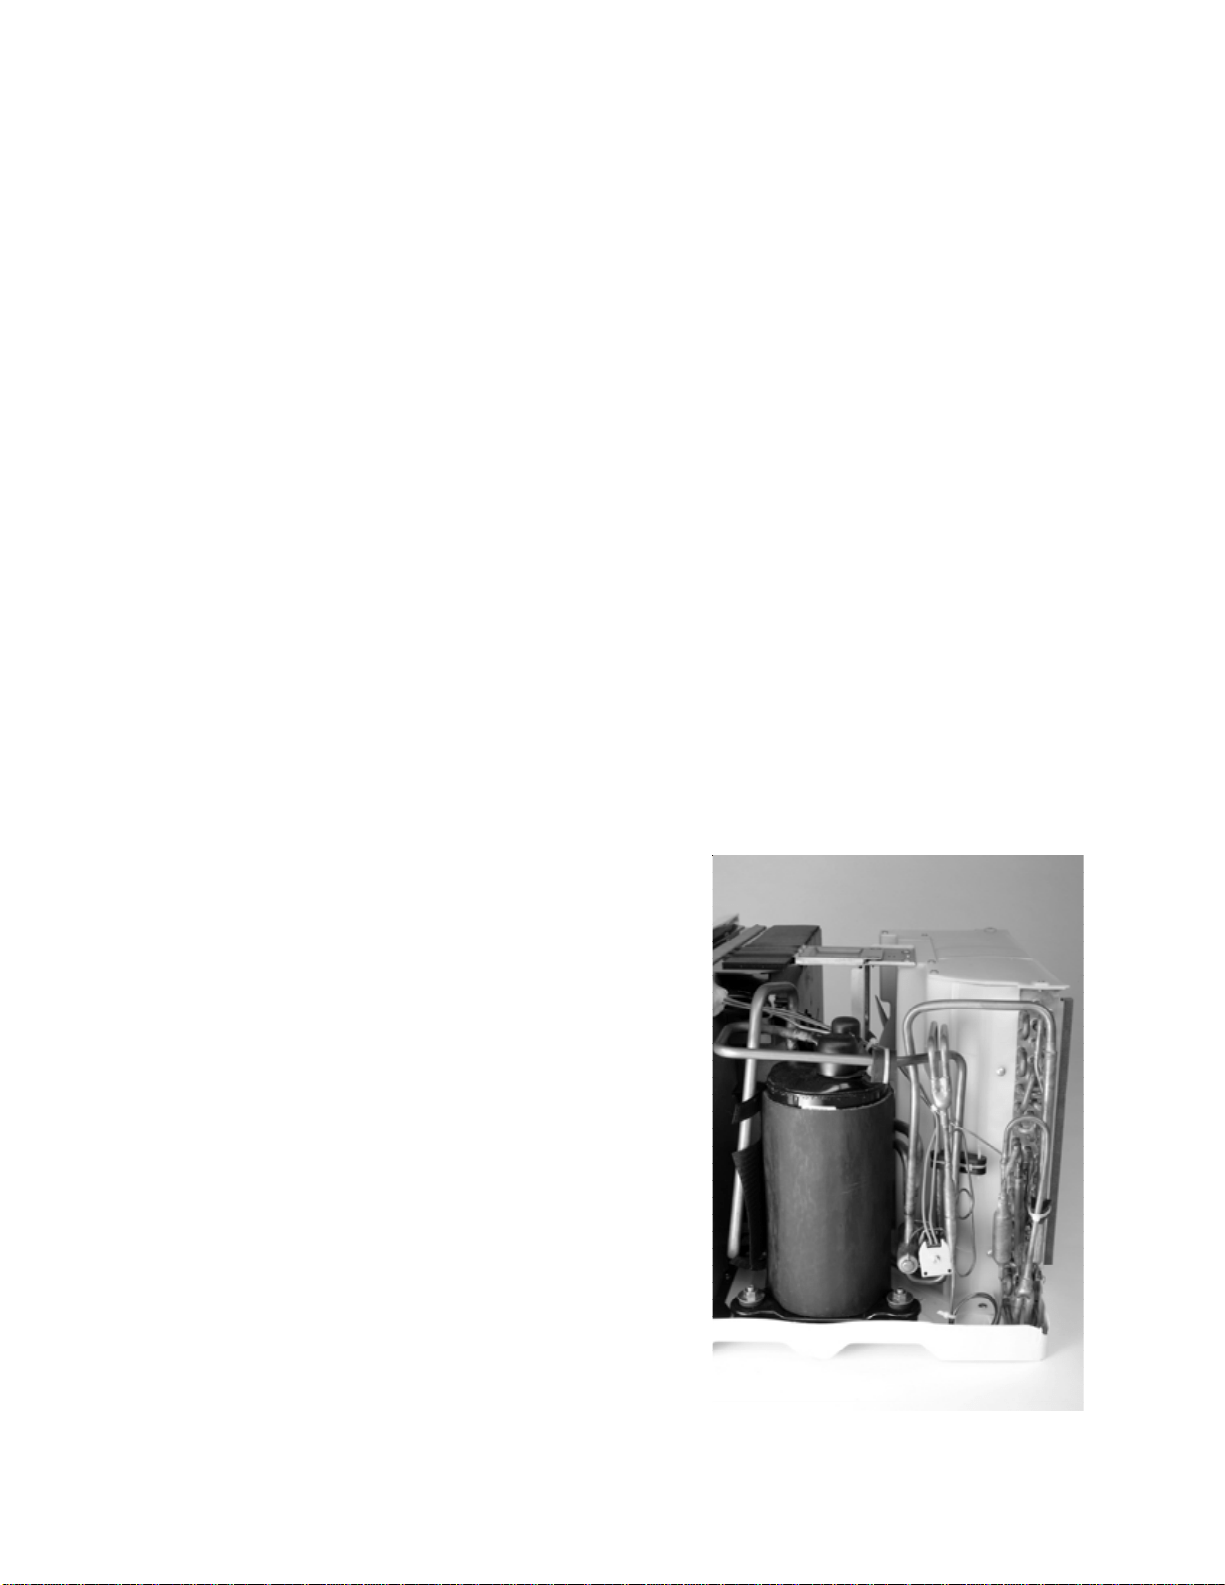
COMPRESSOR
The compressor is hermetically sealed, permanently lubricated
and requires no additional oiling.
FRONT PANEL AND GRILLE
The front panel and grille can be cleaned with a mild soap or
detergent. Do not use hydrocarbon-based cleaners (e.g. acetone,
benzene, naphtha, gasoline, etc.) to clean the front panel or grille.
Use care when cleaning the control area. Do not use an exces-
sively wet cleaning cloth.
SCHEDULED MAINTENANCE
To achieve continuing top performance and high efficiency, a regular
cleaning/inspection schedule must be established. Maintaining
this schedule can be accomplished by either a local maintenance
staff or an authorized servicer and must follow the instructions
described in this manual.
• If the unit is operated in a dusty climate, dust may collect in
the basepan and clog the condenser coil. It is advisable to
remove the unit from the sleeve and thoroughly clean the
basepan and condenser coil on a periodic basis.
• If the unit is installed ocean side or in a corrosive atmosphere,
its life may be greatly reduced by the corrosive environment.
Under these conditions, the unit should be removed from the
sleeve and completely cleaned once a year. At that time any
scratches or blisters on the painted surfaces should be
sanded and repainted.
OUTDOOR COIL CLEANING
The coils on the outdoor side of the air conditioner should be
checked regularly. For cleaning outside coil, remove the 6 screws
that mount the condenser coil top cover to condenser shroud.
Loading ...
Loading ...
Loading ...