Carefully unpack the dryer. Keep all packaging materials away from children. The parts and location of parts shown below may differ from your dryer. Before installation, make sure the dryer has all the parts listed here. If the dryer and/or parts are damaged or missing, contact the nearest Samsung customer service centre.
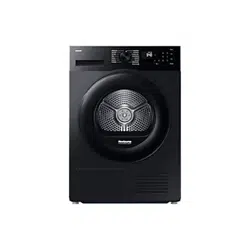
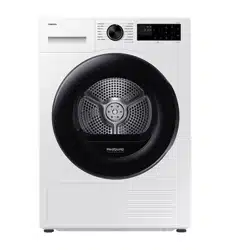
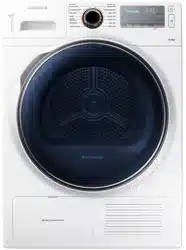
Dryer at a glance
01 Top cover 02 Water Tank 03 Lint filter 04 Heat exchanger 05 Levelling Leg 06 Door 07 Control Panel
Accessories (supplied)
Accessories (not supplied)
NOTE
The stacking kit allows the dryer to be stacked on top of a washer. Please note that the stacking kit can only be used with Samsung washers and dryers. To purchase a bracket stacking kit (SK-DH, SK-DA, SKK-DF) or stacking kit (SKK-DD, SKK-DDX), contact a Samsung service centre or local appliance retailer. The stacking kit differs with the washer model.
For stacking instructions with the dryer, see the installation manual included in the stacking kit.
For information about model-specific availability of the stacking kit, see the installation manual included in the stacking kit.
Installation requirements
NOTE
This dryer must be installed by a qualified installer. If service is required due to poor or faulty installation, it is considered the owner’s responsibility and may void the warranty. Keep these instructions for future reference.
WARNING
Do not plug the power cord into a wall outlet before the dryer is completely installed.
Have two or more persons help move the dryer.
Do not let children or pets play in, on, or around the dryer. Proper supervision is necessary at all times.
Keep all packaging materials away from children.
Do not replace a damaged power cord or power plug yourself. Have Samsung or a qualified service technician replace a damaged power cord or power plug.
Do not attempt to repair, disassemble, or modify the dryer. For any repairs, contact the nearest Samsung service centre.
Remove the door/lids from all discarded appliances to avoid children from suffocating.
If the dryer generates a strange noise, burning smells, or smoke, unplug the power plug immediately and contact the nearest Samsung service centre.
Do not unplug the dryer while it is operating.
Do not place flammable objects near the dryer.
Location requirements
Select a level, well-constructed surface that will withstand vibrations. Select a location where a grounded, 3-prong outlet is easily accessible.
WARNING
Install the dryer indoors only.
Do not install the dryer in areas exposed to the weather.
Do not install the dryer where the temperature may fall below 5 °C or rise above 35 °C.
Do not install the dryer where gas may leak.
Do not block the cooling grill’s air inlet located at the dryer front.
Alcove or closet installation
For alcove or closet installation, the dryer requires the following minimum clearances:
If installing the dryer with a washer, the front of the alcove or closet must have an unobstructed air opening of at least 490 mm.
Electrical and grounding requirements
The dryer requires an AC 220-240 V / 50 Hz electrical supply.
The dryer must be properly grounded. If the dryer malfunctions or breaks down, grounding reduces the risk of electric shock by providing a path of least resistance for the electric current. The dryer comes with a power cord that has a 3-prong grounding plug. The plug must be plugged into an appropriate outlet that is properly installed and grounded in accordance with all local codes and ordinances.
If you have any questions regarding the electrical or grounding requirements, please contact Samsung or a qualified electrician.
WARNING
Plug into a grounded, 3-prong outlet.
Do not use a damaged power plug, cord, or loose or damaged wall outlet.
Do not use an adaptor or an extension cord.
Improper connection of the equipment-grounding conductor may result in electric shock. If you are unsure if the dryer is properly grounded, check with a qualified electrician.
Do not modify the power plug, power cord, or power outlet in any way.
Do not connect the ground wire to plastic plumbing lines, gas lines, or hot water pipes
Levelling
Before you install the dryer, make sure you have read Installation requirements on page 17. Please note that the following instructions are for installation without using a drain hose. For instructions for using a drain hose, see the next section, Drain hose (if necessary). For convenience, consider installing the dryer next to your washer.
Gently put the dryer on the desired location.
Use a level (A) and check the levelness of the dryer from side to side and front to back.
If the dryer is not level, adjust the levelling leg (B). Turning the leg counter-clockwise retracts the leg. Turning the leg clockwise extends the leg.
Once the dryer is level, make sure the dryer stands firmly on the floor.
Plug in the dryer.
NOTE
The dryer can be levelled using either or both of the front and rear legs of the dryer.
To set the dryer to the same height as the washer, fully retract (C) the levelling legs by turning them counter clockwise, then loosen (D) the legs by turning them clockwise.
Extend the levelling leg only as much as necessary. Extending the levelling leg more than necessary can cause the dryer to vibrate.
Drain hose (if necessary)
The dryer comes with a built-in water tank. However, if you do not want to use the water tank, you may install the drain hose. The provided accessory hose (long drain hose) can be used as an extension to the drain hose.
1. Remove the drain hose from hole (A), and insert it into hole (B).
2. Insert one end of the accessory hose (long drain hose) into hole (A).
3. Insert the other end (outlet) of the accessory hose to the drainage system in one of the following ways:
Over a wash basin:
1. Make sure to place the end of the accessory hose lower than 90 cm (*) from the bottom of dryer.
2. To bend some point of the accessory hose, use the supplied plastic hose guide (B) and secure the guide to the wall with a hook or to the tap with a piece of string. Assemble the drain hose (A) and the hose guide (B) and fix them with the cable-tie (C).
3. You can drain the condensed water by connecting the accessory hose (long drain hose) to the drain-outlet directly.
CAUTION
Do not extend the drain hose. Water may leak from the connected area. Use a long drain hose.
By using the drain pipe of the wash basin:
1. Assemble the hose connector (A), and attach it to the end of the accessory hose as shown.
CAUTION To prevent water leak, make sure to connect the hose and the connector firmly.
2. Connect the hose adaptor directly to the drain pipe of the wash basin.
Installation checklist
The dryer is plugged into a properly grounded outlet.
All packaging material is completely removed and properly disposed.
The dryer is level and standing firmly on the floor.
Start the dryer to make sure that it runs, heats, and shuts off.
Run a TIME DRY cycle for 20 minutes to see if the HC information code is displayed. If this is the case, contact a local service centre.
After installation, we recommend that you wait at least 1 hour before using the dryer.
Before using the dryer
Make sure no accessory remains inside the drum.
Plug in the power cord just before operating the dryer.
Do not block the air inlet hole of the cooling grill at the front of the dryer.
Do not place inflammable objects near the dryer and keep the surroundings clean.
Keep the dryer level with the ground.
Do not remove the adjustable levelling legs of the dryer. They are necessary to keep the dryer level with the ground.
Door reversal (DV9*N62****/DV8*N62**** only)
You might want to reverse the direction of the door, depending on your site conditions or to your needs
WARNING Make sure door reversal is performed by a qualified technician
1. Remove the door packing from the door.
2. Remove the screws on the inner glass holder of the door.
- First, loosen and remove the 3 screws on the bottom. Then, loosen and remove the 3 screws on the top of the holder.
3. Detach the glass holder.
CAUTION Use caution not to drop any part of the holder when detaching it. Property damage (cracks or breaks) or physical injury may occur.
4. Remove the hinge screws, and then detach the door.
- Loosen and remove the 2 bolts on the door frame.
- To prevent abrasion on the bolts, use a hex screwdriver.
5. Remove the upper screw on the left of the door frame, and then insert it in the corresponding right hole of the door frame. Do not remove the lower bracket screws
6. Remove the 2 bracket screws on the right frame, and then remove the 2 holder screws on the left frame.
7. Insert the 2 removed bracket screws in the left frame as shown.
- See the figure on the right for the correct position of the screws.
8. Remove the bottom screw on the left frame, and then insert it in the corresponding hole on the right frame.
9. Insert the lever holder on the right frame, and then tighten the 2 holder screws.
10.Insert the door hinge in the opposite position of the door frame, and then, tighten the 2 bolt screws.
11.Insert the inner glass holder in the door cover that has been installed on the left frame.
12.Tighten the 3 holder screws on the top. Then, tighten the 3 holder screws on the bottom.
13.Attach the door packing to the door.
Environment
Please dispose of the packaging materials for this product in an “environmentally friendly” manner. For further detail, please contact your local area authority.
Operations
Control panel
01 Digital Graphic Display
Displays all cycle information, including cycle time, information codes, and dryer status. See the table below for status details.
02 Cycle Selector
Turn the dial to select a cycle. See the Cycle overview on page 31 for available cycles.
03 Dry Time
Press to adjust the cycle time for TIME DRY, WARM AIR, and COOL AIR (DV**N62**** models only) cycles. The following time options (unit: minute) are available: 30, 60, 90, 120, and 150.
• 120 minutes and 150 minutes are not available for WARM AIR and COOL AIR (DV**N62**** models only) cycles
• The exact drying time differs depending on the humidity of the load.
04 Dry Level
Press to select the dryness level in the AIR WASH , COTTON, MIXED LOAD, SYNTHETICS, and SILENT DRY (DV9*N82**** models only) cycles. The dryness can be set in three levels (1-3). Level 1 is used to partially dry items that lay flat or hang to dry. Level 3 is the strongest and is used to dry larger or bulk loads.
05 Damp Alert
This alert is available only with COTTON, MIXED LOAD, SYNTHETICS and SILENT DRY (DV9*N82**** models only) cycles. If a load contains mixed fabrics, the Damp Alert indicator ( ) blinks when the average dryness of the item is 80 % dry. This lets you take items that you don’t want fully dried or that dry quickly out of the dryer early while letting others continue to dry.
06 Wrinkle Prevent
Adds approximately 3 hours of intermittent tumbling at the end of the selected cycle to reduce wrinkles. To activate, press Wrinkle Prevent. The wrinkle prevent indicator blinks, and zero appears on the display.
07 Alarm Off
Press to mute/unmute the alarm. The sound setting is retained when you turn the dryer off and turn it on again.
08 Drum Light
Press to turn on or off the interior lamp. The lamp stays lit for 2 minutes after it has turned on, and then turns off automatically.
09 Smart Control
After connecting the dryer to your home network using the SmartThings app, you can control dryer remotely. The Smart Control indicator blinks. The loader enters waiting mode for remote commands. For more information, see the SmartThings section on page 40.
10 Start/Pause (Hold to Start)
Press and hold to start an operation, or press to stop an operation temporarily.
11 Power
Press to turn the dryer on/off. If the dryer turns on for 10 minutes without any button being pressed, the dryer automatically turns off.
Cycle chart
For best results, follow the load size recommendations for each dry cycle.
Large load: Fill the drum to about ¾ full. Do not add items over this level as they need to tumble freely.
Medium load : Fill the drum to about ½ full.
Small load : Fill the drum with 3-5 items, not more than ¼ full.
Getting started
Simple steps to start
Press Power to turn the dryer on.
Load the dryer and close the door.
Turn the Cycle Selector to select a cycle.
Change the cycle settings (Dry Time, and Dry Level) as necessary.
Select necessary settings and options to your preference. (Damp Alert, Wrinkle Prevent, Alarm Off, and/or Delay End).
Press and hold Start/Pause (Hold to Start). The dryer indicator lights up, and the estimated cycle time appears on the display.
NOTE
The number of available settings and options differs with the cycle.
To change the cycle during operation
Press Start/Pause (Hold to Start) to stop operation.
Select a different cycle.
Press and hold Start/Pause (Hold to Start) to start new cycle.
Sorting and loading
Put only one wash load in the dryer at a time.
Avoid mixing heavy and lightweight items together.
To increase drying efficiency when drying one or two items, add a dry towel to the load.
For best results, untangle items before inserting into the dryer.
Overloading restricts the tumbling process, resulting in uneven drying and wrinkling.
Unless recommended on the care label, avoid drying woollens or fibreglass items.
Avoid drying unwashed items.
Do not dry items soiled with oil, alcohol, gasoline, etc.
Rack Dry (applicable models only)
Set the drying time up to 150 minutes according to the moisture and weight of the items to dry. When drying laundry using the drying rack, the TIME DRY cycle is recommended.
A. Rack dry
1. Position the drying rack in the drum, inserting the front lips of the rack into the holes of the door diaphragm.
2. Place items on the rack, leaving enough space where air can circulate. For clothing items, fold and place flat on the rack. For shoes, place shoes with their soles facing down.
3. Close the door and press Power. Select TIME DRY, and then press Dry Time to select the drying time.
4. Press and hold Start/Pause (Hold to Start).
Drying suggestions
CAUTION
• Drying foam rubber, plastic, or rubber on a heat setting may cause damage to the items and lead to a fire hazard.
• To prevent damage to shoes, use Rack Dry.
Cycle guide
Always follow the care label when drying. If care label instructions are not available, refer to the following table.
Special features
Delay End
You can set the dryer to complete a selected cycle at your set time.
1. Select a cycle with necessary options.
2. Press the - or + Delay End buttons to set a time between 1 to 24 hours in 1-hour increment.
3. Press and hold Start/Pause (Hold to Start). The corresponding indicator blinks, and the clock begins counting down to the set time.
Child Lock
To prevent children or infants from accidentally starting or setting the dryer, Child Lock locks all buttons except for the Power button.
To activate/deactivate Child Lock, simultaneously press and hold the – and + Delay End buttons for 3 seconds.
Smart Check
If the dryer has detected an issue, Smart Check allows you to check the status of the dryer using a smartphone. Please note that Smart Check can only be used for Galaxy and iPhone series smartphones.
To use Smart Check, make sure you have downloaded the Samsung Smart Washer app, and then follow the steps below.
1. Press and hold Dry Level and Damp Alert for 3 seconds. The LED’s on the display panel rotate, and the Smart Check code is displayed.
2. On the smartphone, open the Samsung Smart Washer app and tap the Smart Check button.
3. Focus the smartphone’s camera on the Smart Check code shown on the display panel.
4. If the information code is recognised, the app provides detailed information for the issue and further instructions.
Maintenance
WARNING
Do not clean the dryer by directly spraying water onto the dryer.
Do not clean the dryer with benzene, thinner, alcohol, or acetone. This may cause discolouration, deformation, damage, electric shock, or fire.
Before cleaning the dryer, be sure to unplug the power cord.
Control panel
Clean with a soft, damp cloth. Do not use abrasive cleaners. Do not spray cleaners directly on the panel. Immediately wipe up any spills or liquids from the control panel.
Exterior
Clean with a soft, damp cloth. Do not use abrasive cleaners. Avoid using or placing sharp or heavy objects near/on the dryer. Keep detergent and laundry supplies on the pedestal (sold separately) or in a separate storage container.
Drum
Clean with a damp cloth with a mild, non-abrasive cleaner suitable for stainless steel. Wipe remaining residue with a clean, dry cloth.
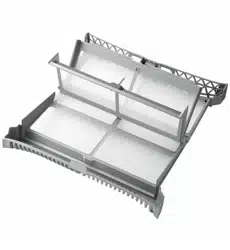
Lint filter
Clean the lint filter after each load.
1. Open the door and pull the lint filter upward to remove.
2. Open the outer filter and remove the inner filter (A).
3. Unfold both the inner filter and the outer filter.
4. Remove the lint from both filters, and then clean the filters with the cleaning brush.
NOTE To clean the filters thoroughly, clean the filters in running water, and then dry them completely.
5. Put the inner filter into the outer filter, and then reinsert the lint filter into the original position.
CAUTION
Clean the lint filter after each load. Otherwise, the drying performance may decrease.
Do not operate the dryer without the inner filter inside the outer filter.
Using the dryer with a wet lint filter may cause mold, bad odours, or a decrease in drying performance.
Water tank
To avoid leaks, empty the water tank after every load.
1. Using both hands, pull the water tank (A) forward to remove.
2. Empty the water through the drain hole (B) and place the water tank back into place.
NOTE If you empty the water tank and press and hold Start/Pause (Hold to Start), the corresponding indicator turns off.
Heat exchanger
Clean the heat exchanger at least once a month. As a reminder, the heat exchanger indicator ( ) lights up on the display when the heat exchanger needs to be cleaned.
1. Gently press the top part of the outer cover (A) to open.
2. Unlock the fixers (B).
3. Remove the inner cover (C).
4. Clean the heat exchanger with the provided cleaning brush or a vacuum cleaner with a brush attachment. Take care not to bend or damage the heat exchanger fins when cleaning. This may lead to a decrease in drying performance.
CAUTION
• To avoid physical injury and burns, do not touch or clean the heat exchanger with bare hands.
• Do not use water to clean the heat exchanger
5. Clean the inner cover with a smooth, damp cloth.
6. Reinsert the inner cover to its original position, and then lock the fixers.
7. Close the outer cover.
NOTE After cleaning, make sure the fixers are locked.
Troubleshooting
Checkpoints
If you encounter an issue with the dryer, first check the table below and try the suggestions.
Symptom
Action
Dryer does not run
• Make sure the door is completely closed.
• Make sure the power cord is plugged in.
• Check the home’s circuit breaker and fuses.
• Empty the water tank.
• Clean the lint filter.
Dryer does not heat
• Check the home’s circuit breaker and fuses.
• Select a heat setting other than COOL AIR (DV**N62**** models only).
• Check the lint filter and heat exchanger. Clean them if necessary.
• Dryer may be in the cool-down phase of the cycle
Dryer does not dry
Check the above, plus…
• Make sure the dryer is not overloaded.
• Sort light and heavy items separately.
• Reposition large, bulky items to ensure even drying.
• Check that the dryer is draining properly.
• For small loads, add a few dry towels.
• Clean the lint filter and heat exchanger.
Dryer is noisy
• Check for coins, buttons, lighters, etc.
• Make sure the dryer is level and standing firmly on the floor.
• The dryer may hum due to air moving through the drum and fan. This is normal.
Dries unevenly
• Seams, pockets, and other parts of clothing are harder to dry than others. This is normal.
• Sort heavy and light items separately.
Dryer emits an odour
• The dryer may draw household odours in from the surrounding air and then exhaust them. This is normal.
Dryer turns off before the load is dry
• Dryer load is too small. Add more items and restart the cycle.
• Dryer load is too large. Remove items and restart the cycle.
Lint on clothes
• Make sure the lint filter is clean before every load.
• Dry lint-producing items (fuzzy towels) separate from lint trappers, such as black linen pants.
• Divide larger loads into smaller loads.
Items still wrinkled after Wrinkle Prevent
• Small loads of 1-4 items work best.
• Load fewer items. Load similar type items.
Odours remain in items after COOL AIR (DV**N62**** models only)
• Make sure to thoroughly wash items with strong odours.
Information codes
If the dryer fails to operate, you may see an information code on the display. Check the table below and try the suggestions.
Information code
Meaning
Action
tC
Air temperature sensor issue
Clean the lint filter and/or heat exchanger. If this continues, call for service.
tC5
Compressor temperature sensor issue
Wait 2-3 minutes. Turn the power on and restart
dC
Running the dryer with door open
Close the door and restart. If this continues, call for service.
HC
Compressor overheat
Call for service.
5C
The water tank full Drain pump is out of order
Empty the water tank, turn the power on, and restart. If this continues, call for service.
AC6
Check communications between the main and the inverter PBAs.
• Depending on the state, the dryer may automatically returns to normal operation.
• Turn the dryer off and turn it on again. Then, restart the cycle.
• If the information code continues to appear, call for service.
3C
Check the motor for operation.
• Try restarting the cycle.
• If the information code continues to appear, call for service
For any codes not listed above, or if the information code continues to appear, call for service.
-273170.png)
-711944.png)
-270426.png)
-428576.png)
-322777.png)
-645079.png)
-176093.png)
-258803.png)
-366867.png)
-43529.png)
-760632.png)
-853246.png)
-130564.png)
-621313.png)
-130605.png)
-593710.png)
-455290.png)
-47318.png) Large load: Fill the drum to about ¾ full. Do not add items over this level as they need to tumble freely.
Large load: Fill the drum to about ¾ full. Do not add items over this level as they need to tumble freely.-12526.png) Medium load : Fill the drum to about ½ full.
Medium load : Fill the drum to about ½ full.-450953.png) Small load : Fill the drum with 3-5 items, not more than ¼ full.
Small load : Fill the drum with 3-5 items, not more than ¼ full.-130391.png)
-713464.png)
-229541.png)
-665095.png)
-615301.png)
-575353.png)
-629734.png)
-670949.png)
-536323.png)
-656599.png)
-677856.png)
-353862.png)
-225992.png)
-18740.png)
-286496.png)