Loading ...
Loading ...
Loading ...
Installation
Note: Take into account any special
accessories that are going to be fitted.
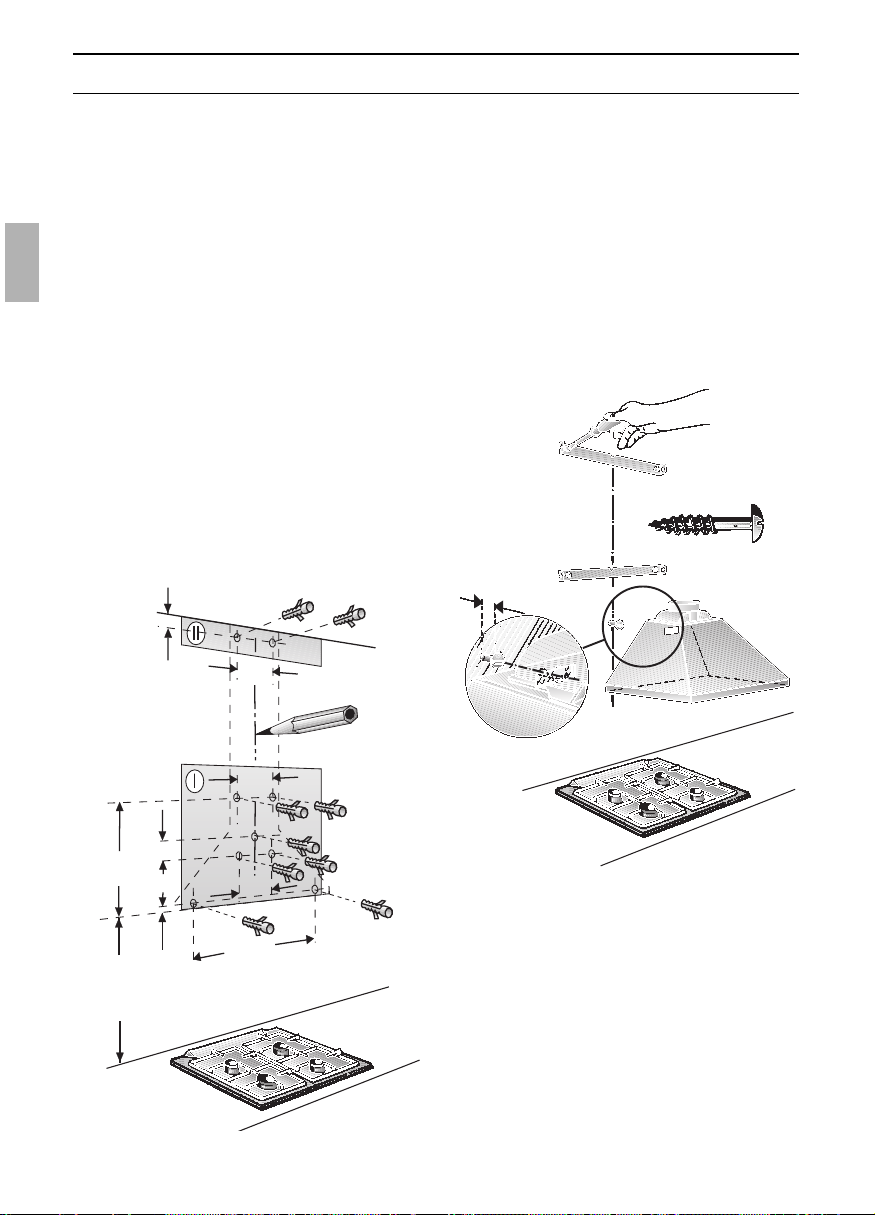
5. Screw on the 2 brackets for fixing the
upper and lower flue ducts.
6. In order to help fix the hood onto the
wall, screw in the middle screw
(without a washer) until it protrudes by
approx.
1
/
4
”.
7. Hook the hood over the screw in the
wall.
9”
9”
1
18
15
2
4
”
5
8
/
”
1
4
/
”
1
2
/
”
1
16
/
”
5
8
/
”
3
4
/
MIN.
30”
8
1
”
1
5
/
CA. 7/32”
This hood is intended to be mounted onto
the kitchen wall.
1. Remove the grease filter
(see operating instructions).
2. Draw a line on the wall from the ceiling
to the lower edge of the hood at the
center of the location where the hood is
going to be mounted.
3. Using the template, mark positions on
the wall for the screws.
Ensure that the minimum distance
between the cooking surface and the hood
is maintained. The bottom edge of the
template equates to the lower edge of the
hood.
4. Drill 5 holes (dia.
1
/
4
”) for the
hood and 4 holes (dia.
1
/
4
”) for the
brackets for fixing the flue ducts and
insert wall plugs flush with the wall.
Note: At least one screw must be
installed through a stud.
10
Loading ...
Loading ...
Loading ...