Loading ...
Loading ...
Loading ...
En
13
Part names and functions
c BACK button
Press this once to return to the previous screen.
Press for over 1 second to move to the top layer.
= Moving back up to a higher layer (p. 25 )
d STANDBY indicator
This lights when in the standby mode.
= Setting the auto standby mode (p. 31 )
e TAG TRACK/REMOVE button
Use these to add and remove tracks from the tag list.
= Editing tag lists (p. 27 )
f Rotary selector
When selecting tracks or setting items, the cursor moves when the
rotary selector is turned. Press the rotary selector to enter.
g VINYL MODE button
The mode switches between VINYL and CDJ each time this is
pressed. When the VINYL mode is selected, the indicator lights.
= Switching the jog dial mode (p. 19 )
h TEMPO ±6/±10/±16/WIDE button
Use this to switch the playing speed adjustment range.
= Adjusting the playing speed (Tempo control) (p. 18 )
i MASTER TEMPO button
Use this to turn the master tempo function on and off.
= Adjusting the playing speed without changing the pitch (Master
Tempo) (p. 19 )
j TEMPO slider
Use this to adjust the track playing speed.
= Adjusting the playing speed (Tempo control) (p. 18 )
k Jog dial
This can be used for such operations as scratching, pitch bending,
etc.
= Operating the jog dial (p. 19 )
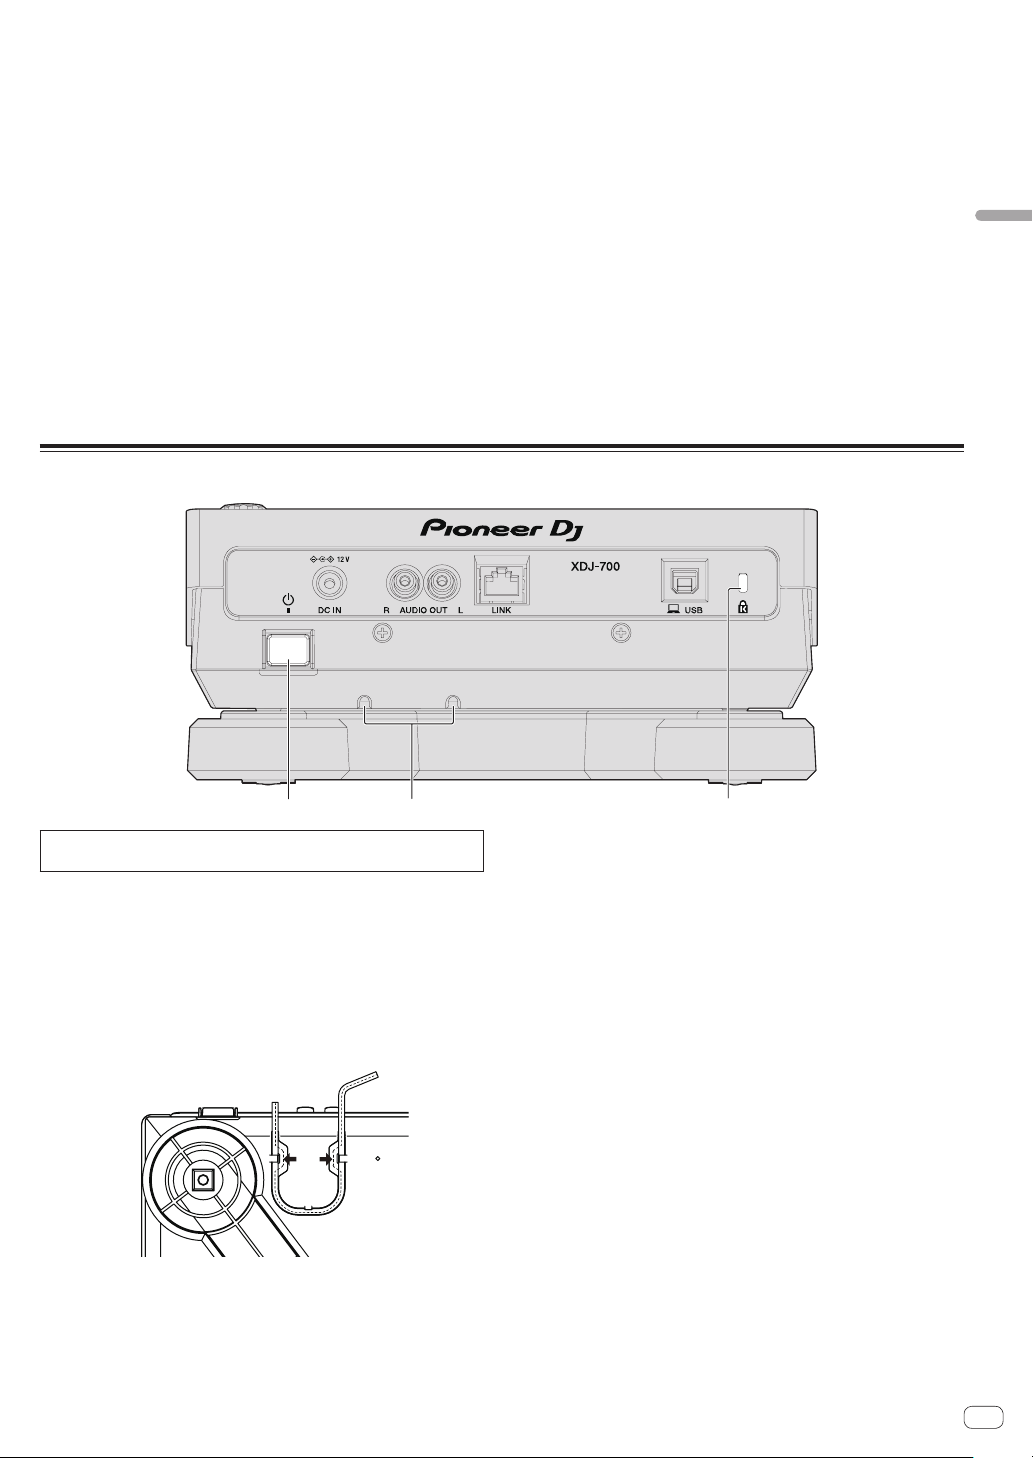
Rear panel
111 32
For the terminals used for connections, see Descriptions of terminals
on page 8 .
1 u switch
Turns this unit’s power on and off.
2 Cable clamper
Put the AC adapter’s cord through the clampers.
The clampers prevent the cord from being pulled out by accident.
Put the AC adapter’s cord through the grooves on the bottom of the
product.
Insert the cord by sliding it from the side of the stop.
3 Kensington security slot
Loading ...
Loading ...
Loading ...