|
PROBLEM
|
POSSIBLE CAUSE
|
SOLUTION
|
| Difficult to close the lid |
Rubber gasket not installed properly |
Check the position of the rubber gasket
|
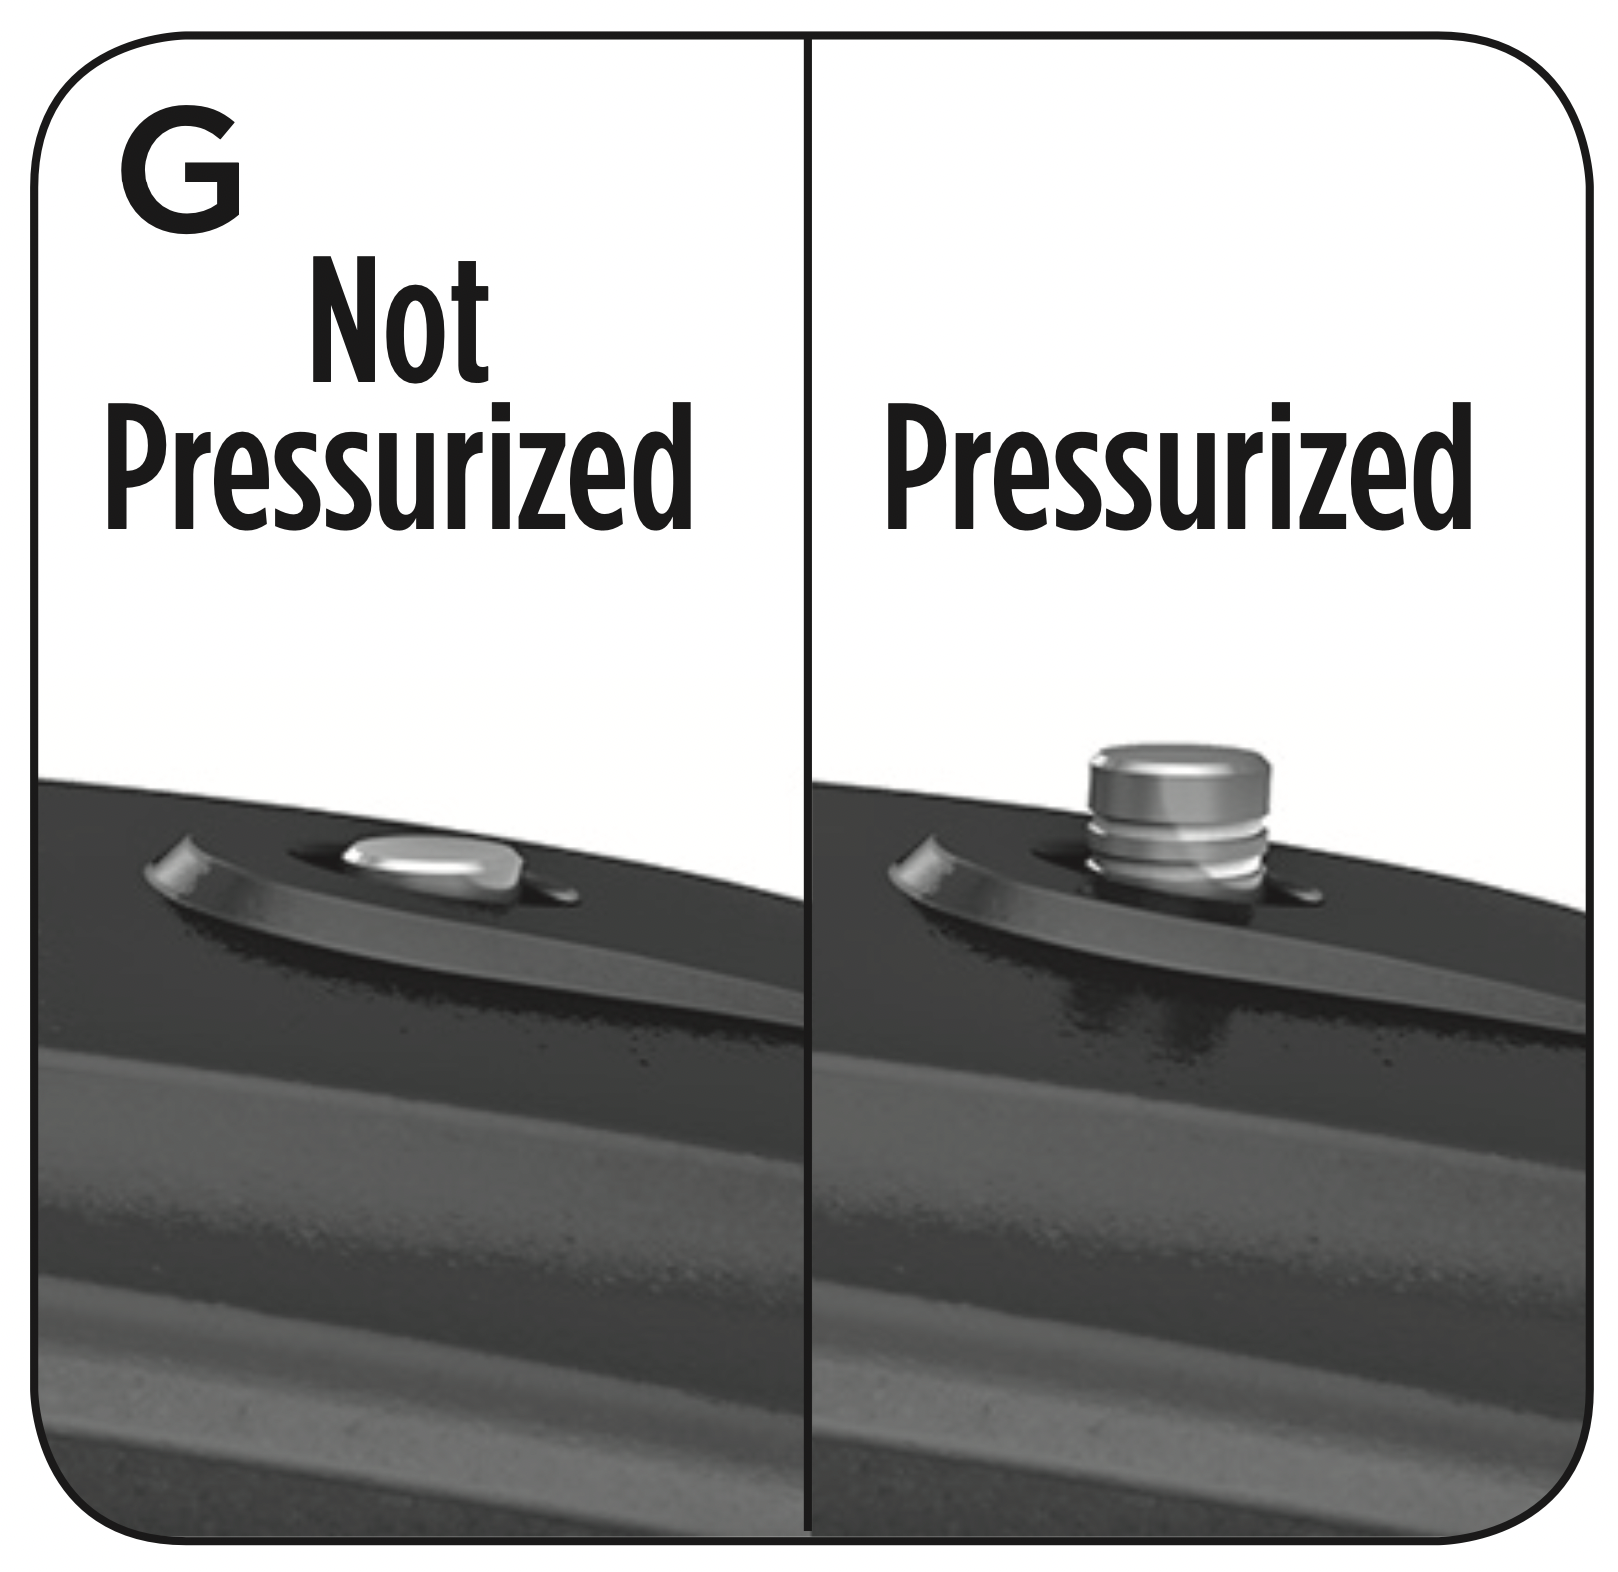
| Red float valve in the popped-up position |
Press the red float valve downward lightly
|
| Difficult to open the lid |
Pressure exists inside the cooker |
Use the pressure release valve to reduce the internal pressure. Open the lid after the pressure is completely released
|
| Red float valve stuck at the popped-up position |
Press the red float valve lightly downward with a kitchen utensil
|
| Steam leaks from the side of the lid |
Rubber gasket not in place |
Install the rubber gasket correctly
|
| Rubber gasket damaged |
Replace the rubber gasket
|
| Food debris attached to the rubber gasket |
Clean the rubber gasket
|
| Lid not closed properly |
Open then close the lid again
|
| Red float valve unable to rise |
Not enough food or water in the cooking bowl
|
Add water according to the recipe
|
| Red float valve is obstructed by the locking lid pin |
Close the lid completely, see “Operating Instructions” section
|
| Steam comes out from the exhaust valve without stopping |
Lid is not in the seal position |
Turn the pressure release valve to the seal position
|
| Pressure control fails |
Contact the consumer service team
|
| Display flashes “OPEN” |
Lid is not at the correct position for the selected program |
Close the lid for pressuring cooking or open the lid for browning  . .
|
|
Display flashes 3 blinking bars but timer doesn’t start
|
Working pressure isn’t reached inside during preheating cycle
|
Pressure release valve is not in the seal position
|
Check if pressure release value is turned to the seal position
|
|
Rubber gasket is not in place
|
Install the rubber gasket correctly
|
|
Red interlock pin with rubber retainer ring on bottom of lid is not in place
|
Check that red interlock pin is installed with the rubber retainerring on the bottom of lid
|
|
Display flashes “C5” and the pressure cooker shuts down
|
Overheating is detected on the cooking bowl
|
Stop the program, use the pressure release valve to reduce the internal pressure and check if the food at the bottom of the cooking bowl is burnt
|
|
Display remains blank after connecting the powercord
|
Bad power connection or no power
|
Inspect the power cord to ensure a good connection, check that the power outlet is active
|
|
Appliance electrical issue
|
Contact the consumer service team
|
|
All LEDs flash with a code appearing on screen
|
C1code
|
Faulty temperature sensor (cannot be detected)
|
Contact the consumer service team
|
|
C2code
|
Faulty temperature sensor (short circuited)
|
|
C5code
|
Temperature is too high because cooking bowl is not in the pressure cooker
|
|
Temperature is too high because there is no water in cooking bowl
|
|
C6code
|
Faulty pressure sensor
|
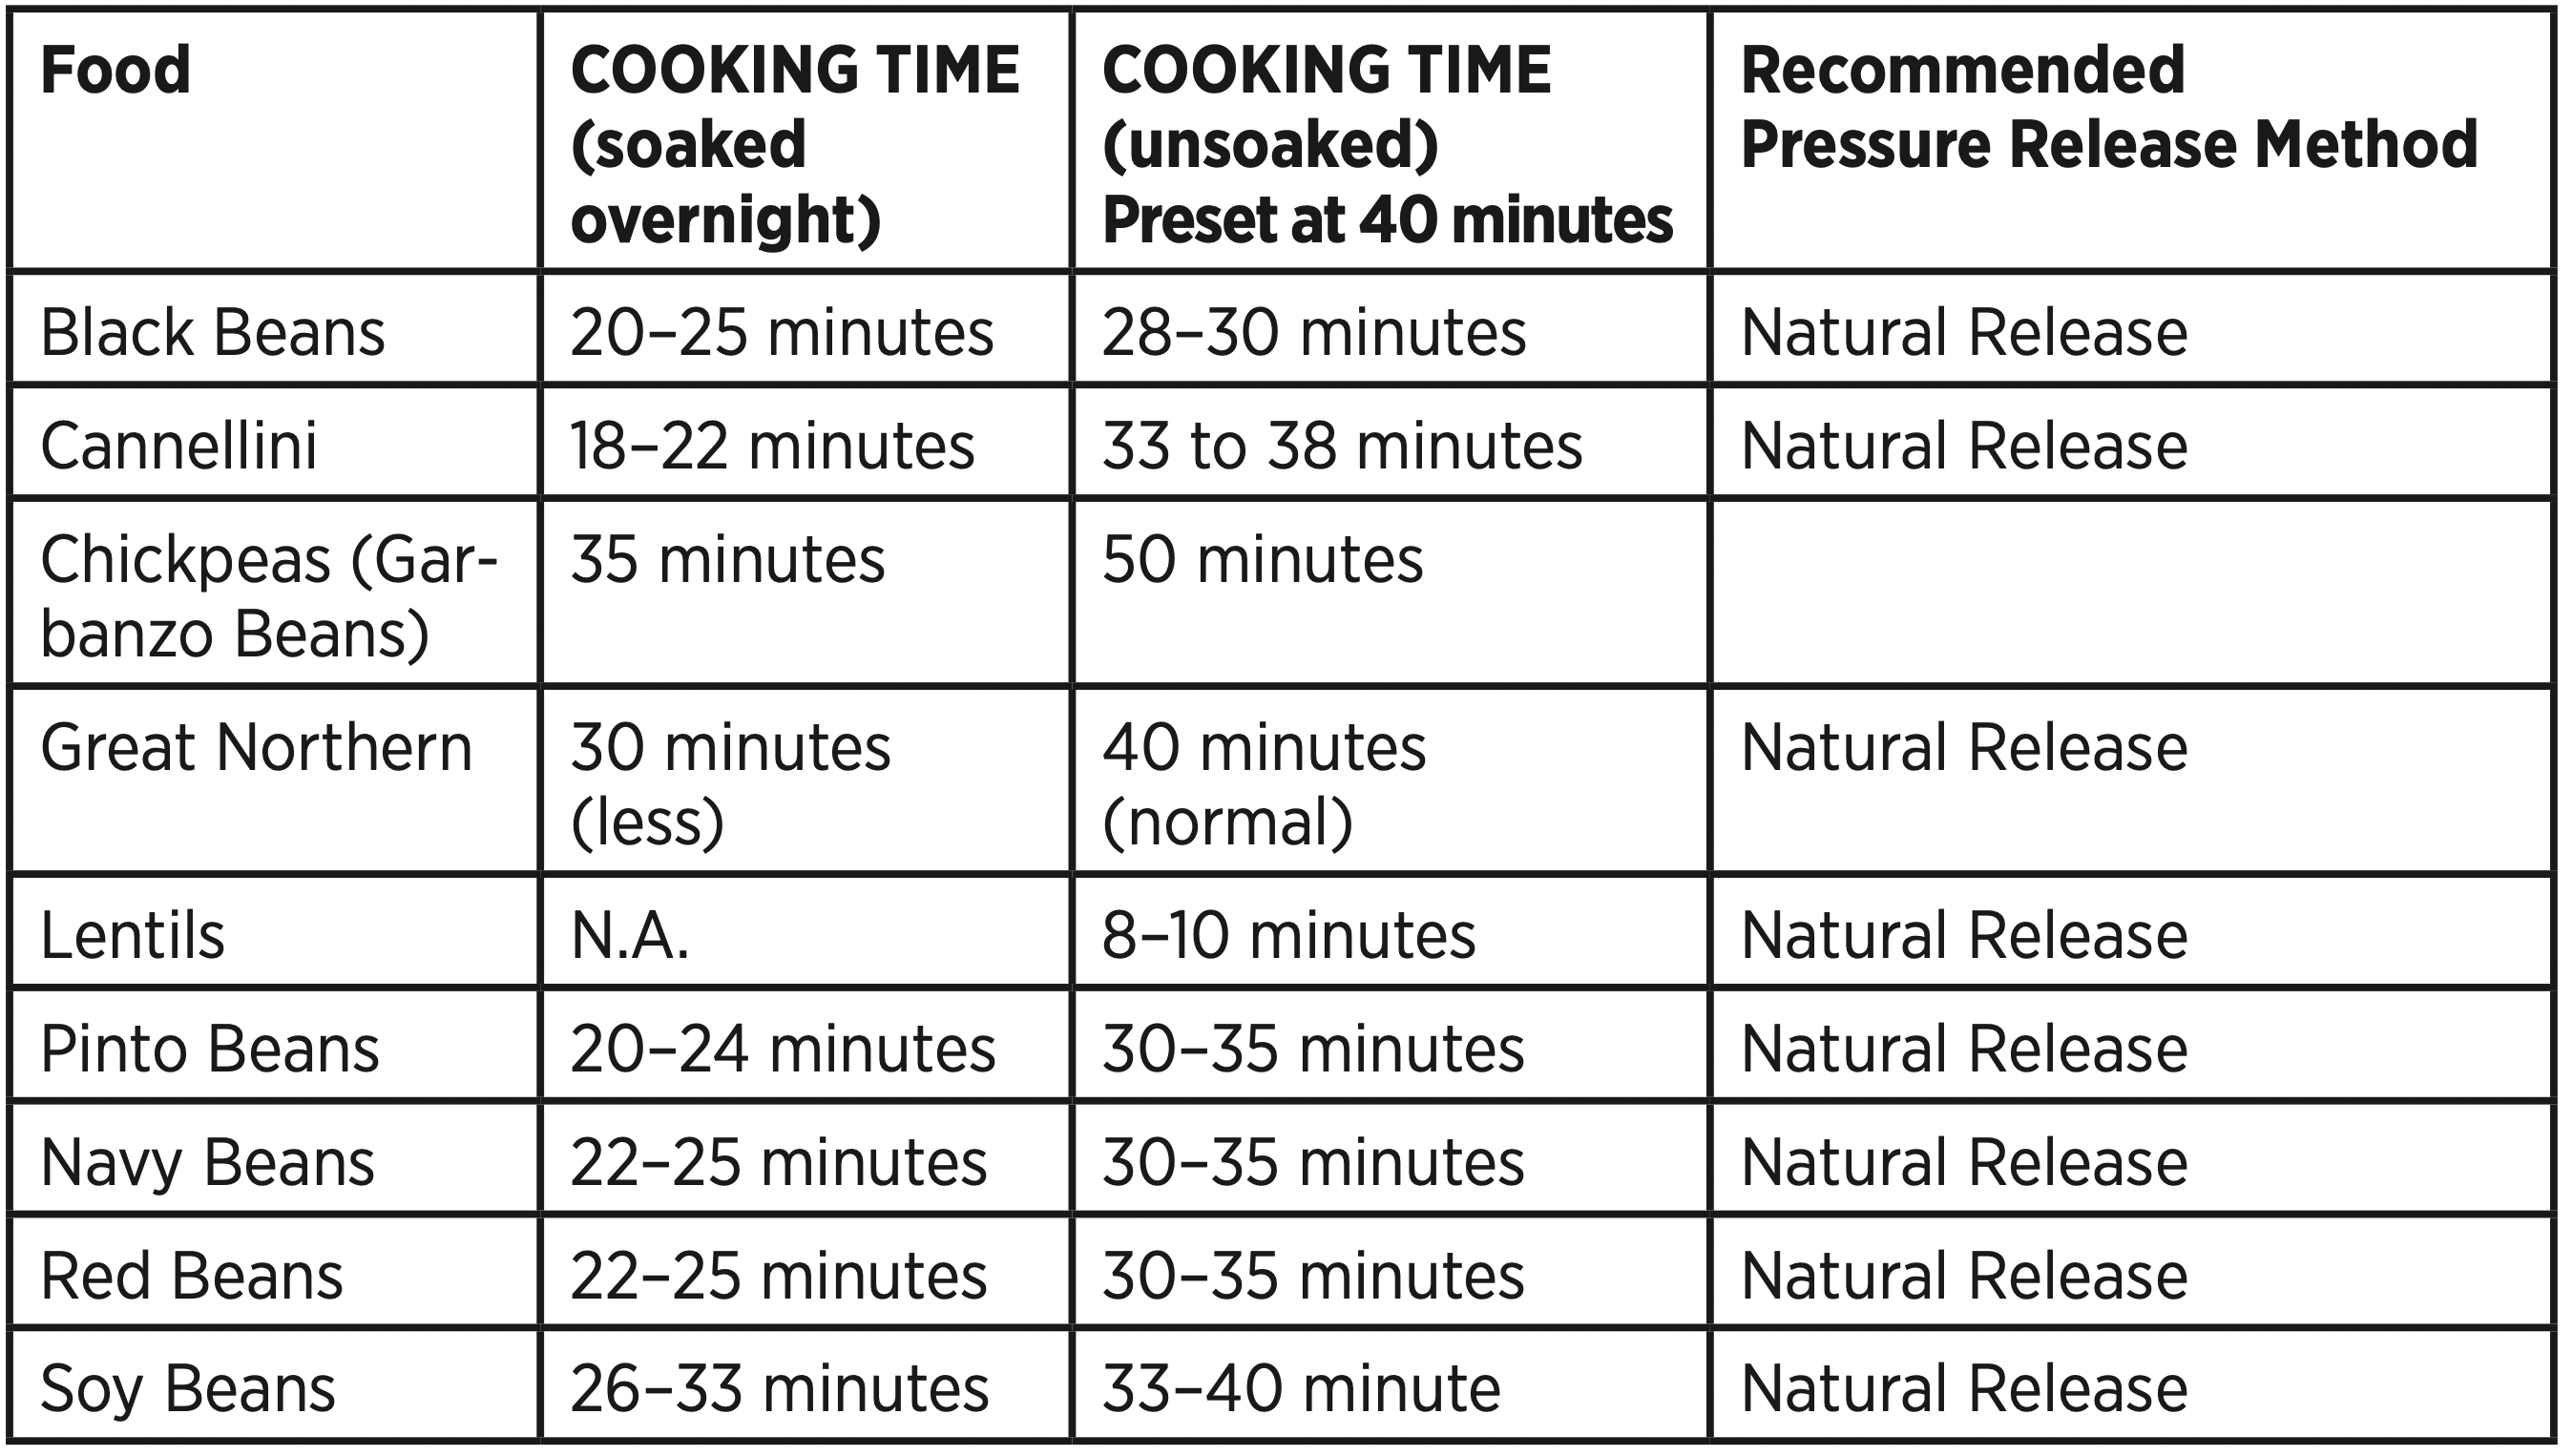
| Rice half cooked or too hard |
Not enough water |
Adjust dry rice and water ratio according to the recipe
|
| Lid was opened prematurely |
After cooking cycle is complete, leave the lid on for 5 more minutes
|
| Rice too soft |
Too much water |
Adjust dry rice and water ratio according to the recipe
|
| Intermittent beeping after pressure cooker has been cooking for a while |
Indication of overheating. Pressure cooker has reduced the heating temperature and may not reach cooking pressure |
Possible starch deposits at the bottom of the cooking bowl have clogged the heat dissipation. Stop  the pressure cooker, use the pressure release valve to reduce internal pressure and inspect the bottom of the cooking bowl the pressure cooker, use the pressure release valve to reduce internal pressure and inspect the bottom of the cooking bowl
|
| Occasional ticking or light cracking sound |
The normal sound of power switching and expanding because pressure board is changing temperature
|
This is normal, do not worry about it
|
| Wet cooking bowl bottom |
Wipe cooking bowl bottom dry before cooking
|

 ” marking on the lid aligns with the “OPEN
  ” marking on the pressure cooker; lift the lid straight up and off the pressure cooker. (A)
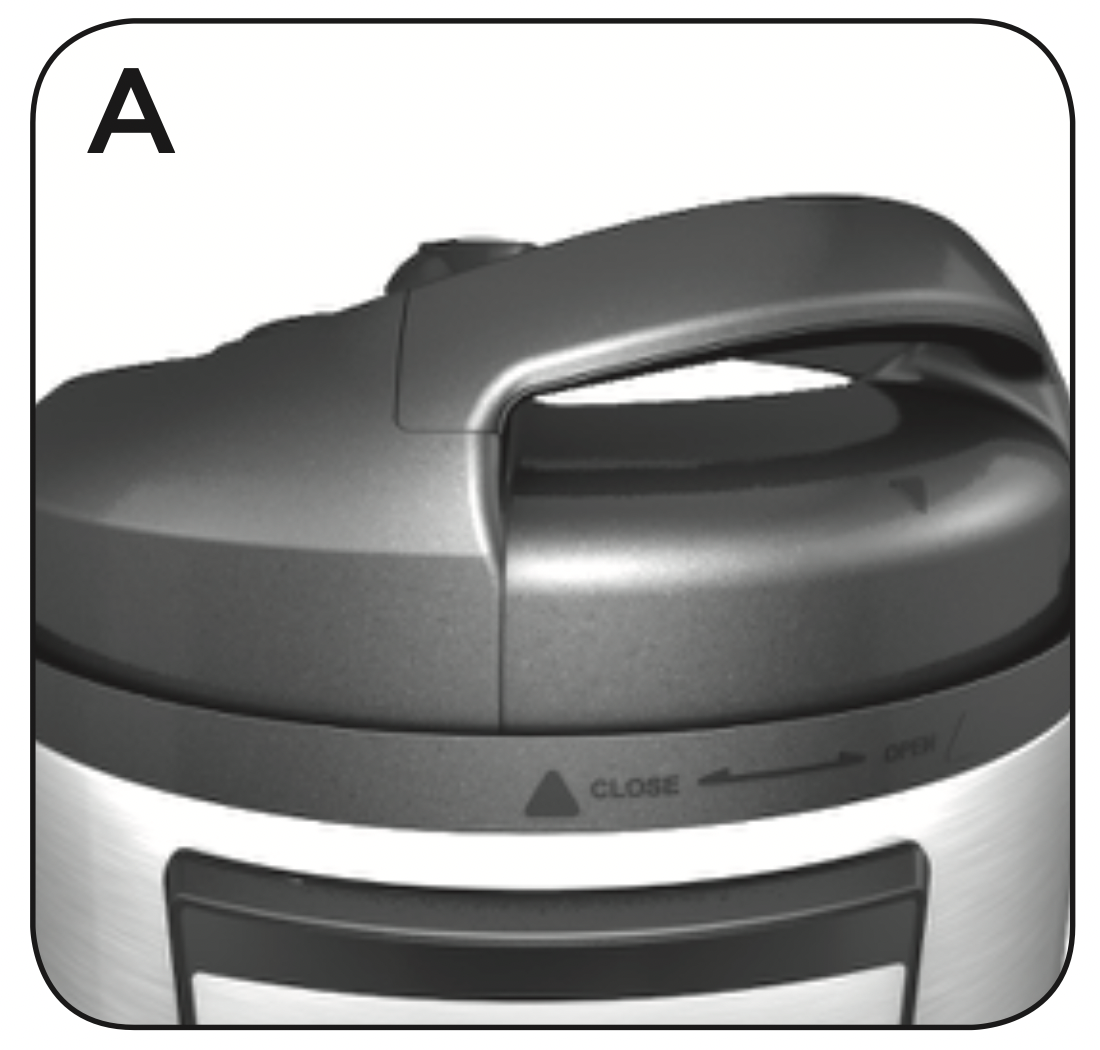
 ” marking on the lid aligns with the “CLOSE
  ” marking on the pressure cooker. (D) The lid is now locked in place.
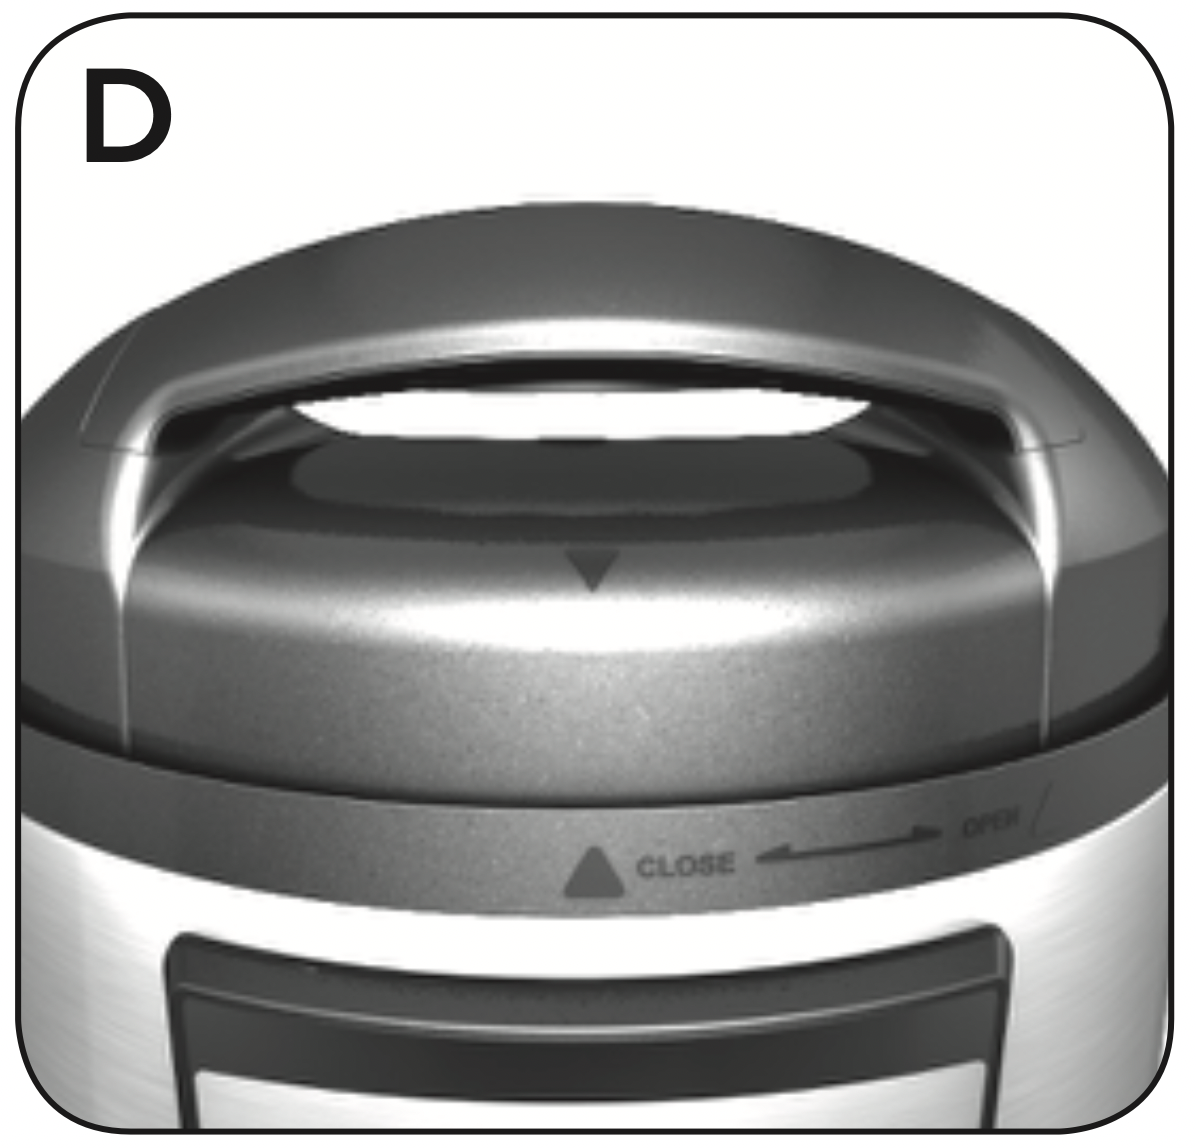
 but the lid is not correctly closed, the main screen will blink “OPEN”. The unit will not heat on the pressure settings unless the lid is properly closed.
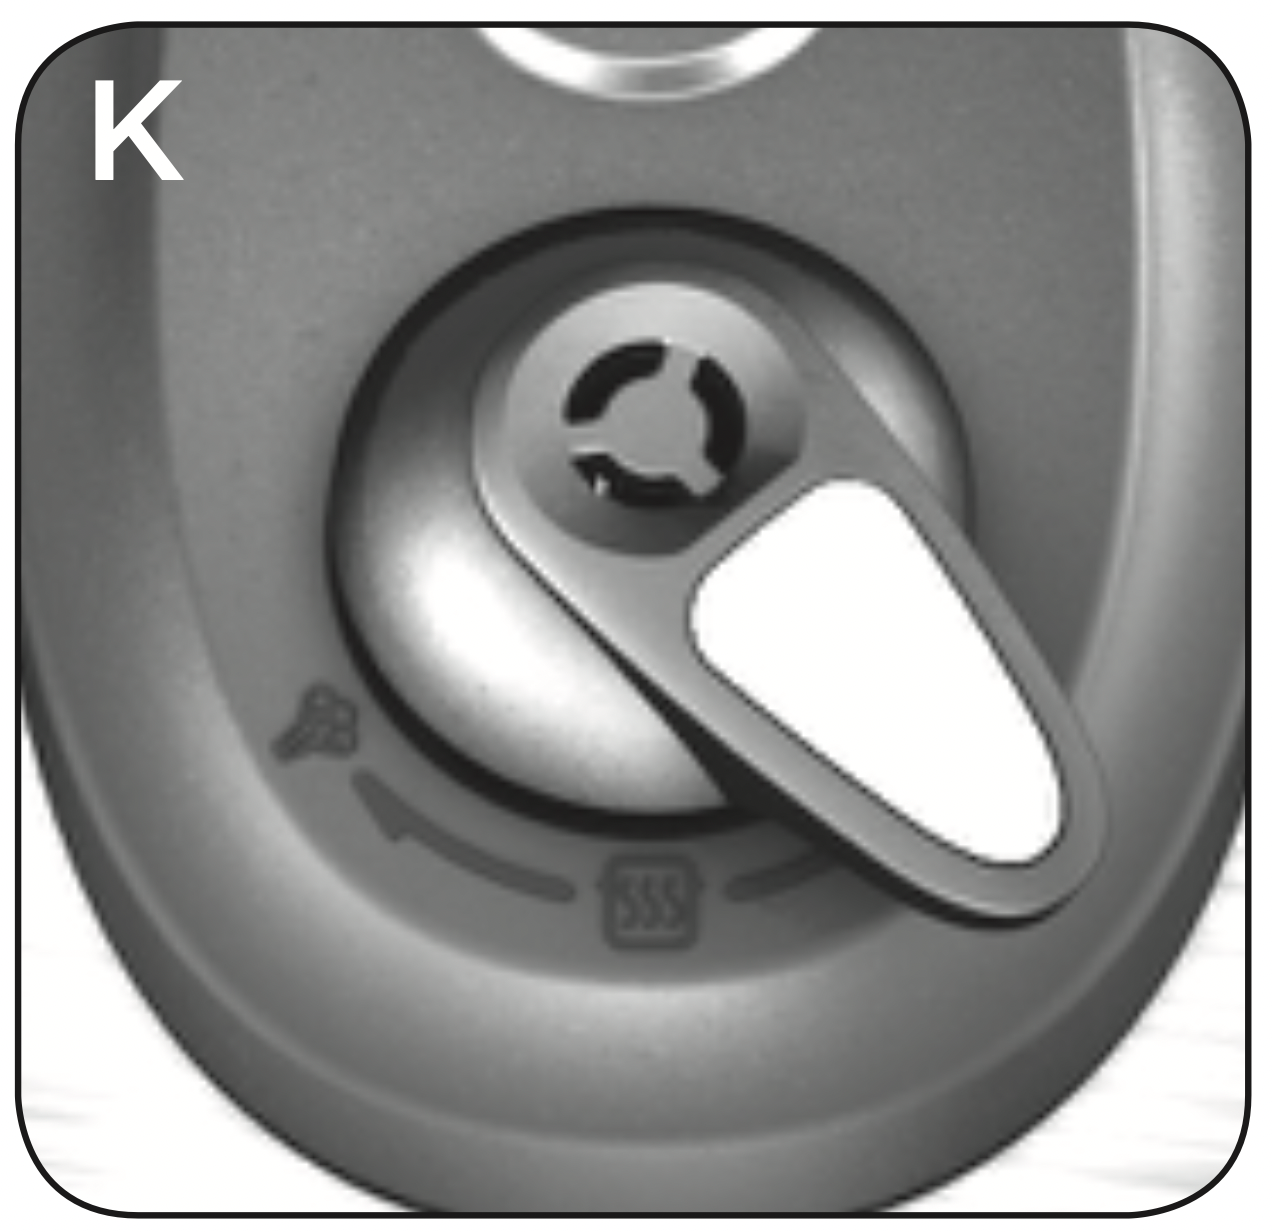
 ) on the lid. (E) The valve must be pointed down to properly seal the pressure cooker before cooking. If the pressure release valve has not been aligned properly, pressure will not build up and you may not achieve desired results.
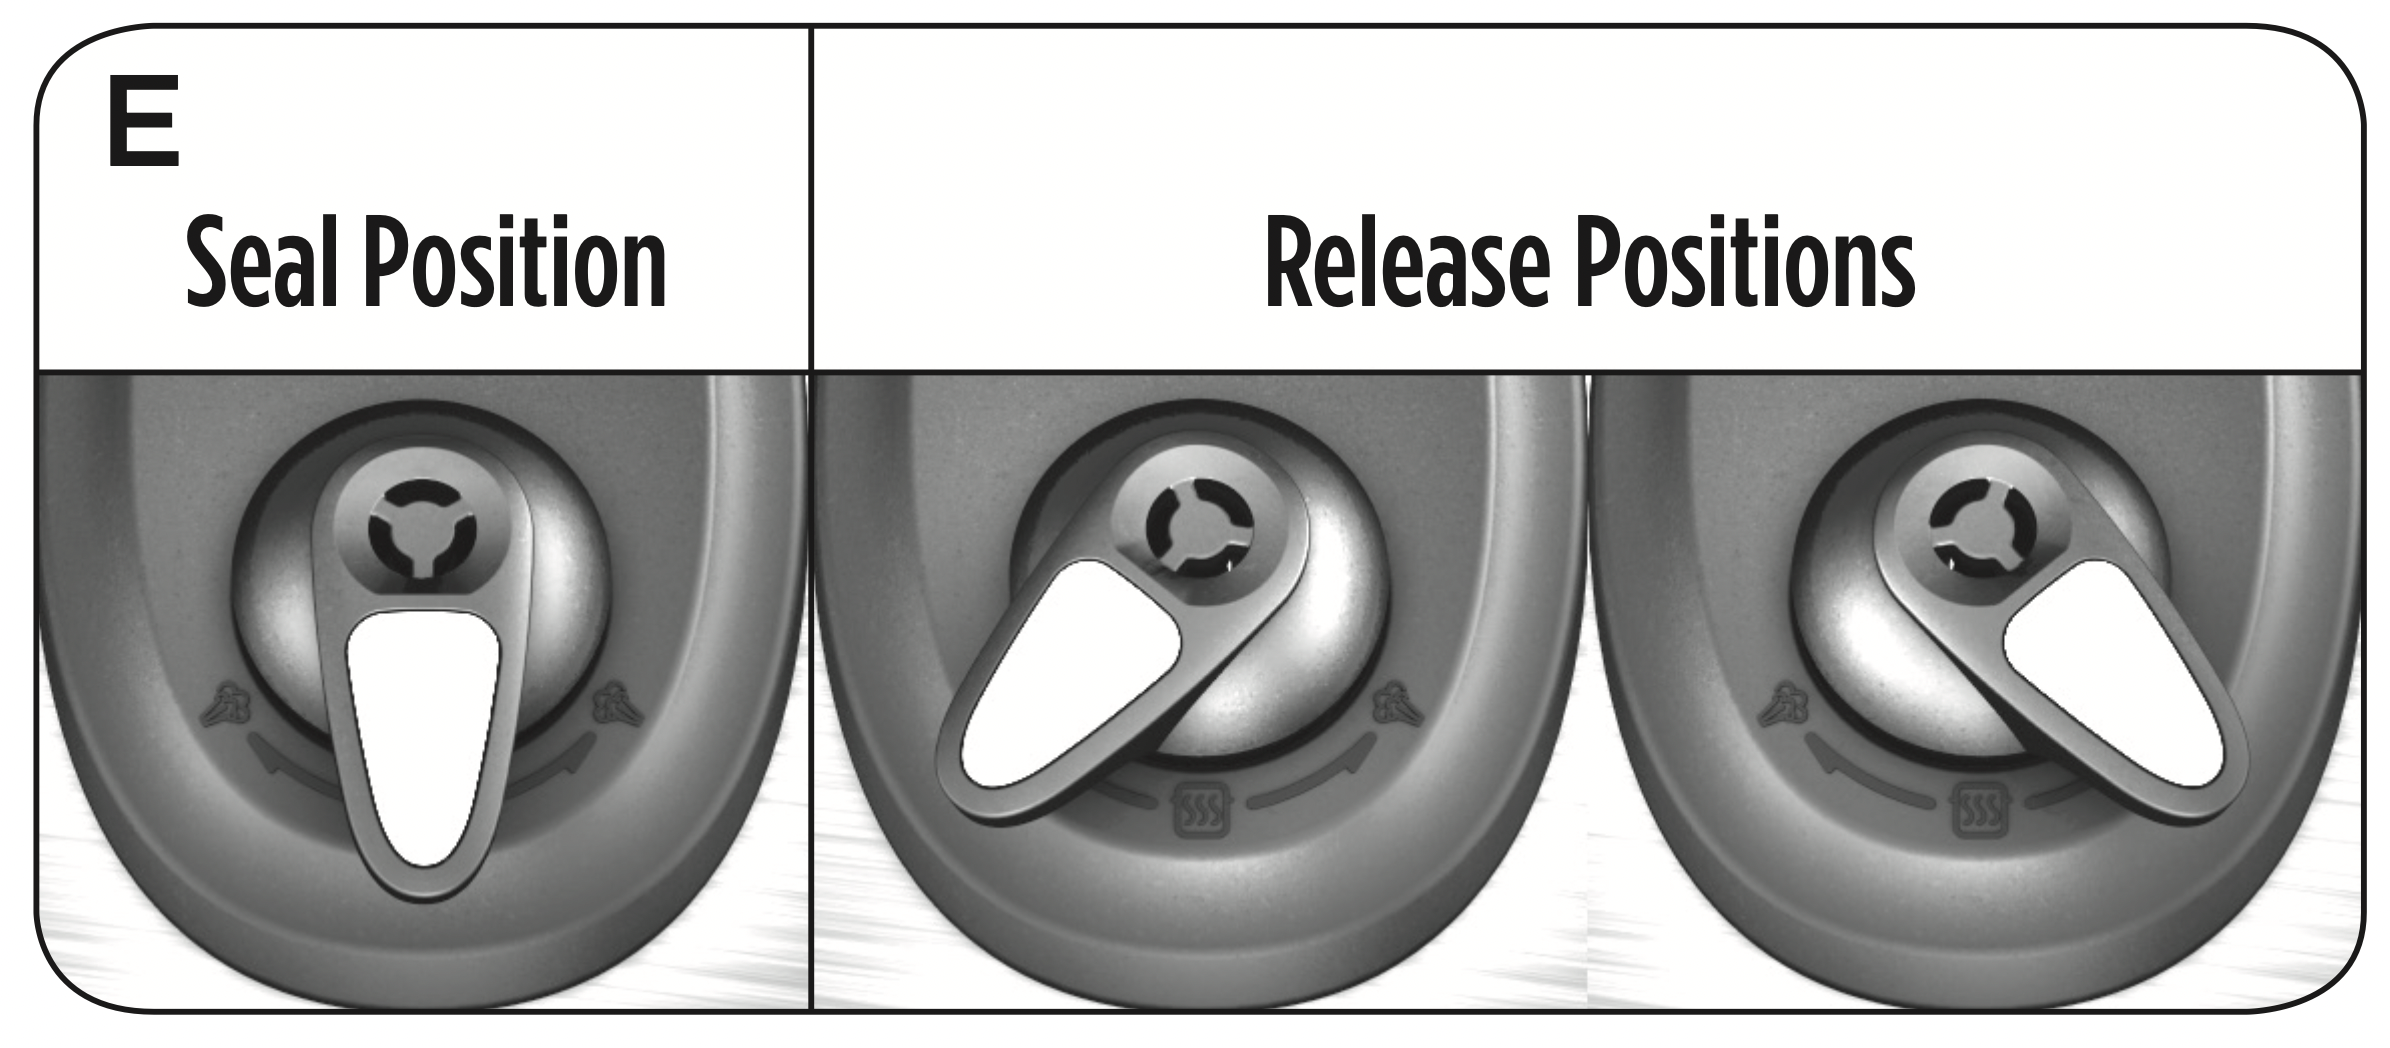
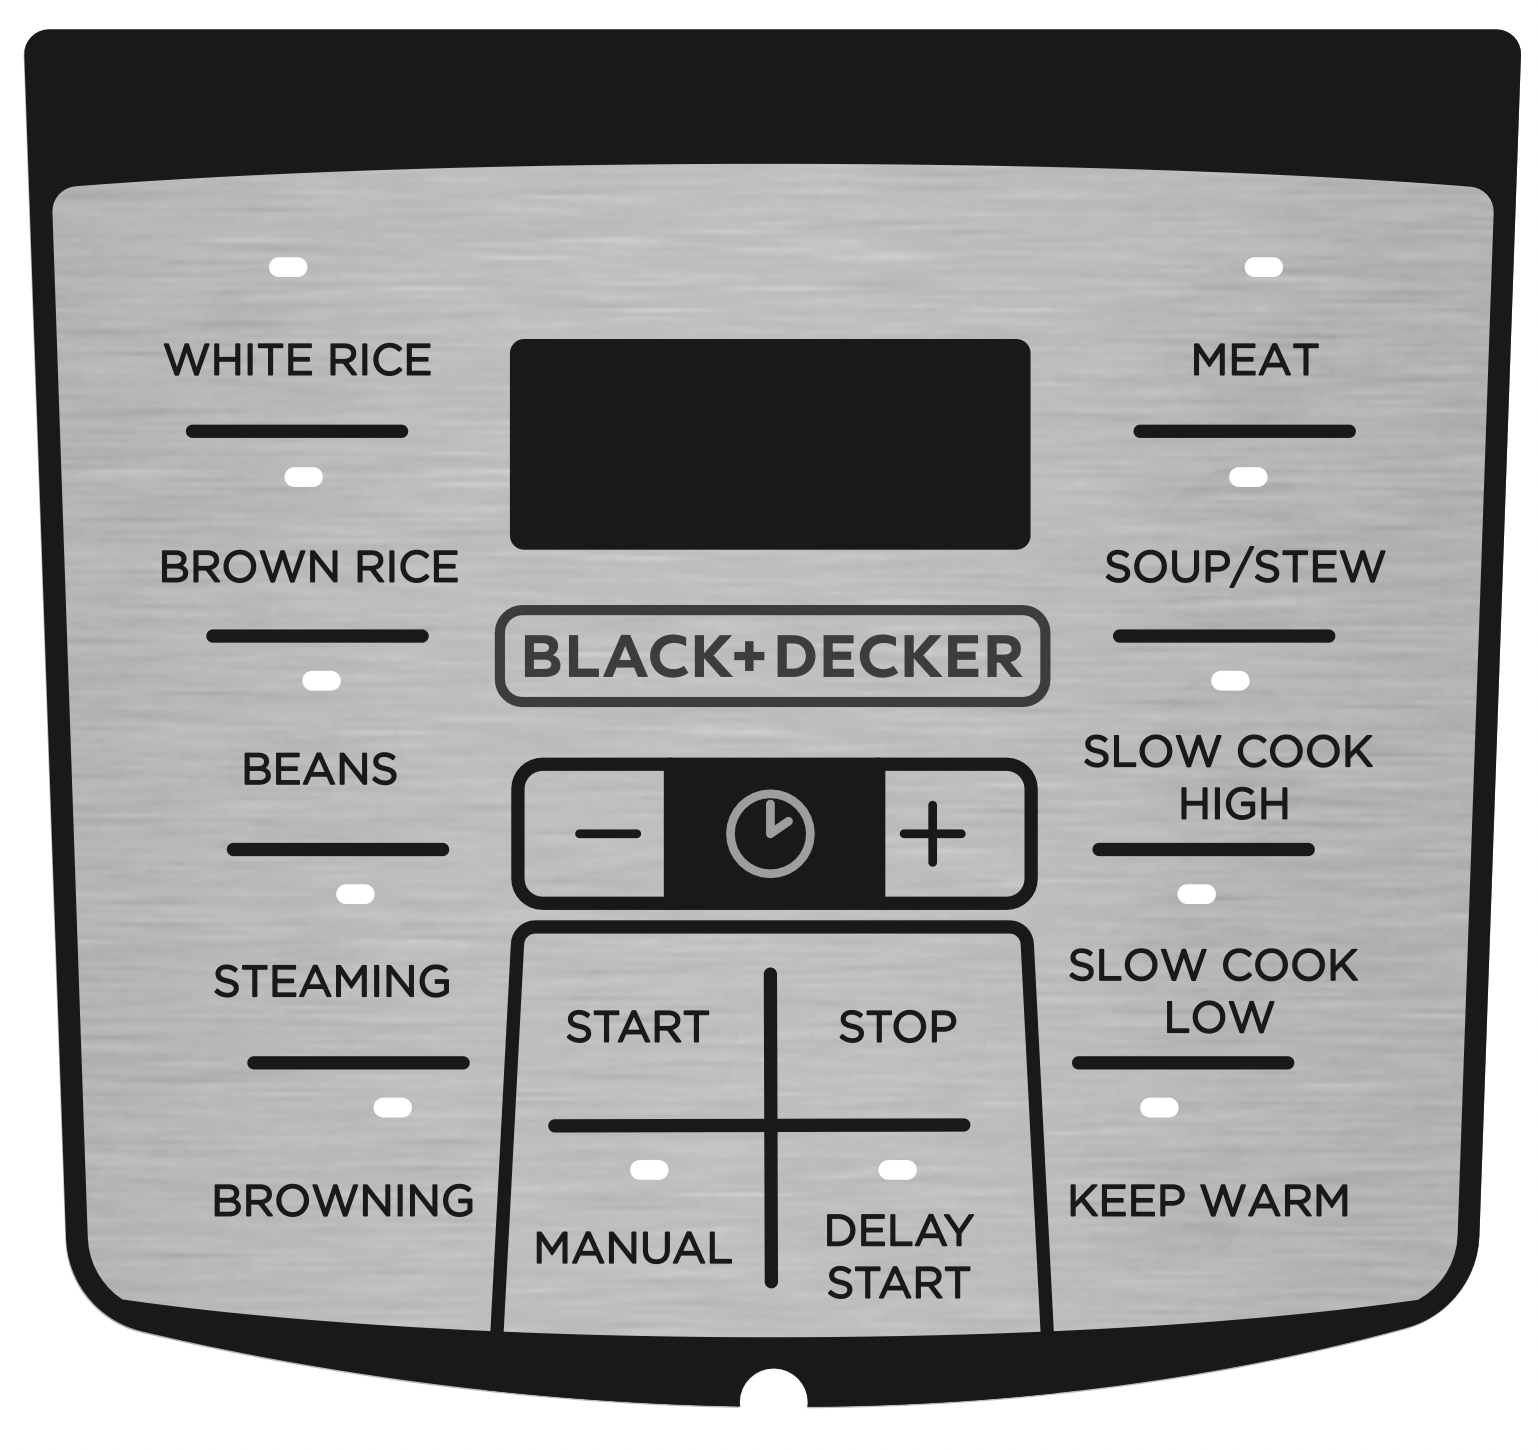
 button.
 allows you to easily choose any time based on your cooking needs. The timer will automatically default to 30 min but can be adjusted using the instructions above. For general cook time guidelines, see the preset function section for information.
 button has been pressed, the red light above the selected function will turn solid and the pressure cooker will begin to build pressure. The amount of time to build pressure will depend on the amount of liquid and food inside the cooking bowl.
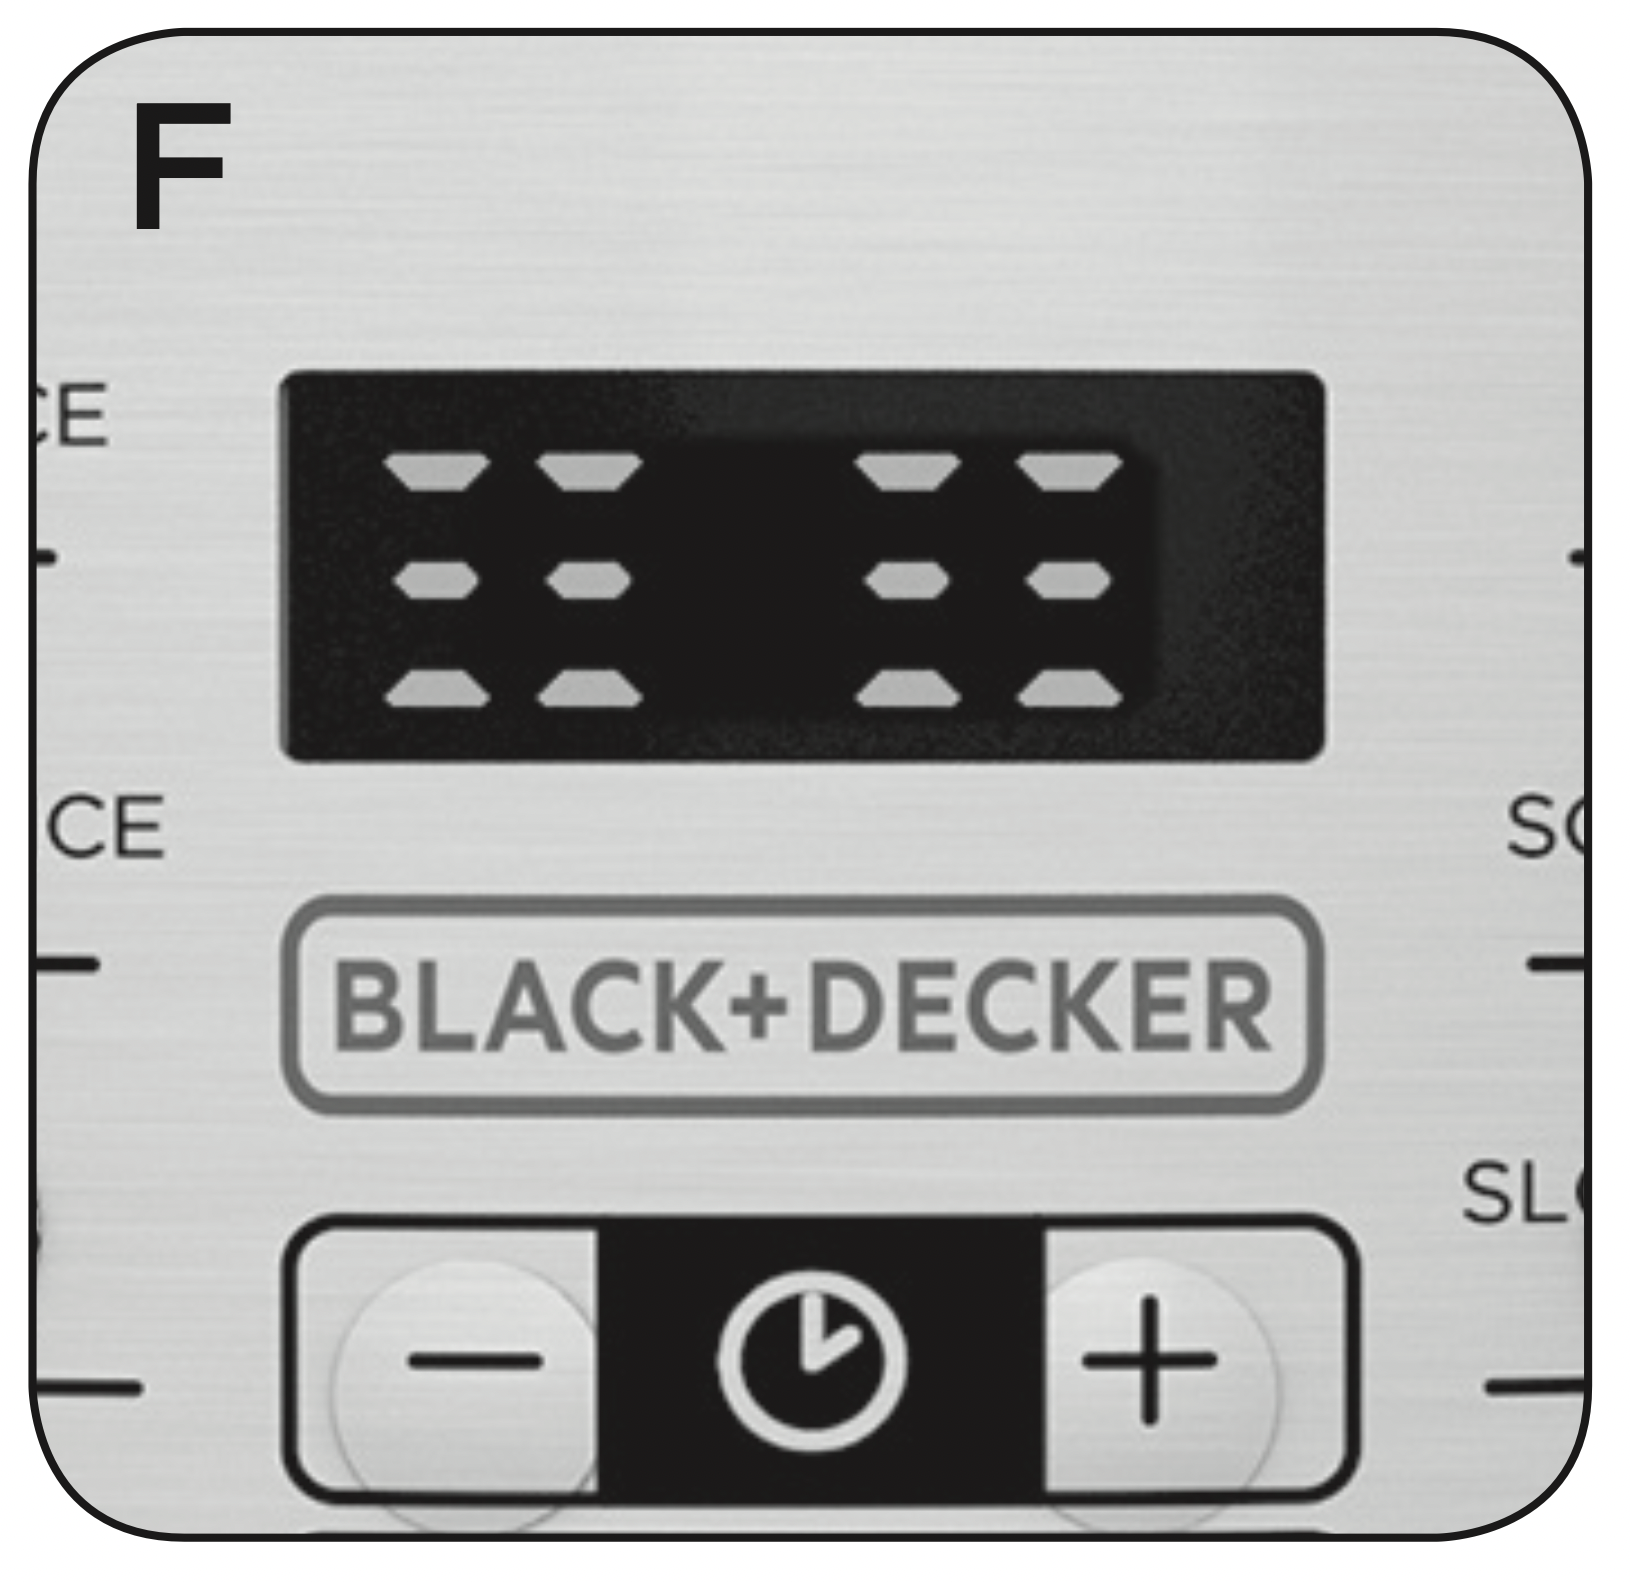
 (H) and, using a kitchen utensil, push the pressure release valve to the right or the left to allow steam to escape. (I) Once all steam is released, the pressure cooker is safe to open.
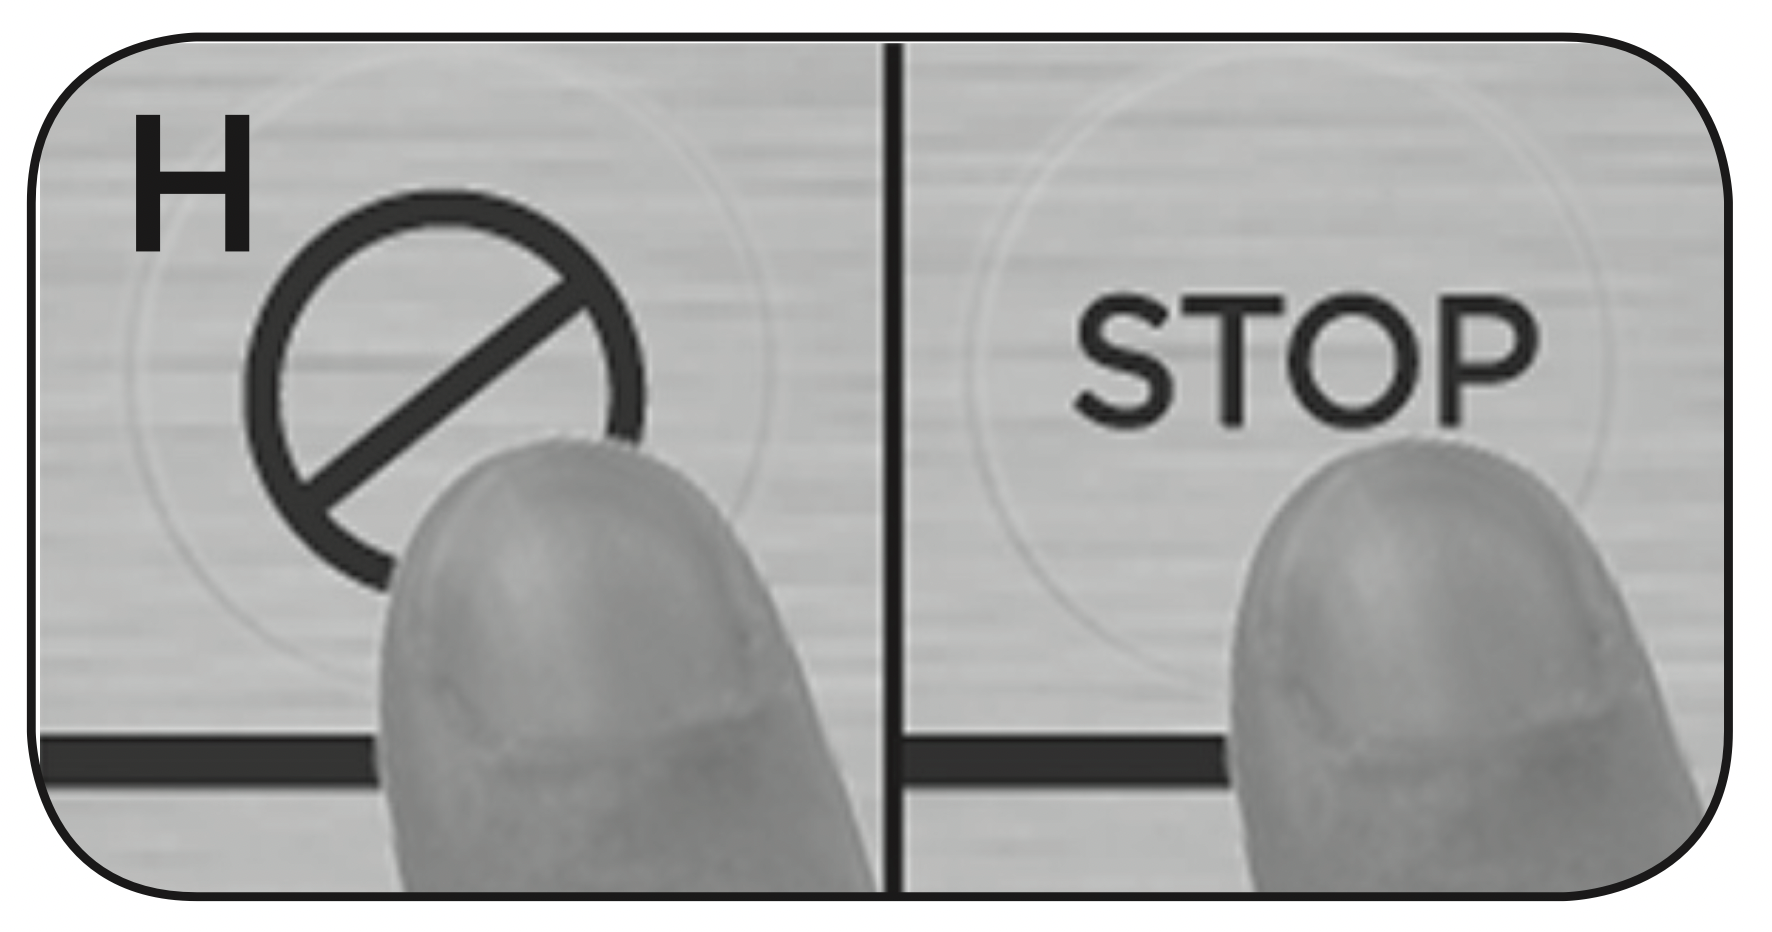

 and the timer will flash and begin to count up. At this time you can choose either Natural Pressure Release or Quick Pressure Release:
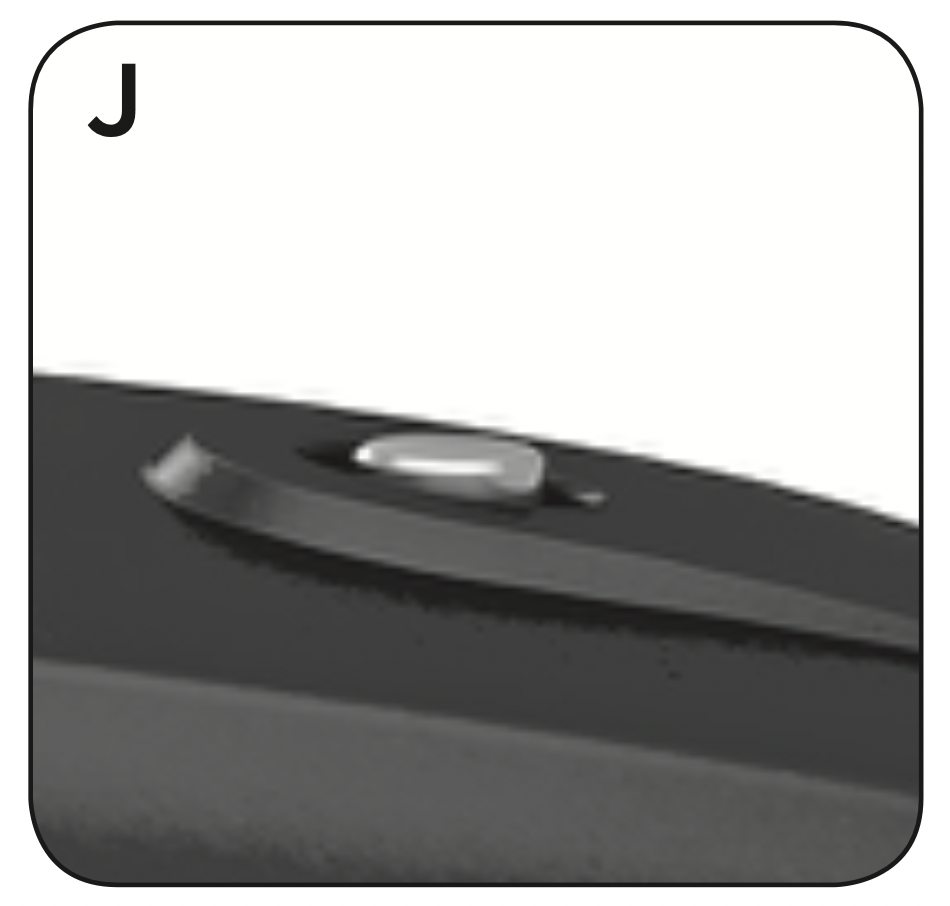
 ” marking on the lid aligns with the “OPEN
  ” marking on the pressure cooker; lift the lid straight up and off the pressure cooker.
 :
:
 :
:
 :
:
 :
:
 :
: within this section.
 :
:
 :
:
 or the Slow Cook Low
  button. A red light will begin flashing above the selected function, and the LED display will flash with 6 hour default for HIGH and an 8 hour default for LOW. Press the + or – buttons to adjust the time.
 and the timer will flash and begin to count up.
 :
: