Loading ...
Loading ...
Loading ...
4
Installing Your Microwave Oven
Place the oven on a flat, level surface that strong
enough to safely bear the weight of the oven.
✽
Never
block the air vents as the oven may overheat and automatically
switch itself off. It will remain inoperable until it has cooled sufficiently.
✽
For your personal safety, plug the cable into a 3-pin, 240 Volt, 50Hz, AC
earthed socket. If the power cable of this appliance is damaged, it must be
replaced by the manufacturer or its service agent or a
similarly qualified
person in order to avoid
a
hazard.
✽
Do not
install the microwave oven in hot or damp surroundings like next
to a traditional oven or radiator. The power supply specifications of the
oven must be respected and any extension cable used must be of the
same standard as the power cable supplied with the oven. Wipe the
interior and the door seal with a damp cloth before using your microwave
oven for the first time.
How a Microwave Oven Works
Cooking Principle
☛
As the centre of the food is cooked by heat dissipation, cooking continues
even when you have taken the food out of the oven. Standing times specified
in recipes and in this booklet must therefore be respected to ensure:
• Even cooking of the food right to the centre
• The same temperature throughout the food
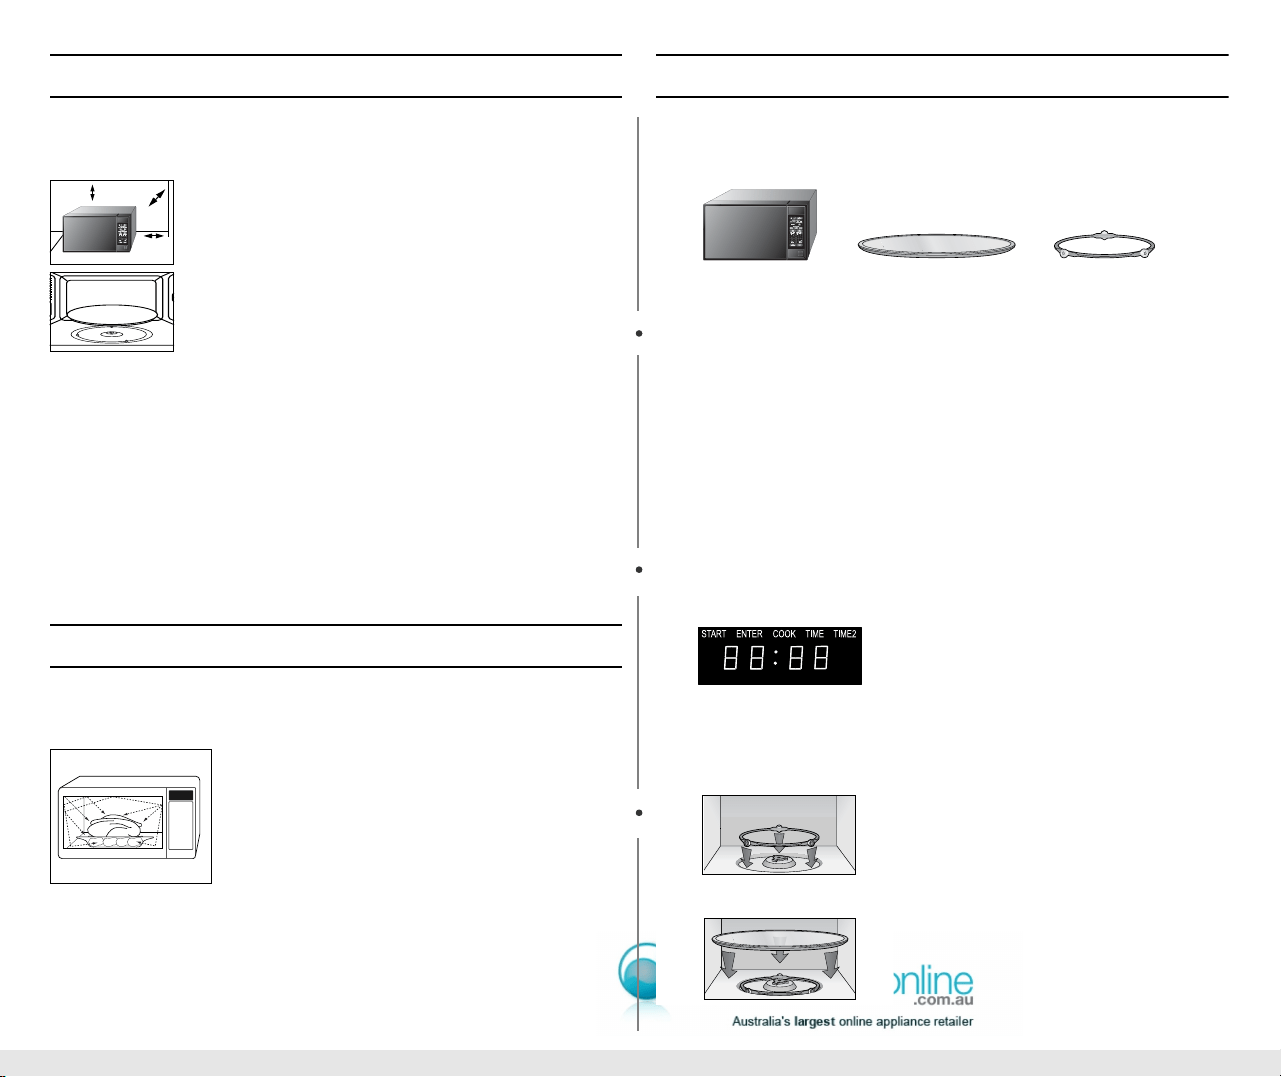
Your New Microwave oven
Checking Parts
Unpack your microwave oven and check to make sure that you have all the parts
shown here. If any part is missing or broken, call your dealer.
Warranty and Service Information
When contacting Samsung, please provide the specific model and serial number infor-
mation which is usually located on the back or bottom of the product. Please record
these numbers below, along with the other requested information. Keep this informa-
tion in a safe place as a permnent record of your purchase to aid in identification in
case of theft or loss, and a copy of your sales receipt as a proof of purchase if waranty
service is needed.
MODEL NUMBER ____________________
SERIAL NUMBER ____________________
DATE PURCHASED ____________________
PURCHASED FROM ____________________
Warranty service can only be performed by a Samsung Authorized Service Center. If
you should require warranty service, provide the above information with a copy of your
sales receipt to the Samsung Authorized Service Center.
Setting Up Your Microwave Oven
1.
Place the oven on a flat, sturdy surface and plug the cord into a grounded outlet.
once plugged in, the display on your oven will show:
Make sure there is adequate ventilation for your oven by leaving at least four
inches of space behind, above, and to the side of the oven.
2.
Open the oven door by pulling on the handle.
3.
Wipe the inside of the oven with a damp cloth.
4.
Place the pre-assembled ring in the indentation in the center of the oven.
5.
Place the glass tray on top of the ring so that the three glass tabs in the center of
the tray fit securely into the tabs on the floor of the oven. )
1.
When you install your oven, make sure there is adequate
ventilation for your oven by leaving at least 10 cm (4 inches)
of space behind, and on the sides of the oven and 20 cm (8
inches) of space above.
2.
Remove all packing materials inside the oven.
Install the roller ring and turntable.
Check that the turntable rotates freely.
1.
The microwaves generated by the magnetron are
distributed uniformly as the food rotates on the
turntable. The food is thus cooked evenly.
2.
The microwaves are absorbed by the food up to a
depth of about 1 inch (2.5 cm). Cooking then continues
as the heat is dissipated within the food.
3.
Cooking times vary according to the container used
and the properties of the food:
• Quantity and density
• Water content
• Initial temperature (refrigerated or not)
20cm
above
10cm
behind
10cm
on the side
Microwave oven
Glass tray
Roller guide ring
kg
g
Oz. Lbs. QTY.
ME6124W_XSA-03248A_EN.fm Page 4 Friday, March 31, 2006 11:21 AM
Loading ...
Loading ...
Loading ...