Loading ...
Loading ...
Loading ...
49-60466-6
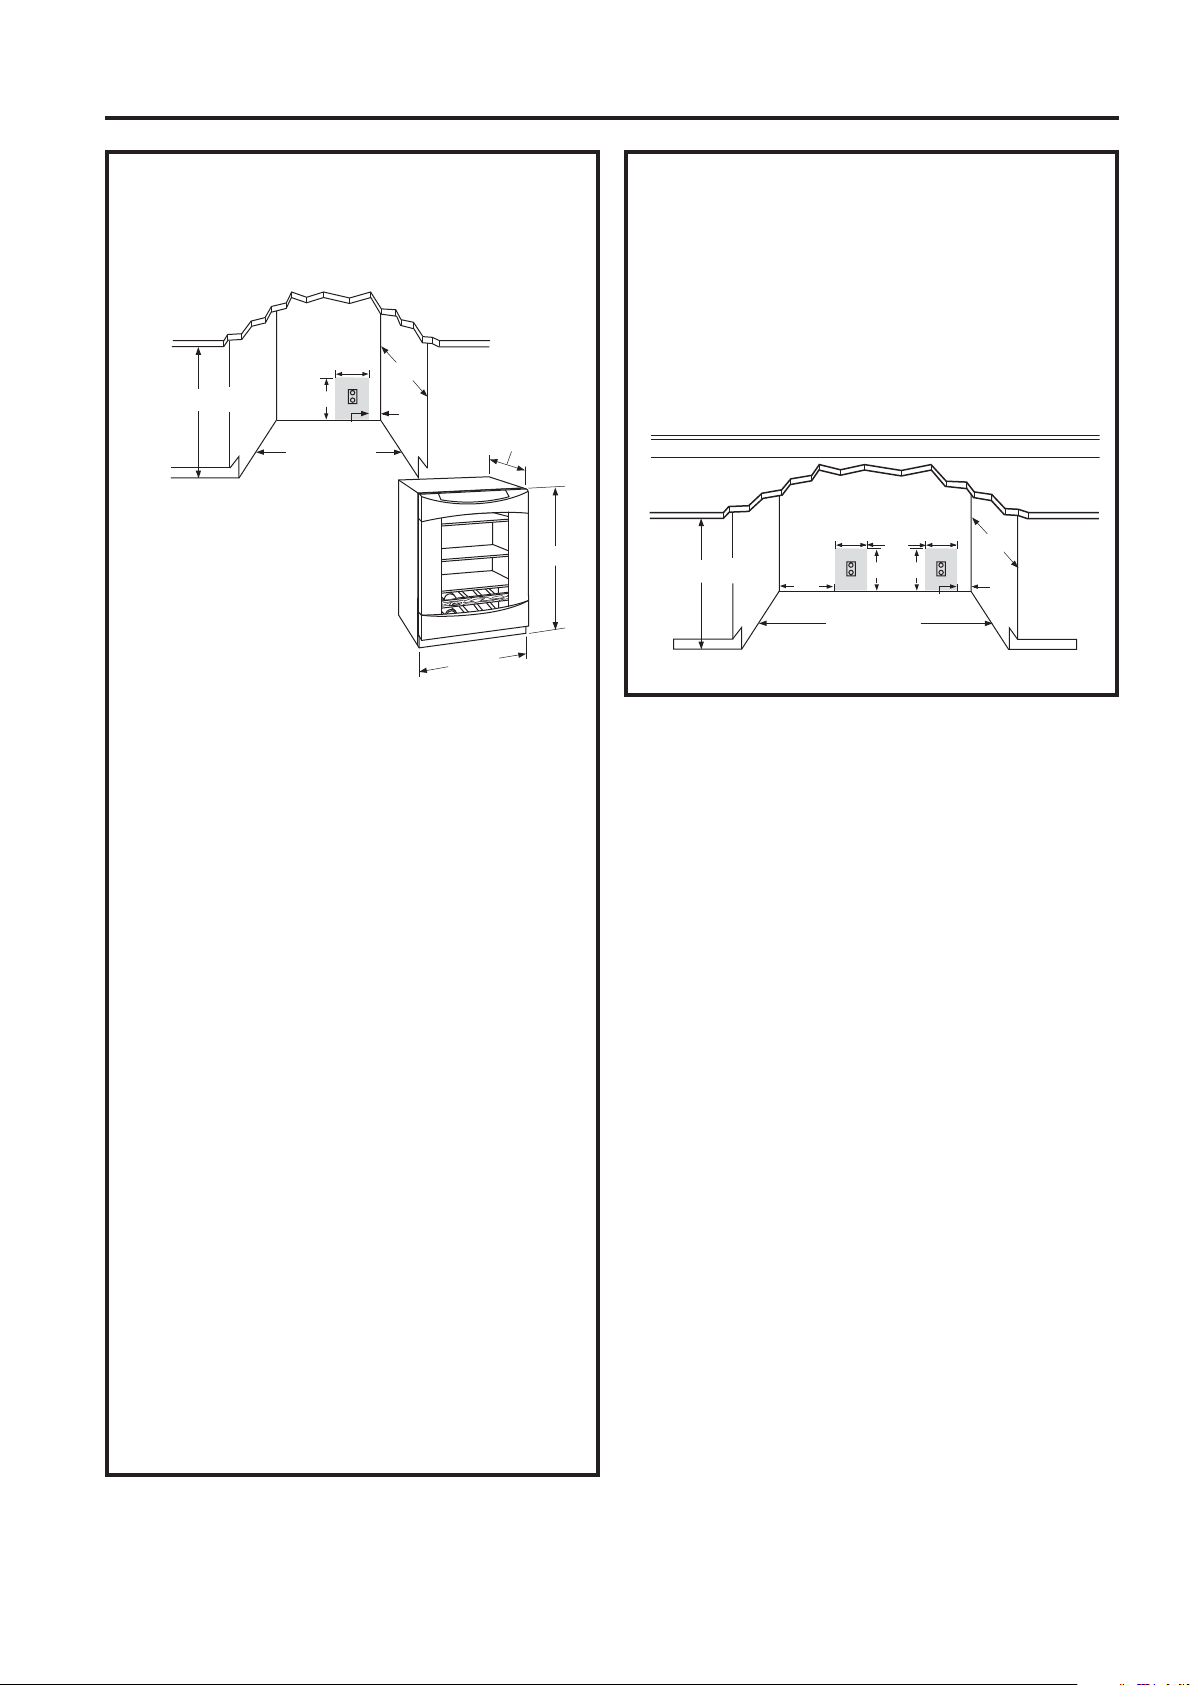
INSTALLATION SPACE
The beverage center and wine chiller can be a
free-standing model or it can be built in using the
cut-out dimensions below.
The cutout depth should be 24”
The cutout dimensions shown allow for a full
door swing and access to the pull-out racks
ZKHQLQVWDOOHGDVDEXLOWLQLQVWDQGDUG´GHHS
cabinets.
7KHGRRUVKRXOGSURWUXGH´EH\RQGWKH
VXUURXQGLQJFDELQHWV)RUHDV\UHIHUHQFHWKH
back edge of the pocket handle should protrude
DPLQLPXPRI´EH\RQGWKHIURQWHGJHRIWKH
countertop.
,ILQVWDOOLQJEHWZHHQIUDPHOHVVFDELQHWVD´
wide filler strip or side panel may be needed on
hinge side. The filler strip will act as a spacer
between the case and adjacent cabinet door
swing. The width of the opening must include the
filler panels. NOTE: The door should protrude
´EH\RQGWKHVXUURXQGLQJFDELQHWV
• The beverage center and wine chiller can be
installed freestanding.
Additional Specifications
$YROW+]RUDPSSRZHUVXSSO\LV
required. An individual properly grounded branch
circuit or circuit breaker is recommended. Install
a properly grounded 3-prong electrical receptacle
recessed into the back wall as shown. Electrical
must be located on rear wall as shown.
NOTE: GFI (ground fault interrupter) is not
recommended.
SIDE-BY-SIDE INSTALLATIONS
Increase storage capacity by installing two
beverage centers or wine chillers together. Or, for
a complete refreshment center, install any two of
these units together.
• A side-by-side installation requires at least a
´ZLGHRSHQLQJ1RWULPNLWVUHTXLUHG
• Products must operate from separate, properly
grounded receptacles.
23-3/4"
34-1/2"
25-1/2"
Locate
Outlet
34-1/2"-35"
24"
24" Min.
9" Max.
10-1/2"
1-1/2"
Product dimensions:
+HLJKWPP
:LGWKPP
'HSWKPP
Cut-out dimensions:
+HLJKW±±PP
:LGWKPPPLQLPXP
'HSWKPPPLQLPXP
INSTALLATION INSTRUCTIONS
Installation Instructions
34-1/2"-35"
47-1/2" Min.
1-1/2"
9"
10-1/2"
9"
10-1/2"
14"
15"
Locate
Outlet
24"
Loading ...
Loading ...
Loading ...