
O
w
n
e
r
’
s
M
a
n
u
a
l
b
O
b
i
b
y
b
O
b
s
w
e
e
p

Owner’s Manual
How to employ your intelligent oor cleaner

Congratulations on purchasing your intelligent oor cleaner! bObi is now at
your service. To see bObi at her best, please read the Quick Start Guide
and this manual thoroughly.
If you ever have questions or concerns feel free to contact our helpful team
at [email protected]. Welcome to the bObsweep family and happy
cleaning!

Contents at a Glance
Important Safety Instructions
Components
Installing the Battery
Turning bObi ON/OFF
Working Modes
Charging Station
Charging bObi
Mop
Remote Control
Cleaning Schedule
Maintenance
Troubleshooting
Checkup Guide
Warranty and Support
bObi FAQs

Important Safety Instructions
Basic safety precautions should always be observed, including the following:
To protect against electrical shock, do not immerse any part of bObi into water or
other liquids. bObi’s dustbin may be washed with water only once her motor has
been removed.
Turn bObi OFF when she is not in use and before conducting maintenance.
If bObi, her remote control, or her charging station has been damaged, do not op-
erate them. Contact our customer care center.
If bObi is not working as she should or has been dropped, damaged, left outdoors,
or immersed in water, contact our customer care center.
Do not handle bObi, her remote control, or her charging station with wet hands; use
only on dry surfaces.
bObi is not intended for use by persons (including children) with reduced physical or
mental capabilities, or lack of experience and knowledge.
Do not pull or carry the charging station by the cord, use the cord as a handle, close
a door on the cord, or pull the cord around sharp edges or corners. Keep the cord
away from heated surfaces. Do not unplug the cord by pulling on it. To unplug the
cord grasp the plug, not the cord.
Do not mutilate or incinerate the battery, as it will explode at high temperatures.
Do not attempt to open the charging station. Repairs on the charging station should
only be carried out by our qualied customer care center.
Do not expose bObi, her remote control, or charging station to temperatures higher
than 45° C (113° F) or moisture or humidity. Do not use bObi outdoors.
Do not let bObi pick up toxic materials (chlorine bleach, ammonia, drain cleaner,
etc.).
bObi is composed of electronic components that in rare and unintended cases can
cause hazards of heating, re, and other malfunctions. Furthermore, because bObi

is capable of and intended for autonomous movement and cleaning, its use poses
the risk of collision with property, pets, and persons, and unintended removal of
articles, such as small valuables, jewelry, or hair of persons or pets lying on the oor,
among others.
Do not let bObi pick up anything that is burning or smoking, such as cigarettes,
matches, or hot ashes.
Do not use bObi to pick up ammable or combustible liquids such as gasoline, nor
use her in areas where they may be present.
Do not use bObi in an enclosed space lled with vapors given o by oil based paint,
paint thinner, moth proong substances, ammable dust, or other explosive or toxic
vapors.
Leaks from battery cells can occur under extreme usage or temperature conditions.
If the liquid gets on skin, wash quickly with water. If the liquid gets into the eyes,
ush them immediately with clean water for a minimum of 10 minutes. Seek medical
attention immediately.
Do not dispose of your battery in re. Old batteries should be recycled safely (check
with your local recycler).
Do not look directly into the UV light.
Do not use bObi for other than intended usage.
bObi
Charging station
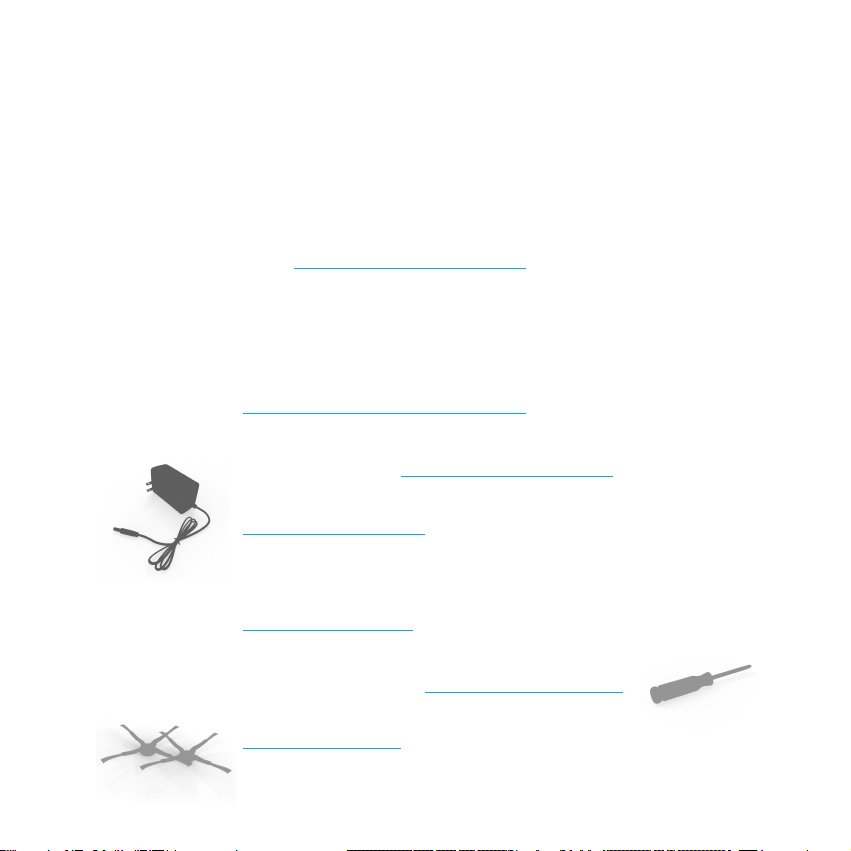
Charging adapter
Remote control
2 side brushes
2 main brushes
Screwdriver
Components
What comes in bObi’s box?
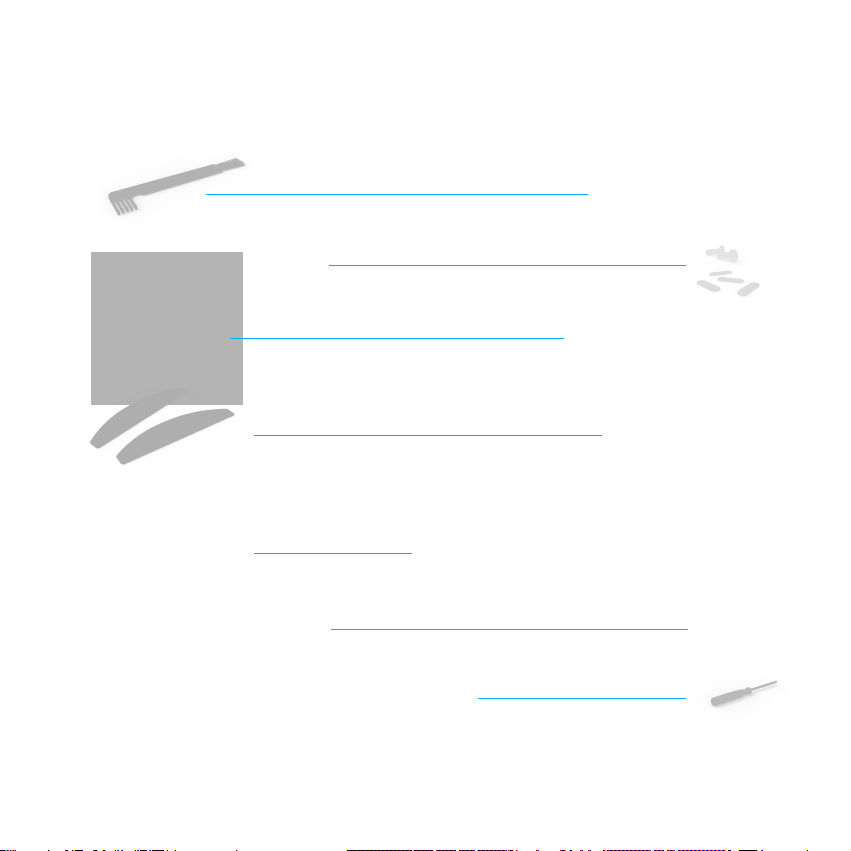
Cleaning brush (to clean bObi)
Extra screws & Blindfold stickers
Mop extension
2 mop cloths
Filter rell
Owner’s manual, quick start guide
Syncing tool

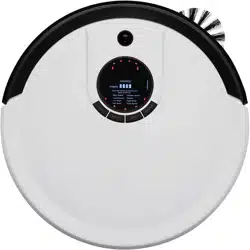
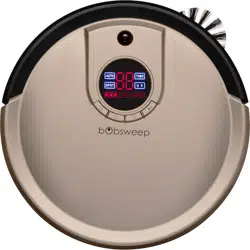
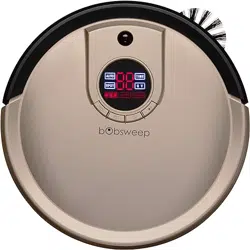
bObi’s anatomy
Top view
Charging inlet
On/O
Cover
Go!
Juice
Wae
Charging bars
Head sensor
Touch sensorsWall sensors

Bottom view
Main brush
Duster
Dustbin
Wheels
Side brush
Floor sensors
Front wheel
UV light
Battery

Charging station
Remote

Get bObi Ready for Cleaning

Installing the Battery
When bObi rst arrives, her battery is not installed. To install bObi’s battery, place
bObi on a at surface and set her power switch to OFF.
1
Using the provided
Phillips screwdriver,
remove the screws
on the battery cover.
2
Remove the battery
cover. Remove bO-
bi’s battery from the
packaging.
3
Check which way
the connectors go
on both the battery
and its compartment.

Turning bObi ON/OFF
bObi’s power switch is located on her side. Use this switch to turn bObi ON or OFF.
If bObi is not cleaning and the power switch is left ON, she enters standby mode,
which uses a small amount of battery. When in stand-by mode, bObi beeps every
few minutes to remind you to charge her or to turn her OFF. Remember to turn the
power switch OFF when you are not using bObi to conserve her battery life.

Working Modes
There are three touch buttons on
top of bObi:
JUICE, WAFFLE, and GO!
These buttons will not work while
bObi is on her charging station.
To use these buttons, you must
rst move bObi from her charging
station manually or using her re-
mote control, and then press the
buttons on top of bObi while she
is on the oor.
GO!
The GO! button activates bObi’s default cleaning mode. In this mode she will use her
programmed algorithm to clean the oor. To use this mode, simply touch the GO!
button found on top of bObi or click the GO! button on her remote.
WAFFLE
Wae cleaning mode can be used to clean up small spills of dry substances. In
Wae cleaning mode, bObi will clean an area of approximately 10 square feet (1
square meter) for about 3 minutes before she stops and enters standby mode.
Wae cleaning mode can be used to clean up small spills of dry substances. To
have bObi clean a small area, press the WAFFLE button on bObi’s cover or on her
remote.
Clear away clutter and cords before letting bObi clean a room.

JUICE
Pressing the JUICE button makes bObi stop cleaning and start searching for her
charging station. When she detects her charging station, she will dock herself and
start juicing.
bObi’s main brush and vacuuming motor do not work while in Juice mode.
bObi enters Juice mode automatically when her battery level falls below 15%.
Charging Station
Setting up bObi’s charging station
Position bObi’s charging station against
a wall on a hard at surface. Make
sure that there is at least 10 feet (3
meters) of open space in front of the
charging station and 2 feet (0.5 me-
ters) on either side of the station.
Plug the adapter into the charging
station. The nightlight on top of
the charging station will turn on.
Sync button is located on
the back of the charging
station
10ft
(3m)
2ft (0.5m)
2ft (0.5m)

bObi can accidentally run over her adapter cord and get it tangled in her brush. Help
bObi avoid this by hiding the cord behind her station and securing it between the
charging station and the wall.
Syncing bObi with her charging station
If bObi can’t nd her charging station, the station and bObi are out of sync and you
need to sync up their coding. Follow these steps:
1. Bring bObi close to her charging station.
2. Disconnect the charging station from the adapter.
3. Set the power switch on bObi’s side to OFF.
4. Plug the adapter into the charging station.
5. Use the syncing tool to press and hold the sync button on back of the
charging station.
6. While holding down the sync button, set bObi’s power switch to ON.
7. bObi will emit a series of chirps to indicate the charging station has been
synchronized.
8. If you do not hear the chirps, turn bObi and the charging station OFF, dis-
connect the station from the adapter, and wait a few minutes before repeating
the process (restart from step 1).

Charging bObi
bObi is powered by a rechargeable battery. She will perform best if she juices up for
12 hours prior to her rst cleaning mission.
Manual charging using the charging station
1. Turn bObi ON and place her directly onto her plugged-in charging station.
2. Make sure bObi’s charging electrodes (on her front) make full contact with
the station’s electrodes.
3. To indicate that she is successfully connected, bObi ashes the middle or-
ange LED light on her cover. The charging station’s red nightlight also ashes
slowly.
4. When bObi is done juicing (approximately 4-5 hours), the ashing light on
her cover becomes solid and the charging station’s nightlight ashes faster.
Manual charging using the adapter
While bObi is OFF, plug her charging adapter directly into her side. The power inlet
is next to bObi’s “ON/OFF” switch. bObi will chirp, ash her cover lights, then chirp
again to let you know that she’s connected. Her center LED light will blink orange to
indicate that she is charging and turn solid orange when she’s fully juiced.

Automatic charging
bObi will automatically start searching for her charging station when her battery falls
below 15%. She will emit a series of chirps, stop her vacuum motor to preserve
energy, and light up the JUICE button on her cover. She will move around, make full
circles, and communicate with her station. When bObi detects the charging station,
she will move her way towards it, dock, and begin to charge. You will know bObi is
fully charged when the middle LED light on her cover stops blinking and turns solid.
If bObi cannot nd her charging station, she will continue searching until her battery
runs out, at which point you can manually pick her up and connect her to her station
(see manual charging).
If bObi’s battery drains fully before recharging, she will not be able to recharge on
her charging station. Charge her manually by plugging her directly into the adapter.
Remote Control
The remote control is your most useful tool when communicating with bObi. It al-
lows you to schedule bObi to clean your home automatically and to direct her to
work in any of her modes. It also allows you to alter and control bObi’s movements
as she is cleaning. Each time you select an action on the remote, bObi will chirp
once before performing the designated function.
bObi’s remote control requires two AAA batteries (not included). Do not leave the
batteries in the remote if you are not using it on a regular basis. Keep the remote at
a normal room temperature.
Weekdays (days 1-7)
Signal indicator
Current time indicator
UV indicator Scheduled time
Speed indicator indicator
Current time Wae
Scheduled time Go!
All-days selection / Juice
schedule reset
Power (On/O)
UV light Speed
Stop
Select/OK
Navigation buttons

1. Remove the battery cover on
the back of the remote.
2. Insert the batteries with the
negative side toward the spring
and the positive side against the
other connector.
3. Reattach the cover.
Installing the remote’s batteries
Syncing bObi with her remote
If bObi isn’t responding to your commands
on the remote, you may need to resyn-
chronize the remote with bObi. Follow
these steps:
1. Set the power switch on bObi’s
side to OFF.
2. Press and hold the OK button on
the remote.
3. While holding down the OK but-
ton, turn the Power switch on bObi’s
side to ON.
4. bObi will chirp several times to in-
dicate that the remote has been syn-
chronized.
5. If you do not hear bObi chirp, re-
peat the process.

Using the direction buttons to steer bObi with her remote
Be careful! Do not
drive bObi in
reverse towards
edges or she could
fall.
The edge detection
system only works
when bObi is
moving forward.
If you want to turn bObi or drive her backwards, hold down the applicable direction
button until she is in the correct direction. When you release the button, bObi will
move forward. If you press the back button, bObi will move backwards as long as the
button is held and will stop when it is released.
The STOP button
in the center of the
direction buttons
will interrupt bObi’s
cleaning cycle and
stop her until you
press another
button.

Choosing bObi’s cleaning speed with her remote
bObi’s default setting is fast mode, which maximizes the area she covers while
cleaning. You can slow bObi down for a deeper, more thorough cleaning.
Press the SPEED button on bObi’s remote control to toggle between fast or slow
modes. The fan on the lower left side of her remote screen indicates slow mode by
displaying only four blades and fast mode by displaying full blades.

Mop
bObi comes with a mop extension and 2 mini mop cloths that may be attached to
her. bObi can mop at the same time as she is sweeping, vacuuming, and disinfect-
ing! The microber mop cloths included with bObi may be used dry or damp - with
water or your favorite cleaning product - to remove stains from tile, laminate, con-
crete, wood, and any other hard ooring.
Attach bObi’s mop
1
Turn bObi upside down and line up
the at side of the attachment with
the two clear plastic holders found
on either side of the main brush.
2
Make sure the square notches on
the sides of the trailing bar line up
with the notches in the middle of
bObi’s holders.
3
Hold the mopping extension per-
pendicular to bObi’s underside and
apply light pressure downwards.
4
The mop will snap into place and
lie at along bObi’s underside.

Detach bObi’s mop
1
Grip the button on the curved side
of the attachment to unlock it from
bObi. 2
Lift the attachment upwards until
it’s perpendicular to bObi’s under-
side, then pull up to detach.
3
Remove the cloth from the Velcro
on the mop extension and wash
after use if needed. 4
Remove the mop extension before
bObi cleans the carpets.

Automatic Cleaning Schedule

bObi can be programmed to start working at a specic time of the day on as many
days of the week as you want. Use the remote to program bObi’s cleaning schedule.
Weekdays
Time (current time)
Scheduled time
Weekdays
The numbers 1 to 7 on top of the screen represent days of the week. 1 stands for
Monday and 7 is Sunday:
1 = Monday 2 = Tuesday 3 = Wednesday 4 = Thursday
5 = Friday 6 = Saturday 7= Sunday
Current time
The current time is the top set of numbers indicated on remote’s screen.
Scheduled time
The scheduled time is the bottom set of numbers indicated on remote’s screen.

Time
bObi uses a 24-hour clock. If you want bObi to start cleaning at 8:00 AM set her
schedule time to 08:00. If you want her to start at 8:00 PM, set it to 20:00.
8:00 AM is the default time. This time is displayed when installing batteries in the
remote for the rst time or after installing new batteries.
Quick reminder before programming bObi: bObi will clean on the scheduled time
even if her bin or brushes require cleaning. Remember to check bObi’s bin and
brushes after every cleaning.
Setting the current time and weekday
To set the current time on bObi’s remote, follow these steps:
1. Press the CUR TIME button.
2. The rst (hour) digit under CURRENT TIME will start ashing. Use the FWD and
BACK buttons to adjust the hour.
3. Use the LEFT and RIGHT buttons to scroll left and right to choose and adjust the
other hour and minute digits.

4. Press CUR TIME again to save the time.
5. To set the current weekday, press CUR TIME again.
6. Press the LEFT button until the frame around number 1 on top of the screen
starts to ash.
7. Press the FWD and BACK buttons to scroll through weekdays.
8. When you reach the current weekday, press CUR TIME again to save the day.

Programming bObi’s cleaning schedule
Follow the steps below to schedule bObi’s cleaning time and day(s):
1. Turn bObi ON and keep her close to the remote.
2. Press SCH TIME on her remote.
3. The rst (hour) digit under SCHEDULED TIME will start ashing. Use the
FWD and BACK buttons to adjust the time to the desired cleaning time.
4. Use the LEFT and RIGHT buttons to scroll left and right between the digits
and change hour and minute settings.
5. Press SCH TIME again to save the scheduled cleaning time.
6. To choose the cleaning days, press SCH TIME again.
7. Press LEFT until the frame around the rst day of the week, number 1,
begins to ash.
8. Press the FWD and BACK buttons to scroll through days of the week.

9. To schedule cleaning for a certain day, press OK when the frame around
that day is ashing. A day is selected when the number that represents that
day is underlined. Keep pressing FWD and BACK to move between the days
and press OK to select or deselect cleaning for each day.
10. Press SCH TIME when you are nished selecting days. bObi will conrm
she has received her new schedule by chirping each time a new schedule is
programmed.
11. If bObi is meant to work at the same time every day, just press the ALL/
NONE button after setting her cleaning time schedule while the day of the
week frame is ashing. All days will be underlined, which means bObi will start
her work at the scheduled time every day. Press SCH TIME to save.
12. The ALL/NONE button can also be used to reset bObi’s scheduled clean-
ing days. Remember, pressing ALL/NONE then SCH TIME when bObi has a
preset schedule turns o cleaning on all days.

Maintenance

Dustbin
Remove and clean the dustbin
One of bObi’s best features is her washable dustbin. For a quick clean, grasp and
push down the button on the back of her dustbin, then pull the bin away from bObi
to eject it while bObi is on the oor.
To remove the dustbin, push
down the eject button and
pull the bin away from bObi
Do not remove the dustbin
while bObi is upside down

Remove and clean the lter
Turn the dustbin around (HEPA lter on
top), hold the dustbin with both hands,
and press down on the two colored clips
on the sides of the dustbin to release
the lter cover. With the lter case open,
take the HEPA lter out and clean it us-
ing the cleaning tool, or a ow of air.
It is recommended that you change
bObi’s HEPA lter every few months de-
pending on the frequency and intensity
of cleaning.
Wash the dustbin
To wash the dustbin, eject the vacuum
motor rst by pushing the button on top
of the dustbin.
To open the dustbin, hold it with both hands and press down the two colored clips
on the sides of the dustbin to release its plastic door.
For a quick clean, use the cleaning brush to remove the remaining dirt and dust from
the dustbin.

With the motor and lter removed, the
dustbin may be washed with water. You
can also sanitize it with your choice of
cleaning product (do not use harsh
chemicals). Do not wash or wet the vac-
uum motor.
Reinstall the dustbin
Place the vacuum motor and lter back
in place and ip the lter cover and the
dustbin’s cover back so they snap into
place. To reinstall the dustbin, make sure
the side that encloses the lter faces
down, put bObi upright and slowly slide
the dustbin in until it clicks and locks
properly. Be careful not to damage the
two metal connectors that are located
on bObi.
If bObi’s dustbin is not fully engaged,
her motor may not make proper con-
tact with the battery’s electrodes. If bObi
does not resume her normal work after
reinstalling her bin, or if she shows error
5 (Er 05) and her vacuum motor is not
turning on, remove her dustbin, check
that the connecting prongs on bObi (im-
age on the right) are not stuck and can
spring freely, then replace the dustbin
securely.

Main Brushes
bObi uses a dual brush cleaning system. It is recommended that you open and
clean bObi’s main brushes after every 2-3 cleaning tasks. To open and clean the
brushes:
1
Flip bObi over, so the front wheel
is farthest from you and the side
brush is on your left.
2
Open the locking bar by pressing
the red latch found to the right side
of the main brushes, then lift the
locking tab up from its lower end.
Take out the brushes by lifting the ex-
posed side up. Then pull to the right.

3
Use the cleaning tool, paper tow-
els, and a can of compressed air
to fully remove dust, dirt, and hair
from the brushes as well as the brush
holders inside of bObi.
4
If there is anything wrapped around
the bristles or brush ends (hair,
strings, etc.), use scissors to cut it
out and then use the cleaning tool and a
paper towel to remove it.
5
Remove the circular rubber brush
ends on each of the brushes.
Clean them o and put them back
on the brushes.
6
Lower the brushes into place starting with the left side then the right. Press
the brushes down gently until they are secured in place. Lower the locking tab
until it clicks into place.

Side Brush
bObi uses her side brush to clean corners and along walls. Dirt and dust trapped
around the brush can deteriorate its ability to move freely and reduce bObi’s
eciency. To clean the side brush:
1
Unscrew the screw in the center
of the side brush with a Phillips
screwdriver.
2
Remove the side brush and clean
it. Use the cleaning tool to remove
any debris around the side brush’s
anchor.
3
Replace the side brush and se-
cure it with the screw.

UV Light
bObi’s sterilizing UV light is located on
her underbelly.
The UV light is automatically turned ON
when bObi starts cleaning. Toggle the
UV light ON or OFF by pressing the UV
button on the remote.
Caution: Do not look directly into the UV light.
Front Wheel
Use the cleaning tool to clean the front
wheel.
To remove the wheel, position a at
screwdriver under the front wheel. Pop
the entire wheel assembly out with an
upward motion and clean the wheel and
its internal parts. Replace the wheel with
gentle pressure until it clicks into place.

Sensors
Cleaning bObi’s sensors
Dirt and dust on bObi’s bottom and side
sensors can reduce her performance.
Regular cleaning of the sensors ensures
that bObi keeps working at her best.
Use a soft cloth or cotton swab slightly
moistened with cold water or alcohol to
wipe along bObi’s surface and around
and underneath her belly, especially on
the bumper and oor detection sensors
on bObi’s bottom.
Blindfold stickers
Dark-colored carpets and certain pat-
terns can seem like edges to bObi’s in-
frared sensors. If you notice that bObi
stops with error1 (Er 01) on your carpet,
you can try “blindfolding” her by cover-
ing the 4 oor detection sensors under-
neath her. The oor detection sensors
are on the front and sides of bObi’s bot-
tom when you ip her over. Just make
sure bObi is not getting anywhere near
stairs or sharp edges when blindfolded,
as she can fall.

Storing bObi
bObi should not be left unused with her power switched ON for more than one
week. If you are not using bObi for an extended period of time, switch her OFF.
Then, unplug the charging station, remove bObi’s battery, and store everything in a
dry place at room temperature.
Do not leave bObi in direct sunlight.

Troubleshooting
Likely Cause(s) for bObi’s Trouble/Error Codes
When bObi faces an uncomfortable situation, she will try to notify you of the issue. If
she ever stops in the middle of her cleaning with the error sign (Er) lit on her remote,
read the two-digit code on the remote’s display. Below are the codes, the likely
cause of the trouble, and what to do in the case of each code. Additionally, bObi
is equipped with a self-checkup feature that allows you to test the functionality of
her various parts and sensors. If the problem is not resolved, please contact us at
Not a fan of reading? For a complete archive of bObi’s how-to videos, troubleshoot-
ing and checkup guides, go to http://owners.bobsweep.com or scan this smart-
phone barcode:
Error Code 1 (Er 01)
bObi cannot see! Her ground/edge detecting sensors (the 4 sensors on the front
and sides of bObi’s bottom) are blocked or dirty.
What to do:
What kind of ooring are you using bObi on? On dark carpets or rugs use bObi’s
blindfold stickers as instructed to resolve the error.

If the ooring is not dark or patterned, turn bObi around and wipe sensors with a
clean, dry cloth until they are completely clean. If the issue persists, run a checkup
test on bObi.
If bObi needs a change of ground/edge detecting sensors contact our support
team. Alternatively, you can change bObi’s sensors at home. All you need is a new
set of ground/edge detecting sensors and a Philips head screwdriver. Go to bObi’s
owners’ corner at owners.bobsweep.com for a video guide and step-by-step in-
structions.
Error Code 2 (Er 02)
Error code 2 relates to bObi’s main brush system and can appear when one or both
main brushes have diculty rotating.
What to do:
Open and take out the main brushes, and clean them thoroughly from end to end. If
you see congestion in the main brush motor area try to clean it using a sharp-ended
tool like a pair of tweezers. If the congestion is not easily removable, bObi’s main
brush motor may need to be replaced. For a video guide and step-by-step instruc-
tions, refer to bObi’s owners’ corner at owners.bobsweep.com.
On shag carpet or rugs take out the rubber main brush and use bObi’s soft-bristled
blue main brush. If the problem persists on hard ooring with a clean main brush and
no congestion in the brush motor area, it is likely that bObi has an internal problem.
Contact support team for help.

Error Code 3 (Er 03)
If bObi’s battery is 100% empty, she won’t be able to charge using her station and
may show error 3 (Er 03) on her remote.
What to do:
Plug bObi directly into the adapter using the inlet below her ON/OFF switch. bObi’s
screen will ash and turn on, and she will make a short, chirping sound. Let bObi sit
for about 30 minutes then unplug her. Turn the side switch OFF, then back ON, and
then put her on her station to complete charging.
Error Code 4 (Er 04)
Error code 4 pertains to an issue with bObi’s left and right wheels, or blockage in her
main rubber brush. The issue may simply be a jam in one or both wheels, or bObi
may have an electronic problem that is keeping her right wheel from moving freely.
What to do:
Check bObi’s wheels for jamming. Open the wheels and use compressed air to
remove dust or debris. Check bObi’s main brush and remove dirt, dust, or entan-
glement. If error 4 (Er 04) occurs on a soft or plush carpet, remove bObi’s rubber
brush and restart.
If this does not solve the problem and bObi still shows an error, perform a checkup
test to see how the wheels and brushes respond to the test.
Contact support if needed.

Error Code 5 (Er 05)
Error code 5 means that bObi’s dustbin is installed improperly or the vacuum mo-
tor’s contact points are blocked or bent.
What to do:
Take out the dustbin, empty it, and clean the connector electrodes. Check that the
connector electrodes (two metal prongs on bObi) spring freely and are not stuck
or bent. If one or both of the electrodes is stuck, use a screwdriver to gently pull
the metal tab up and out to free it. Carefully reinstall the dustbin while bObi is in an
upright position, ensuring that it is fully engaged.

Checkup Guide

If you notice that bObi is not working in her usual way or repeatedly runs into a cer-
tain error, you may want to perform a checkup test to nd out what is causing the
issue. bObi’s remote can be used to test all of her sensors and electronic parts in
the span of a few minutes. If bObi does not produce the results as described during
any of her tests, contact our support team for further assistance.
To begin the checkup, make sure the side power button on bObi is turned OFF.
Bring bObi near the remote.
Put bObi in checkup mode
Press and hold the OK button on the remote while you switch bObi’s power back ON.
Continue holding the OK button. The three touch buttons (GO!, WAFFLE, JUICE) on
bObi’s cover will start ashing. While the touch buttons are ashing, simultaneously
press the WAFFLE and JUICE buttons on bObi’s cover with the OK button on the
remote still held down. When bObi makes two beeping sounds, release the OK but-
ton and you will notice that all the digits on her remote become zeroes. bObi is now
in test mode. While in this mode, the three buttons on bObi’s cover (GO!, WAFFLE,
JUICE) stay on, and the 5 LED lights above the buttons ash sequentially.
You may switch between dierent tests by pushing the LEFT button on the remote.
Alternate between dierent parts of a certain test by pushing the RIGHT button,
which will change the digits to let you know what part of bObi is being tested.

Test bObi’s oor detecting sensors
Remove bObi’s side brush before testing her oor sensors.
bObi’s oor detection sensors are the rst item tested when bObi is put into test
mode. In this test mode, numbers 1-6 located on top of the remote represent bO-
bi’s 4 infrared oor detection sensors and the two oor detection sensors located in
bObi’s left and right wheels. The test mode indicator reads 0000.
With bObi on the oor, numbers 1, 2, 3, and 4 should be underlined to show that
bObi’s oor detection sensors are working.
When you lift bObi up, the lines under numbers 1,2,3, and 4 will disappear and new
ones will show up underneath the numbers 5 and 6. This means that the left and
right wheels are o the oor, and oor detection sensors are working properly.
bObi’s rmware version
After testing the oor detection sensors, and while in test mode 0000, press LEFT
on the remote. The number 0001 will appear on the test mode indicator. The main
4-digit number on the screen indicates the rmware version of your bObi.

Test the battery
While in test mode 0001, press LEFT on the remote. The number will change to
0002. In this mode, the main 4-digit number on the screen indicates the voltage of
bObi’s battery in millivolts (mv). Under normal circumstances this number ranges
between 1400 and 1600. If the number on the screen changes to 0000, it means
bObi’s battery is not working or has a loose connection. Open the battery compart-
ment and check the battery.
Test bObi’s wall detecting sensors
After testing the oor detection sensors, press RIGHT on the remote. The number
0100 will appear on the test mode indicator. Use a piece of paper, a roll of paper
towels, or a at white surface to imitate a wall in front of bObi. Drag it from the left
side of the bumper around to the right side until you reach the power switch. Num-
bers 1-5 on the remote will become underlined one by one as you do this. Ignore the
numbers on the large 4-digit number in the middle of the screen.

Test the touch sensors
80 tiny touch sensors surround bObi’s front. Test them while in same test mode as
the wall detection sensors (0100). Press on any of the small points on the left side of
the bumper and the number 6 will be underlined. Do the same to the right side and
the number 7 will be underlined.
Usage counter
To nd out how many times bObi has been used (charged in full and ran out of
charge) either manually or automatically, press RIGHT on the remote while in test
mode 0100. The test mode indicator becomes 0200. In this mode, the main 4-dig-
it number on the screen indicates the number of times bObi’s battery has been
charged.

Test the left and right wheels, brushes, and vacuum
motor
Turn bObi upside down and lay her on a at surface. In test mode 0200, press
RIGHT on the remote to enter test mode 0300. In this mode you can test the left
and right wheels, main and side brushes, and vacuum fan’s motor. As soon as she
enters test mode 0300, bObi’s wheels drive forward, her brushes move, and the
vacuum fan starts to work.
Left Wheel: Digits 1 and 3 become underlined, indicating that both left and right
wheels are working. The main 4-digit number on the remote’s screen shows the
current of bObi’s left wheel. Normal current ranges between 0020 and 0110.
Right Wheel: Press LEFT on the remote to enter test mode 0301. Digits 1 and 3 will
still be underlined; this time the main 4-digit number on the remote’s screen shows
the current of bObi’s right wheel. Normal current ranges between 0020 and 0110.
Main Brush: In test mode 0301, press LEFT on the remote to enter test mode 0302.
The wheels will stop moving. The main 4-digit number on the remote’s screen will
show the current of bObi’s main brush. Standard current for the brushes should be
below 0260mA.
Vacuum Motor: After testing the brush, press LEFT on the remote again and you will
see the digits 0303 in the test mode indicator. The vacuum motor will start working
and the main 4-digit number on remote’s screen will show the current of the vacuum
motor. Standard current range for the vacuum motor is between 0160 and 0200mA.

Test the charging station
The nal part of the checkup tests bObi’s ability to charge. To begin this test, press
RIGHT on the remote so that bObi enters test mode 0400. The main 4-digit number
in the center of the remote’s screen should show 0000 when bObi is not on her
charging station. Place bObi on her charging station, and a number between 0400
and 0800 should appear in place of the zeroes.
When you are nished with the test, turn bObi’s side power button OFF to leave the
checkup mode. When you switch it back ON, bObi will return to her normal working
mode.
If everything responds properly, bObi’s internal parts are working correctly. Contact
need help with bObi.

Support and Warranty

Warranty Information
All bObsweep products purchased from an authorized seller and used anywhere
in the world include a one 1-year limited warranty on parts and labor. This includes
the battery. The warranty does not cover consumable parts (brushes, lters, mop).
Additional coverage plans are available for purchase at:
http://bobi.bobsweep.com/bobi-support-warranty/coverage-plans
Even after bObi’s warranty is over, we will share the maintenance costs with you.
During the rst ve years of your purchase, we will replace/repair bObi when needed
and subsidize the replacement/repair charges. The exact amount of our co-pay may
vary. We will cover no less than 25%.
To receive warranty services you must register bObi online. You must also keep the
original receipt of your purchase.
To register bObi visit:
http://bobi.bobsweep.com/bobi-support-warranty/register-bobi

bObi’s Cleaning Behavior
Most of the time, bObi can be left on Go! cleaning mode to clean without super-
vision. In this automatic cleaning mode, bObi detects dirtier areas as she crosses
them, and gives them more attention.
Sometimes bObi may seem to avoid one area of a room for a while, but be patient
while she searches out dirt particles in her own way. bObi’s pattern may look quite
dierent from the way a human would clean: She sometimes draws short lines that
are straight. Or she may go back and forth in the middle of the room, zigzagging
over a small area. Rest assured, frequent directional changes are normal for bObi
while she changes cleaning modes and algorithms. It is best to let bObi work in her
own way even if her movements appear odd. Moving bObi around, manipulating her
movements excessively, or picking her up will disrupt her cycle. If you leave bObi
to do the job on her own, you will notice the excellent results when you open the
dustbin at the end of her cleaning cycle. If you wish to control bObi’s movements to
cover/avoid a certain area, we recommend that you only do so using her remote.
If the remote seems unresponsive at any time, check to make sure it is synced up
with bObi. If your rooms are divided by ledges higher than bObi is able to climb, you
may gently push her over.
Although bObi is capable of transitioning between rooms and most oor types, this
does not mean that she always chooses to move onto the next area when she ar-
rives at a transition. She may appear to be ignoring some spaces or spending too
much time in others, but rest assured that her algorithms are designed to render an
ecient cleaning job by the end of a full cycle.

bObi FAQs
1. Where can I nd bObi’s training videos?
bObi’s “how-to” videos can be found at bObi’s owners’ corner at
http://owners.bobsweep.com
2. How long should bObi’s battery last?
bObi’s running time depends on the type of oor she is cleaning, the speed she is
set on, the age of the battery, etc. On average she works anywhere between 1 to
1.5 hours on a full battery. When her battery life falls below 15%, she automatically
starts to look for her charging station. Before her rst use, it is best to allow bObi to
charge for 12-14 hours.
3. How often should I empty the dustbin?
It is recommended that you empty bObi’s bin after one or two cleaning jobs but this
mainly depends on the volume of cleaning that she does. The good news is you can
wash bObi’s bin under running water! Simply detach the vacuum motor from the bin
and the bin is ready to wash!
4. How often do I need to change bObi’s HEPA lter?
It is recommended that you clean bObi’s HEPA lter every week and replace the lter
every 3-6 months.

5. How often should I clean bObi’s brushes?
bObi’s brushes do a lot of work picking up hair and larger debris, so it is recom-
mended that you clean the main and side brushes every 1 to 4 uses.
However, if you clean them more frequently, bObi will be able to store more dirt in
her dustbin, rather than on her brushes. If you notice a thick covering of hair, dust,
and debris on her brushes, remove and clean them. Remember to clean the interior
of bObi where the brushes connect and where the dust ows to the dustbin to en-
sure they stay in good condition for a long time.
6. My bObi won’t turn on no matter what I do.
If bObi has not been charging for a long time, and does not turn on when press-
ing the side power button or placing her on her charging station, it’s likely that the
battery has been drained too low for bObi to operate. To recharge her, unplug the
adapter that normally attaches to the charging station and plug it directly into the
inlet on bObi’s side. Then, let bObi recharge fully before using her again. Afterwards,
you will be able to charge bObi manually or automatically using her charging station.
If you place bObi on her charging station, always make sure to turn her ON rst, to
activate the charging plates on her bottom. When bObi is charging, the battery bars
on her cover blink
7. Why is my bObi beeping?
If bObi is left ON but she is not cleaning or charging, she makes a beeping sound
once every ve minutes to warn you that she is left unattended and her battery is
being drained. Place bObi on her station, or turn her OFF completely by using her
side power button. You will have to switch this button ON the next time you want
bObi to clean.
bObi also makes this noise when she encounters problems cleaning and needs
your assistance. In addition to the chirp, there will be an error number (Err) on the
remote’s display, which lets you know why bObi has stopped. You can decode this
message by consulting the Troubleshooting section of this manual.

8. bObi is having trouble landing her charging station. Where is the best place to
put the station?
bObi nds her station through the transmission of WiFi signals. bObi will park on her
station more easily when the station is placed near the perimeter of the room with
plenty of space in front, so that she may adjust her distance from the station and
make a perfect landing. Place the station on a at surface like hardwood or tile oor-
ing instead of carpet. To facilitate bObi’s work, nd a spot for the charging station
where bObi has a higher chance of passing through.
9. I left bObi’s brush in for multiple cleans and am having problems removing it.
If the main or side brushes are dicult to remove, it is likely because hair, string, or
other debris have been caught in them and are clogging the areas where they attach
to bObi. You can use scissors to cut the hair wrapped around either brush, until you
are able to remove it.
10. bObi is getting stuck under some of my furniture or travelling into areas with
wires that tangle up the brush. How can I stop her from going into these areas?
bObi is determined to cover all the spaces she can nd in your home. Because of
this, she might get herself into trouble once in a while. If she nds her way under a
piece of furniture where she can barely t, she may struggle to get out. If there is
only one open entrance, bObi may take a few minutes to gure out how to escape
on her own. You do not have to assist her when this happens, unless you would like
to use the remote to steer bObi out of her struggle zone.

11. Why does bObi start even though I did not tell her to clean?
bObi may begin cleaning on her own if you put her remote into auto-resume (Finish
Fueling and Go) mode, or if she is scheduled to clean at a certain time.
First, look at the display on bObi’s remote. If the scheduled cleaning time slot does
not show a 4-digit number but that the code “FFGO,” then bObi is programmed to
start working immediately once she is nished fueling.
To reset this feature and cancel the auto-resume, press the SCH TIME button on the
remote, then press STOP.
12. When is a good time to use the wae function?
The Wae function is best for cleaning a small area with a large amount of dirt or
dust. It is a great way to target only one area that has become dirty, such as a spill
that must be swept or mopped in an otherwise clean area. It is also very eective
when mopping, to minimize streaking on tile or hardwood oors.
13. My bObi is stopping and showing an Error Number on remote’s screen, how
can I x this?
To understand bObi’s language, consult the Troubleshooting section of this manual
for the cause of the problem as well as its solution.

14. Where can I buy spare parts?
Extra parts are available for purchase on our owners website, owners.bobsweep.
com. With bObi’s modular design and our how-to videos, you can change each
individual part easily if it gets old or damaged.
15. I have a question and need to contact bObsweep’s support team.
Need help with bObi? Our devoted team is ready to help you! You can reach us by
phone or e-mail.
Call us toll free 1-888-549-8847 for support in Canada and the United States. Or,
email us at [email protected]. Our goal is to get back to you within a day.
To nd bObi’s how-to videos, repair videos, troubleshooting videos, and to connect
with your extended bObsweep family members and fellow Bob and bObi owners,
visit bObi’s owners’ corner at http://owners.bobsweep.com.

bObsweep
sealed with care
® and © bObsweep Inc.all rights reserved.