Loading ...
Loading ...
Loading ...
26 49-3000206 Rev 1
Installation Instructions
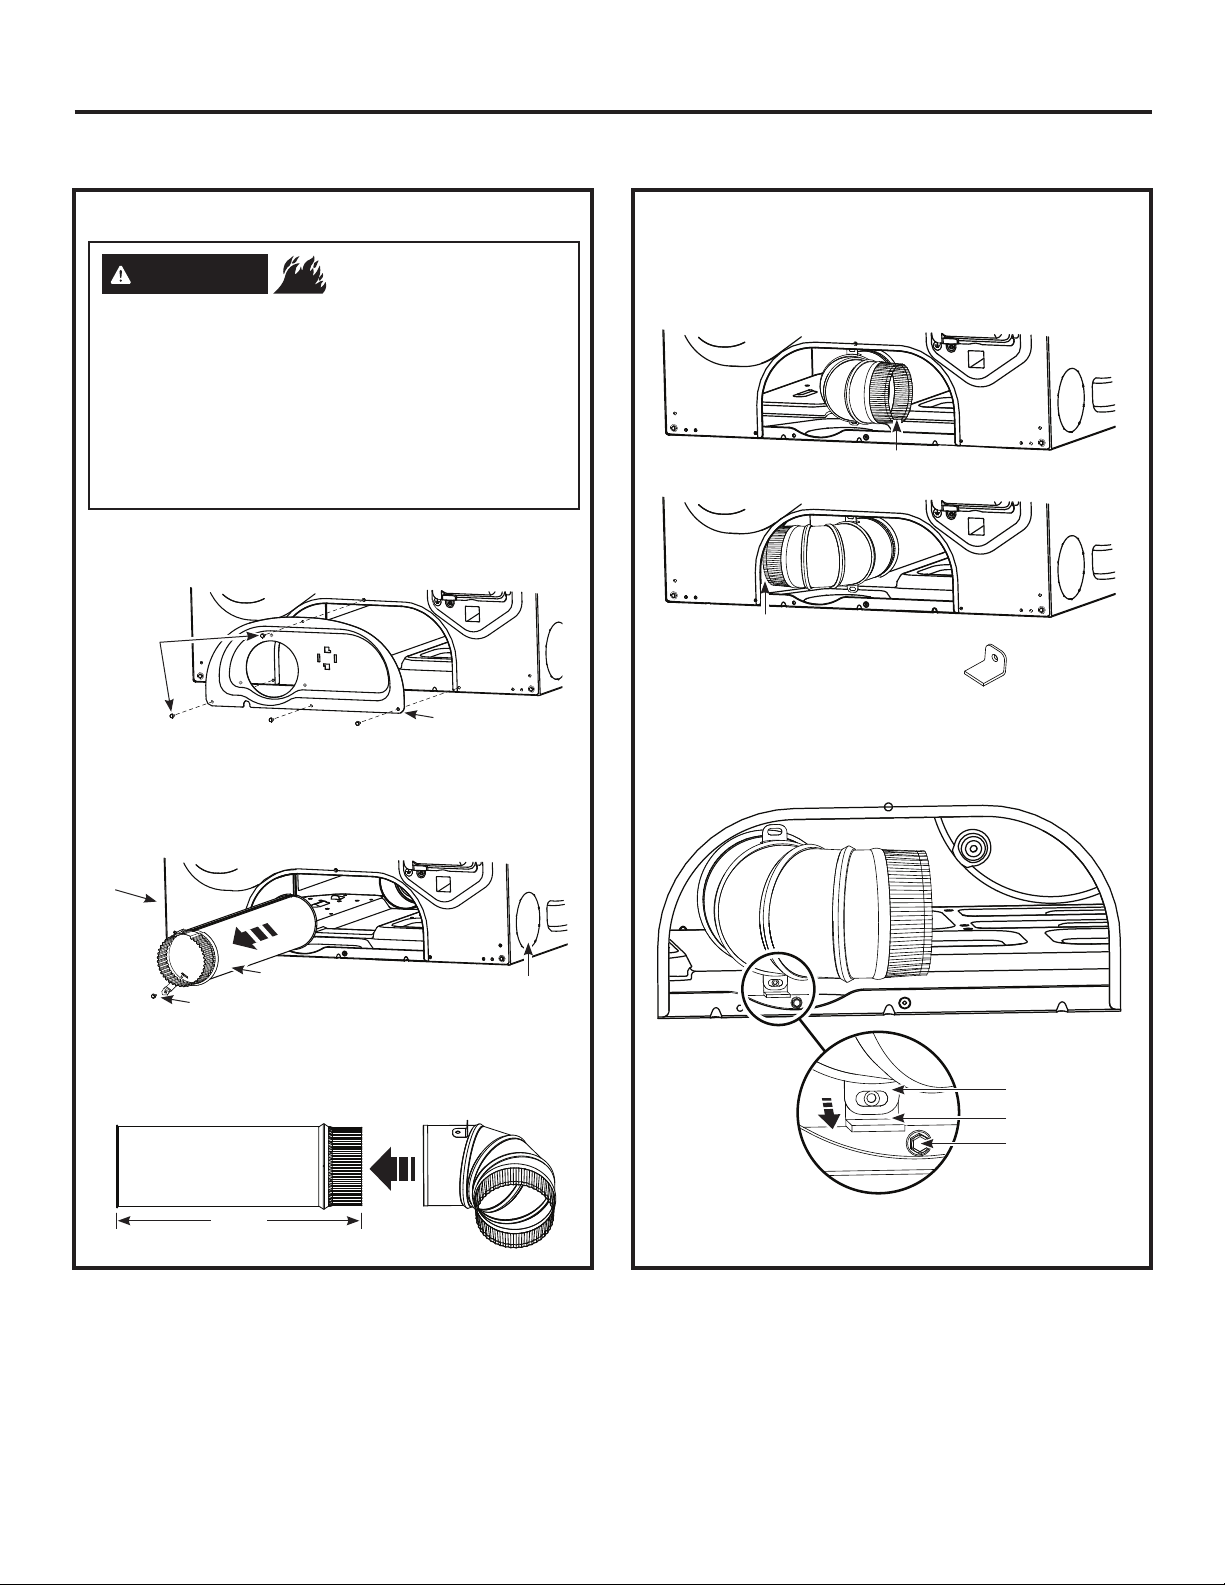
EXHAUSTING THE DRYER (cont.)
SIDE VENTING
Disconnect dryer from electrical supply.
Wear gloves and arm guards.
Close the back opening with the access
panel included in kit WE16X29317.
Failure to do so may result in fire, electrical
shock or lacerations.
- Fire Hazard
WARNING
• Remove the 4 screws that secure the access panel
and save. Remove the access panel.
• Detach and remove the right or left side knockout
as desired. Remove the screw that secures the
dryer exhaust duct and save. Pull the exhaust duct
out of the dryer.
Remove
4 screws
and save
Access Panel
SIDE VENTING (cont.)
• Locate the 12-1/2” exhaust duct and elbow duct
from the kit and assemble together. Apply duct tape
around the joint to eliminate leaks between ducts.
• Insert and connect the elbow/exhaust duct assembly
to the blower housing and orient the elbow for either
left or right venting.
12-1/2"
Right Venting
Left Venting
Left Knockout
Right
knockout
Remove screw and save
Exhaust Duct
• Locate the bracket from the kit.
• Remove the adhesive liner from the bottom of the
bracket and position it behind the elbow duct tab.
• Press down firmly to secure the bracket to the bottom
of the dryer.
• Using one of the screws from earlier, secure the
elbow duct tab to the bracket.
Elbow Duct Tab
Bracket
Saved Screw
Loading ...
Loading ...
Loading ...