Loading ...
Loading ...
Loading ...
4
KEY USAGE TIPS
AquaLift
®
Self-Cleaning Technology
AquaLift
®
Self-Cleaning Technology is a first-of-its-kind
cleaning solution designed to minimize the time, temperature,
and odors that ordinarily come with traditional self-cleaning
methods. With AquaLift
®
Self-Cleaning Technology, an innovative
coating on the interior of the oven is activated with heat and
water to release baked-on soil. To use AquaLift
®
Self-Cleaning
Technology, simply wipe out loose debris, pour water into the
oven bottom, and run the AquaLift
®
Self-Cleaning cycle. When
the cycle finishes in under 1 hour at a lower temperature than
in traditional self-cleaning methods, just wipe out the remaining
water and loose debris. See the “Clean Cycle” section for more
detailed instructions. For additional information, frequently
asked questions and videos on using AquaLift
®
Self-Cleaning
Technology, visit our website at http://whirlpoolcorp.com/
aqualift.
Surface Temperatures
When the range is in use, all range surfaces may become hot,
such as the knobs and oven door.
Warming or Storage Drawer
When the oven is in use, the drawer may become hot. Do not
store plastics, cloth, or other items that could melt or burn in
the drawer.
Oven Vent
The oven vent releases hot air and moisture from the oven, and
should not be blocked or covered. Do not set plastics, paper,
or other items that could melt or burn near the oven vent.
Preheating
When beginning a Bake, Convect Bake, or Convect Roast cycle,
the oven will begin preheating after Start is pressed. The oven
will take approximately 12 to 15 minutes to reach 350°F (177°C)
with all of the oven racks provided with your oven inside the
oven cavity. Higher temperatures will take longer to preheat.
The preheat cycle rapidly increases the oven temperature. The
actual oven temperature will go above your set temperature to
offset the heat lost when your oven door is opened to insert food.
This ensures that when you place your food in the oven, the
oven will begin at the proper temperature. Insert your food when
the preheat tone sounds. Do not open the door during preheat
before the tone sounds.
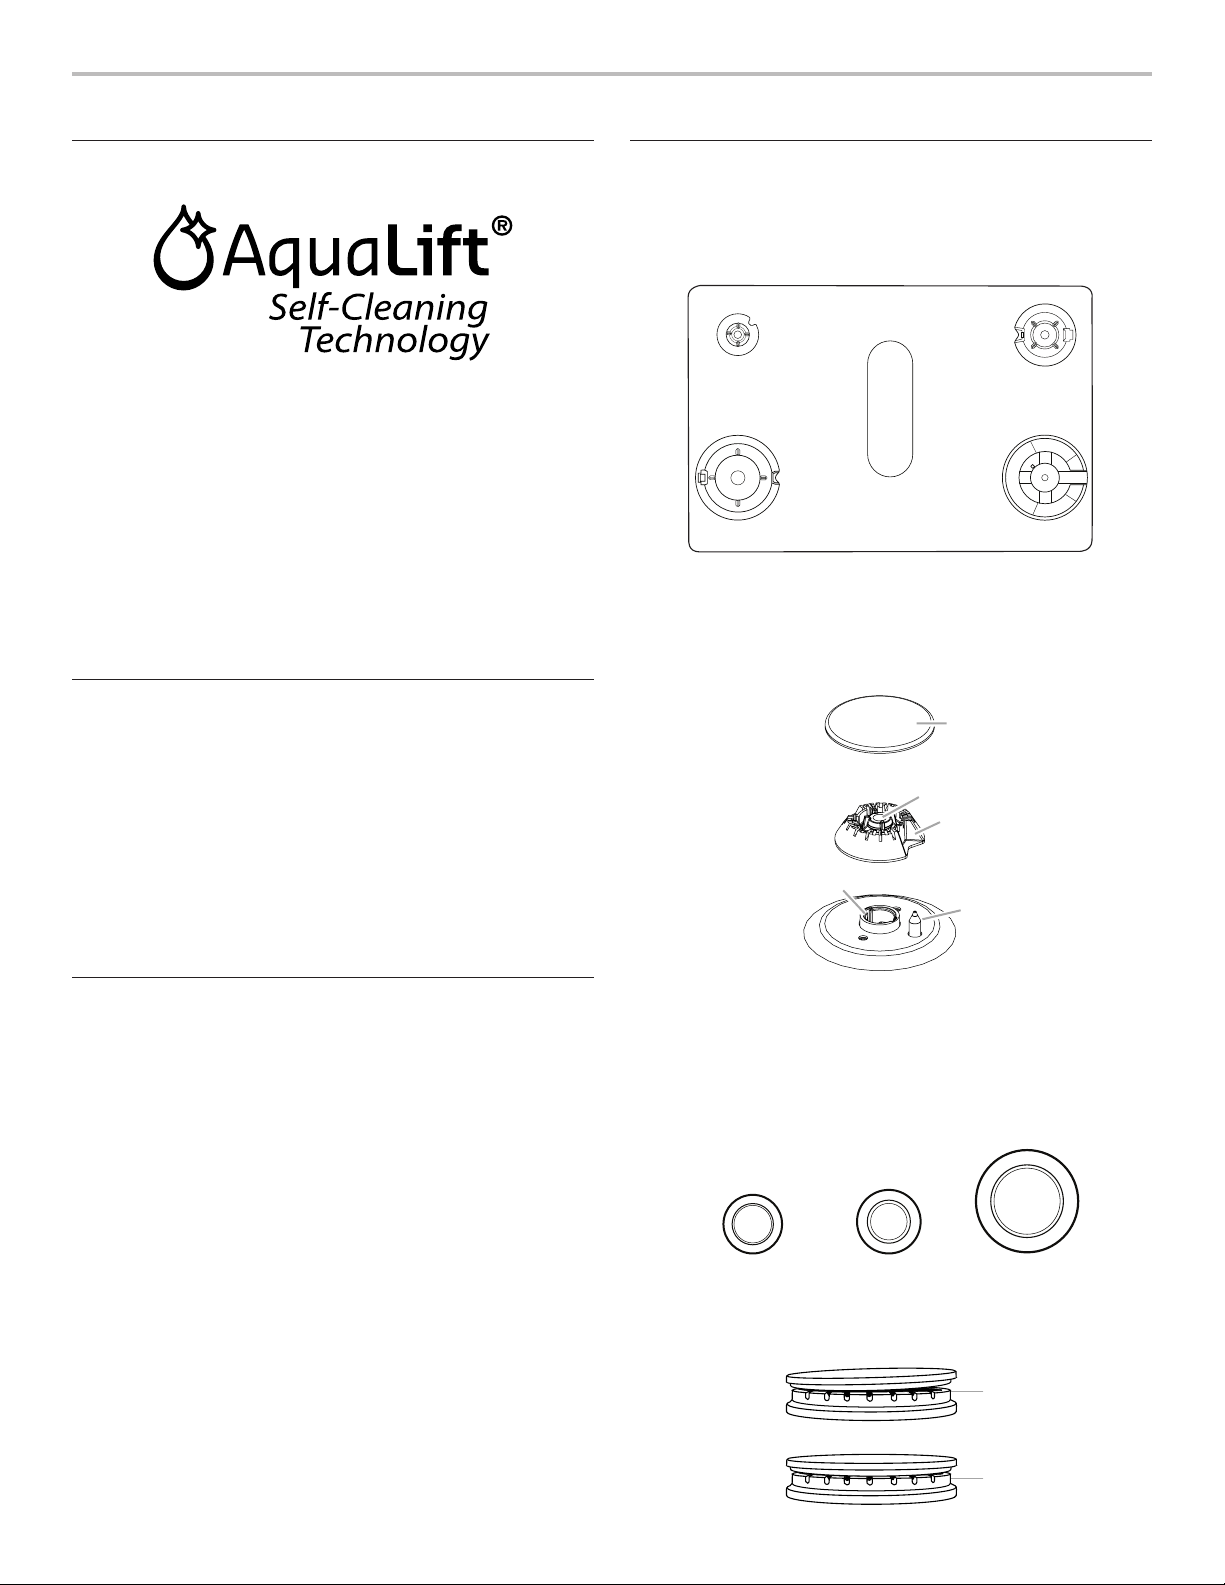
Surface Burners
The burner bases and caps must be properly positioned before
cooking. Your range comes with three sizes of burners and
caps. Each round burner base is marked with a letter indicating
the burner size. Align the burner bases as shown in the following
illustration:
Align the gas tube opening in the burner base with the orifice
holder on the cooktop and the igniter electrode with the notch
in the burner base.
Each round burner cap is marked with a letter indicating the
burner size. Place the burner caps on the appropriate burner
bases.
AUX
SR
UR
Small cap (AUX)
Medium cap (SR) X-Large (UR)
Burner caps should be level when properly positioned. If burner
caps are not properly positioned, surface burners will not light.
The burner cap should not rock or wobble when properly aligned.
A
D
EB
A. Small (S)
B. Large (L)
C. Oval D. Medium (M)
E. Large (L)
C
A. Small (AUX)
B. X-Large (UR)
C. Medium D. Medium (SR)
E. Wok
A
B
C
D
E
A. Burner cap
B. Gas tube opening
C. Burner base
D. Igniter electrode
E. Orifice holder
A
B
A. Incorrect
B. Correct
Loading ...
Loading ...
Loading ...