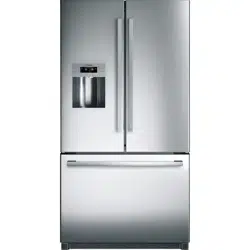
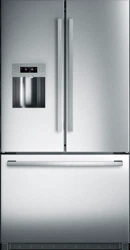
These operating and installation instructions apply to several models. The illustrations may differ from your particular model.
A. Refrigerator compartment can be adjusted between 35 °F (+2 °C) and 46 °F (+8 °C)
B. Freezer compartment can be adjusted between 5 °F (-15 °C) and -7 °F (-22 °C)
1. Butter and cheese compartment
2. Can bin
3. Control and display panel
4. Ice and water dispenser
5. Ice storage bin
6. Door storage compartment
7. Vita Fresh compartment with LED light
8. Removable door storage compartment
9. Top freezer drawer
10. Bottom freezer drawer
11. Freezer compartment light switch
12. Freezer compartment divider
13. Deli drawer with LED light
14. Egg compartment
15. Door storage compartment
16. Water filter
17. Adjustable glass shelf
18. Small glass shelf
19. Ice maker/Ice cube container
20. Refrigerator compartment light switch
Control and display panel
The control and display panel on the left refrigerator door consists of a touch pad. Touch the keypad to activate the corresponding function. The light of the control and display panel goes out after approx. 1 min when no keypad was touched.
1 “freezer” button
Button for
adjusting the freezer compartment temperature
switching the ”Super freeze” function on/off.
2 ”super/quick ice” button
Quick ice cube production on/off switch.
3. Water dispenser button
4. Crushed ice dispenser button
5. Ice cube dispenser button
6. ”alarm/lock” button
Button for
switching the warning signal off
switching panel lock on/off.
7. ”light/filter” button
Button for
switching the ice and water dispenser light on/off
reset the filter indicator.
8. “fridge” button
Button for
adjusting the temperature in the refrigerator compartment
switching the ”Super cool” function on/off.
9. Refrigerator compartment temperature display
Displays the temperature set for the refrigerator compartment.
10. Freezer compartment temperature display
Displays the temperature set for the freezer compartment.
11. Symbols on the display panel
”quick ice” Appears when the ”quick ice” function is on.
”Light” Appears when the ice and water dispenser light is on.
”Water filter” Displays the status of the filter cartridge.
”Panel lock” Appears when the panel lock is on.
Operating tips
Opening and closing the refrigerator compartment doors
The refrigerator compartment doors can be opened and closed independently. The left refrigerator compartment door has a foldaway door bar.
When closing the left refrigerator compartment door, the door bar folds behind the right refrigerator compartment door, forming a seal between the refrigerator compartment doors.
Switching on the appliance
Connect the appliance plug to the outlet. After the appliance has been plugged in, the refrigeration process will begin. The interior light in the refrigerator compartment switches on when the door is open. It will take several hours for the inside of the appliance to reach the temperatures set at the factory. Do not place food in the appliance until these temperatures are reached.
Setting the temperature
Refrigerator compartment
(can be adjusted between 35 °F (+2 °C) and 46 °F (+8 °C)) Press the ”fridge” button until the desired refrigerator compartment temperature is set.
The most recent temperature value will be stored. We recommend a setting of 39 °F (+4 °C). Perishable foods should not be stored at temperatures higher than 39 °F (+4 °C).
Freezer compartment
(can be adjusted between 5 °F (-15 °C) and -7 °F (-22 °C)) Press the ”freezer” button until the desired freezer compartment temperature is set.
The most recent temperature value will be stored. We recommend a setting of 0 °F (-18 °C).
Alarm function
The door warning signal sounds if the temperature inside the appliance is too high or one of the appliance doors is open for more than three minutes. The warning signal will sound three times and will sound for one minute each time it is triggered. There will be a one-minute pause between signals.
Refrigerator compartment
The word ”alarm” will appear on the right on the display panel.
To switch off the warning signal:
Press ”alarm/lock” or close the refrigerator compartment doors. The word ”alarm” will blink on the display panel until the temperature is close to the set temperature.
Freezer compartment
The word ”alarm” will appear on the left on the display panel.
To switch off the warning signal:
Press ”alarm/lock” or close the freezer compartment drawer. The word ”alarm” will blink on the display panel until the temperature is close to the set temperature.
Panel lock
When the panel lock is activated, all of the buttons on the control and display panel are locked.
To switch the panel lock on or off:
Press ”alarm/lock” for 2 seconds. The ”Panel lock” symbol appears when the panel lock is activated.
Super cooling
Super cooling cools the refrigerator compartment down as low as possible for approximately 6 hours. The temperature is then automatically reset to 39 °F (+4 °C).
Super cooling is particularly recommended for the following:
Before placing large quantities of food in the refrigerator compartment.
To cool drinks quickly.
To switch on super cooling:
Press ”fridge” until ”super” appears on the right on the display panel.
To switch off super cooling:
Press ”fridge”. The word ”super” disappears on the display panel. The temperature is automatically set to 39 °F (+4 °C).
Super freezing
Food should be frozen as quickly as possible in order to retain their vitamins, nutritional value, appearance and flavor. To prevent an undesirable rise in temperature when placing fresh food in the freezer compartment, switch on super freezing several hours beforehand. As a rule, 4 to 6 hours is adequate. Allow for a minimum of 24 hours if planning to use the maximum freezing capacity. Smaller quantities of food can be frozen without super freezing.
To switch on super freezing:
Press ”freezer” until ”super” appears on the left on the display panel.
To switch off super freezing:
Press ”freezer”. The word ”super” disappears on the display panel. The temperature is automatically set to 0 °F (-18 °C).
quick ice
Use this function to accelerate the production of ice cubes.
To switch on quick ice:
Press ”super/quick ice”. The ”quick ice” symbol appears on the display panel.
When the ice cube container is full, quick ice automatically shuts off after a few hours.
Water filter symbol
The symbol indicates the filter cartridge's period of use.
Up to two months.
Up to four months.
Up to six months.
After six months, the symbol flashes. Replace the filter cartridge.
When the appliance is turned off, the water filter symbol is reset.
To reset the water filter symbol after replacing the filter cartridge:
Press and hold the ”light/filter” button for 3 seconds.
The symbol stops flashing.
Temperature unit
The temperature can be displayed in degrees Fahrenheit (°F) or Celsius (°C). After the appliance is switched on, the temperature appears in degrees Fahrenheit (°F).
To set the temperature unit:
Press ”alarm/lock” for 2 seconds. The ”Panel lock” symbol appears.
Press and hold ”super/quick ice” for 15 seconds until the temperature unit switches.
Refrigerator compartment
The refrigerator compartment temperature can be adjusted between 35 °F (+2 °C) and 46 °F (+8 °C). We recommend a setting of 39 °F (+4 °C). Perishable foods should not be stored at temperatures higher than 39 °F (+4 °C).
Using the refrigerator compartment
For storage of ready meals, cakes and pastries, canned food, condensed milk, cheese, spreads, sauces, dips and eggs.
Follow these guidelines when storing food:
- Allow warm food and drinks to cool down outside the appliance.
- Place food in airtight containers to prevent it from losing its flavor or drying out.
- To prevent poor air circulation in the appliance, do not block ventilation openings with food.
- Avoid contact of oil and grease with plastic parts and door seal.
Vita Fresh compartment
(not included on all models) The temperature inside the Vita Fresh compartment is kept at almost 32 °F (0 °C). The low temperature provides optimum storage conditions for perishable food. Food can be stored much longer in the Vita Fresh compartment than in the regular refrigerator compartment without losing its freshness. The Vita Fresh compartment is covered by a special humidity filter. The special humidity filter optimizes the humidity in the Vita Fresh compartment. Depending on how full the Vita Fresh compartment is, the humidity can reach up to 90 percent which is ideal for all garden and field products such as vegetables, lettuces, herbs and fruit.
Deli drawer
The temperature in the deli drawer is kept at a constant temperature just below freezing. This provides optimum storage conditions for meat and meat products, fish, seafood, dairy products as well as hard and soft cheese.
Removing the deli drawer
1. Pull out the deli drawer as far as possible.
2. Lift up the front of the deli drawer and pull it out.
3. Inserting the drawer: Insert the deli drawer into the rail and push toward the back
Variable interior design
Glass shelves
The adjustable glass shelves can be removed.
You can pull out the adjustable glass shelves and place them at varying heights.
Removing a glass shelf
Lift up and pull the shelf toward you. Unhook and then remove the shelf.
Installing the glass shelf
Lift up the front of the shelf and insert the hooks into the openings at the desired height. Lower the front of the shelf.
Small top glass shelf
The glass shelf can be removed and placed in the holder underneath the ice maker. This provides room to place taller items such as tall bottles next to the ice maker.
Door storage compartments
To remove door storage compartments:
Lift door compartment and take it out.
To install door storage compartments:
Place the compartment above the bracket at the desired height and press down.
Butter and cheese compartment
Raise the cover on the butter and cheese compartment.
To remove the butter and cheese compartment:
Lift up the compartment and take it out.
To install the butter and cheese compartment:
Place the compartment above the bracket at the desired height and press down.
Egg compartment
Freezer compartment
The freezer compartment temperature can be adjusted between 5 °F (-15 °C) and -7 °F (-22 °C). We recommend a setting of 0 °F (-18 °C).
Use the freezer compartment to
- store deep-frozen food
- freeze food
- make and store ice cubes.
Freezing food
Freeze fresh and undamaged food only. Separate food to be frozen from food that is already frozen. Place food in airtight containers to prevent it from losing its flavor or drying out.
How to wrap food correctly:
1. Place food in packaging.
2. Press out any air.
3. Seal the packaging.
4. Label the package with the contents and date.
Items not suitable for wrapping food:
Wrapping paper, greaseproof paper, cellophane, garbage bags and used shopping bags.
Items suitable for wrapping food:
Plastic film, polyethylene blown film, aluminum foil and freezer cans. These products can be purchased from your retailer.
Items suitable for sealing wrapped food: Rubber bands, plastic clips, string, cold-resistant adhesive tape or similar items. Bags and polyethylene blown film can be sealed with a film sealer.
Storage life of frozen food
The storage life depends on the type of food. At a temperature setting of 0 °F (-18 °C):
Fish, sausage, ready meals and cakes and pastries: up to 6 months
Cheese, poultry and meat: up to 8 months
Fruit and vegetables: up to 12 months.
Purchasing and storing deep-frozen food
Follow these guidelines when purchasing deep-frozen food:
Make sure the packaging is not damaged.
Check the ”sell by” date.
The temperature of the supermarket freezer should be lower than 0 °F (-18 °C). If not, this shortens the storage life of the frozen food.
Pick up deep-frozen food last when shopping. Wrap in newspaper or place in a cold bag and take home.
At home, immediately place deep-frozen food in the freezer compartment. Use the deep-frozen food before the ”sell by” date.
Thawing frozen food
Depending on the type of food and its intended use, frozen food can be thawed as follows:
at room temperature
in the refrigerator
in an electric oven with/without fan-assisted hot air
in the microwave.
Freezer compartment features
Top freezer drawer
The freezer drawer can be removed.
To remove the top freezer drawer:
1. Pull out the top freezer drawer as far as possible.
2. Carefully pull out the clips on both sides and lift up the front of the freezer drawer.
3. Pull out the freezer drawer
Bottom freezer drawer
The freezer drawer can be removed.
To remove the bottom freezer drawer:
Lift the freezer drawer up and out
Ice and water dispenser
The following may be dispensed as necessary:
cooled water,
crushed ice,
ice cubes.
When switching on the appliance, note the following
The ice and water dispenser only works when the appliance is connected to the water supply. After the appliance has been switched on, it will take 24 hours before the first batch of ice cubes are ready. When the appliance is connected, air bubbles will still be in the lines. Extract the drinking water and discard until water can be dispensed without bubbles. Discard the first five glasses of water. When using the ice maker for the first time, do not use the first 30 to 40 ice cubes for reasons of hygiene.
Operating the ice maker
Once the freezer compartment has reached its freezing temperature, water flows into the ice maker and freezes into ice cubes. The ice cubes are automatically discharged into the ice cube container when they are ready. The sides of the ice cubes may occasionally stick together. They usually break away from each other as they move to the dispenser opening. Ice making switches off automatically when the ice cube container is full. The ice maker can make approximately 100 ice cubes within 24 hours when ice cubes are discharged several times during the day. As the ice cubes are being made, the sound of the buzzing water valve, the water flowing into the ice storage bin and the falling ice cubes can be heard.
Drinking water quality
All materials used in the water dispenser are odorless and tasteless.
If the water has an aftertaste, this may be caused by:
Mineral and chlorine content in the drinking water
Materials from which the domestic water line or connection line are made
Freshness of the drinking water. If water has not been dispensed for an extended period of time, the water may have a ”stale” taste. In this case, dispense approx. 15 glasses of water and discard.
The taste and smell of the water can be improved by installing the included filter cartridge at the water intake point.
Dispensing water
1. Hold an appropriate receptacle under the ice and water dispenser.
2. Keep the water dispenser button pressed until the desired amount of water is in the receptacle.
Tip: The water from the water dispenser is cooled to a palatable temperature. If you would like colder water, place ice cubes in the glass before dispensing the water.
Dispensing ice
1. Hold an appropriate receptacle under the ice and water dispenser.
2. Keep the ice cube or crushed ice button pressed until the desired amount is in the receptacle.
Ice storage bin
The ice storage bin stores a reserve supply of ice cubes the freezer compartment. The ice storage bin fits perfectly into the ice and water dispenser due to its shape.
Disconnecting the ice maker
If ice cubes will not be dispensed for more than 1 week (such as due to vacation), temporarily disconnect the ice cube maker to prevent the ice cubes from freezing together.
1. Press the release button and remove the ice cube container.
2. Press the button for 3 seconds (led lamp is off) behind the ice cube container - the ice maker is deactivated.
3. Empty and clean out the ice cube container.
4. Push the ice cube container all the way back onto the supports until it locks into position.
Reactivating the ice maker:
Press the button for 3 seconds (led lamp is on) behind the ice cube container - the ice maker is activated.
Water filter
A filter cartridge for filtering particles can be obtained from customer service. The water filter should be replaced after 6 months at the latest. After 6 months, the flashing water filter symbol prompts you to replace the filter cartridge (see ”Water filter symbol”).
Other connection requirements
Do not install the filter cartridge if the water pressure exceeds 116 psi (8.0 bar). If the water pressure exceeds 80 psi (5.5 bar), a pressure reducing valve must be installed.
Important note
Rinse the water system thoroughly if the appliance has not been used for a long period of time, or the water has an unpleasant taste or smell. To do this, extract water from the water dispenser for several minutes. Replace the filter cartridge if the unpleasant taste or smell persists.
The ice maker and water dispenser can be used without the filter cartridge. In this case, replace the water filter with the bypass cap
Installing and replacing the filter cartridge
1. Pull out and then lower the cover
2. Carefully turn the filter cartridge 90° anti-clockwise e.g. with a spoon and pull it out.
3. Take the new filter cartridge out of its packaging and remove the safety cap.
4. Insert the new filter cartridge and carefully rotate 90° clockwise as far as it will go e.g. by using a spoon.
5. Raise the cover up and lock it in place.
6. Turn on the water supply to the appliance.
7. Draw about a gallon of water from the water dispenser. This will remove air from the water system.
8. Pour out the water in the used filter cartridge. The filter cartridge can be disposed of in the household garbage.
9. Press and hold the ”light/filter” button for 3 seconds. The water filter symbol is reset. The symbol stops flashing. The new filter cartridge is activated.
Specification
* Based on the use of Cryptosporidium parvum oocysts.
Energy-saving tips
Install the appliance in a dry, well ventilated room, but not in direct sunlight and not near a heat source (radiator, stove, etc.). Use an insulating plate, if required.
Allow warm food and drinks to cool down before placing in the appliance.
When thawing frozen food, place it in the refrigerator compartment. The low temperature of the frozen products cools the food in the refrigerator.
Open and close the appliance doors as quickly as possible.
Operating noises
Normal noises
Humming - refrigerating unit is running. The fan in the circulating air system is running.
Bubbling, whirring or gurgling noises - refrigerant is flowing through the tubing or water is flowing into the ice maker. Clicking - motor is switching on or off. The solenoid valve at the water connection is opening or closing.
Rumbling - ready ice cubes from the ice maker are falling into the ice cube container.
Solving simple noise problems
The appliance is not level
Align the appliance using a level. Use the height-adjustable feet or place something under the feet.
The appliance is touching adjacent units or appliances
Move the appliance away from adjacent units or appliances.
Loose or sticking drawers, baskets or storage areas
Check the removable parts and, if required, reinsert them.
Receptacles are touching each other
Move bottles or receptacles slightly away from each other.
Defrosting
Freezer compartment
The fully automatic Nofrost system ensures that the freezer compartment remains free of ice. Defrosting is no longer required.
Refrigerator compartment
Defrosting takes place automatically. The condensation runs through the drainage hole into an evaporation pan at the rear of the appliance.
Switching off and disconnecting the appliance
Switching off the appliance
Unplug the appliance or switch off the fuse.
Disconnecting the appliance
If the appliance is not used for an extended period of time:
1. It is imperative that you disconnect the water supply to the appliance for a few hours before switching off the appliance.
2. Remove all food from the appliance.
3. Unplug the appliance.
4. Remove and dispose of the filter cartridge.
5. Empty and clean the ice cube container.
6. Clean the appliance interior (see ”Cleaning the appliance”).
To prevent odors, leave the appliance doors open.
Cleaning
Cleaning the appliance
The Vita Fresh compartments and deli drawer can be removed for cleaning.
1. Unplug the appliance or switch off the fuse.
2. Remove all food from the appliance and store in a cool location.
3. Clean the appliance with a soft cloth, using lukewarm water and a small amount of pH-balanced dishwashing liquid.
4. Rub dry when done.
5. Wipe the door seal with clear water only and then thoroughly wipe dry.
6. After cleaning, reconnect to switch on the appliance.
Cleaning the water collecting tray
Spilled water collects in the water collecting tray. Remove the strainer to empty and clean. Wipe out the water collecting tray with a sponge or absorbent cloth
Cleaning the ice cube container
Ice cubes will shrink, have a stale taste and stick together if they have not been dispensed for an extended period of time.
1. Press the release button and remove the ice cube container.
2. Empty the ice cube container and clean with lukewarm water.
3. Thoroughly dry the container and screw conveyor to prevent new ice cubes from sticking.
Inserting the ice cube container
4. Push the ice cube container all the way back onto the supports until it locks into position.
Removing special humidity filter
1. Pull out Vita Fresh drawers by approx. 4 inches (approx. 10 cm).
2. Flip up the glas plate above the Vita Fresh drawers and take them out.
3. Reach between the openings of the cover, carefully unhook the front 4 notches and pull out the cover.
4. Remove the special humidity filter.
5. Clean the special humidity filter with lukewarm water and let it dry.
6. Insert the special humidity filter.
7. Reattach the rear of the cover, move it down and make sure the front part engages.
8. Insert the glass plate and close the Vita Fresh drawers.
LED light
The appliance features a maintenance-free LED light.
These lights must be repaired by customer service or authorized technicians only
Troubleshooting minor issues
Refrigerator compartment and freezer compartment
Problem
Possible cause
Corrective action
No display on the display panel, interior light is not working, and the appliance is not working
The power cord is not plugged in.
Plug in the power cord
The fuse has blown or circuit breaker has been tripped.
Replace fuse or reset the circuit breaker. Check if electricity is present at outlet.
Power outage.
Wait until power has been restored. If necessary, contact an electrician or the utility company.
The interior light is not working
The light switch to the freezer or refrigerator compartment is sticking.
Check whether the light switch can be moved.
The LED bulb is defective.
See ”LED light”
Food is too cold.
Temperature has been set too low.
Adjust to a higher temperature.
Food is too warm.
Door will not close properly.
Align the appliance with a level. See ”Aligning the appliance”.
Check the position of the drawers and correct, if necessary
Check the door seals and foldaway door bar; if necessary, clean or correct position.
Temperature has been set too high.
Select a lower temperature.
Ventilation opening is blocked.
Remove any food blocking the ventilation opening.
Doors were opened frequently or were open for an extended period of time.
Wait until the temperature in the appliance drops.
A large amount of fresh food has been placed in refrigerator.
Fresh food must first reach the correct storage temperature.
Appliance has an unpleasant odor.
Food with a strong odor was placed in the refrigerator
Wrap up the food or place it in an airtight container.
The interior compartment is dirty
Clean the interior compartment.
Water droplets are forming on the exterior of the appliance.
Door will not close properly.
Align the appliance with a level. See ”Aligning the appliance”.
Check the position of the drawers and correct, if necessary
Check the door seals and foldaway door bar; if necessary, clean or correct position.
Humidity is too high.
This may be normal in certain regions.
Water droplets are forming inside the appliance.
Humidity is too high or doors have been opened frequently.
Do not open doors as frequently or do not keep them open too long.
The door seals are not tight.
Check the door seals and foldaway door bar; if necessary, clean or correct position.
Drawers can only be closed with great difficulty.
The drawer has not been inserted correctly
Insert the drawer correctly
The drawer rails are dirty
Clean the drawer rails.
Ice and water dispenser
Problem
Possible cause
Corrective action
The water filter symbol is flashing
The filter cartridge is old.
Replace the filter cartridge.
After replacing the filter cartridge, the water filter symbol was not reset.
Reset the water filter symbol.
The ice maker is not making enough ice cubes or the ice cubes are deformed.
The appliance or ice maker was just recently switched on
It takes approx. 24 hours before it starts making ice.
A large amount of ice has been taken out.
It takes approx. 24 hours before the ice storage bin is full again.
Water pressure is too low.
Have the water pressure checked.
The filter cartridge is clogged or old.
Replace the filter cartridge.
The ice maker is not making enough ice cubes or any ice cubes at all.
An ice cube is jammed on the arm that measures the level of the ice cube container
Remove the ice cube container and release the jammed ice cubes with a blunt plastic tool. Do not use sharp or pointy objects as this could damage the appliance.
When switching from ice cubes to crushed ice, an ice cube may become jammed inside the dispenser opening. The ice cube will begin to melt and water will drip into the ice and water dispenser.
Release the jammed ice cube from the dispenser opening using a blunt plastic tool. Do not use sharp or pointy objects as this could damage the appliance.
There is a layer of ice on the screw conveyor.
Remove and clean the ice cube container.
The ice cube container contains ice cubes that are not being dispensed.
Ice cubes are frozen to one another.
Remove and clean the ice cube container.
The ice maker is not making ice cubes.
The ice maker is switched off.
Switch on the ice maker.
The appliance is not being supplied with water
Have a qualified technician check the water connection.
The water connection line has kinks in it.
Shut off the water supply. Straighten out the kinks. Have damaged water connection lines replaced with original manufacturer parts.
Water pressure is too low.
Have the water pressure checked.
The ice cube container is not inserted correctly
Insert the ice cube container correctly
The water connection is installed incorrectly
If the water connection is not installed correctly, this can cause low water pressure and can damage the appliance.
Very little or no water is dispensed from the water dispenser.
The filter cartridge is clogged or old.
Replace the filter cartridge.
Water pressure is too low.
Have the water pressure checked
The shut-off valve is not open all the way
Adjust the shut-off valve so it is open all the way.
The water connection line has kinks in it.
Shut off the water supply. Straighten out the kinks. Have damaged water connection lines replaced with original manufacturer parts.
The dispensed water is not cold.
The appliance was just recently installed
It takes approx. 12 hours for the water to cool down.
The water has been in the lines for an extended period of time and has adjusted to the room temperature.
Fill and discard the first 15 glasses of water.
The water is cloudy.
Air or air bubbles in water
This is normal when using the water dispenser for the first time and will disappear after a short period of time
There are particles floating in the water or suspended in the ice cubes.
The first time the water flows through the filter cartridge, it may contain carbon dust from the filter cartridge.
These suspended particles are not harmful! They will disappear after a short period of time.
Suspended particles are formed by mineral deposits when water is frozen and then allowed to thaw.
These suspended particles are not harmful! This occurs naturally in the water supply
#1 How do I clean the exterior of my refrigerator / freezer?
For normal stainless steel surfaces, use mild soapy water or a stainless steel cleaner with a soft cloth. Always wipe in the direction of the stainless steel grain when washing and drying. Dry thoroughly and use a stainless steel conditioner to condition the surface. Bosch Stainless Steel Cleaning Powder and Conditioner can be purchased in the Bosch Accessories Store. Warning: Some stainless steel cleaners are known to have negative effects on materials other than stainless steel. Do not use the Bosch Stainless Steel Cleaning Powder or Conditioner on control labels, markings, black stainless steel, or appliance interiors. For black stainless steel and non-stainless steel surfaces, simply wipe down the surface with mild soapy water and a soft cloth and dry. Make sure to always wipe in the direction of the grain.
#2 How do I clean the interior of my refrigerator / freezer?
Follow these step-by-step instructions: 1. Unplug the appliance or switch off the fuse. 2. Remove all the food and store it in a cool location. 3. Remove the storage compartments, drawers, or shelves. Clean these parts with warm, mild soapy water and a soft cloth. Wipe dry with a soft cloth. 4. Clean the interior of the appliance with warm, mild soapy water and a soft cloth. Make sure the soap does not get into the lights or run into the evaporation tray through the drain hole. Wipe dry with a soft cloth. 5. Wipe the door seal with water and a soft cloth. Then, thoroughly dry with a soft cloth.
#3 How do I clean the tray under the water dispenser?
Follow these step-by-step instructions: 1. Remove the grate. 2. Remove the water that has collected in the tray with a sponge or an absorbent cloth. 3. If desired, disinfect the tray with a pH-balanced dishwashing liquid and wipe dry when finished.
#4 What cleaners can I use to clean my refrigerator / freezer?
You can use warm, mild soapy water and a soft cloth to clean your refrigerator / freezer. Do not use cleaners that are flammable, acidic, or chlorine-based. Abrasive cleaning pads or sponges should also be avoided since they may scratch the surface.


 ”quick ice” Appears when the ”quick ice” function is on.
 ”Light” Appears when the ice and water dispenser light is on.
 ”Water filter” Displays the status of the filter cartridge.
 ”Panel lock” Appears when the panel lock is on.


 Up to two months.
 Up to four months.
 Up to six months.
 After six months, the symbol flashes. Replace the filter cartridge.