Loading ...
Loading ...
Loading ...
45 mm
.
560 mm
.
N
L
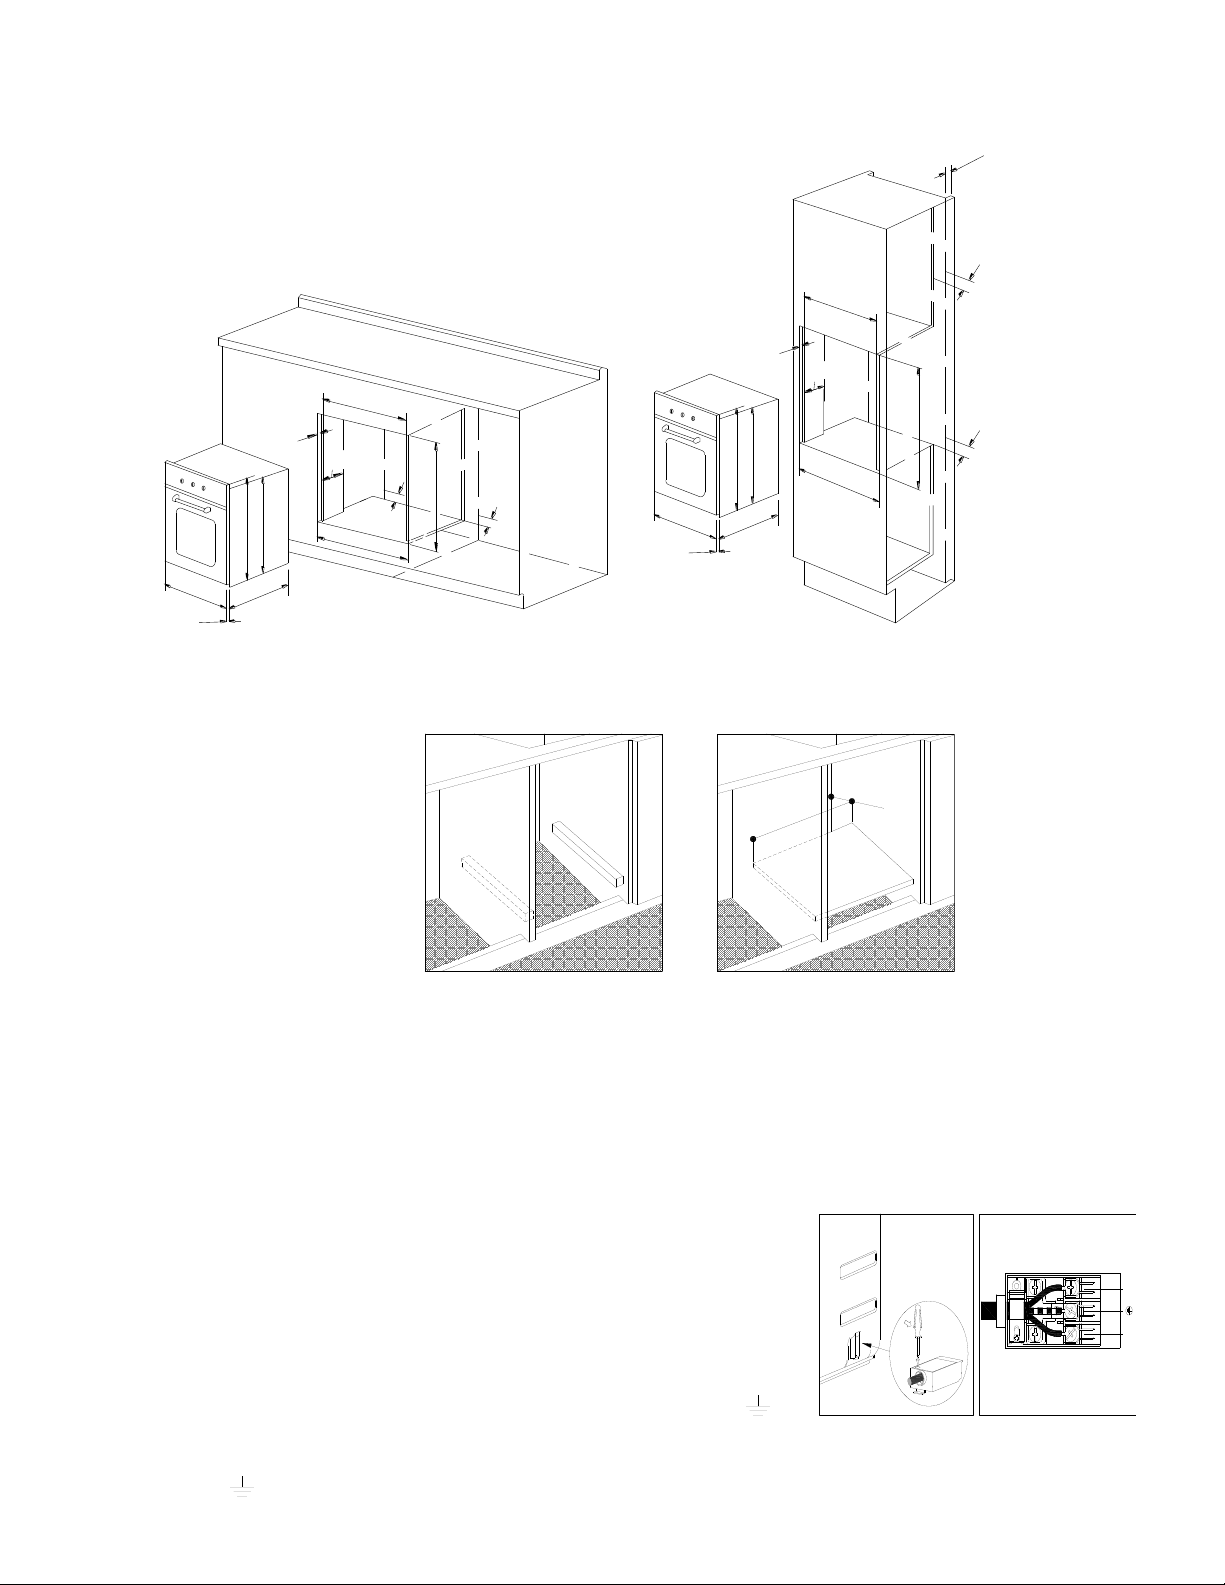
N. B :Installation in compliance with the consumption declaration
In order to ensure adequate ventilation ,the back panel of the cabinet unit must be removed .Installing the oven
so that it rests on two strips of wood is preferable .If the oven rests on a continuous ,flat surface ,there must be an
aperture of at least 45×560mm .
The panels of the adjacent cabinets must be made of heat-resistant material .In particular ,cabinets with a veneer
exterior must be assembled with glues which can withstand temperatures of up to 100℃.
In compliance with current safety standards, contact with the electrical parts of the oven must not be possible
once it has been installed.
All parts, which ensure the safe operation of the appliance, must be removable only with the aid of a tool.
To fasten the oven to the cabinet, open the door of the oven and attach it by inserting the 4 wooden screws into
the 4 holes located on the perimeter of the frame.
Electrical Connection
Those ovens equipped with a three-pole power supply cable are designed to operate with an alternating
current .The wire for earthling the appliance is yellow-green in color.
Fitting on a Power Supply Cable
Opening the terminal board:
· Using a screwdriver ,prize the bolt on the side tabs of the
terminal board cover ;
· Unscrew the bolt, pull open the cover of the terminal board .
To install the cable, proceed as follows:
· Remove the wire clamp screw and the three contact screws L-N -
· Fasten the wires beneath the screw heads using the following color scheme :Blue (N) Brown (L)
Yellow-Green
595
595
565
22
595
565
595
200MIN
22
200MIN
45min
45min
45min
45min
45min
594
594
545
567.5
21
594
594
545
567.5
21
Loading ...
Loading ...