Loading ...
Loading ...
Loading ...
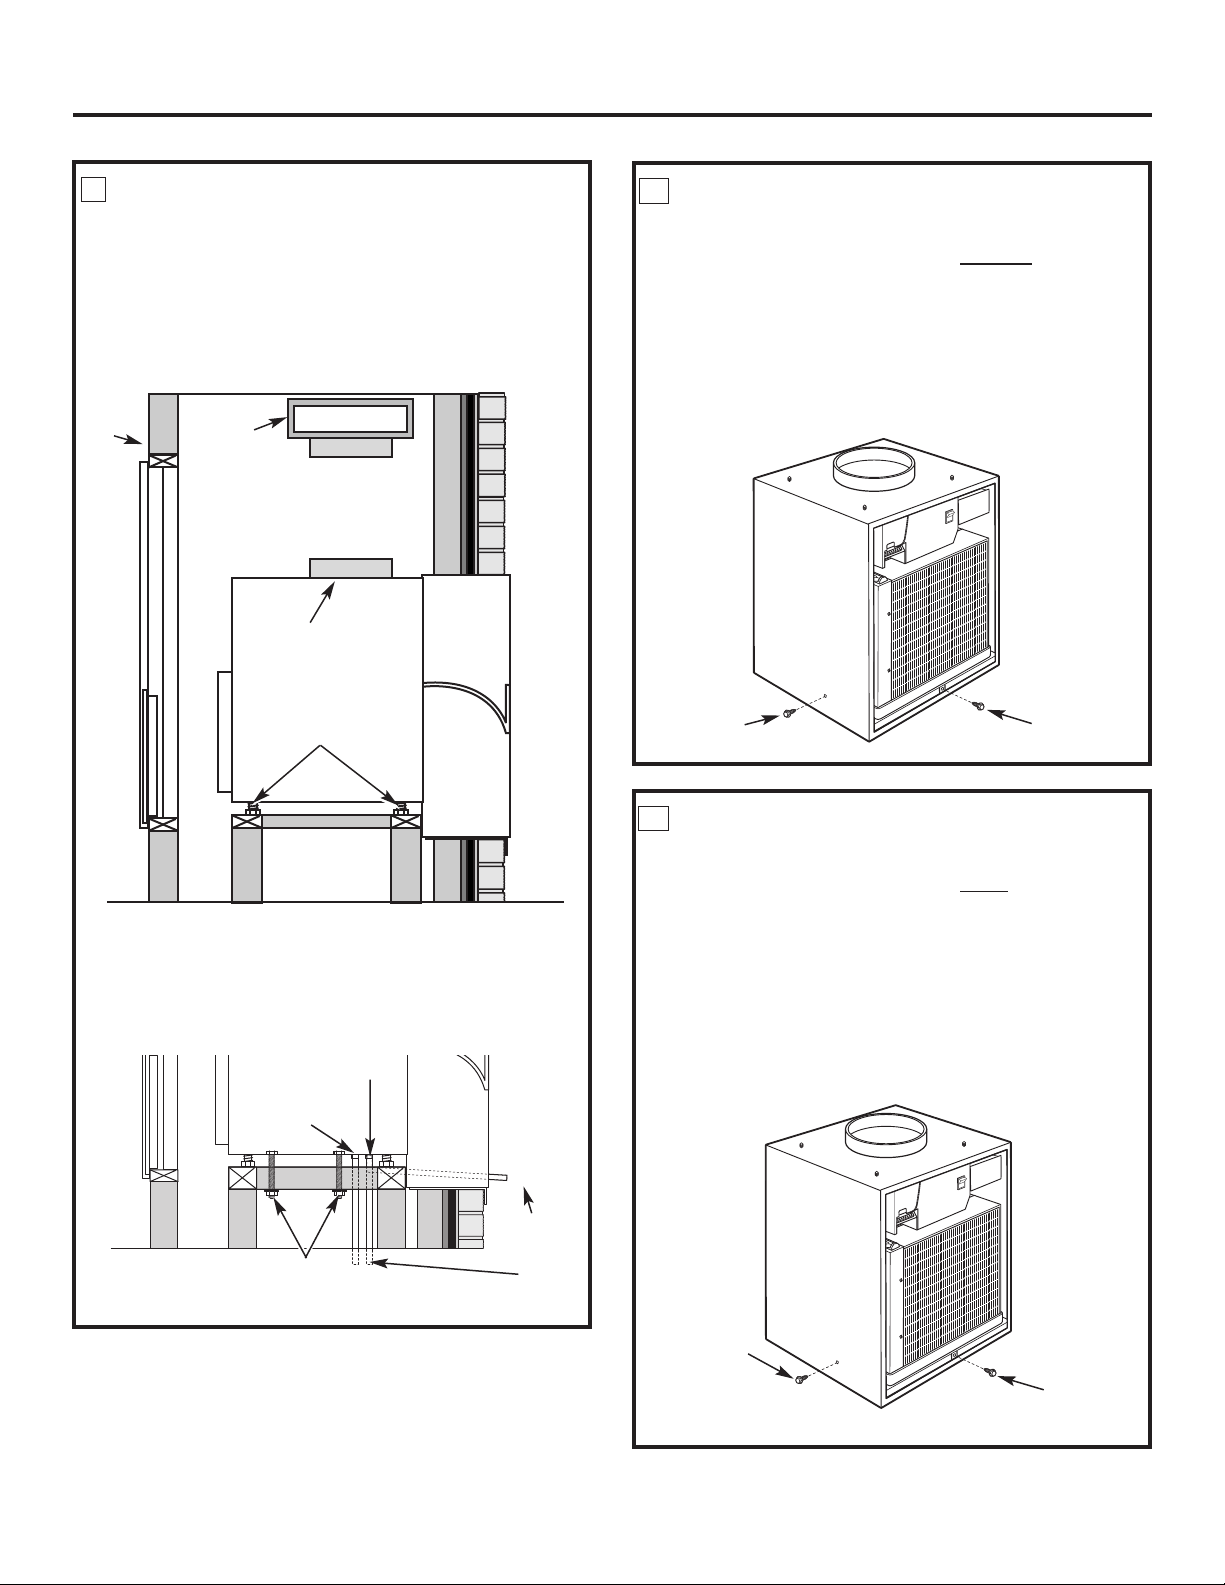
INSTALL AND CONNECT THE CASE
1. Remove the front case panel and pull
the unit out of the case. Place the empty case onto
the platform in the closet with the outdoor side facing
the wall plenum opening. Align the case with plenum
opening and attach with six field-supplied sheet metal
screws (corrosion-resistant screws recommended).
2. Adjust all four leveling legs until the case is level.
3. Using field-supplied screws, bolt the case
to the platform.
4. Connect the internal or external drain(s) as necessary.
4
Installation Instructions
INSTALL AND GROUND
THE UNIT TO THE CASE
UNIT INSTALLED THROUGH FRONT OF CASE
1. Slide the back of the unit into the case. Push the unit
all of the way into the case until it stops.
NOTE: Either of the case sides may be removed
to enable the unit to be slid into the case.
2. Ground the unit to the case by installing the front
case-to-unit hex-bolt and/or case-to-unit side screw.
5a
Hex bolt
Air
discharge
outlet
Rigid
ductwork
Inside
wall
20
Primary female
drain fitting
3
⁄4″
Leveling legs
INSTALL AND GROUND
THE UNIT TO THE CASE
UNIT INSTALLED THROUGH SIDE OF CASE
1. Slide the side of the unit into the case. Push the unit
all of the way into the case until it stops.
NOTE: Either of the case sides may be removed
to enable the unit to be slid into the case.
2. Attach the case side panel to the main case.
3. Ground the unit to the case by installing the front
unit-to-case hex-bolt and/or case-to-unit side screw.
5b
Side screw
Hex bolt
Side screw
(may be
installed on
either side)
External
drain
OR
Internal
drain(s)
Bolt case to
platform
Secondary
3
⁄4″ drain
option. If not used,
seal with a MNPT plug
NOTE: Piping is not
supplied with the unit.
Obtain locally.
Loading ...
Loading ...
Loading ...