Loading ...
Loading ...
Loading ...
4
ENGLISH
NAME OF EACH PART
■ Remote Control
● Remote Control Signal.
• Make sure it is not obstructed.
• Maximum distance : 10 m (32.8 ft.).
• Signal received sound.
One short beep or one long beep.
● Notes for Remote Control.
• Do not throw or drop.
• Do not get it wet.
• Certain type of fluorescent lamps may affect
signal reception. Consult your dealer.
CHECK
TEMP
AUTO
ON
OFF
AUTO DRY FAN
F
COOLCOOL
FAN
AUTO
RESET CLOCK
MODE
SLEEP
ECONOMY
FAN SPEED
AIR SWING
OFF
CANCEL
ON
SET
1
2
3
TIMER
OFF/ON
POWERFUL
AUTO
MANUAL
#
!
$
%
^
$
*
&
3
5
8
7
9
0
6
4
(
2
1
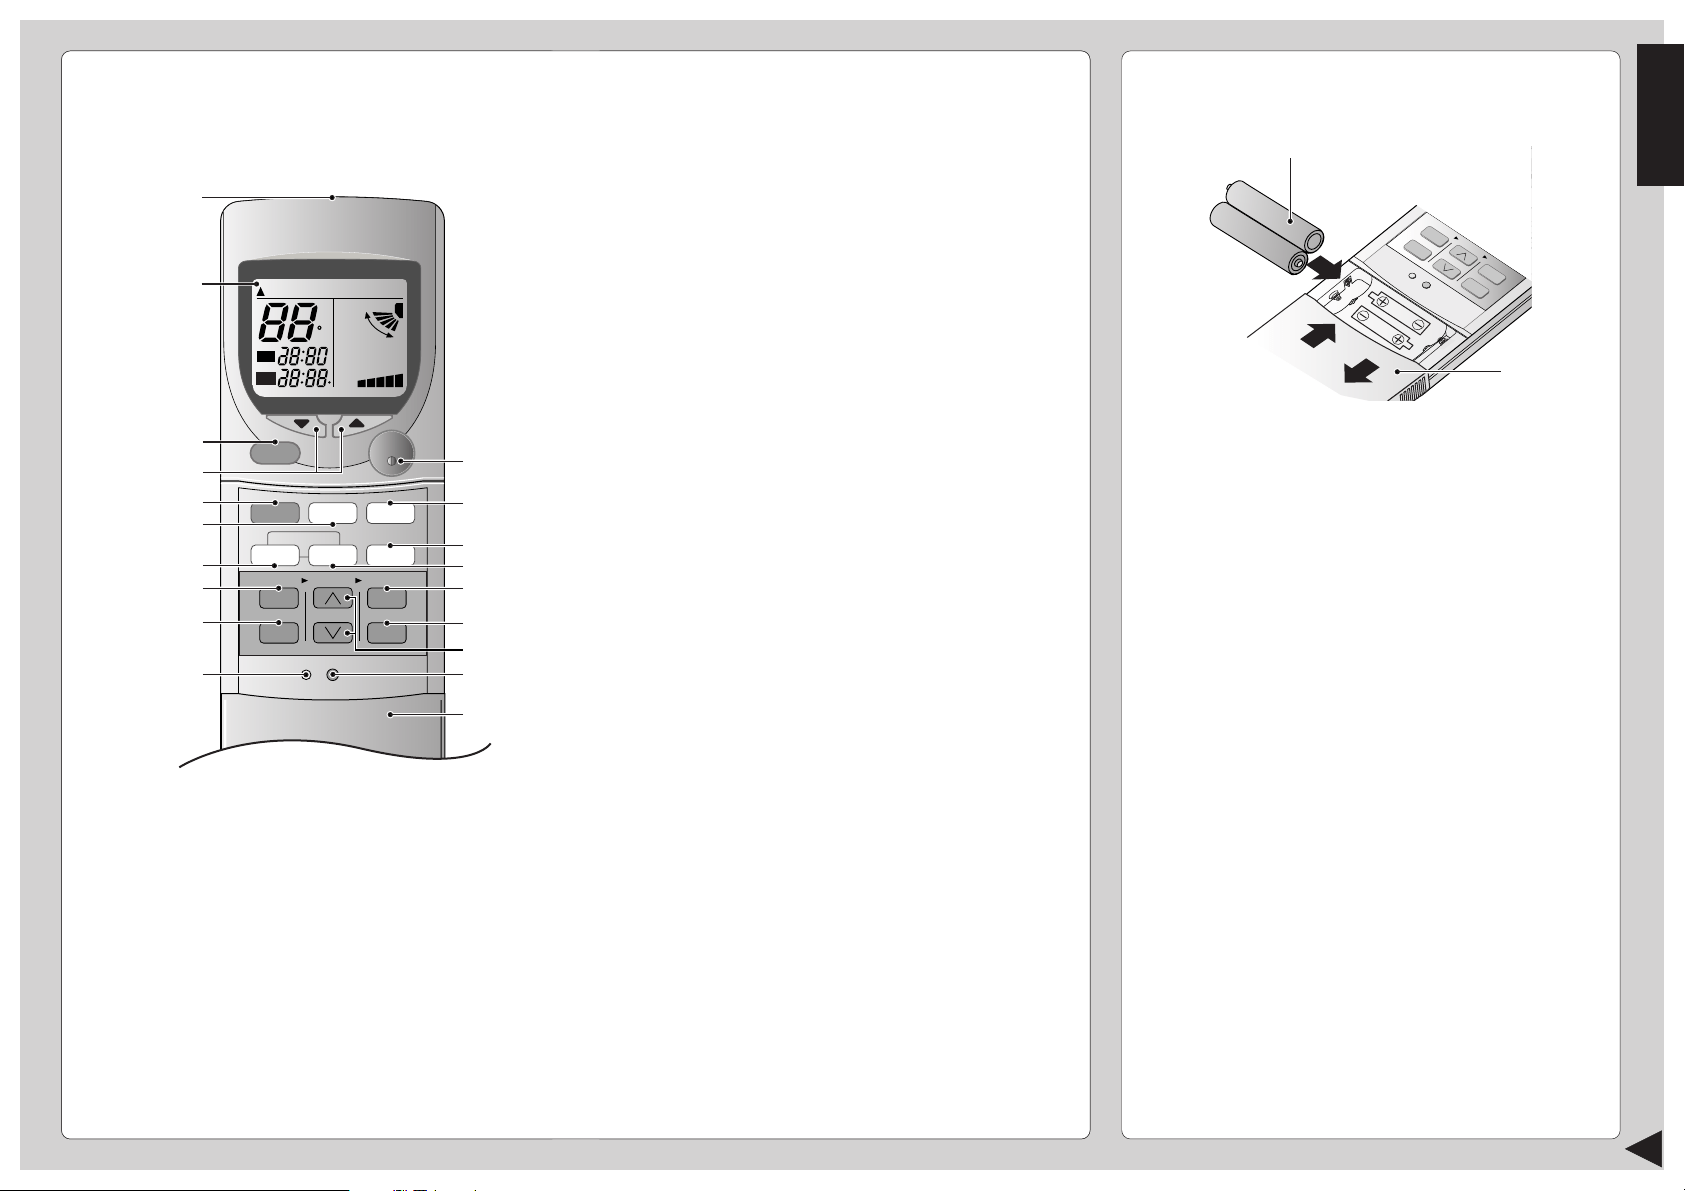
● How to Insert the Batteries
1 Slide down the remote control cover completely
2 Insert the batteries
– Be sure the direction is correct
– 12.00 at display - flashing
• Set the current time (CLOCK) immediately to
prevent battery exhaustion.
● About the batteries
• Can be used for approximately one year.
● Observe the following when replacing the
batteries
• Replace with new batteries of the same type.
• Do not use rechargeable batteries (Ni-Cd).
• Remove the batteries if the unit is not going to be
used for a long period.
1 Signal Transmitter
2 Operation Display
3 Powerful Mode Operation Button
4 Room Temperature Setting Button
(self-illuminating button)
5 Operation Mode Selection Button
6 Economy Mode Operation Button
7 Auto Airflow Direction Button
8 ON-Timer Button
9 OFF-Timer Button
0 Reset Point
(Press with fine-tipped object to clear the memory)
! OFF/ON Button
(self-illuminating button)
@ Sleep Mode Operation Button
# Fan Speed Selection Button
$ Manual Airflow Direction Selection Button
% Timer Set Button
^ Timer Cancellation Button
& Time-Setting Button
* Clock Button
( Remote Control Cover
CHECK
AUTO
OF
AUTO HEAT
DRY
FANCOOL
FAN
AUTO
AUTO
RESET
CLOCK
AIR SWING
OFF
CANCEL
1
2
3
TIMER
PO
W
ERFU
L
AUTO
MANUAL
ECONOMY
SLE
ON
SET
FAN SPEED
MODE
2
1
1.5V
1.5V
Loading ...
Loading ...
Loading ...