Loading ...
Loading ...
Loading ...
8
First use
Important!
Some models only have some of the features and accessories listed above. For information on accessories,
contact Customer Care.
Before using your new oven for cooking or baking, please:
1
Read this user guide, taking special note of the ‘Safety and warnings’ section.
2
Remove all accessories and packaging. Make sure you peel any protetctive film off the surfaces.
Discard the film immediately, keeping it out of reach of children.
3
If your model has side catalytic panels and sliding shelf supports, check that these are fitted. If
they aren’t, see ‘Care and cleaning’ for instructions.
4 Depending on your model, set manual mode (models with analogue timer) or set the clock
(models with electronic clock). The oven will not work until this has been done.
For models with analogue timer, see ‘Oven controls and setting manual mode’ for
instructions.
For models with electronic clock, see ‘Oven controls and setting the clock’ for
instructions.
5
Slide in the shelf/shelves and grill tray as shown in ‘Using your oven’.
6
Condition the oven. Heat it on maximum temperature for the times below:
60 minutes using
Bake
30 minutes using Fan Forced
15 minutes using
Grill
Note: some of these functions may not be available in some models.
There will be a distintcive smell during the conditioning. This is normal, but make sure your
kitchen is well ventilated.
7
Once cooled, wipe out the oven with a damp cloth and mild detergent, and dry thoroughly.
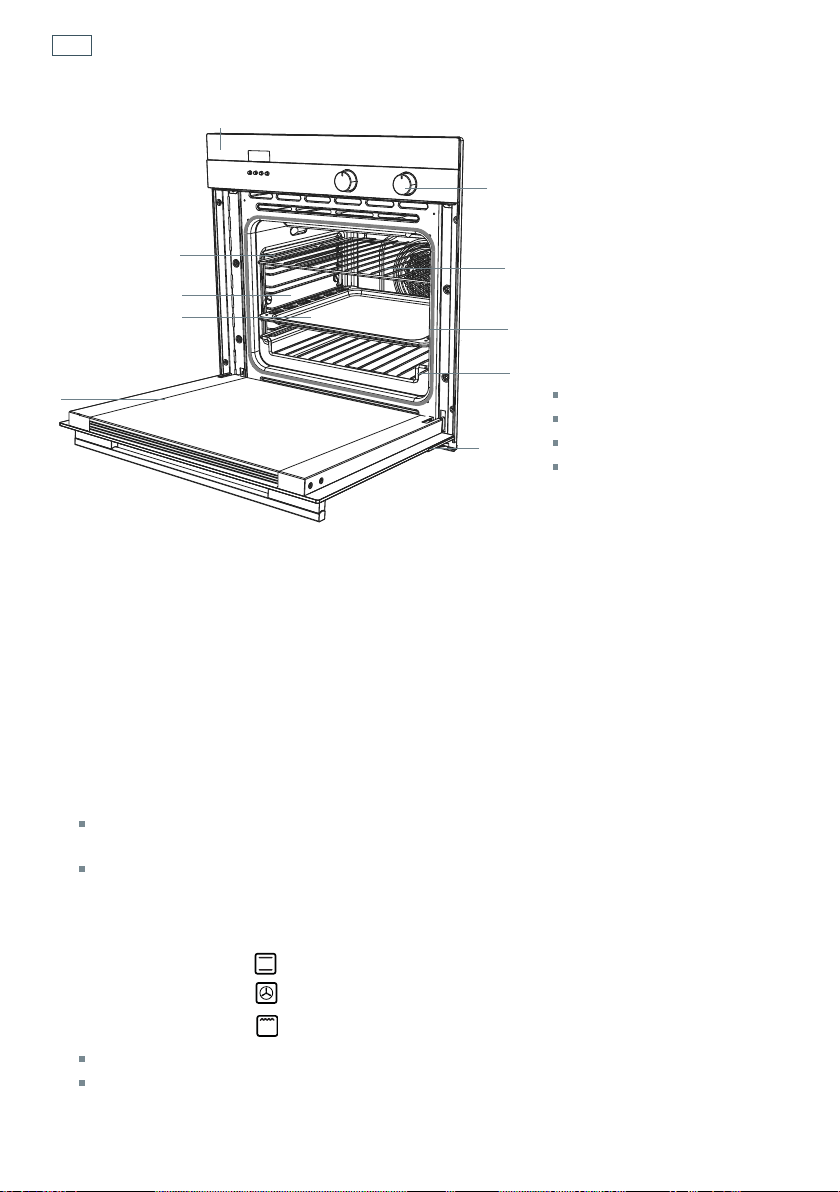
Fig. 10 Oven parts
(ovens vary – drawing for purposes of illustration only)
1
Control panel
2
Knobs
3
Side rack
4
Grill tray
5
Oven door and handle
6
Step-down oven shelf
7
Flat oven shelf
8
Side catalytic panel
9
Rubber seal
Not illustrated:
Sliding shelf supports
Fat filter
Grill rack
Baking tray
2
2
6
9
7
3
4
8
5
1
Loading ...
Loading ...
Loading ...