Loading ...
Loading ...
Loading ...
9
Complete Preparation
For Vented installations only:
1. Determine and make all necessary cuts in the ceiling for
the vent system. Install the vent system before installing
the hood. See “Venting Requirements” section.
2. Using a jigsaw or keyhole saw , cut a 6½" (16.5 cm) diameter
hole in the ceiling for the vent duct.
3. Install the vent duct through the hole in the ceiling.
4. Connect the flexible vent section to the vent system.
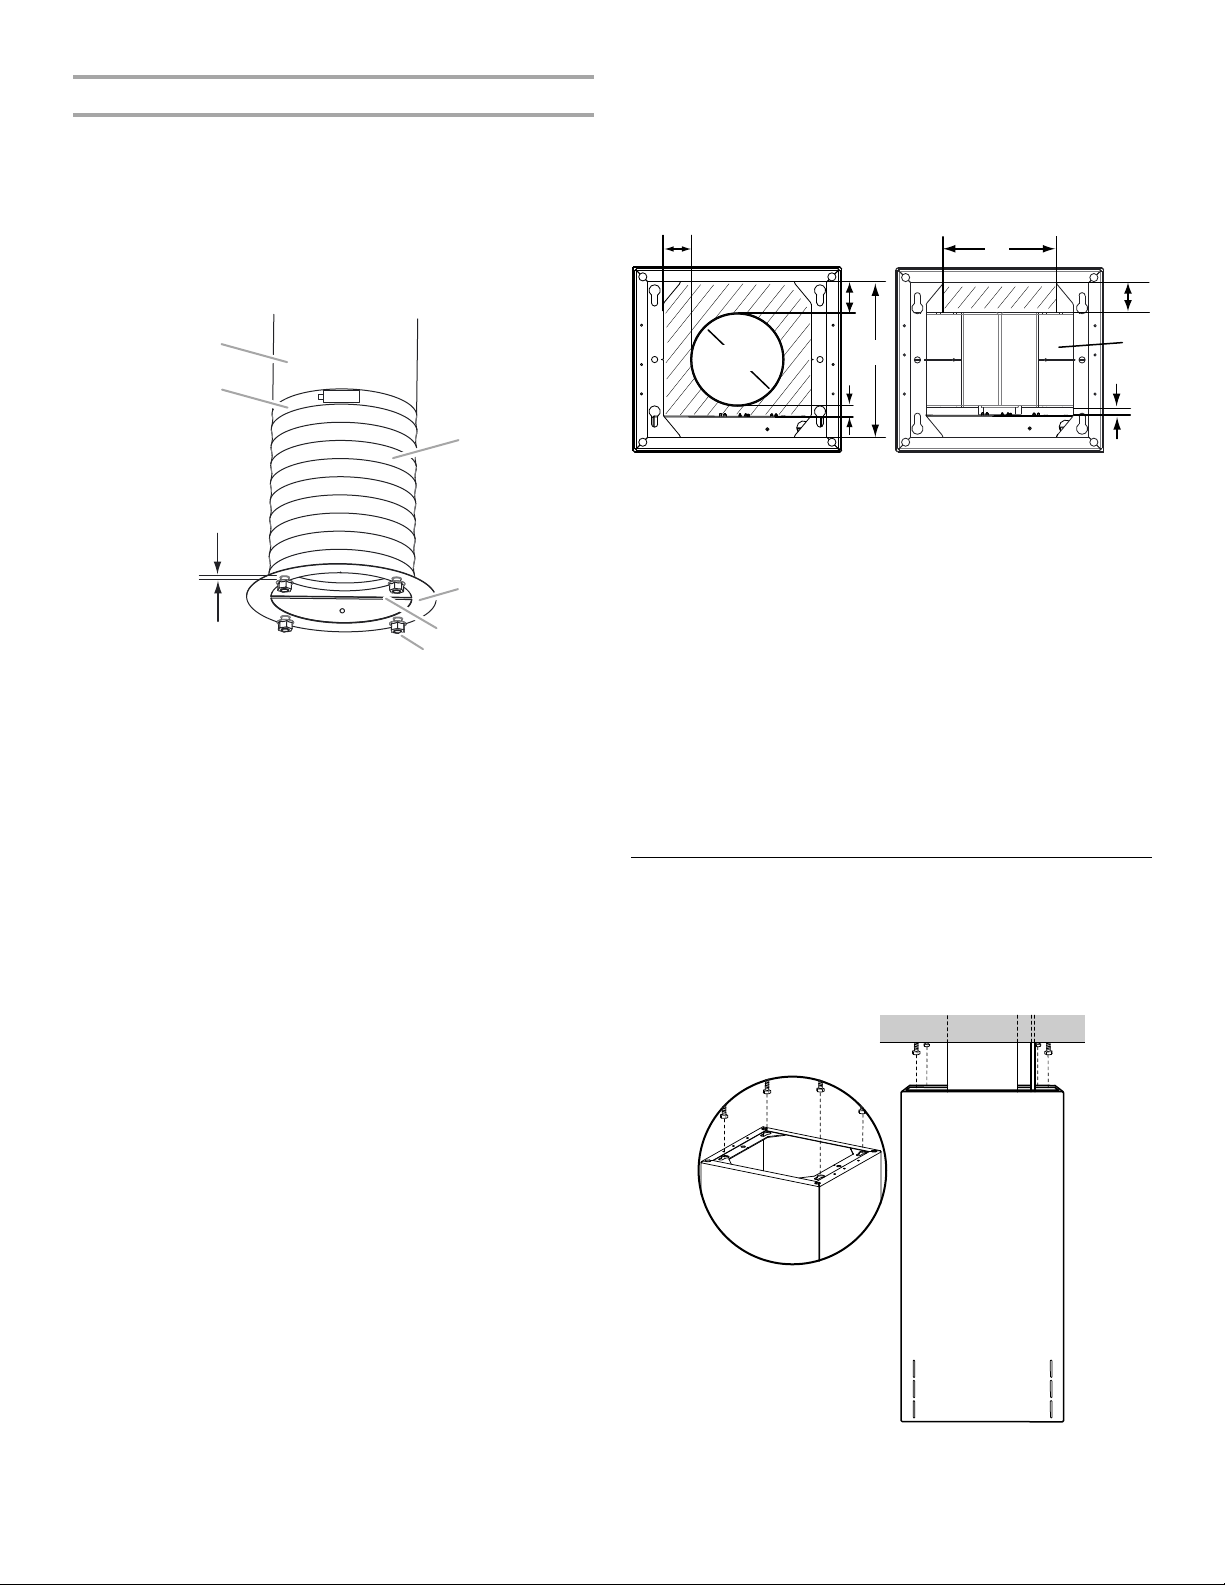
NOTE: Mounting boss handle must be parallel with the front
of the range hood to align the mounting studs with the half
slots in the module top cover plate.
For Vented and Non-Vented installations:
1. Expand the flexible section of vent duct (supplied) to
approximately 12" (30.5 cm) to 24" (61.0 cm) depending
on the ceiling height.
NOTE: For ceiling heights above 9' (2.7 m), additional 6"
(15.2 cm) round duct (not supplied) will be required.
2. Loosen the four nuts on the mounting boss. (The back flange
of each nut should be approximately ³⁄₁₆" [5 mm] from the
face of the mounting boss.)
3. Secure all connections with vent clamps.
4. Determine the required location in the ceiling for the
home power supply cable and drill a 1¼" (3.2 cm) hole
at this location.
Top View:
Use flexible wiring. Crosshatch is the open area available for
wiring access in the ceiling within the upper chimney area.
5. Run the home power supply cable according to the National
Electrical Code or CSA Standards and local codes and
ordinances. There must be enough flexible wiring from the
fused disconnect (or circuit breaker) box to make the
connection in the hood’s electrical terminal box.
NOTE: Do not reconnect power until installation is complete.
6. Use caulk to seal all openings.
Install Range Hood
1. Slip the upper chimney cover over the assembled vent duct
and electrical outlet and slide it to the ceiling. Align the large
end of the keyhole slots in the top of the upper chimney cover
up over the nuts and then slide it into the smaller slot section
on the keyhole slots.
2. Using the ½" (13 mm) special tool (supplied) or a ½" (13 mm)
socket and driver with 24" of extensions, tighten the nuts to
fasten the upper chimney cover section to the ceiling.
A. 6" (15.2 cm) flexible metal duct
B. Mounting boss
C. Mounting boss handle
D. Mounting studs and nuts (4)
E.
³⁄₁₆
" (5 mm)
F. Ve nt c lam p
G. 6" (15.2 cm) round vent
system duct
A
B
C
D
E
F
G
Vented Installation: Non-vented (recirculating)
Installation:
A. 1
¹¹⁄₁₆
" (4.3 cm)
B. 1
¹³⁄₁₆
" (4.8 cm)
C. 9
⁷⁄₈
" (24.9 cm)
D.
⁵⁄₈
" (1.5 cm)
E. Electrical box
F. Front of range hood
G. 6" (15.2 cm) round duct
A. 7" (17.8 cm)
B. 1½" (3.8 cm)
C.
⁵⁄₈
" (1.5 cm)
D. Air deflector
E. Electrical box
F. Front of range hood
A
B
C
D
F
E
G
A
B
C
D
F
E
Loading ...
Loading ...
Loading ...