Loading ...
Loading ...
Loading ...
4 | USING THE FOOD GRINDER ATTACHMENT
ASSEMBLING THE FOOD GRINDER ATTACHMENT
Before first use, clean all parts and accessories (see “Care and Cleaning” section).
USING THE FOOD GRINDER ATTACHMENT
GUIDE TO GRINDING
NOTE: None of the parts and accessories of this KitchenAid
®
Food Grinder attachment (model
KSMFGA) are compatible with the parts and accessories of the KitchenAid
®
Metal Food
Grinder Attachment or previous KitchenAid
®
Food Grinder Attachment (models KSMMGA,
FGA, SSA, FVSP, FVSFGA, FPPA, KSMFPPA, GSSA, KSMGSSA, KN12AP) and vice versa.
USE THESE PARTS
WITH THESE
PARTS
SUGGESTED
USES
SPEED
Fine (4.5 mm) Grinding
Plate
Blade
Cooked meats for spreads, hard
cheeses (e.g. Parmesan), bread
crumbs).
4
Coarse (6 mm) Grinding
Plate
Blade
Raw meats for burgers and chili,
vegetables for salsas and sauces
4
1
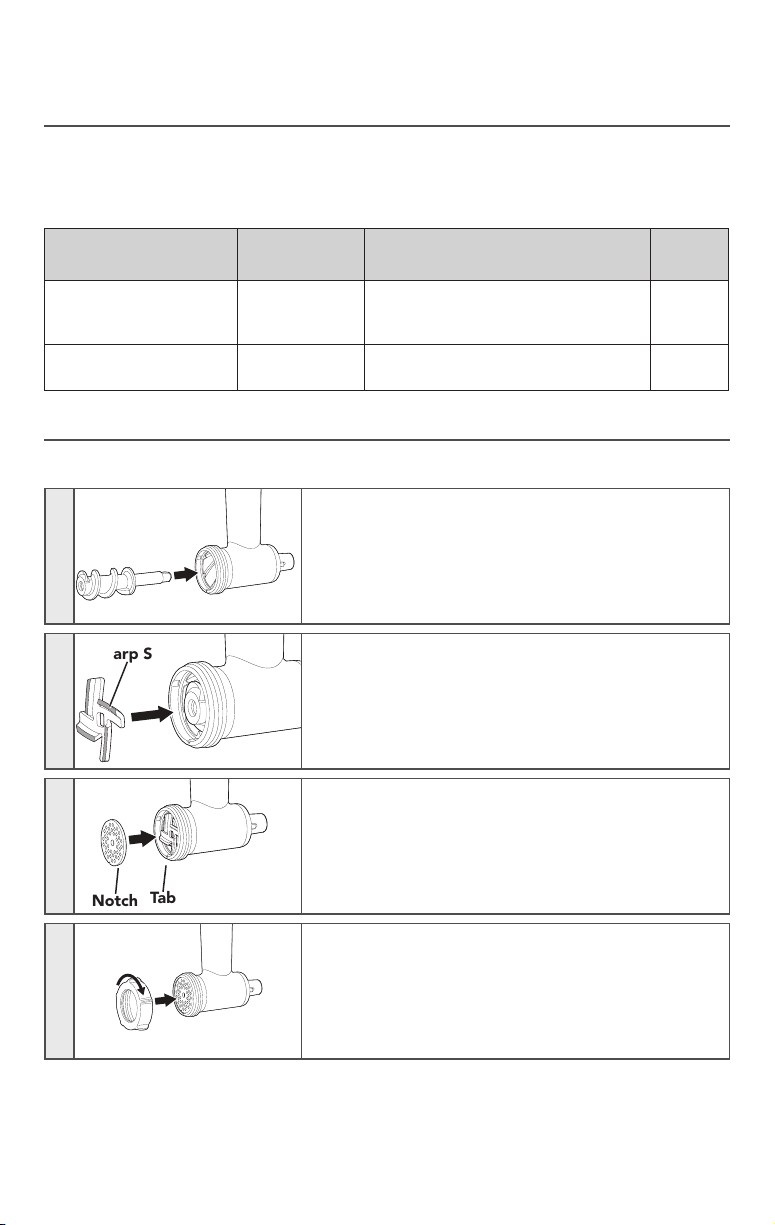
Insert the Grind Screw into the Main Housing.
2
Place the Blade over the end of the Grind Screw.
The Blade should fit entirely inside the Housing. If it
doesn’t, pull it off, turn it over, and place it again.
IMPORTANT: Make sure the sharp side of the Blade is
facing out.
3
Place the desired Grinding Plate over the Blade,
matching the notch of the plate with the tab on the
bottom of the Main Housing.
4
Place the Collar on the Main Housing, turning
clockwise by hand until secured but not tightened.
Tab
Notch
Sharp Side
Loading ...
Loading ...
Loading ...