Loading ...
Loading ...
Loading ...
16 17REMOVING FEATURES TEMPERATURE CONTROL
Drawers fitted with telescopic slides
To remove the drawer for cleaning.
1. Empty food from the drawer.
2. Remove the drawer by pulling it forward and lifting
the front to unhook it from the slides. Once you have
removed the drawer, ensure the slides are pushed
back so they are fully closed.
WARNING
WARNING
Never close the door while the telescopic slides are
extended. This may damage the slide and/or refrigerator
or cause the slide to become disengaged from the
refrigerator.
To replace the drawer:
1. Ensure the telescopic slides are pushed in all the way.
2. Slide the drawer into place over the slides and push
the bin in until it stops.
3. Drop drawer into position.
Freezer bottom bin
To remove the bin, pull the drawer out until it is open all
the way then lift bin out from the front of the bin. When
refitting insert the rear of the bin first then lower into
position.
When replacing the bins after cleaning, we recommend
fitting the lower bin first.
WARNING
CAUTION
Never close the door while the telescopic slides
are extended. It may damage the slide and/or the
refrigerator or cause the slide to become disengaged
from the refrigerator.
TEMPERATURE CONTROLREMOVING FEATURES
The factory default settings;
Top mount
Refrigerator Mid
Freezer Mid
Bottom mount & French door
Refrigerator 3°C
Freezer -18°C
All Refrigerator Mid
All Freezer -18°C
If you want to change the temperature, follow the
instructions in the section about the user interface for
your model. Ensure that you make only small adjustments
and wait 24 hours to see if it’s correct to your liking.
TIPS & INFORMATION
IMPORTANT
NOTE: When you set a temperature, you set an average
temperature for the whole refrigerator cabinet.
Checking the softness of ice cream is a good indication
that your freezer is the right temperature, while checking
the temperature of water kept in the refrigerator is a
good way of checking the temperature of the food
compartment.
Temperatures inside each compartment may vary,
depending on how much food you store and where you
place it.
High or low room temperature may also affect the actual
temperature inside the refrigerator.
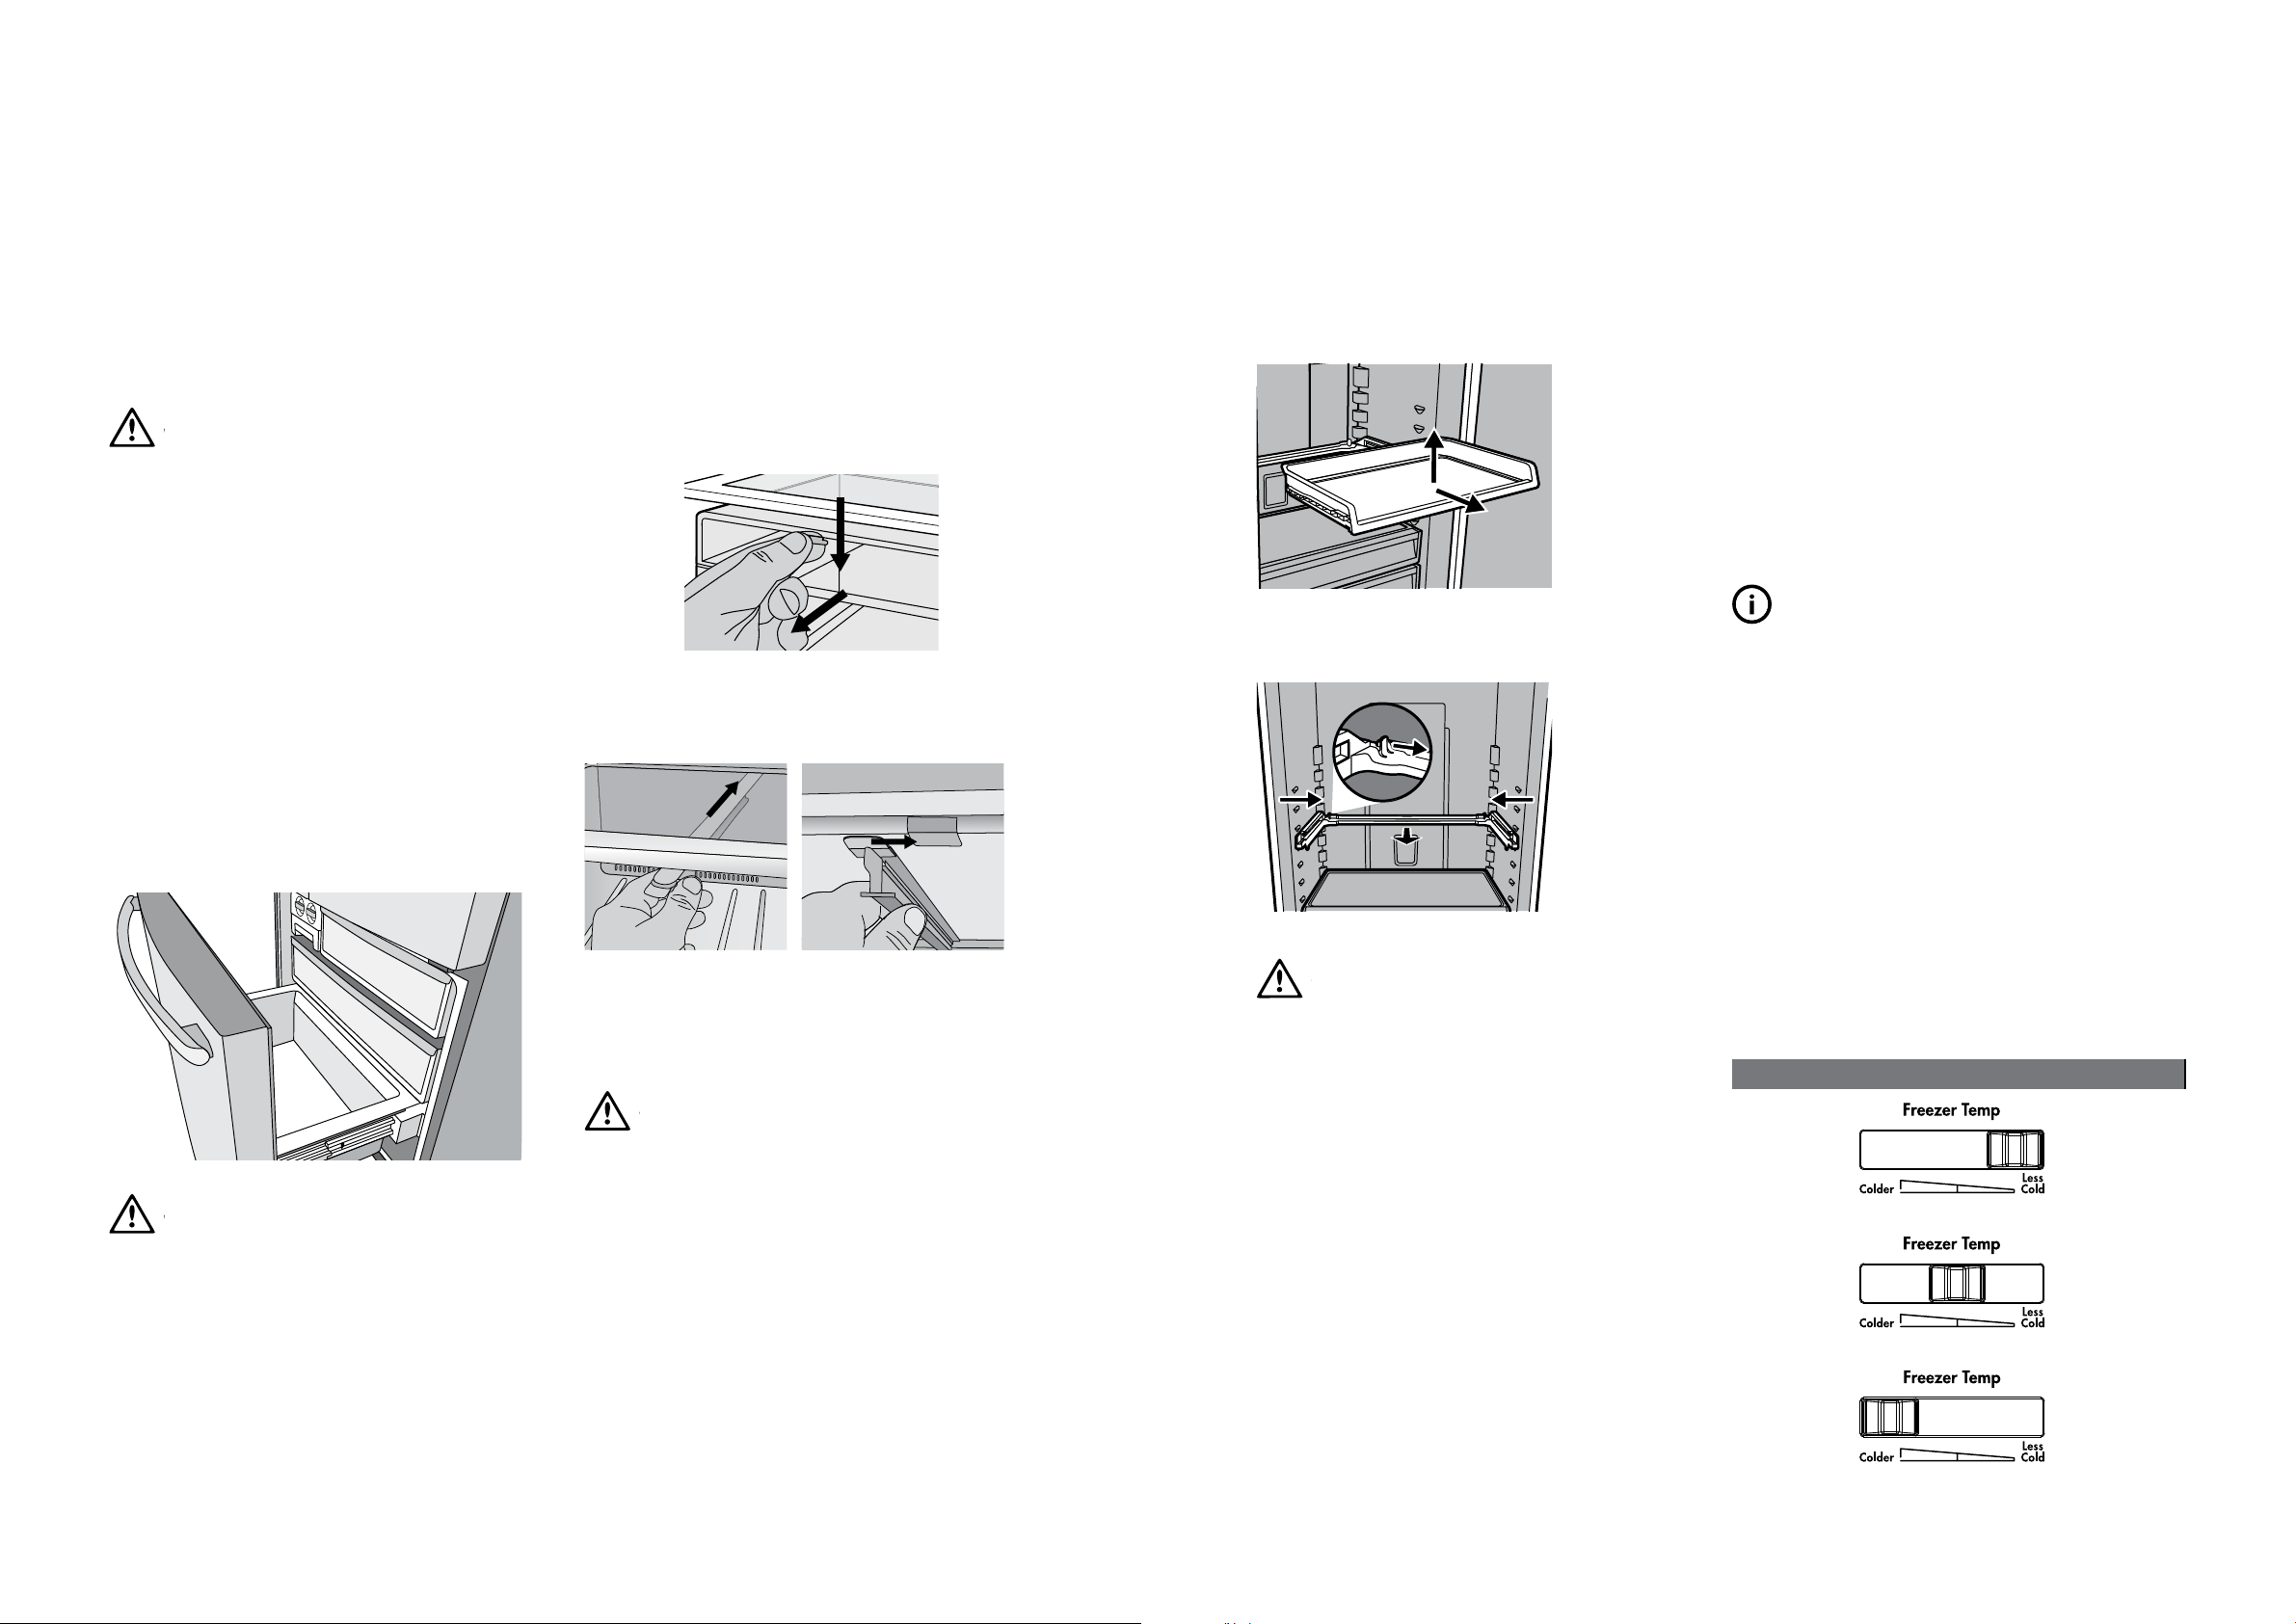
Top mount freezer temperature adjustment
1. Select the freezer control.
2. Slide the control to the right (as per image below).
3. Slide the control to the left (as per image below).
Set to less coldSummer (>35°c)
Normal
Winter (<15°c) Set to colder
FREEZER TEMPERATURE SETTING RECOMMENDATION
Twist and Serve Ice
Mounting the twist & serve dispenser to the other side of
the freezer.
NOTE: this is only possible on Top mount models.
1. Remove the ice bin and ice cube tray. If the ice tray
assembly is frozen to the carriage, simply squeeze
the tray and shelf together to break the ice.
2. Before you remove the ice carriage, remember to
disengage it from the glass shelf as it may result in
damage to the assembly.
3. Remove the centre runner by disengaging it at the
front of the shelf, and removing it from the rear.
4. Refit the runner into the rear of the shelf on the right
hand side and then engage the front.
Insert into the slot at the rear
of the shelf
Then engage into the front of
the shelf
5. Fit the carriage by sliding it into the runners until the
front if the carriage engages with the shelf.
6. Refit the ice tray and ice bin.
WARNING
WARNING
Fill the ice cube tray with potable water only.
Pullout shelf
To remove shelf:
1. Extend the tray fully outward.
2. Lift the tray up gently and then pull forward to
remove the tray from the frame.
To remove the frame:
1. Push the rear tabs gently inwards on both sides of
the frame, pull the frame towards you to remove.
WARNING
CAUTION
LED lighting
Your appliance is fitted with long life LED lighting. In the
unlikely event the LED lights should fail, then the LED
lights should be serviced by the manufacturer.
Refer to the warranty page for contact details.
Loading ...
Loading ...
Loading ...