Loading ...
Loading ...
Loading ...
18 INSTALLATION
CAUTION
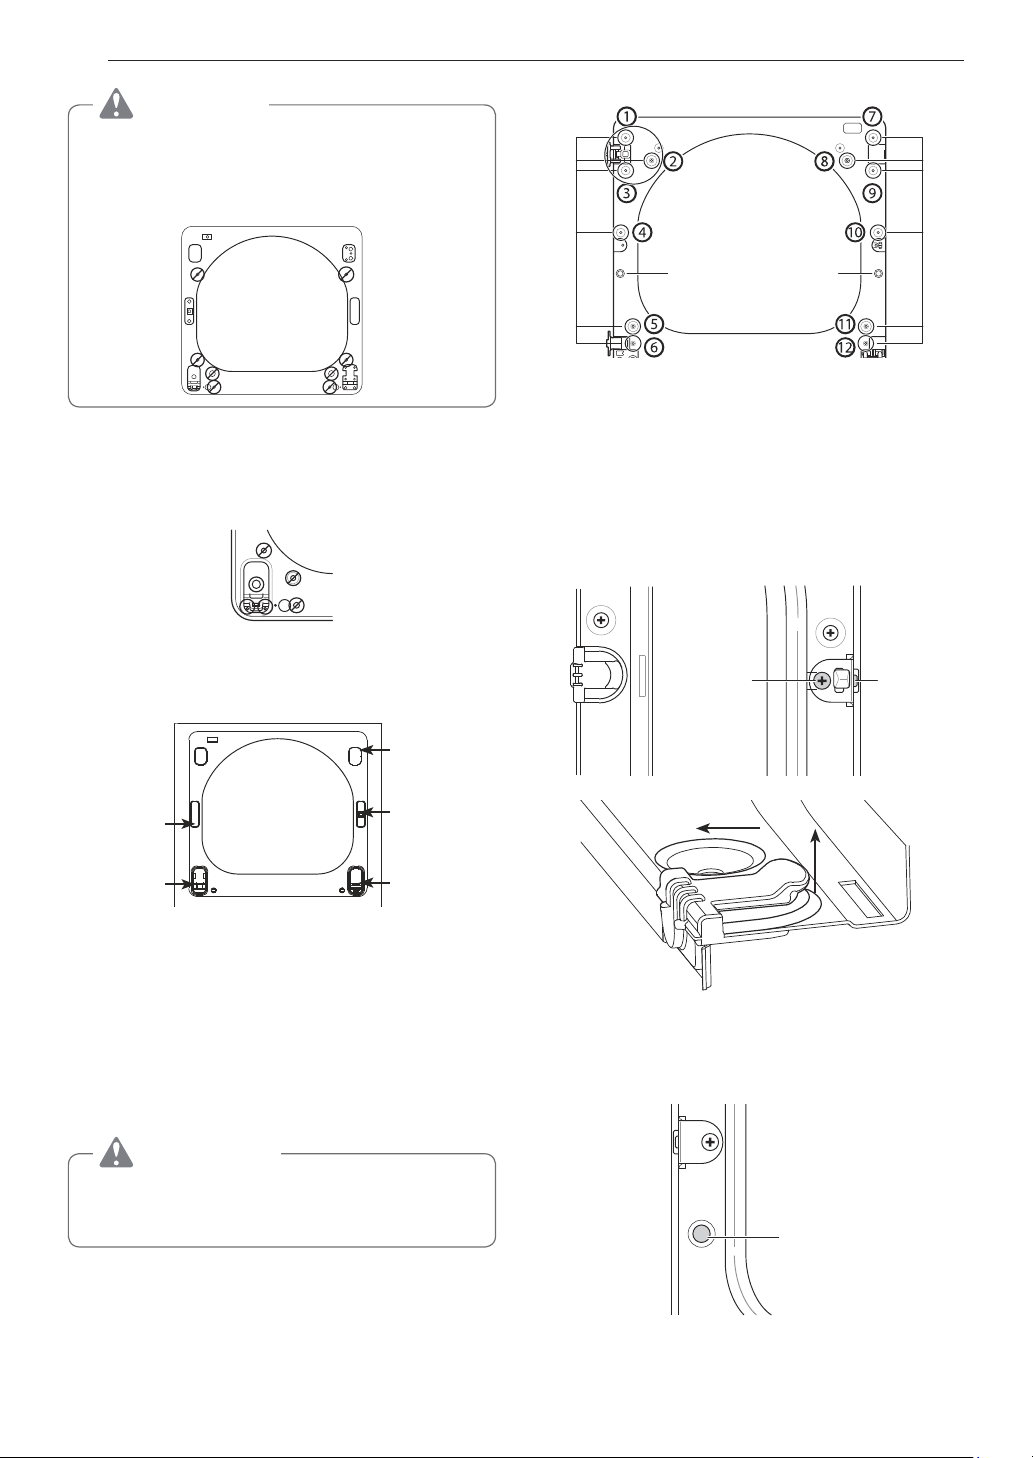
Do NOT remove any of the eight screws on the
face of the cabinet (marked below). Doing so
could result in damage to the dryer and the need
for a service call to repair the dryer.
e. Remove the three screws on the hinge at the
bottom left. Remove the hinge and reinstall it
on the right side. The top screw will occupy
the hole where you removed the screw behind
the hinge bracket in step d.
f. Install the hinge bracket removed in step d on
the bottom left side, first installing one screw
behind the hinge bracket.
hinge
cover
hinge
bracket
latch hole
cover
latch
mechanism
hinge
Cabinet Reversal complete
ON THE DOOR:
4
Lift off the door cover.
With the door laid inside facing up on a protected
surface, remove the twelve screws on the
inside of the door. (The two bottom screws wil
be different from the rest.) Carefully lift off the
door cover with the help of a small flat blade
screwdriver inserted in the upper left corner.
WARNING
The edges of the door cover may be sharp. Take
care when handling, or wear gloves to avoid
injury.
Hole
plug
Twelve screws
Side
Interlock
button
5
Switch the door strike and the blank cover.
Remove the two screws on the door cover that
secure the door strike.
Switch the door strike and the blank cover,
installing them on the opposite sides from which
they were removed.
It may be difficult to insert the two screws in the
door strike on the opposite side. Use a cordless
screwdriver if necessary.
Long
screw
Short
screws
Blank cover Door strike
Pull
Raise
Remove blank cover
Gently pry out the hole plug on the side of
the door cover and install it in the hole on the
opposite side.
Hole
plug
Set the door cover aside.
Loading ...
Loading ...
Loading ...