Loading ...
Loading ...
Loading ...
20 49-60814 Rev. 1
Installation Instructions
INSTALLATION INSTRUCTIONS
STEP 3 INSTALL WATER LINE
WARNING
Connect to potable water supply
only.
• A cold water supply is required for automatic
icemaker operation. The water pressure must be
EHWZHHQDQGSVLN3D
5RXWH´2'FRSSHURU6PDUW&RQQHFW
plastic
tubing between house cold water line and the water
connection location.
• The tubing should be long enough to extend to the
front of the refrigerator. Allow enough tubing to
accommodate the bend leading into the water line
connection.
NOTE: The only GE Appliances approved plastic
tubing is supplied in the SmartConnect
Refrigerator
7XELQJNLWV'RQRWXVHDQ\RWKHUSODVWLFZDWHUVXSSO\
line because the line is under pressure at all times.
Other types of plastic may crack or rupture with age
and cause water damage to your home.
SmartConnect
5HIULJHUDWRU7XELQJ.LWVDUHDYDLODEOH
in the following lengths:
¶P:;;
¶P:;;
¶P:;;
¶P:;;
Shut off the main water supply.
Turn on the nearest faucet long enough to clear the
line of water.
,QVWDOODVKXWRIIYDOYHEHWZHHQWKHLFHPDNHUZDWHU
valve and cold water pipe in a basement or cabinet.
The shut-off valve should be located where it will be
easily accessible.
• Turn on the main water supply and flush debris.
Run about a quart of water through the tubing into
a bucket. Shut off the water supply at the shut-off
valve.
NOTE: Saddle type shut-off valves are included in
many water supply kits. Before purchasing, make
sure a saddle type valve complies with your local
plumbing codes.
STEP 1 REMOVE PACKAGING
WARNING
Tip Over Hazard.
The refrigerator is much heavier at the top than at the
bottom—be careful when moving. When using a hand
truck, handle from the side only.
• Carefully cut banding at the top and bottom, remove
the outer carton.
• Slide out the back corner posts (2).
• Slide the carton off the top of the cabinet.
NOTE: ,7,61271(&(66$5<72/$<7+(
&$%,1(7'2:1,125'(5725(029(7+(
6.,'
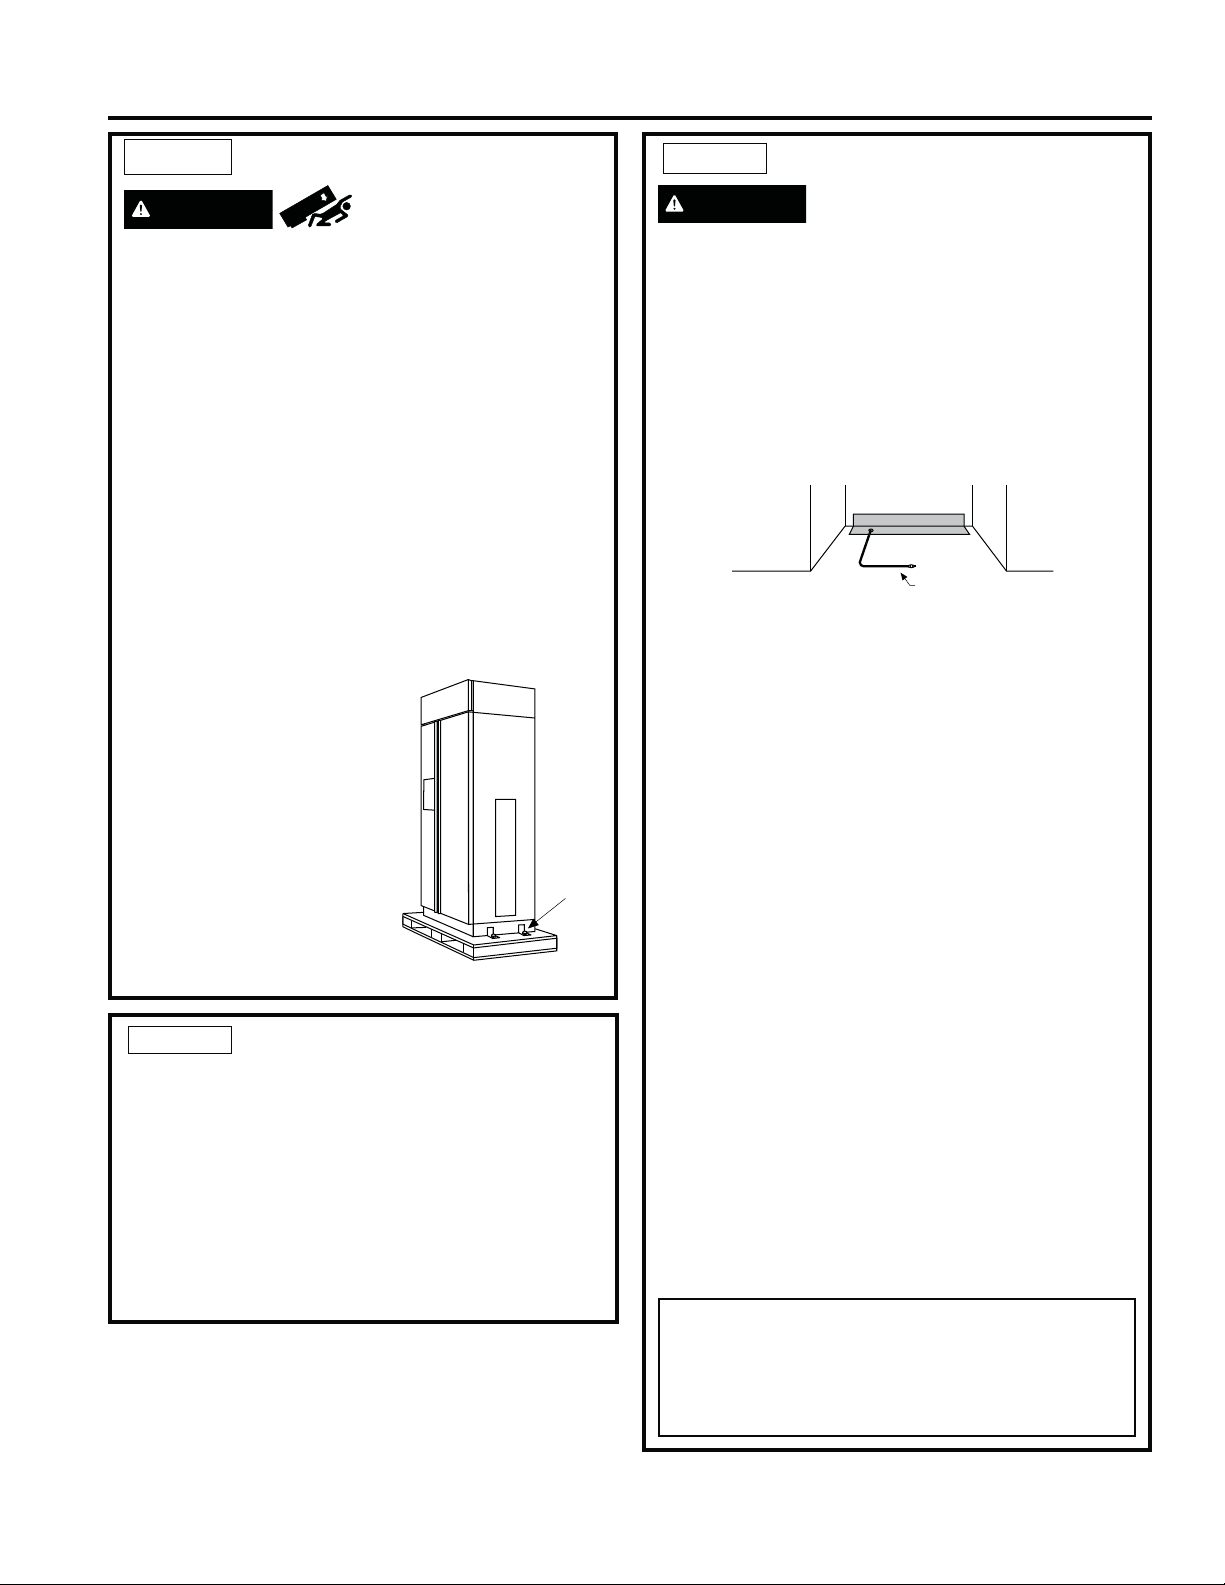
• The unit is secured to the skid with 4 slotted tie-
GRZQVWUDSV5HPRYHWKHVL[´EROWVIURPWKH
base channels in the tie-downs.
5HPRYHWKHVL[´EROWVVHFXULQJWKHVWUDSVWR
the skid.
NOTE: '2127$77(0377252//81,72))
6.,'
• The support blocks on the bottom of the refrigeration
case must be removed
before the refrigerator is
taken off the skid or damage
will occur. Carefully tilt the
refrigerator and slide the
blocks out from beneath.
• Remove the toekick and set
aside for final installation.
• Lift the refrigerator off the
skid with an appliance dolly.
Handle from the sides.
Remov
e
Tie Dow
n
Toekick
Floor
Cold Water Line
STEP 2 MOVE THE
REFRIGERATOR INTO THE HOUSE
• Re-use the corner posts from the packaging to
protect stainless steel models. Run the appliance
dolly straps over the posts and under the handles.
• Leave the protective film on the refrigerator until
installation is complete. IMPORTANT: Never lift the
refrigerator by the handle or push against the grille
SDQHOWKLVFRXOGFDXVHGDPDJHRUPLVDOLJQPHQW
• Avoid laying the unit on its back or side to prevent
sealed system restrictions.
NOTE: Commonwealth of Massachusetts
3OXPELQJ&RGHV&05VKDOOEHDGKHUHGWR
Saddle valves are illegal and use is not permitted
in Massachusetts. Consult with your licensed
plumber.
Loading ...
Loading ...
Loading ...