Loading ...
Loading ...
Loading ...
14
INSTALLATION
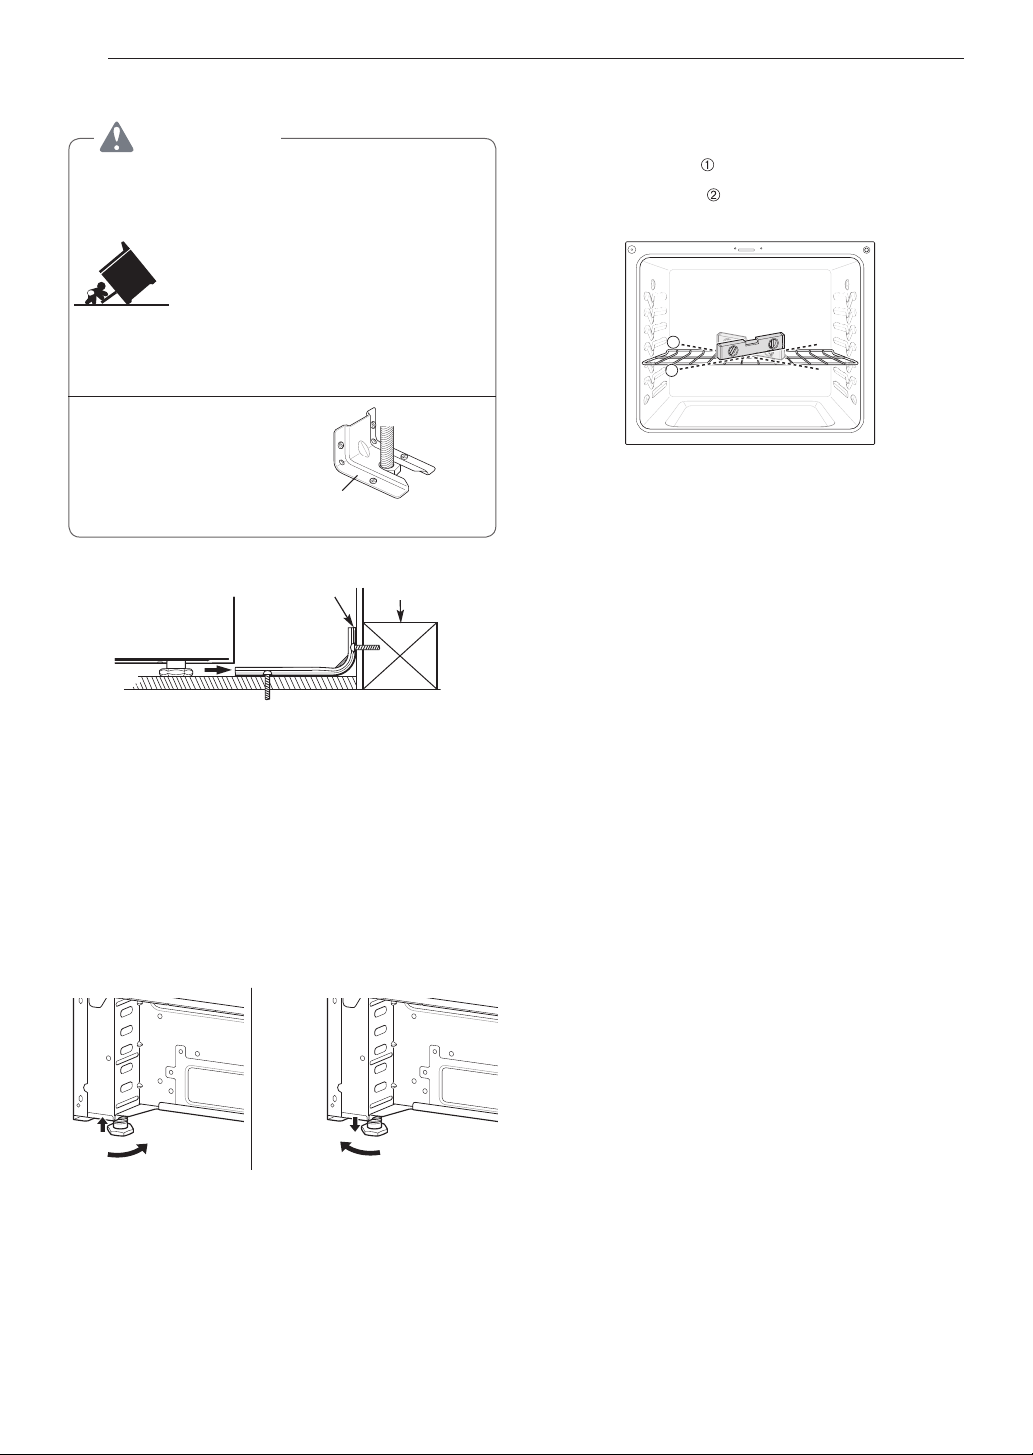
Installing the Anti-tip Device
Anti-tip
bracket
Leveling
leg
WARNING
Tip - Over Hazard
A child or adult can tip the range and
be killed. Verify the anti-tip bracket
has been installed. Ensure the anti-tip
bracket is engaged when the range
is moved. Do not operate the range
without the anti-tip bracket in place.
Failure to follow these instructions
can result in death or serious burns to
children and adults.
To check that leveling leg is
inserted into anti-tip bracket,
grasp the top rear edge
of the range and carefully
attempt to tilt it forward.
Wall plate
Anti-tip
bracket
Screw must
enter wood or
concrete
Locate the anti-tip bracket using the template
An anti-tip bracket is packaged with the template.
The instructions include necessary information to
complete the installation. Read and follow the range
installation instruction sheet (template).
Leveling the Range
Level the range by adjusting the leveling legs with a
wrench. Extending the legs slightly may also make it
easier to insert the rear leg into the anti-tip bracket.
Use a level to check your adjustments. Place the level
diagonally on the oven rack, and check each direction
for level.
First check direction
.
Then check direction
. If the level doesn’t show level
on the rack, adjust the leveling legs with a wrench.
1
2
Connecting Electricity
Electrical Requirements
This appliance must be installed and grounded on a
branch circuit by a qualified technician in accordance
with the National Electrical code ANSI/NFPA NO. 70 -
latest edition.
All wiring should conform to Local and NEC codes.
This range requires a single-phase, 3 wire, A.C
120/208 V or 120/240 V 60 Hz electrical system. Use
only a 3-conductor or a 4-conductor UL- listed range
cord with closed-loop terminals, open-end spade
lugs with upturned ends or similar termination. Do not
install the power cord without a strain relief.
A range cord rated at 40 amps with 120/240
minimum volt range is required. If a 50 amp range
cord is used, it should be marked for use with 1
3
/
8
"
diameter connection openings. This appliance
may be connected by means of a conduit or power
cord. If a conduit is being used, go to page 17 for
3 wire conduit connections or 4 wire conduit
connections.
Loading ...
Loading ...
Loading ...