Loading ...
Loading ...
Loading ...
53
Power level 2 2
Vacuuming at normal power and with the electric
brush switched on. For difficult cleaning tasks at an
average run time.
Power Level 3 / Turbo Mode 3 / Turbo
Vacuuming at full power and with the electric brush
switched on. For stubborn cleaning tasks on all sur-
faces (carpets, in particular) and when using an op-
tional accessory. The appliance achieves a shorter
run time at this level.
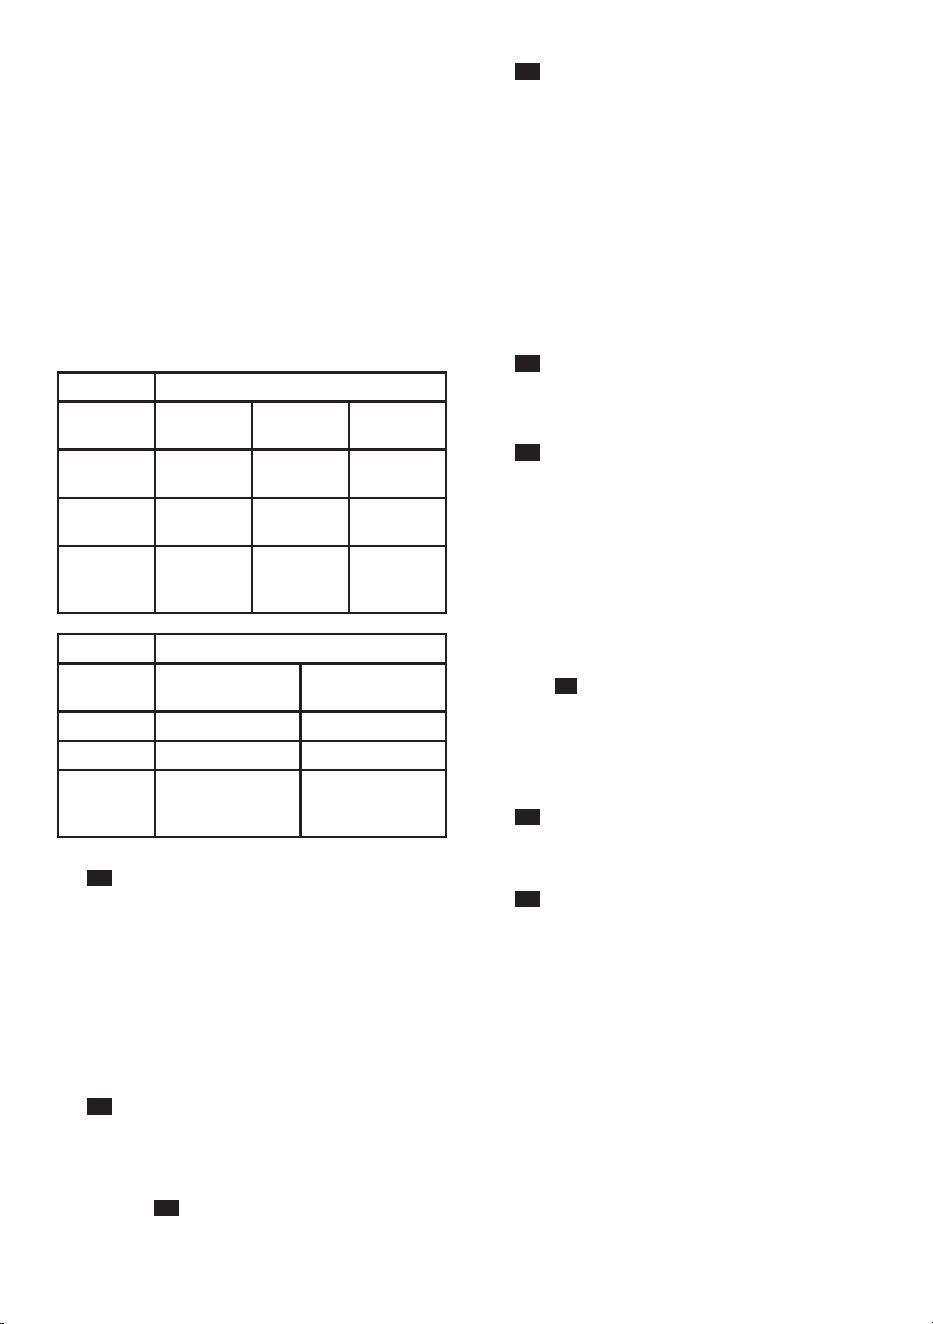
Runtime
The runtime time stated here may vary due to charge
status, battery temperature and battery age etc.
For 1,95Ah battery
Runtime Athlet
18V
Athlet
25,2V
Athlet
28V
Level 1: Up to
40 min.
Up to
60 min.
Up to
65 min.
Level 2: Up to
30 min.
Up to
30 min.
Up to
30 min.
Level 3 /
Turbo
mode:
Up to
10 min.
Up to
12 min.
Up to
12 min.
For 2,6Ah battery
Runtime Athlet Runtime
Plus 25,2V
Athlet Runtime
Plus 28V
Level 1: Up to 75 min Up to 80 min.
Level 2 Up to 37 min Up to 37 min
Level 3 /
Turbo
mode: Up to 12 min. Up to 12 min.
Fig.
7
During short pauses in vacuuming, the appliance can
be left standing anywhere in the room. To do this, tilt
the vacuum cleaner forwards slightly in the direction
of the nozzle.
!
Caution: When the appliance is left standing, it must
be switched off, because if the brush is turning while
the appliance is standing still, it could cause damage
to the floor covering.
Vacuuming with accessories
Fig.
8*
a) Fasten the carrying strap to the short handle provided.
b) Remove the long handle from the main housing .
c) Insert the short handle and lock it in place.
d) Remove the hand-held vacuum cleaner from the floor
nozzle.Fig.
2
e) Plug the accessory adapter into the hand-held vacuum
cleaner and lock it in place.
Fig.
9*
Fit nozzles as required to the flexible hose with the ac-
cessory adapter handle:
Upholstery nozzle for vacuuming upholstered furni-
ture, curtains, etc.
Crevice nozzle for vacuuming crevices and corners,
etc.
Upholstery crevice nozzle for vacuuming upholstery,
ideal for cleaning car seats in particular
Secure the drill dust nozzle to the handle and then
place against the wall, so that the nozzle drill hole
opening sits directly over the hole to be drilled.
After using the appliance
Fig.
10
Switch off the appliance after vacuuming.
Emptying the dust container
Fig.
11
In order to achieve the best possible vacuuming re-
sults, the dust container should be emptied after every
use or, at the latest, when dust at one point in the dust
container has reached the marking.
We recommend that you not fill the dust container bey-
ond the marking, as this leads to considerable soiling
of the filter.
When emptying the dust container, always check how
dirty the outer filter unit is and, if necessary, clean it as
detailed in the "Cleaning the outer filter unit" instruc-
tions.
Fig.
16
!
Caution: The filter can only be cleaned if the appli-
ance is switched off.
Never vacuum without the outer filter unit and its
fitted filter cartridge.
Fig.
12
Using the release button, unlock the dust container
and remove it from the appliance.
Fig.
13
Take the filter unit out of the dust container.
Empty the dust container.
* Depending on model
Loading ...
Loading ...
Loading ...